
Grow Square Watermelons: Ever dreamt of wowing your friends and family with a uniquely shaped, conversation-starting fruit? Imagine serving up perfectly cubed slices of watermelon at your next summer barbecue! It might sound like something out of a futuristic food lab, but I’m here to tell you that growing square watermelons is surprisingly achievable right in your own backyard.
The practice of shaping fruits and vegetables isn’t entirely new. In Japan, farmers have been cultivating square watermelons for decades, initially as a space-saving solution for easier storage and transportation. While the novelty factor is undeniable, the square shape also prevents the melons from rolling, reducing damage during shipping. This ingenious technique has since captured the imagination of gardeners worldwide, inspiring a wave of creative fruit shaping experiments.
Why would you want to learn this DIY trick? Well, beyond the sheer fun of it, growing square watermelons offers a fantastic opportunity to connect with nature, learn about plant development, and impress everyone with your gardening skills. Plus, let’s be honest, who wouldn’t want to show off a perfectly formed, geometrically pleasing watermelon? This guide will provide you with all the tips and tricks you need to successfully grow square watermelons, turning your garden into a source of wonder and delicious, uniquely shaped treats. Let’s get started!
Growing Square Watermelons: A Fun and Fruity DIY Project!
Hey there, fellow gardening enthusiasts! Ever wanted to impress your friends and family with something truly unique? Well, get ready to dive into the fascinating world of growing square watermelons! It might sound like something out of a sci-fi movie, but trust me, it’s totally achievable with a little patience and this guide. I’m going to walk you through every step, from choosing the right watermelon variety to crafting the perfect mold. Let’s get started!
What You’ll Need
Before we get our hands dirty, let’s gather all the necessary supplies. This will make the whole process smoother and more enjoyable.
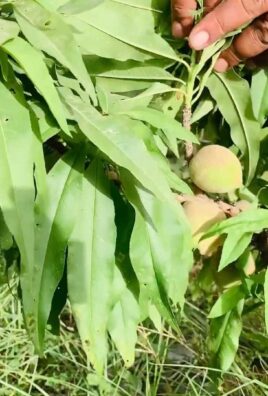
* Watermelon Seeds: Choose a variety known for its smaller size and round shape. Sugar Baby, Blacktail Mountain, or even some icebox varieties work well. Avoid giant varieties like Carolina Cross, as they’ll be too big for the molds.
* Square Molds: These are the heart of our project! You can buy them online (search for “square watermelon molds”) or, if you’re feeling crafty, build your own. I’ll give you instructions for both options.
* Seed Starting Supplies (Optional): If you live in a cooler climate with a shorter growing season, starting your seeds indoors is a great idea. You’ll need seed starting trays, potting mix, and a grow light.
* Gardening Gloves: Protect your hands from dirt and potential irritants.
* Trowel or Small Shovel: For transplanting seedlings or preparing the soil.
* Watering Can or Hose: Essential for keeping your watermelon plants hydrated.
* Fertilizer: A balanced fertilizer (like 10-10-10) will help your watermelons thrive.
* Pruning Shears or Scissors: For trimming vines and removing unwanted fruit.
* Measuring Tape: To ensure your watermelons fit snugly in the molds.
* Zip Ties or Twine: To secure the mold around the watermelon.
Choosing or Building Your Square Molds
This is a crucial step, as the mold determines the final shape of your watermelon. You have two main options: buying pre-made molds or building your own.
Buying Pre-Made Molds
This is the easiest option, especially if you’re short on time or not particularly handy. You can find square watermelon molds online from various retailers. Look for molds made from clear polycarbonate or acrylic, as these materials are durable, weather-resistant, and allow sunlight to reach the watermelon.
Things to consider when buying:
* Size: Make sure the mold is appropriately sized for the watermelon variety you’ve chosen. A mold that’s too small will restrict growth, while one that’s too large won’t create a defined square shape. Aim for a mold that’s roughly 8-10 inches on each side for smaller varieties.
* Material: As mentioned earlier, polycarbonate or acrylic are ideal. Avoid flimsy plastic molds that might crack or warp in the sun.
* Ventilation: The mold should have ventilation holes to prevent moisture buildup and overheating.
* Ease of Assembly: Look for molds that are easy to assemble and disassemble, as you’ll need to open them to check on the watermelon’s progress.
Building Your Own Molds
If you’re feeling adventurous and want to save some money, building your own molds is a fun DIY project. Here’s how I did it:
Materials:
* Clear Acrylic or Polycarbonate Sheets: You’ll need six pieces, each cut to the desired size (e.g., 8×8 inches). You can usually find these at your local hardware store.
* Acrylic Cement or Strong Adhesive: To bond the acrylic pieces together.
* Drill with Small Drill Bit: For creating ventilation holes.
* Clamps: To hold the pieces together while the adhesive dries.
* Sandpaper: To smooth any rough edges.
* Measuring Tape and Marker: For accurate measurements and marking.
Instructions:
1. Cut the Acrylic Sheets: Carefully cut the acrylic sheets to the desired size. Ensure all pieces are the same size for a perfect square.
2. Sand the Edges: Use sandpaper to smooth any rough edges on the acrylic pieces. This will prevent injuries and ensure a clean finish.
3. Drill Ventilation Holes: Drill several small ventilation holes in each acrylic piece. Space them evenly apart to allow for adequate airflow.
4. Assemble the Mold: Apply acrylic cement or strong adhesive to the edges of one acrylic piece. Attach it to another piece, forming a 90-degree angle. Use clamps to hold the pieces together until the adhesive dries completely.
5. Repeat: Repeat step 4 to assemble the remaining pieces, creating a complete square box. Ensure all seams are securely bonded.
6. Let it Cure: Allow the adhesive to cure completely according to the manufacturer’s instructions. This may take several hours or even overnight.
7. Test the Mold: Before using the mold, test its strength and stability. Make sure it can withstand the weight of a growing watermelon.
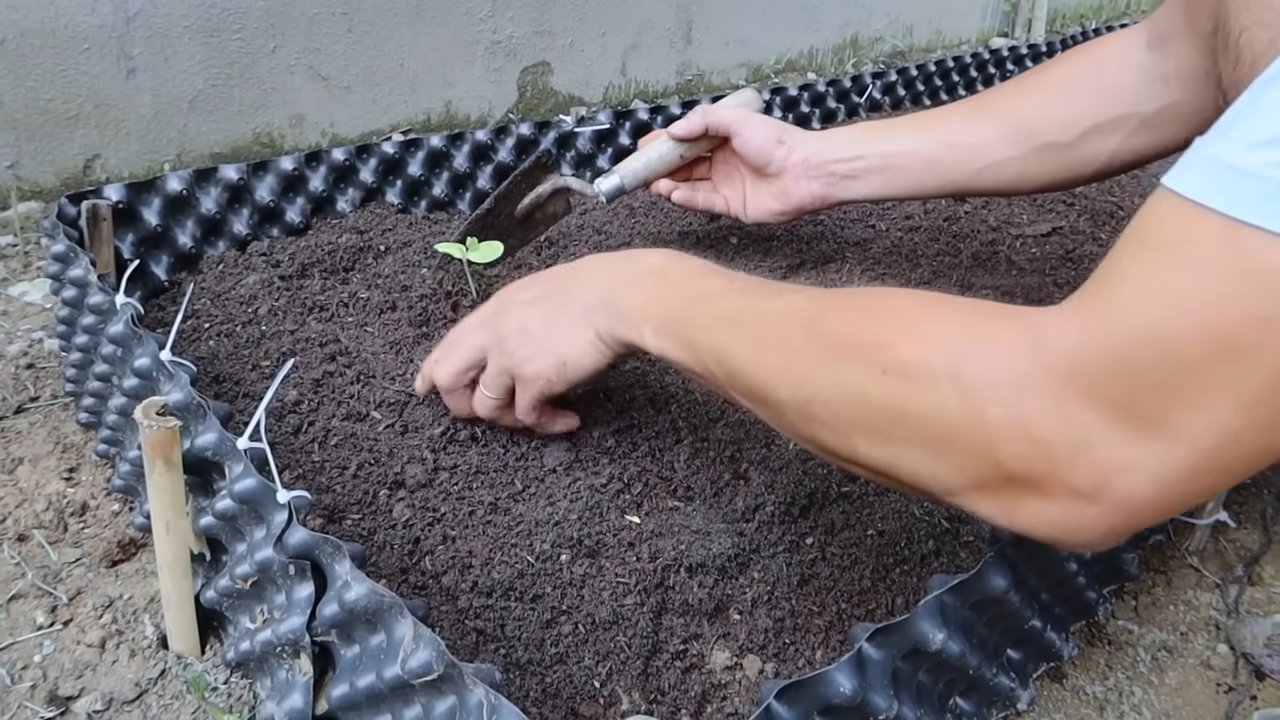
Planting Your Watermelon Seeds or Seedlings
Now that we have our molds ready, it’s time to get our watermelon plants started. You can either start seeds indoors or direct sow them in the garden, depending on your climate.
Starting Seeds Indoors (Recommended for Cooler Climates)
1. Prepare Seed Starting Trays: Fill seed starting trays with a high-quality seed starting mix.
2. Sow the Seeds: Plant 2-3 watermelon seeds per cell, about 1 inch deep.
3. Water Gently: Water the trays gently to moisten the soil.
4. Provide Warmth and Light: Place the trays in a warm location (around 70-80°F) and provide ample light, either from a sunny window or a grow light.
5. Keep Soil Moist: Keep the soil consistently moist, but not waterlogged.
6. Thin Seedlings: Once the seedlings emerge, thin them to one strong seedling per cell.
7. Harden Off Seedlings: Before transplanting the seedlings outdoors, gradually acclimate them to outdoor conditions by exposing them to increasing amounts of sunlight and fresh air over a period of 7-10 days.
Direct Sowing Seeds (Suitable for Warmer Climates)
1. Prepare the Soil: Choose a sunny location with well-drained soil. Amend the soil with compost or other organic matter to improve fertility.
2. Sow the Seeds: Plant the watermelon seeds directly in the ground, about 1 inch deep and 2-3 feet apart.
3. Water Thoroughly: Water the soil thoroughly after planting.
4. Keep Soil Moist: Keep the soil consistently moist until the seedlings emerge.
5. Thin Seedlings: Once the seedlings emerge, thin them to one strong seedling per hill.
Transplanting Seedlings (If Starting Indoors)
1. Choose a Sunny Location: Watermelons need at least 6-8 hours of sunlight per day.
2. Prepare the Soil: Amend the soil with compost or other organic matter to improve fertility and drainage.
3. Dig Holes: Dig holes that are slightly larger than the root balls of the seedlings, spacing them 2-3 feet apart.
4. Carefully Remove Seedlings: Gently remove the seedlings from the seed starting trays, being careful not to damage the roots.
5. Plant Seedlings: Place the seedlings in the holes and backfill with soil.
6. Water Thoroughly: Water the seedlings thoroughly after planting.
7. Mulch: Apply a layer of mulch around the plants to help retain moisture and suppress weeds.
Caring for Your Watermelon Plants
Once your watermelon plants are established, it’s important to provide them with proper care to ensure healthy growth and a bountiful harvest.
* Watering: Water watermelons deeply and regularly, especially during hot, dry weather. Aim for about 1-2 inches of water per week. Avoid overhead watering, as this can promote fungal diseases.
* Fertilizing: Fertilize your watermelon plants every 2-3 weeks with a balanced fertilizer. Follow the manufacturer’s instructions for application rates.
* Weeding: Keep the area around your watermelon plants free of weeds, as weeds can compete for nutrients and water.
* Pruning: Prune your watermelon vines to encourage fruit production. Remove any suckers (small shoots that grow from the base of the plant) and any dead or diseased leaves.
* Pest and Disease Control: Monitor your watermelon plants regularly for pests and diseases. Common pests include aphids, squash bugs, and cucumber beetles. Common diseases include powdery mildew and fus
Conclusion
So, there you have it! Growing square watermelons isn’t just a quirky gardening experiment; it’s a rewarding endeavor that combines ingenuity, patience, and a touch of agricultural artistry. It’s a conversation starter, a unique gift, and a testament to your green thumb. Forget the mundane round melons; embrace the geometric revolution and cultivate something truly special.
Why is this a must-try? Because it’s more than just growing food; it’s about pushing boundaries, learning new skills, and experiencing the sheer joy of creating something extraordinary. Imagine the look on your friends’ faces when you present them with a perfectly cubed watermelon! It’s a guaranteed “wow” moment. Plus, the controlled environment within the mold can sometimes lead to more uniform ripening and potentially even sweeter fruit, although this is anecdotal and depends heavily on your growing conditions.
But don’t stop at just square! Experiment with different mold shapes. Try rectangular watermelons, heart-shaped watermelons, or even pyramid-shaped ones! The possibilities are limited only by your imagination and access to appropriately sized and food-safe molds. Consider using clear molds to allow for better sunlight penetration, or molds with ventilation holes to prevent moisture buildup and potential mold growth on the developing fruit. You can also try painting the inside of the mold with reflective paint to maximize light exposure.
For those seeking an extra challenge, consider grafting your watermelon seedlings onto more vigorous rootstock. This can improve disease resistance and overall plant health, leading to a more successful square watermelon harvest. Remember to research compatible rootstock varieties for your specific watermelon type.
Don’t be discouraged if your first attempt isn’t perfect. Gardening is a learning process, and even experienced growers face challenges. The key is to observe, adapt, and learn from your mistakes. Keep detailed notes on your progress, including the type of watermelon you used, the size and material of your mold, the weather conditions, and any challenges you encountered. This will help you refine your technique and improve your chances of success in future seasons.
We wholeheartedly encourage you to embark on this exciting gardening adventure. It’s a fantastic way to connect with nature, learn new skills, and impress your friends and family. And most importantly, have fun!
Once you’ve harvested your perfectly formed square watermelons, we’d love to hear about your experience. Share your photos, tips, and challenges in the comments below. Let’s create a community of square watermelon enthusiasts and learn from each other’s successes and failures. Together, we can unlock the secrets to growing the most geometrically pleasing watermelons imaginable! So, grab your seeds, your molds, and your gardening gloves, and get ready to grow some square watermelons!
Frequently Asked Questions (FAQ)
What type of watermelon is best for growing in a square mold?
Smaller, personal-sized watermelon varieties tend to work best for growing in square molds. These varieties reach maturity faster and are less likely to outgrow the mold before they are ripe. Look for varieties like ‘Sugar Baby,’ ‘Golden Midget,’ or ‘Tiger Baby.’ These varieties are also generally easier to handle and maneuver within the mold. Avoid larger varieties like ‘Charleston Gray’ or ‘Crimson Sweet,’ as they may become too large for the mold before they are fully ripe, potentially causing the mold to crack or the watermelon to become misshapen.
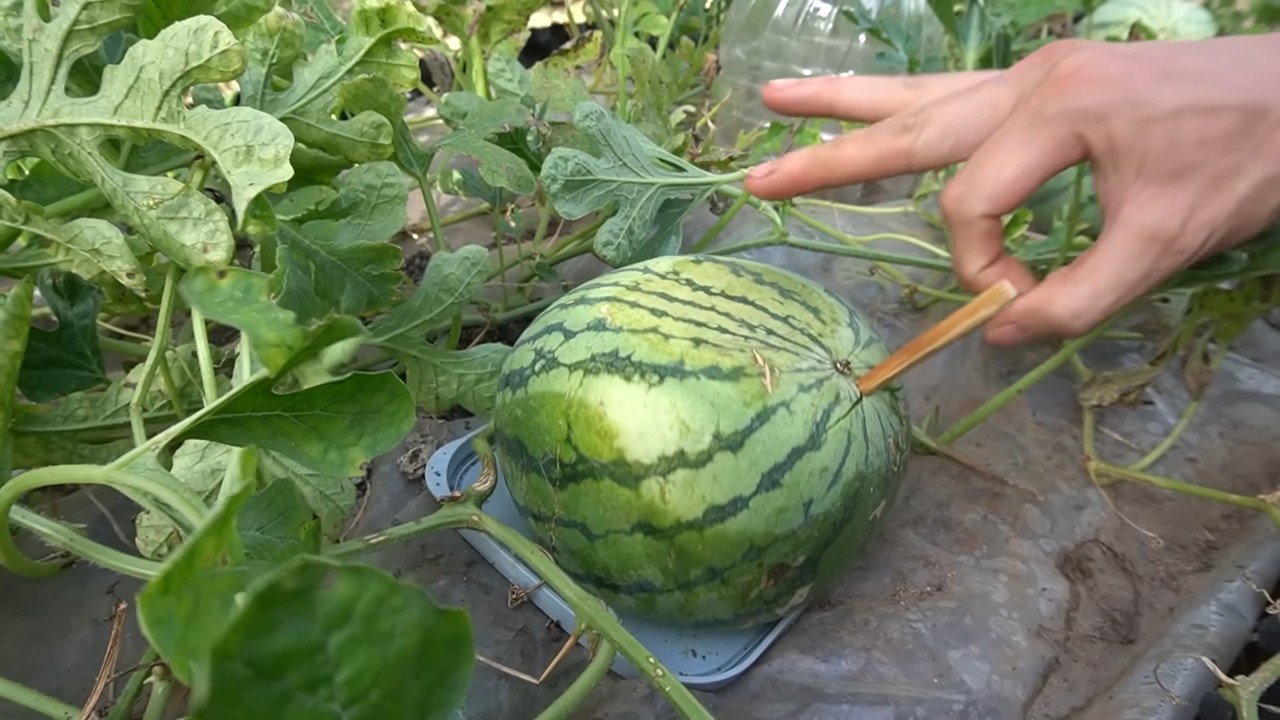
When is the right time to put the watermelon in the mold?
Timing is crucial for success. You want to place the mold around the watermelon when it’s about the size of a tennis ball or softball. This is typically a few weeks after the fruit has set. If you put the mold on too early, the watermelon may not develop properly. If you wait too long, the watermelon may be too large to fit comfortably inside the mold, potentially damaging the fruit or the mold. Regularly monitor your watermelons and choose a fruit that is healthy, uniform in shape, and free from blemishes before placing it in the mold.
What kind of mold should I use?
The ideal mold is made of a durable, food-safe material like clear polycarbonate plastic. Clear molds allow sunlight to reach the watermelon, which is essential for proper ripening. The mold should also have ventilation holes to prevent moisture buildup and potential mold growth. Ensure the mold is the correct size for the watermelon variety you are growing. You can find commercially available square watermelon molds online or at gardening supply stores. Alternatively, you can create your own mold using food-safe plastic sheets and fasteners. If you choose to build your own mold, make sure it is sturdy enough to withstand the weight of the growing watermelon.
How do I care for the watermelon while it’s in the mold?
Continue to water and fertilize the watermelon plant as usual. Monitor the watermelon regularly for signs of disease or pests. Check the mold periodically to ensure it is still securely in place and that the watermelon is not becoming too large for it. If you notice any signs of stress on the plant or the watermelon, such as wilting leaves or cracks in the fruit, take action immediately. You may need to adjust the watering schedule, apply fertilizer, or treat for pests or diseases.
How do I know when the square watermelon is ripe?
Determining ripeness can be tricky when the watermelon is inside a mold. Look for the same signs of ripeness as you would with a regular watermelon, such as a dull thud when you tap it, a change in color on the underside where it rests on the ground, and a dried tendril near the stem. You may also be able to gently lift the mold and check the color of the watermelon’s skin. Ripe watermelons typically have a deep, rich color. If you are unsure, it is better to err on the side of caution and harvest the watermelon a little early rather than letting it overripen inside the mold.
Can I reuse the mold for future watermelons?
Yes, you can reuse the mold for future watermelons. However, it is essential to clean and disinfect the mold thoroughly after each use to prevent the spread of diseases. Wash the mold with soap and water, and then disinfect it with a solution of bleach and water. Rinse the mold thoroughly with clean water and allow it to dry completely before storing it. Store the mold in a cool, dry place away from direct sunlight.
What if the watermelon doesn’t fully fill the mold?
Sometimes, despite your best efforts, the watermelon may not completely fill the mold. This can happen if the watermelon is not growing vigorously enough or if the mold is too large. If this happens, don’t worry! You can still harvest the watermelon and enjoy its unique shape. While it may not be a perfect cube, it will still be a conversation starter and a testament to your gardening skills.
Are there any risks to growing watermelons in molds?
Yes, there are some risks associated with growing watermelons in molds. One risk is that the mold can trap moisture and create a humid environment that is conducive to mold and fungal growth. This can lead to diseases that can damage or kill the watermelon. Another risk is that the mold can restrict the watermelon’s growth and prevent it from ripening properly. It is essential to monitor the watermelon regularly for signs of disease or stress and to take action immediately if you notice any problems.
Can I grow other fruits or vegetables in molds?
Yes, you can grow other fruits and vegetables in molds. The same principles apply as with watermelons. Choose a variety that is appropriate for the size and shape of the mold, and monitor the plant regularly for signs of disease or stress. Some popular fruits and vegetables to grow in molds include cucumbers, tomatoes, and pumpkins. Experiment with different shapes and sizes of molds to create unique and interesting produce.
Leave a Comment