
Grow Taro Indoors Organically? Absolutely! Imagine harvesting your own vibrant, edible taro leaves right from your living room. It sounds like a tropical dream, doesn’t it? Well, it’s more achievable than you might think! For centuries, taro has been a staple food in many cultures, particularly in the Pacific Islands and Asia, where it’s revered not just for its nutritional value but also for its cultural significance. Think of poi in Hawaii or the various taro-based dishes enjoyed across Southeast Asia – this plant is deeply woven into the fabric of these societies.
But what if you don’t live in a tropical paradise? That’s where these DIY tricks come in! I know, I know, the idea of growing taro indoors might seem daunting. Maybe you’ve tried gardening before and felt defeated, or perhaps you’re just short on outdoor space. But trust me, with a few simple hacks, you can successfully grow taro indoors organically, even if you’re a complete beginner. This guide will break down the process into easy-to-follow steps, ensuring you can enjoy fresh, homegrown taro without the need for a sprawling garden. Let’s ditch the store-bought stuff and cultivate our own little slice of the tropics, shall we?
Growing Taro Indoors Organically: A Step-by-Step Guide
Hey there, fellow plant enthusiasts! Ever thought about growing your own taro indoors? It’s totally doable, and trust me, the satisfaction of harvesting your own organically grown taro is amazing. I’ve been doing it for a while now, and I’m excited to share my secrets with you. This guide will walk you through everything you need to know, from choosing the right taro variety to harvesting your delicious, homegrown crop. Let’s get started!
Choosing Your Taro Variety
Not all taro varieties are created equal, especially when it comes to indoor growing. You’ll want to pick a variety that’s well-suited for container gardening and can tolerate slightly lower light conditions. Here are a few of my favorites:
* Bun Long: This variety is known for its relatively compact size and delicious corms (the edible underground stems). It’s a great choice for beginners.
* Elephant Ear (Colocasia esculenta): While technically an ornamental taro, some varieties of Elephant Ear produce edible corms. Just make sure you do your research to confirm the specific variety you choose is safe to eat.
* Black Magic: Another ornamental variety, but its striking dark foliage adds a beautiful touch to your indoor garden. While the corms might not be as flavorful as other varieties, they are still edible.
Preparing for Planting
Before you even think about getting your hands dirty, you need to gather your supplies and prepare your planting environment. This is a crucial step, so don’t skip it!
* Choosing the Right Container: Taro needs plenty of room to grow, so opt for a large container – at least 12 inches in diameter and 12 inches deep. Make sure it has drainage holes to prevent waterlogging.
* Selecting the Soil: Taro thrives in rich, well-draining soil. I like to use a mix of equal parts potting soil, compost, and perlite. The compost provides essential nutrients, while the perlite improves drainage.
* Finding the Perfect Location: Taro needs bright, indirect sunlight. A spot near an east- or west-facing window is ideal. If you don’t have enough natural light, you can supplement with a grow light.
* Sourcing Your Taro Corms: You can find taro corms at most nurseries or online retailers. Look for firm, healthy corms with no signs of rot or disease.
Step-by-Step Planting Instructions
Alright, now for the fun part! Let’s get those taro corms planted.
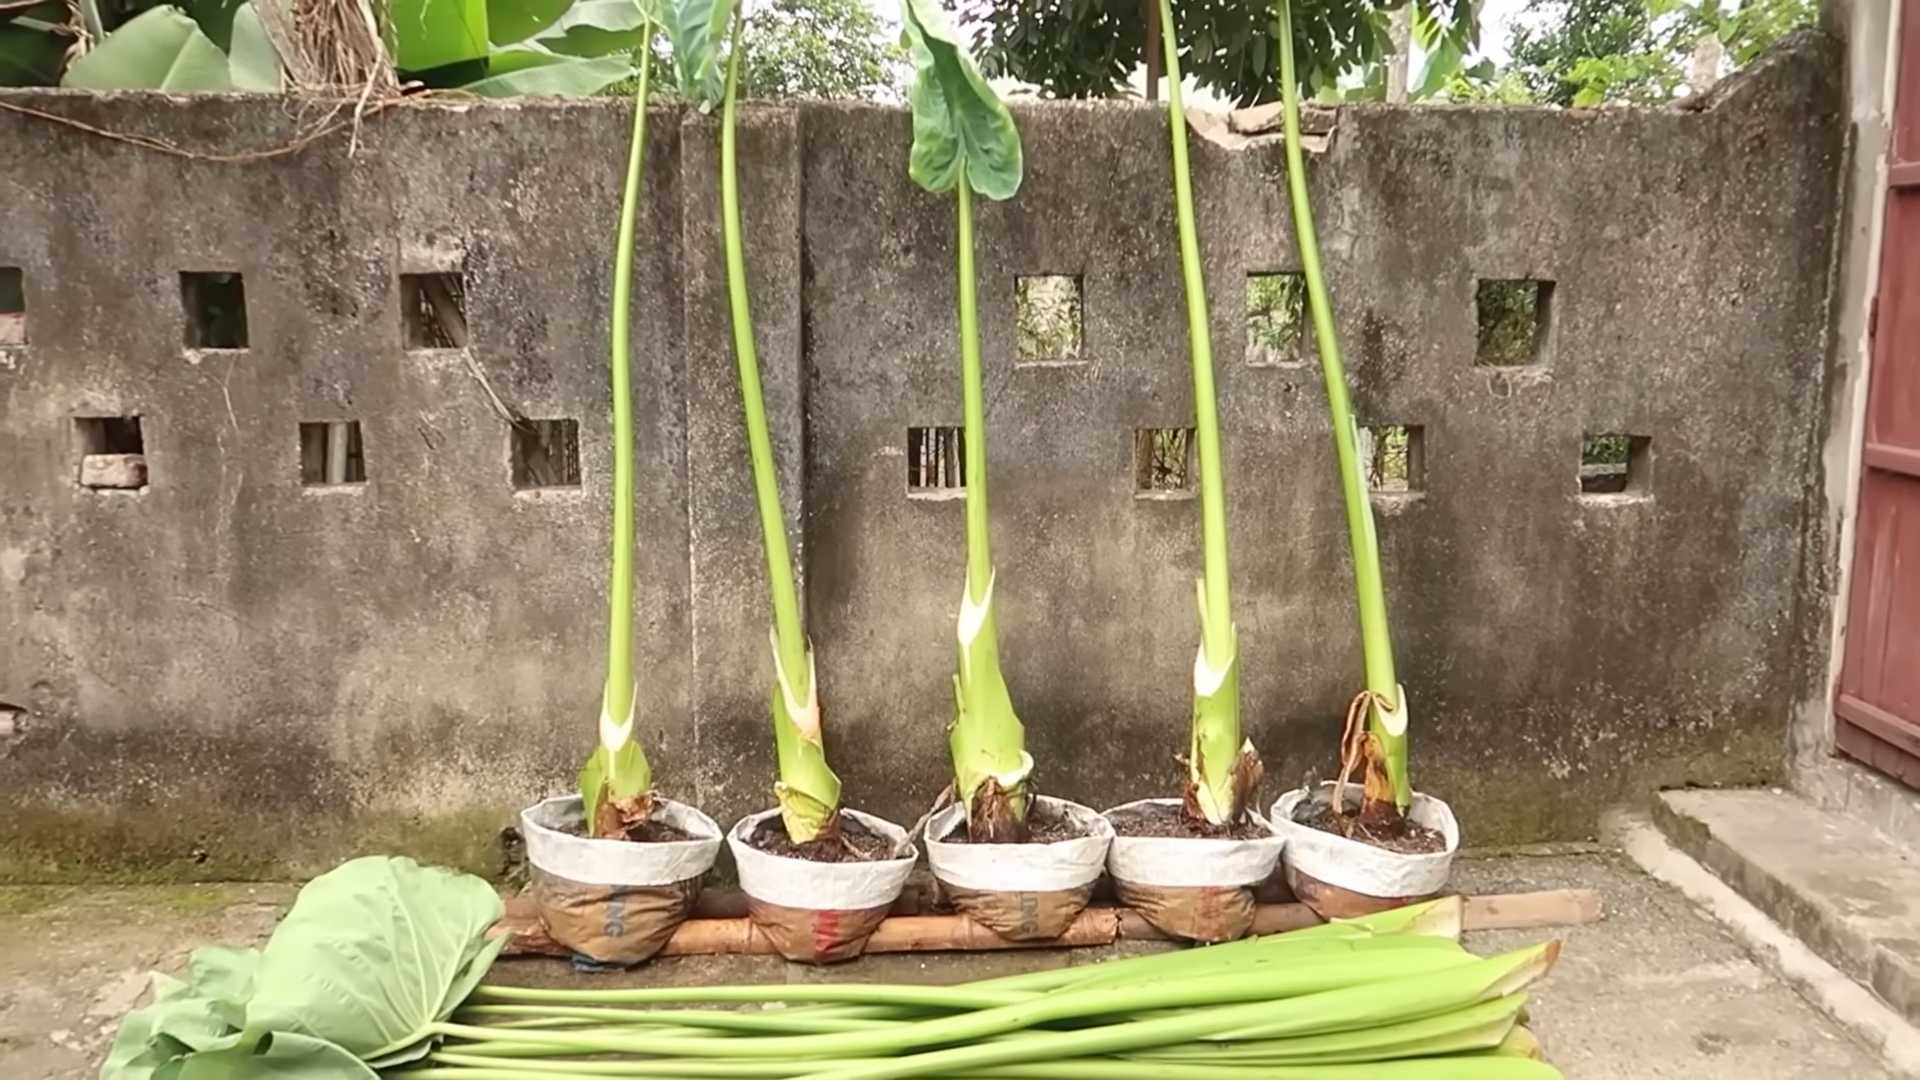
1. Prepare the Container: Fill your chosen container with your prepared soil mix, leaving about an inch or two of space at the top.
2. Plant the Corm: Dig a hole in the center of the soil that’s about 4-6 inches deep. Place the taro corm in the hole with the pointed end facing up.
3. Cover the Corm: Gently cover the corm with soil, making sure it’s firmly planted.
4. Water Thoroughly: Water the soil thoroughly until water drains out of the drainage holes. This will help settle the soil and encourage root growth.
5. Mulch (Optional): Add a layer of organic mulch, such as shredded leaves or straw, around the base of the plant. This will help retain moisture and suppress weeds.
Caring for Your Indoor Taro
Once your taro is planted, it’s time to provide it with the care it needs to thrive. Here’s what you need to know:
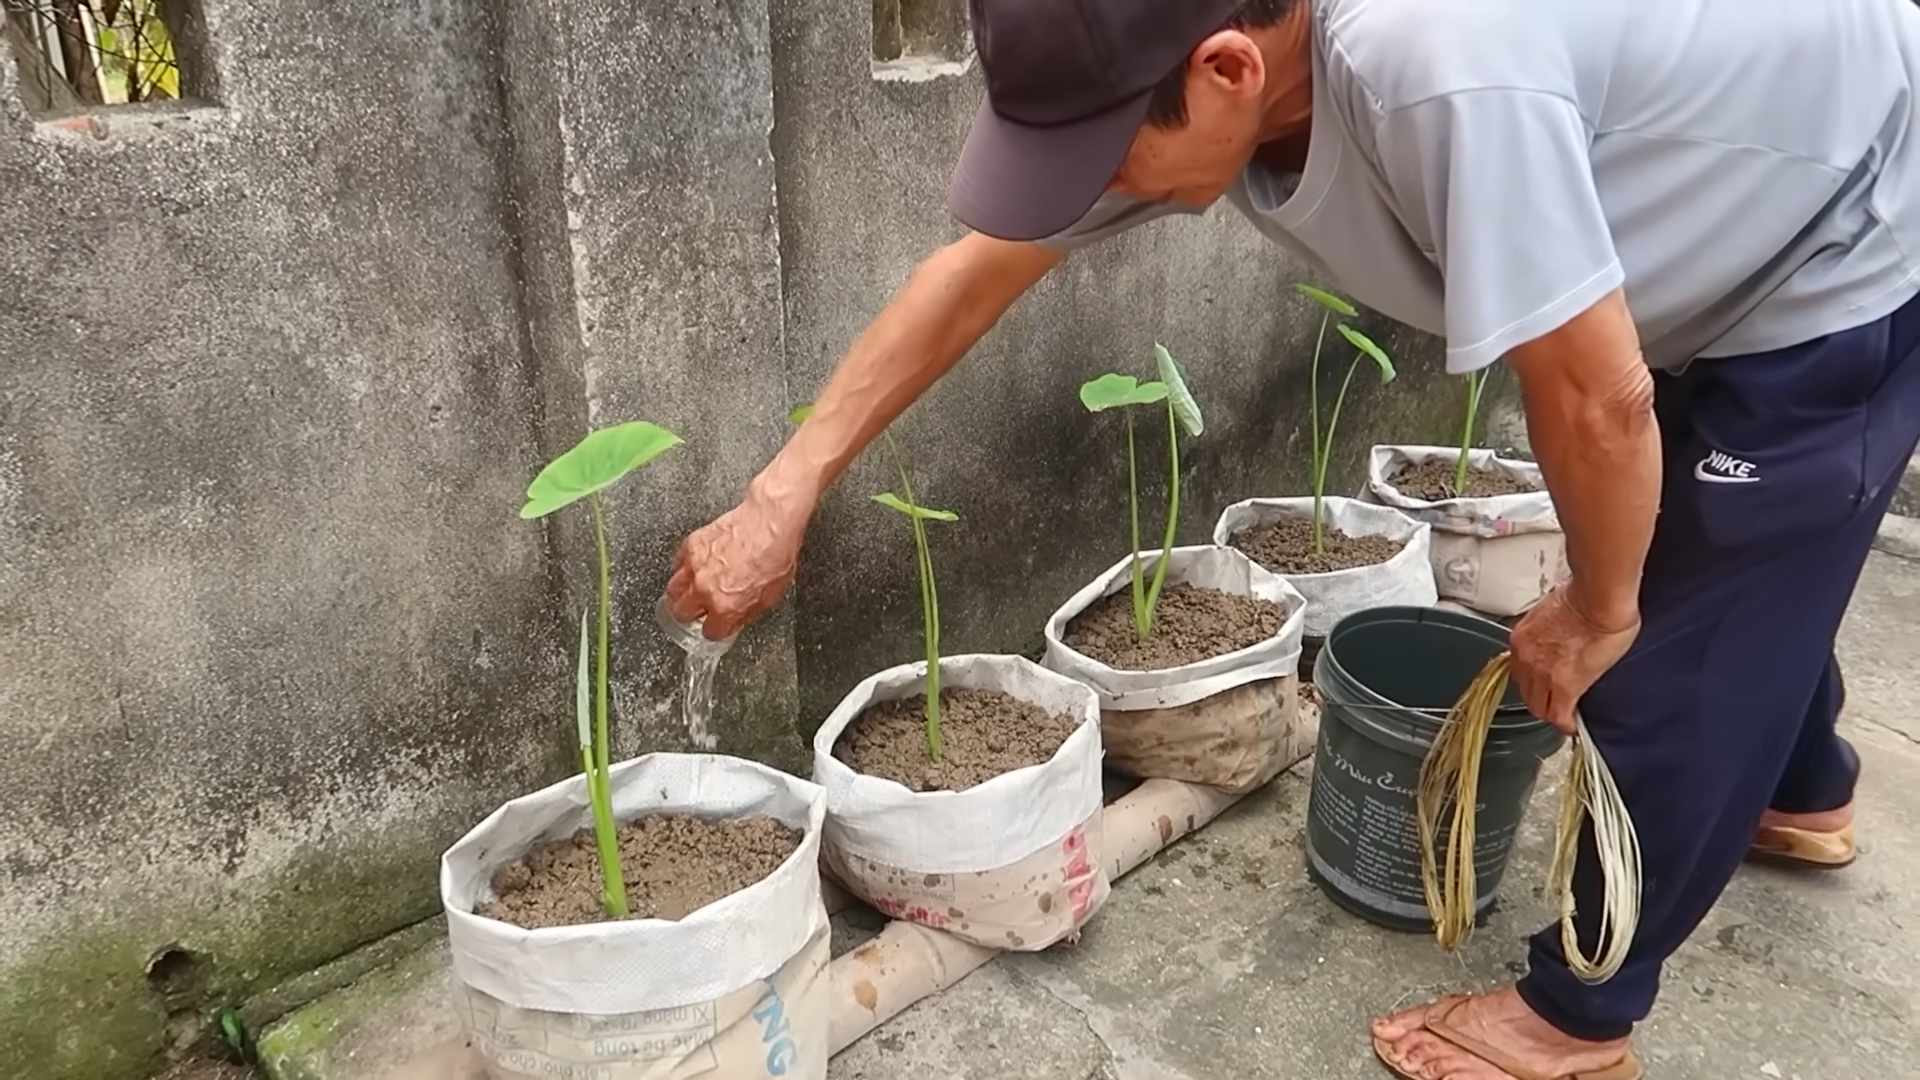
* Watering: Taro loves moisture, so keep the soil consistently moist but not waterlogged. Water when the top inch of soil feels dry to the touch.
* Fertilizing: Feed your taro plant every 2-3 weeks with an organic liquid fertilizer. Look for a fertilizer that’s high in nitrogen, which promotes leafy growth. I personally use a seaweed emulsion fertilizer.
* Light: As mentioned earlier, taro needs bright, indirect sunlight. If you’re not getting enough natural light, supplement with a grow light.
* Temperature: Taro prefers warm temperatures, ideally between 70-85°F (21-29°C). Avoid exposing your plant to drafts or sudden temperature changes.
* Humidity: Taro thrives in humid environments. If your home is dry, you can increase humidity by misting the leaves regularly, placing a humidifier nearby, or setting the pot on a tray filled with pebbles and water.
* Pest Control: Keep an eye out for common pests like aphids, spider mites, and mealybugs. If you spot any pests, treat them with an organic insecticide, such as neem oil.
* Pruning: Remove any yellowing or dead leaves to encourage new growth and prevent disease.
Troubleshooting Common Problems
Even with the best care, you might encounter some problems along the way. Here are a few common issues and how to fix them:
* Yellowing Leaves: This could be a sign of overwatering, underwatering, or nutrient deficiency. Adjust your watering schedule and fertilize your plant regularly.
* Drooping Leaves: This could be caused by lack of water, low humidity, or insufficient light. Make sure your plant is getting enough water, humidity, and light.
* Slow Growth: This could be due to lack of nutrients, insufficient light, or cold temperatures. Fertilize your plant regularly, provide it with adequate light, and keep it in a warm location.
* Root Rot: This is caused by overwatering and poor drainage. Make sure your container has drainage holes and avoid overwatering. If you suspect root rot, repot your plant in fresh soil.
Harvesting Your Taro
After several months of care, your taro plant should be ready for harvest. This is the moment you’ve been waiting for!
1. When to Harvest: Taro corms are typically ready to harvest 6-12 months after planting. You’ll know they’re ready when the leaves start to turn yellow and die back.
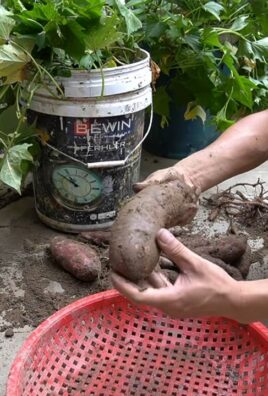
2. How to Harvest: Gently dig around the base of the plant to expose the corms. Carefully lift the corms out of the soil, being careful not to damage them.
3. Cleaning the Corms: Wash the corms thoroughly to remove any dirt or debris.
4. Curing the Corms: Cure the corms for a few days in a cool, dry place. This will help them develop a sweeter flavor and improve their storage life.
Enjoying Your Homegrown Taro
Now that you’ve harvested your taro, it’s time to enjoy the fruits (or rather, corms) of your labor! Taro can be cooked in a variety of ways, including boiling, steaming, baking, and frying. It’s a staple ingredient in many cuisines around the world.
Important Note: Always cook taro thoroughly before eating it. Raw taro contains calcium oxalate crystals, which can cause irritation and discomfort. Cooking breaks down these crystals, making the taro safe to eat.
Propagating Taro
Want to expand your taro collection? You can easily propagate taro from corms or cormels (small corms that grow around the main corm).
* Propagating from Corms: Simply plant a new corm in a pot of soil, following the same planting instructions as above.
* Propagating from Cormels: Separate the cormels from the main corm and plant them in individual pots.
Organic Practices for Healthy Taro
Growing taro organically is not only good for the environment but also for your health. Here are some tips for keeping your taro plants healthy and thriving without the use of synthetic chemicals:
* Use Organic Soil and Amendments: Start with a high-quality organic potting mix and amend it with compost, worm castings, and other organic materials.
* Water Wisely: Avoid overwatering, which can lead to root rot. Water deeply but infrequently, allowing the soil to dry out slightly between waterings.
* Fertilize Organically: Use organic fertilizers, such as seaweed emulsion, fish emulsion, or compost tea.
* Control Pests Naturally: Use organic pest control methods, such as neem oil, insecticidal soap, or handpicking pests.
* Practice Crop Rotation: If you’re growing taro in a garden bed, rotate your crops each year to prevent soil depletion and pest buildup.
* Encourage Beneficial Insects: Attract beneficial insects to your garden by planting flowers that provide nectar and pollen.
Final Thoughts
Growing taro indoors organically is a rewarding experience that allows you to enjoy fresh, homegrown produce year-round. With a little bit of care and attention, you can successfully grow your own taro and impress your friends and family with your gardening skills. So, what are you waiting for? Get planting! I hope this guide has been helpful. Happy growing!
Conclusion
So, there you have it! Growing taro indoors organically is not only achievable but also incredibly rewarding. We’ve walked you through the entire process, from selecting the right corm to providing the ideal environment for your taro plant to thrive. Why is this DIY trick a must-try? Because it offers a unique opportunity to connect with nature, even within the confines of your home. You get to witness the miracle of growth firsthand, nurturing a plant from a simple corm into a lush, vibrant addition to your indoor space. Plus, you’re doing it organically, ensuring that your taro is free from harmful chemicals and pesticides.
Beyond the satisfaction of growing your own food, indoor taro cultivation offers a beautiful aesthetic appeal. The large, heart-shaped leaves of the taro plant bring a touch of the tropics to any room, creating a calming and inviting atmosphere. Imagine the conversations it will spark, the envy of your plant-loving friends, and the sheer joy of harvesting your own organically grown taro.
But the benefits don’t stop there. Growing taro indoors organically allows you to control the growing conditions, ensuring optimal health and productivity. You can adjust the light, humidity, and temperature to suit your plant’s needs, creating a perfect microclimate that promotes vigorous growth. This level of control is simply not possible with outdoor cultivation, where you are at the mercy of the elements.
Variations and Suggestions:
Don’t be afraid to experiment with different varieties of taro. While we’ve focused on the common edible taro, there are many ornamental varieties that boast stunning foliage colors and patterns. Consider trying a black taro for a dramatic statement piece or a variegated taro for a touch of whimsy.
You can also explore different growing mediums. While we recommend a well-draining potting mix, you can also try growing taro in water using a hydroponic setup. This method is particularly well-suited for ornamental varieties and can add a unique visual element to your indoor garden.
Another suggestion is to incorporate companion plants into your taro’s growing environment. Plants like ferns and mosses can help to increase humidity and create a more naturalistic setting. Just be sure to choose plants that have similar light and water requirements.
Finally, remember that patience is key. Taro can take several months to mature, so don’t get discouraged if you don’t see results immediately. With proper care and attention, your taro plant will eventually reward you with a bountiful harvest.
We wholeheartedly encourage you to try this DIY trick and experience the joy of growing taro indoors organically. It’s a rewarding and sustainable way to connect with nature, beautify your home, and enjoy the delicious flavor of homegrown taro.
Once you’ve embarked on your taro-growing journey, we’d love to hear about your experience! Share your tips, tricks, and photos with us in the comments below. Let’s create a community of indoor taro enthusiasts and inspire others to embrace the joys of organic gardening. Happy growing!
Frequently Asked Questions (FAQ)
1. What exactly is taro, and why should I grow it indoors?
Taro (Colocasia esculenta) is a tropical plant primarily grown for its starchy corms, which are edible and used in various cuisines worldwide. Growing it indoors allows you to enjoy fresh, organically grown taro even if you live in a colder climate or have limited outdoor space. It also adds a unique and beautiful tropical touch to your home decor. Furthermore, you have complete control over the growing environment, ensuring optimal conditions for your plant’s health and productivity, and you can avoid the use of harmful pesticides and herbicides by growing taro indoors organically.
2. What kind of container and potting mix do I need for growing taro indoors?
Choose a large container, at least 12 inches in diameter and depth, to accommodate the taro’s root system. Ensure the container has drainage holes to prevent waterlogging. For the potting mix, use a well-draining blend of potting soil, perlite, and compost. A mix of equal parts of these three components works well. The perlite improves drainage, while the compost provides essential nutrients. Avoid using heavy clay soils, as they can retain too much moisture and lead to root rot.
3. How much light does indoor taro need?
Taro thrives in bright, indirect light. Place your taro plant near a sunny window, preferably facing east or west. Avoid direct sunlight, especially during the hottest part of the day, as it can scorch the leaves. If you don’t have access to sufficient natural light, you can supplement with artificial grow lights. LED grow lights are a good option, as they are energy-efficient and provide the full spectrum of light needed for plant growth. Aim for 12-14 hours of light per day.
4. How often should I water my indoor taro plant?
Taro prefers consistently moist soil, but not waterlogged. Water thoroughly when the top inch of soil feels dry to the touch. During the growing season (spring and summer), you may need to water more frequently than during the dormant season (fall and winter). Ensure that excess water drains out of the drainage holes to prevent root rot. You can also increase humidity around the plant by misting the leaves regularly or placing the pot on a tray filled with pebbles and water.
5. What is the ideal temperature and humidity for growing taro indoors?
Taro thrives in warm temperatures, ideally between 65°F and 85°F (18°C and 29°C). Avoid exposing your plant to temperatures below 60°F (15°C), as this can damage the leaves. Taro also prefers high humidity levels, around 60-80%. You can increase humidity by using a humidifier, grouping plants together, or placing the pot on a tray filled with pebbles and water.
6. How do I fertilize my indoor taro plant organically?
Feed your taro plant with an organic fertilizer every 2-4 weeks during the growing season. Use a balanced liquid fertilizer or a slow-release granular fertilizer. You can also amend the soil with compost or worm castings to provide essential nutrients. Avoid over-fertilizing, as this can burn the roots. Always follow the instructions on the fertilizer label.
7. How long does it take for taro to mature and be ready for harvest?
Taro typically takes 6-12 months to mature, depending on the variety and growing conditions. You’ll know it’s ready to harvest when the leaves start to turn yellow and die back. The corm should be firm and well-developed.
8. How do I harvest taro corms from my indoor plant?
To harvest the corms, carefully dig up the entire plant. Gently remove the soil from around the corms. Separate the corms from the main plant. You can then wash the corms and store them in a cool, dry place. Remember to replant a portion of the corm to continue growing taro.
9. Are there any pests or diseases that commonly affect indoor taro plants?
Common pests that can affect indoor taro plants include aphids, spider mites, and mealybugs. These pests can be controlled with insecticidal soap or neem oil. Diseases that can affect taro include root rot and fungal leaf spots. Root rot is caused by overwatering, so ensure that your plant has good drainage. Fungal leaf spots can be treated with a fungicide.
10. Can I eat the leaves of my indoor taro plant?
Yes, the leaves of taro are edible, but they must be cooked thoroughly to remove calcium oxalate crystals, which can cause irritation. Boiling or steaming the leaves for at least 30 minutes will render them safe to eat. The leaves can be used in soups, stews, and other dishes. However, it is generally the corm that is the primary edible part of the plant.
11. What are some signs that my taro plant is not doing well?
Signs that your taro plant is not doing well include yellowing leaves, wilting, stunted growth, and root rot. Yellowing leaves can be caused by overwatering, underwatering, or nutrient deficiencies. Wilting can be caused by underwatering or root rot. Stunted growth can be caused by insufficient light, nutrients, or water. Root rot is characterized by mushy, brown roots and a foul odor.
12. Can I propagate taro from cuttings?
While taro is primarily propagated from corms, it is possible to propagate it from stem cuttings. Take a cutting from a healthy stem with at least one node. Place the cutting in water or moist potting mix. Keep the cutting in a warm, humid environment. Roots should develop within a few weeks. Once the roots are established, you can transplant the cutting into a pot.
13. Is growing taro indoors organically difficult?
No, growing taro indoors organically is not difficult, but it does require some attention and care. By providing the right growing conditions and using organic methods, you can successfully grow taro indoors and enjoy fresh, homegrown produce. The key is to monitor your plant regularly and address any issues promptly.
14. Where can I find taro corms to start growing?
You can find taro corms at local nurseries, garden centers, or online retailers. Look

Leave a Comment