
Grow Turnips at Home? Absolutely! Imagine plucking crisp, slightly peppery turnips straight from your backyard, ready to roast, mash, or even enjoy raw in a vibrant salad. It’s easier than you think, and this DIY guide is your ticket to a bountiful turnip harvest, even if you’re a beginner gardener like I once was!
Turnips have a rich history, dating back to ancient Rome and Greece, where they were a staple food. They’ve nourished communities for centuries, and now, you can tap into that tradition right in your own garden. But why bother growing your own turnips when you can buy them at the store? Well, store-bought turnips often lack the freshness and flavor of homegrown varieties. Plus, you have complete control over what goes into your food, avoiding potentially harmful pesticides and herbicides.
This DIY article is packed with simple, effective tricks and hacks to help you grow turnips at home successfully. I’ll share my secrets for choosing the right varieties, preparing your soil, preventing common pests, and knowing exactly when to harvest for the best flavor. Whether you have a sprawling garden or just a small balcony, you can enjoy the satisfaction of growing your own delicious, nutritious turnips. Let’s get started!
Growing Turnips: A Beginner’s Guide to a Bountiful Harvest
Hey there, fellow gardening enthusiasts! I’m so excited to share my experiences with growing turnips. These root vegetables are incredibly versatile, offering both delicious greens and tasty roots. Plus, they’re relatively easy to grow, making them perfect for beginners like I once was! Let’s dive into how you can cultivate your own turnip patch.
Choosing the Right Turnip Variety
First things first, selecting the right turnip variety is crucial for success. There are tons of options out there, each with its own unique characteristics. Here are a few of my favorites:
* Purple Top White Globe: This is a classic choice, known for its mild flavor and smooth, white flesh with a purple top. It’s a reliable producer and a great all-around turnip.
* Tokyo Cross: If you’re looking for a quick harvest, Tokyo Cross is your best bet. It matures incredibly fast, producing small, tender roots in just a month.
* Golden Ball: As the name suggests, this variety boasts a beautiful golden-yellow flesh. It has a sweet, delicate flavor that’s perfect for roasting or adding to soups.
* Hakurei: This Japanese turnip is prized for its crisp, sweet flavor and tender texture. It’s delicious raw in salads or lightly sautéed.
Consider your climate, growing season length, and personal taste preferences when making your selection. I usually opt for a mix of varieties to enjoy a range of flavors and textures.
Preparing the Soil
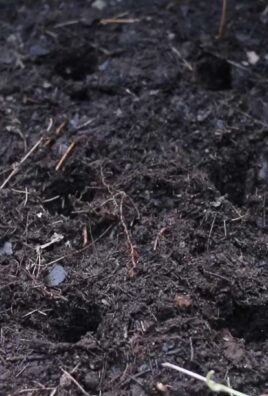
Turnips thrive in well-drained, fertile soil with a slightly acidic pH (around 6.0 to 6.5). Before planting, it’s essential to prepare the soil properly. Here’s what I do:
* Clear the Area: Remove any weeds, rocks, or debris from the planting area. Turnips need space to grow, and weeds can compete for nutrients and sunlight.
* Loosen the Soil: Use a garden fork or tiller to loosen the soil to a depth of at least 12 inches. This will allow the turnip roots to penetrate easily.
* Amend the Soil: Incorporate plenty of organic matter, such as compost, well-rotted manure, or leaf mold. This will improve soil drainage, fertility, and water retention. I usually add a generous layer of compost, about 2-3 inches thick.
* Check the pH: Use a soil testing kit to check the pH level. If the soil is too acidic, add lime to raise the pH. If it’s too alkaline, add sulfur to lower the pH.
Planting Turnip Seeds
Turnips are cool-season crops, so the best time to plant them is in early spring or late summer. I usually aim for planting about 4-6 weeks before the first expected frost in the fall or as soon as the ground can be worked in the spring.
Here’s my step-by-step planting guide:
1. Create Rows: Make shallow furrows in the prepared soil, about 1/2 inch deep and 12-18 inches apart.
2. Sow the Seeds: Sprinkle the turnip seeds evenly along the furrows. Turnip seeds are tiny, so don’t sow them too thickly. I usually aim for about 1 inch spacing between seeds.
3. Cover the Seeds: Gently cover the seeds with a thin layer of soil.
4. Water Thoroughly: Water the planting area gently but thoroughly to moisten the soil.
5. Thin Seedlings: Once the seedlings emerge and have a few true leaves, thin them to about 3-6 inches apart. This will give the turnips enough space to develop properly. Don’t throw away the thinnings! You can eat the young turnip greens in salads or stir-fries.
Caring for Your Turnip Plants
Turnips are relatively low-maintenance plants, but they do require some basic care to thrive.
* Watering: Keep the soil consistently moist, especially during dry periods. Water deeply and regularly, but avoid overwatering, which can lead to root rot. I usually water my turnips 2-3 times a week, depending on the weather.
* Weeding: Regularly remove any weeds that pop up around your turnip plants. Weeds compete for nutrients and water, so it’s important to keep them under control. I prefer to hand-weed, but you can also use a hoe or cultivator.
* Fertilizing: Turnips benefit from regular fertilization. I usually side-dress my plants with a balanced fertilizer, such as 10-10-10, about 3-4 weeks after planting. Follow the instructions on the fertilizer package for application rates. You can also use organic fertilizers, such as compost tea or fish emulsion.
* Pest and Disease Control: Turnips are generally resistant to pests and diseases, but they can be susceptible to certain problems, such as aphids, flea beetles, and clubroot. Inspect your plants regularly for signs of infestation or disease. If you notice any problems, take action promptly. For aphids, you can spray the plants with insecticidal soap. For flea beetles, you can use row covers to protect the plants. For clubroot, practice crop rotation and avoid planting turnips in the same area for several years.
Harvesting Turnips
The harvesting time for turnips depends on the variety and your personal preference. Generally, turnips are ready to harvest when the roots are 2-3 inches in diameter. You can harvest the greens at any time, but they are most tender when they are young.
Here’s how I harvest my turnips:
1. Loosen the Soil: Use a garden fork to loosen the soil around the turnips.
2. Pull the Turnips: Gently pull the turnips from the ground, holding them by the base of the leaves.
3. Trim the Greens: Cut off the greens, leaving about 1-2 inches of stem attached to the root.
4. Wash the Turnips: Wash the turnips thoroughly to remove any dirt or debris.
Storing Turnips
Turnips can be stored for several months in a cool, moist environment. Here’s how I store my turnips:
* Remove the Greens: Cut off the greens, leaving about 1-2 inches of stem attached to the root.
* Wash and Dry: Wash the turnips thoroughly and allow them to dry completely.
* Store in a Cool, Moist Place: Store the turnips in a root cellar, refrigerator, or other cool, moist place. I usually store mine in a plastic bag in the refrigerator.
Enjoying Your Turnip Harvest
Now comes the best part – enjoying the fruits (or rather, roots and greens!) of your labor. Turnips are incredibly versatile in the kitchen.
* Turnip Roots: You can roast them, boil them, mash them, add them to soups and stews, or even eat them raw in salads. I love roasting turnips with a little olive oil, salt, and pepper.
* Turnip Greens: You can sauté them, steam them, add them to soups and stews, or even eat them raw in salads. I love sautéing turnip greens with garlic and olive oil.
Troubleshooting Common Turnip Growing Problems
Even with the best care, you might encounter some challenges when growing turnips. Here are a few common problems and how I address them:
* Slow Growth: If your turnips are growing slowly, it could be due to poor soil, lack of nutrients, or insufficient sunlight. Make sure your soil is well-drained and fertile, and fertilize your plants regularly. Also, ensure they’re getting at least 6 hours of sunlight per day.
* Bitter Taste: Turnips can sometimes develop a bitter taste, especially if they are grown in hot weather or are not watered regularly. Choose heat-tolerant varieties and keep the soil consistently moist.
* Cracked Roots: Cracked roots can be caused by inconsistent watering or nutrient deficiencies. Water your plants regularly and fertilize them with a balanced fertilizer.
* Pest Infestations: Keep an eye out for pests like aphids and flea beetles. Use appropriate pest control methods, such as insecticidal soap or row covers.
Turnip Greens: A Bonus Harvest!
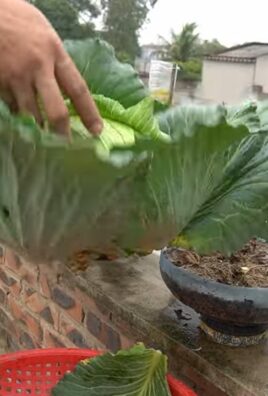
Don’t forget about the turnip greens! They are a nutritional powerhouse, packed with vitamins and minerals. You can harvest them at any time during the growing season. Simply snip off the outer leaves, leaving the inner leaves to continue growing. I love adding turnip greens to salads, stir-fries, and soups. They have a slightly peppery flavor that adds a delicious kick to any dish.
Turnips in Containers
If you don’t have a garden, you can still grow turnips in containers! Choose a large container (at least 12 inches in diameter) with drainage holes. Use a well-draining potting mix and follow the same planting and care instructions as for growing turnips in the ground. Container-grown turnips may require more frequent watering and fertilization.
My Favorite

Conclusion
So, there you have it! Growing turnips at home is not only achievable but also incredibly rewarding. From the crisp, peppery greens to the sweet, earthy roots, you’ll be amazed at the fresh flavors you can cultivate right in your own backyard or even in containers on your balcony. This isn’t just about saving a few dollars at the grocery store; it’s about connecting with your food, understanding its origins, and enjoying the unparalleled taste of homegrown produce.
Why is this DIY trick a must-try? Because it’s accessible to gardeners of all levels. Whether you’re a seasoned pro or a complete beginner, turnips are forgiving and relatively easy to grow. They mature quickly, offering a fast turnaround from planting to harvest, which is incredibly satisfying. Plus, you have complete control over the growing process, ensuring your turnips are free from harmful pesticides and chemicals. You’re getting the purest, most natural flavor possible.
But the benefits don’t stop there. Growing turnips at home allows you to experiment with different varieties. Forget the standard purple-top white globe you find in most supermarkets. Explore heirloom options like ‘Golden Ball’ for a milder, sweeter flavor, or ‘Tokyo Cross’ for early harvests and tender greens. You can even try growing different colored turnips for a visually stunning harvest.
Looking for variations? Consider companion planting. Turnips thrive alongside other vegetables like beans, peas, and radishes. These companions can help deter pests and improve soil health, leading to even better yields. You can also succession plant turnips, sowing seeds every few weeks to ensure a continuous harvest throughout the growing season. This is especially useful if you enjoy turnip greens regularly.
And speaking of turnip greens, don’t underestimate their culinary potential! They can be sautéed, steamed, added to soups and stews, or even used in salads. They’re packed with vitamins and minerals, making them a healthy and delicious addition to any meal. The roots themselves can be roasted, mashed, pickled, or even eaten raw in salads. The possibilities are endless!
We wholeheartedly encourage you to give this DIY trick a try. It’s a simple, cost-effective, and incredibly rewarding way to enjoy fresh, flavorful turnips. Don’t be afraid to experiment with different varieties, growing techniques, and recipes. The journey of growing your own food is a learning experience, and every harvest is a victory.
So, grab some seeds, prepare your soil, and get ready to experience the joy of growing turnips at home. We’re confident that you’ll be amazed at the results. And most importantly, we want to hear about your experience! Share your tips, tricks, and photos with us in the comments below. Let’s build a community of home gardeners who are passionate about growing their own food. Happy gardening!
FAQ
What is the best time of year to plant turnips?
Turnips are a cool-season crop, meaning they thrive in cooler temperatures. The best time to plant turnips is typically in the spring or fall. For a spring crop, sow seeds 2-4 weeks before the last expected frost. For a fall crop, sow seeds 6-8 weeks before the first expected frost. This timing allows the turnips to mature in cool weather, resulting in sweeter, more tender roots. In warmer climates, you can often grow turnips throughout the winter.
How much sunlight do turnips need?
Turnips need at least 6 hours of sunlight per day to grow well. While they can tolerate some shade, especially in hotter climates, insufficient sunlight can lead to smaller roots and less flavorful greens. Choose a planting location that receives plenty of direct sunlight for optimal growth.
What kind of soil is best for growing turnips?
Turnips prefer well-drained, fertile soil with a pH between 6.0 and 7.0. Amend heavy clay soils with compost or other organic matter to improve drainage. Sandy soils can also benefit from the addition of organic matter to help retain moisture. Before planting, work the soil to a depth of at least 6 inches and remove any rocks or debris.
How often should I water turnips?
Turnips need consistent moisture to thrive. Water deeply and regularly, especially during dry periods. Aim to keep the soil consistently moist but not waterlogged. A good rule of thumb is to water when the top inch of soil feels dry to the touch. Mulching around the plants can help retain moisture and suppress weeds.
How long does it take for turnips to mature?
Turnips are a relatively fast-growing crop. Most varieties mature in 50-60 days. However, you can harvest the greens earlier, typically within 30-40 days. Check the seed packet for specific maturity times for the variety you are growing.
How do I know when my turnips are ready to harvest?
The size of the turnip root is a good indicator of maturity. Most varieties are ready to harvest when the roots are 2-3 inches in diameter. You can also check the seed packet for specific size recommendations. To harvest, gently loosen the soil around the turnip and pull it out of the ground.
Can I eat both the turnip roots and the greens?
Yes, both the turnip roots and the greens are edible and nutritious. The roots can be roasted, mashed, pickled, or eaten raw in salads. The greens can be sautéed, steamed, added to soups and stews, or used in salads. Both the roots and the greens are packed with vitamins and minerals.
What are some common pests and diseases that affect turnips?
Some common pests that affect turnips include aphids, flea beetles, and root maggots. Diseases that can affect turnips include powdery mildew and clubroot. To prevent pest and disease problems, practice good garden hygiene, such as removing weeds and debris, and rotate your crops regularly. You can also use organic pest control methods, such as insecticidal soap or neem oil.
Can I grow turnips in containers?
Yes, turnips can be grown in containers. Choose a container that is at least 12 inches deep and wide to allow the roots to develop properly. Use a well-draining potting mix and water regularly. Container-grown turnips may need to be fertilized more frequently than those grown in the ground.
What are some good companion plants for turnips?
Good companion plants for turnips include beans, peas, radishes, and garlic. These companions can help deter pests, improve soil health, and enhance the growth of turnips. Avoid planting turnips near members of the cabbage family, such as broccoli, cauliflower, and kale, as they can attract similar pests and diseases.
Leave a Comment