
Grow Zucchini in Grow Bags? Absolutely! Imagine harvesting plump, juicy zucchini right from your patio, balcony, or even a sunny corner of your garden – all thanks to the magic of grow bags. Forget sprawling vines taking over your entire backyard; this DIY method is perfect for urban gardeners, beginners, and anyone looking to maximize their yield in a limited space.
For centuries, gardeners have sought innovative ways to cultivate their favorite vegetables, adapting to diverse environments and limited resources. While traditional in-ground gardening remains popular, the rise of container gardening, including the use of grow bags, reflects a growing trend towards accessibility and sustainability. Grow bags, in particular, offer excellent drainage and aeration, creating an ideal environment for root development and, ultimately, a bountiful harvest.
Let’s face it, zucchini can be a bit of a space hog when planted directly in the ground. That’s where this DIY trick comes in! I’m going to show you how to successfully grow zucchini in grow bags, saving you precious garden real estate and making the entire process much more manageable. Plus, who doesn’t love a good DIY project that results in delicious, homegrown food? Get ready to unleash your inner gardener and enjoy a summer filled with fresh zucchini – from zucchini bread to grilled zucchini skewers, the possibilities are endless!
Zucchini im Pflanzsack anbauen: Eine einfache DIY-Anleitung
Hallo Gartenfreunde! Ich liebe Zucchini, und es gibt kaum etwas Besseres, als sie frisch aus dem eigenen Garten zu ernten. Aber nicht jeder hat einen riesigen Garten, und da kommen Pflanzsäcke ins Spiel! Sie sind eine fantastische Möglichkeit, auch auf kleinen Balkonen, Terrassen oder sogar in Innenräumen Gemüse anzubauen. Und Zucchini gedeihen darin prächtig! In diesem Artikel zeige ich euch, wie ihr eure eigenen Zucchini im Pflanzsack anbauen könnt – Schritt für Schritt. Keine Angst, es ist einfacher als ihr denkt!
Was ihr für den Zucchini-Anbau im Pflanzsack benötigt
Bevor wir loslegen, hier eine Liste mit allem, was ihr braucht:
* Pflanzsack: Wählt einen Pflanzsack mit einem Volumen von mindestens 30 Litern. Größer ist besser, da Zucchini viel Platz für ihre Wurzeln benötigen. Pflanzsäcke aus atmungsaktivem Material wie Filz sind ideal, da sie eine gute Drainage gewährleisten und die Wurzeln belüften.
* Hochwertige Pflanzerde: Verwendet eine hochwertige, gut drainierende Pflanzerde. Ihr könnt auch eure eigene Mischung aus Gartenerde, Kompost und Perlit oder Vermiculit herstellen.
* Zucchini-Samen oder Jungpflanzen: Ihr könnt entweder Zucchini-Samen aussäen oder Jungpflanzen kaufen. Jungpflanzen sind etwas einfacher, da sie bereits einen Wachstumsvorsprung haben.
* Langzeitdünger: Ein Langzeitdünger versorgt eure Zucchini über einen längeren Zeitraum mit Nährstoffen.
* Gießkanne oder Gartenschlauch: Zum regelmäßigen Gießen.
* Pflanzstab oder Rankhilfe (optional): Einige Zucchinisorten wachsen buschiger als andere. Ein Pflanzstab oder eine Rankhilfe kann helfen, die Pflanze zu stützen und die Früchte vom Boden fernzuhalten.
* Gartenschere oder Messer: Zum Ernten der Zucchini.
* Handschuhe: Um eure Hände sauber zu halten.
Schritt-für-Schritt-Anleitung: Zucchini im Pflanzsack pflanzen
Jetzt geht’s los! Hier ist eine detaillierte Anleitung, wie ihr eure Zucchini im Pflanzsack pflanzt:
1. Den Pflanzsack vorbereiten:
* Faltet den Pflanzsack auseinander und stellt ihn an den gewünschten Standort. Achtet darauf, dass der Standort sonnig ist, da Zucchini mindestens 6-8 Stunden Sonnenlicht pro Tag benötigen.
* Füllt den Pflanzsack zu etwa einem Drittel mit Pflanzerde.
2. Dünger hinzufügen:
* Gebt nun den Langzeitdünger gemäß den Anweisungen auf der Verpackung hinzu. Mischt den Dünger gut mit der Erde.
3. Den Pflanzsack auffüllen:
* Füllt den Pflanzsack nun fast vollständig mit Pflanzerde auf. Lasst etwa 5-10 cm Platz bis zum Rand.
4. Samen aussäen oder Jungpflanzen einsetzen:
* Aussaat von Samen: Wenn ihr Samen aussät, macht mit dem Finger oder einem Stift ein kleines Loch in die Erde (etwa 2-3 cm tief). Legt 2-3 Samen in das Loch und bedeckt sie mit Erde. Gießt die Erde vorsichtig an.
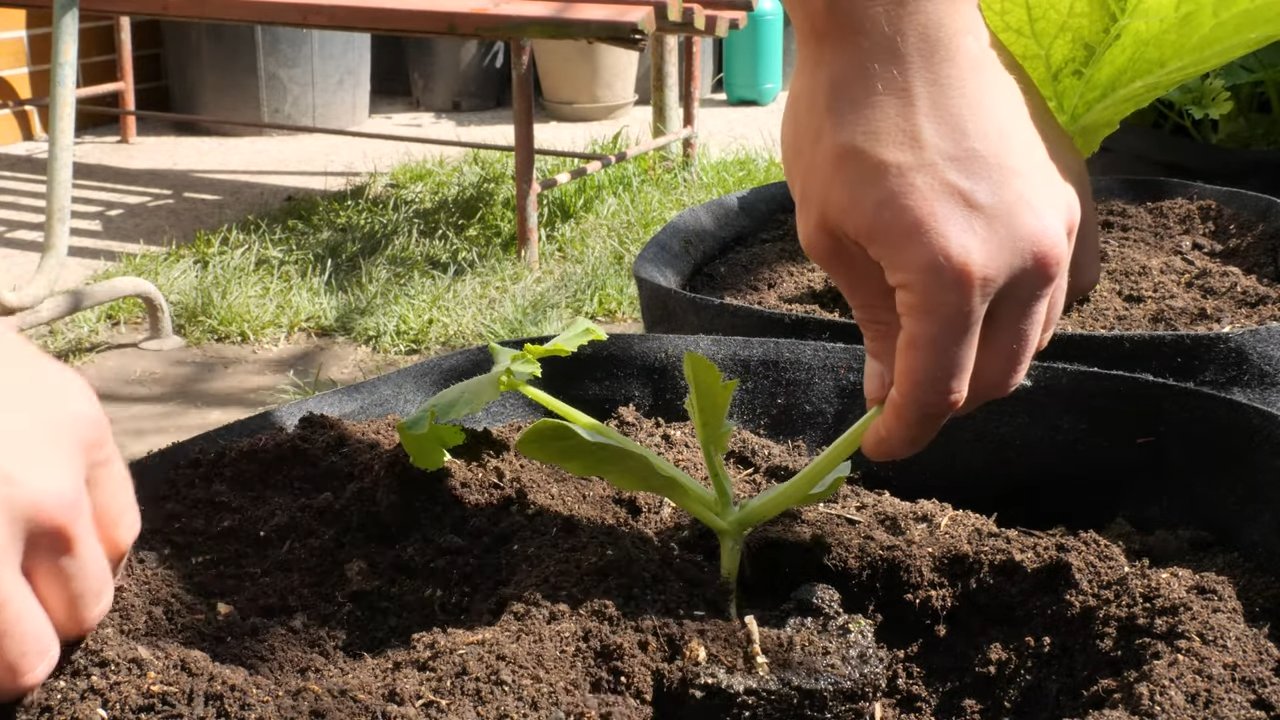
* Einsetzen von Jungpflanzen: Wenn ihr Jungpflanzen verwendet, nehmt die Pflanze vorsichtig aus dem Topf. Lockert die Wurzeln etwas auf. Macht ein Loch in die Erde, das groß genug für den Wurzelballen ist. Setzt die Pflanze in das Loch und füllt es mit Erde auf. Drückt die Erde leicht an und gießt die Pflanze gut an.
5. Gießen:
* Gießt die Erde gründlich, bis das Wasser aus den Drainagelöchern am Boden des Pflanzsacks austritt.
6. Standort und Rankhilfe (optional):
* Stellt den Pflanzsack an einen sonnigen Standort. Wenn ihr eine buschige Zucchinisorte habt, könnt ihr einen Pflanzstab oder eine Rankhilfe anbringen, um die Pflanze zu stützen.
Pflege eurer Zucchini im Pflanzsack
Nachdem ihr eure Zucchini gepflanzt habt, ist es wichtig, sie richtig zu pflegen, damit sie gut gedeihen und viele Früchte tragen.
1. Gießen:
* Zucchini benötigen viel Wasser, besonders während der Fruchtbildung. Gießt die Pflanzen regelmäßig, besonders an heißen Tagen. Die Erde sollte immer feucht, aber nicht nass sein. Vermeidet es, die Blätter zu gießen, da dies Pilzkrankheiten fördern kann. Am besten gießt ihr am frühen Morgen oder späten Nachmittag.
2. Düngen:
* Obwohl ihr bereits Langzeitdünger verwendet habt, kann es sinnvoll sein, die Pflanzen während der Wachstumsperiode zusätzlich zu düngen. Verwendet einen Flüssigdünger für Gemüse und düngt alle 2-3 Wochen gemäß den Anweisungen auf der Verpackung.
3. Schädlinge und Krankheiten:
* Achtet auf Schädlinge wie Blattläuse, Schnecken und Zucchini-Bohrer. Kontrolliert die Pflanzen regelmäßig und entfernt Schädlinge manuell oder verwendet ein geeignetes Insektizid.
* Zucchini können auch von Pilzkrankheiten wie Mehltau befallen werden. Sorgt für eine gute Belüftung und vermeidet es, die Blätter zu gießen. Bei Bedarf könnt ihr ein Fungizid verwenden.
4. Bestäubung:
* Zucchini benötigen Bestäubung, um Früchte zu bilden. Wenn ihr keine Bienen oder andere bestäubende Insekten in eurem Garten habt, könnt ihr die Blüten manuell bestäuben. Nehmt dazu einen Pinsel und übertragt den Pollen von den männlichen Blüten (die Blüten ohne Fruchtansatz) auf die weiblichen Blüten (die Blüten mit Fruchtansatz).
5. Ausgeizen (optional):
* Einige Gärtner entfernen Seitentriebe (Geiztriebe), um die Energie der Pflanze auf die Haupttriebe und die Fruchtbildung zu konzentrieren. Ob ihr ausgeizen wollt, ist Geschmackssache. Ich persönlich mache es nicht immer, aber es kann helfen, den Ertrag zu steigern.
Erntezeit!
Das Wichtigste kommt zum Schluss: die Ernte!
1. Wann ernten?
* Zucchini sind erntereif, wenn sie eine Länge von etwa 15-20 cm erreicht haben. Sie sollten sich fest anfühlen und eine glänzende Haut haben.
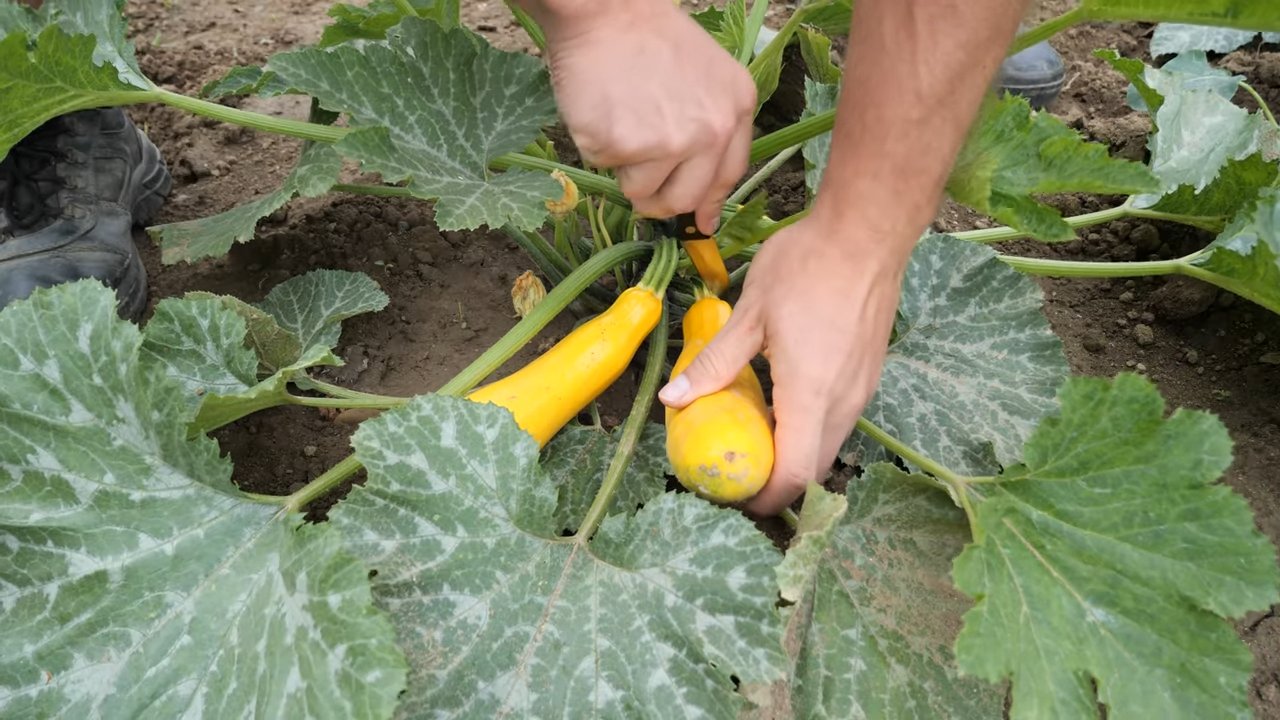
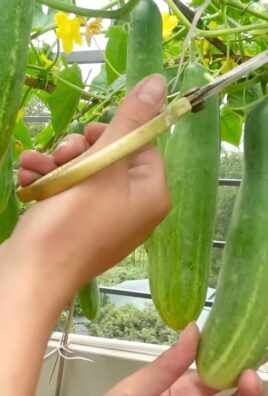
2. Wie ernten?
* Schneidet die Zucchini mit einem scharfen Messer oder einer Gartenschere vom Stiel ab. Lasst dabei einen kleinen Stielansatz an der Frucht.
3. Regelmäßig ernten:
* Erntet die Zucchini regelmäßig, da dies die Pflanze anregt, weitere Früchte zu bilden. Lasst die Zucchini nicht zu groß werden, da sie sonst an Geschmack verlieren und die Pflanze weniger neue Früchte produziert.
Zusätzliche Tipps für den erfolgreichen Zucchini-Anbau im Pflanzsack
Hier noch ein paar zusätzliche Tipps, die euch helfen können, eure Zucchini im Pflanzsack erfolgreich anzubauen:
* Wählt die richtige Sorte: Es gibt viele verschiedene Zucchinisorten. Einige Sorten sind besser für den Anbau im Pflanzsack geeignet als andere. Achtet auf Sorten, die kompakt wachsen und nicht zu viel Platz benötigen.
* Verwendet eine dunkle Pflanzsackfarbe: Dunkle Farben absorbieren mehr Sonnenlicht und erwärmen die Erde schneller. Dies kann besonders in kühleren Klimazonen von Vorteil sein.
* Dreht den Pflanzsack regelmäßig: Dreht den Pflanzsack regelmäßig, damit alle Seiten der Pflanze gleichmäßig Sonnenlicht erhalten.
* Mulchen: Mulcht die Erde um die Zucchini-Pflanze mit Stroh, Holzhackschnitzeln oder anderem organischen Material. Dies hilft, die Feuchtigkeit im Boden zu halten, Unkraut zu unterdrücken und die Bodentemperatur zu regulieren.
* Beobachtet eure Pflanzen genau: Achtet auf Anzeichen von Schädlingen, Krankheiten oder Nährstoffmangel. Je früher ihr Probleme erkennt, desto einfacher ist es, sie zu beheben.
Ich hoffe, diese Anleitung hilft euch dabei, eure eigenen Zucchini im Pflanzsack anzubauen. Es ist ein lohnendes Projekt, das
Conclusion
So, there you have it! Growing zucchini in grow bags isn’t just a gardening trend; it’s a practical, space-saving, and highly effective method for yielding a bountiful harvest of this versatile vegetable. We’ve explored the benefits, the step-by-step process, and even some troubleshooting tips to ensure your success. But why is this DIY trick a must-try?
Firstly, the improved drainage and aeration that grow bags provide are game-changers for zucchini. These plants are notorious for being susceptible to root rot, and grow bags mitigate this risk significantly. Secondly, the portability of grow bags allows you to chase the sun, optimizing your zucchini’s exposure and maximizing its growth potential. This is especially beneficial for those with limited garden space or less-than-ideal soil conditions. Finally, the ease of setup and maintenance makes this method accessible to gardeners of all skill levels, from seasoned pros to complete beginners.
But don’t stop there! Feel free to experiment with different variations to tailor this method to your specific needs and preferences. Consider adding companion plants like marigolds or nasturtiums to your grow bags to deter pests naturally. You could also try using different types of soil mixes, such as a blend of compost, perlite, and vermiculite, to further enhance drainage and nutrient availability. For those in hotter climates, consider using lighter-colored grow bags to reflect sunlight and keep the soil cooler. And if you’re feeling adventurous, try growing different varieties of zucchini in separate grow bags to compare their growth habits and yields.
The possibilities are endless! The key is to embrace the DIY spirit and adapt the method to suit your unique gardening environment.
We wholeheartedly encourage you to give growing zucchini in grow bags a try. It’s a rewarding experience that will not only provide you with a delicious and healthy crop but also deepen your connection to nature. And most importantly, we want to hear about your experiences! Share your successes, your challenges, and your creative variations in the comments below. Let’s build a community of zucchini-growing enthusiasts and learn from each other. Your insights could be invaluable to other gardeners embarking on this journey. So, grab your grow bags, your zucchini seeds, and get ready to enjoy a summer filled with homegrown goodness! Let’s get growing!
Frequently Asked Questions (FAQ)
What size grow bag is best for zucchini?
The ideal size grow bag for zucchini is typically between 15 and 25 gallons. Zucchini plants are vigorous growers with extensive root systems, so they need ample space to develop properly. A smaller bag might restrict root growth, leading to stunted plants and reduced yields. A larger bag, while not necessarily harmful, might be unnecessary and take up more space than needed. Consider the specific variety of zucchini you’re growing; bush varieties might do well in slightly smaller bags (around 15 gallons), while vining varieties will definitely benefit from the larger 20-25 gallon range.
Can I reuse grow bags for zucchini?
Yes, you can absolutely reuse grow bags, but it’s essential to clean and prepare them properly before replanting. After harvesting your zucchini, remove any remaining plant debris and soil. Wash the grow bag thoroughly with a mild soap and water solution to remove any lingering pathogens or pests. Allow the bag to dry completely in the sun before storing it or reusing it. Over time, grow bags may degrade, especially if exposed to harsh weather conditions. Inspect your grow bags regularly for signs of wear and tear, such as tears or thinning fabric. If the bag is significantly damaged, it’s best to replace it to ensure proper drainage and support for your plants.
What type of soil should I use in grow bags for zucchini?
A well-draining and nutrient-rich soil mix is crucial for growing healthy zucchini in grow bags. A good starting point is a blend of equal parts compost, potting soil, and perlite or vermiculite. Compost provides essential nutrients and improves soil structure, while potting soil offers a good balance of drainage and water retention. Perlite or vermiculite enhances drainage and aeration, preventing the soil from becoming waterlogged. You can also amend the soil with slow-release fertilizer or organic amendments like bone meal or blood meal to provide a steady supply of nutrients throughout the growing season. Avoid using garden soil directly in grow bags, as it can be too heavy and compacted, leading to poor drainage and root problems.
How often should I water zucchini in grow bags?
Watering frequency depends on several factors, including the weather, the size of the grow bag, and the stage of plant growth. Generally, zucchini plants in grow bags need to be watered deeply and regularly, especially during hot and dry periods. Check the soil moisture level daily by sticking your finger about an inch into the soil. If the soil feels dry to the touch, it’s time to water. Water thoroughly until water drains out of the bottom of the bag. Avoid overwatering, as this can lead to root rot. During cooler or wetter weather, you may need to water less frequently. As the zucchini plants mature and start producing fruit, they will require more water.
Do I need to fertilize zucchini in grow bags?
Yes, fertilizing is essential for growing healthy and productive zucchini plants in grow bags. Because the plants are confined to a limited amount of soil, they rely on you to provide the necessary nutrients. Start by incorporating slow-release fertilizer into the soil mix at planting time. This will provide a steady supply of nutrients for the first few weeks. After that, you can supplement with liquid fertilizer every 2-3 weeks. Choose a fertilizer that is specifically formulated for vegetables or one that has a balanced NPK ratio (e.g., 10-10-10). You can also use organic fertilizers like compost tea or fish emulsion. Avoid over-fertilizing, as this can lead to excessive foliage growth and reduced fruit production.
How much sun do zucchini plants need in grow bags?
Zucchini plants thrive in full sun, meaning they need at least 6-8 hours of direct sunlight per day. When choosing a location for your grow bags, select a spot that receives ample sunlight throughout the day. If you live in a particularly hot climate, you may need to provide some afternoon shade to prevent the plants from overheating. You can use shade cloth or move the grow bags to a slightly shadier location during the hottest part of the day. Insufficient sunlight can lead to weak, leggy plants and reduced fruit production.
What are some common pests and diseases that affect zucchini in grow bags?
Zucchini plants are susceptible to several common pests and diseases, including squash bugs, squash vine borers, powdery mildew, and blossom end rot. Squash bugs are sap-sucking insects that can weaken plants and transmit diseases. Squash vine borers are moth larvae that tunnel into the stems of zucchini plants, causing them to wilt and die. Powdery mildew is a fungal disease that causes a white, powdery coating on the leaves. Blossom end rot is a physiological disorder caused by calcium deficiency, resulting in dark, sunken spots on the blossom end of the fruit. To prevent these problems, inspect your plants regularly for signs of pests or diseases. Use organic pest control methods like insecticidal soap or neem oil to control pests. Ensure good air circulation to prevent powdery mildew. Provide consistent watering and fertilizing to prevent blossom end rot.
Can I grow multiple zucchini plants in one grow bag?
While it’s technically possible to grow multiple zucchini plants in one large grow bag, it’s generally not recommended. Zucchini plants are vigorous growers and need ample space to develop properly. Crowding multiple plants into one bag can lead to competition for resources, resulting in smaller plants and reduced yields. It can also increase the risk of pests and diseases. For best results, it’s best to grow one zucchini plant per grow bag. If you have limited space, you can choose bush varieties of zucchini, which tend to be more compact.
How long does it take for zucchini to grow in grow bags?
The time it takes for zucchini to grow in grow bags depends on several factors, including the variety of zucchini, the weather conditions, and the overall health of the plants. Generally, zucchini plants start producing fruit about 50-60 days after planting. You can start harvesting zucchini when the fruits are about 6-8 inches long. Regular harvesting encourages the plants to continue producing more fruit.
What are the benefits of using grow bags compared to traditional gardening methods for zucchini?
Grow bags offer several advantages over traditional gardening methods for growing zucchini. They provide excellent drainage and aeration, preventing root rot. They are lightweight and portable, allowing you to move the plants to optimize sunlight exposure. They are easy to set up and maintain, making them ideal for beginners. They are also a great option for gardeners with limited space or poor soil conditions. Finally, grow bags can help to control soil temperature, keeping the roots cooler in hot weather.

Leave a Comment