
Growing Arugula at Home can be surprisingly simple and incredibly rewarding! Imagine stepping out into your backyard or even just onto your balcony and harvesting fresh, peppery arugula for your salad, pizza, or pesto. Forget those wilted, pre-packaged greens from the grocery store – with a few simple tricks, you can have a constant supply of this delicious and nutritious leafy green right at your fingertips.
Arugula, also known as rocket, has a rich history, dating back to ancient Roman times where it was prized for its flavor and believed to be an aphrodisiac! While we might not be growing it for *that* reason today, its peppery bite adds a unique dimension to countless dishes. For centuries, people have cultivated this easy-to-grow green, and now it’s your turn!
Why should you learn these DIY tricks for growing arugula? Well, for starters, it’s a fantastic way to save money on groceries. Plus, you’ll know exactly where your food is coming from and what’s gone into growing it – no pesticides or mystery ingredients! But more than that, growing arugula at home is incredibly satisfying. There’s something truly special about nurturing a plant from seed to harvest, and I’m here to show you just how easy it can be. Let’s dive into some simple DIY hacks that will have you enjoying fresh arugula in no time!
Growing Arugula Yourself: Your Guide for a Zesty Salad
I love arugula, also known as rocket! This peppery, zesty salad is so versatile—whether in a salad, on pizza, or as a pesto. And the best part? You can easily grow it at home! I’ll show you how to start your own arugula garden with little effort.
What you’ll need: The Preparation
Before we get started, make sure you have everything on hand. Here is a list of the things you’ll need:
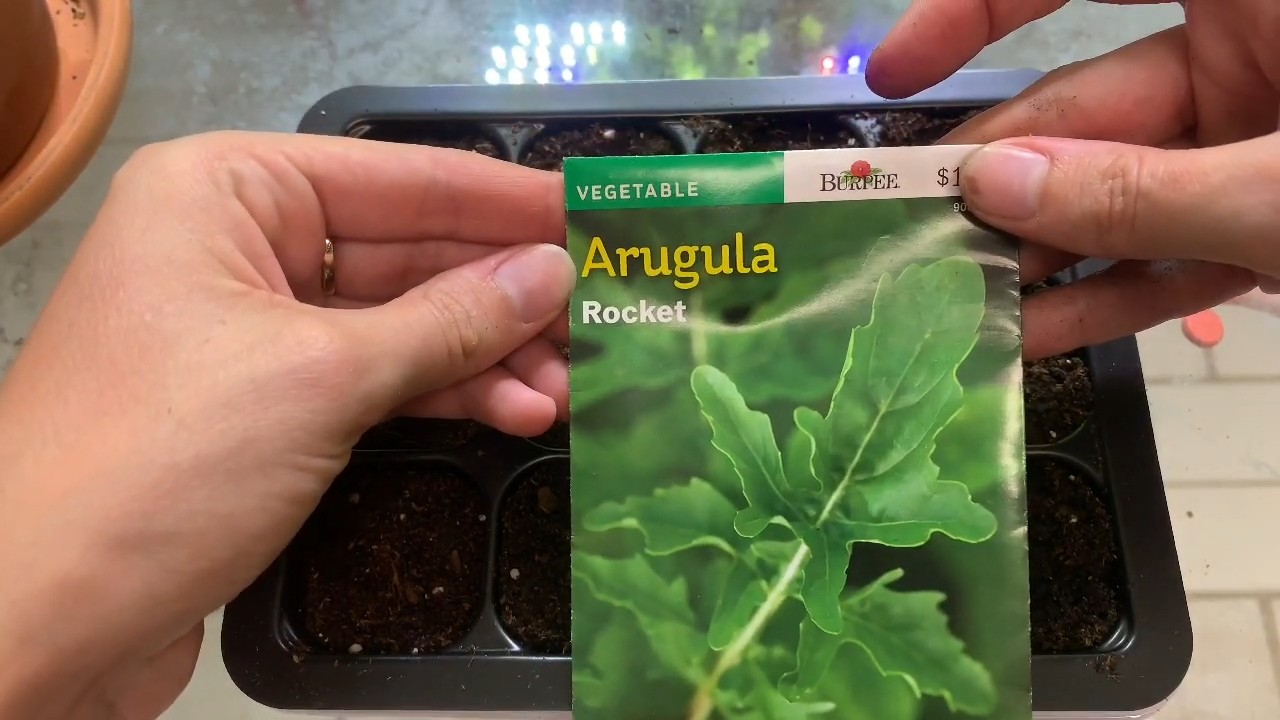
- Arugula seeds (rocket seeds)
- Planters or a garden bed: Arugula grows well in pots, balcony boxes, or directly in the garden.
- High-quality potting soil or garden soil: Make sure the soil is well-draining.
- Watering can or spray bottle: For watering.
- Optional: Organic fertilizer or compost.
- Optional: A small trowel or planting scoop.
- Optional: A marker and labels to identify your sowing.
The Right Location: Light and Soil
Arugula is quite undemanding, but you should consider a few things to achieve optimal results:
- Sun: Arugula prefers a sunny location but also tolerates partial shade. Especially in the hot summer months, partial shade is ideal to prevent the leaves from becoming too bitter.
- Soil: The soil should be loose, well-draining, and rich in organic matter. If you are growing in the garden, you can work compost or well-rotted manure into the soil to enrich it. In pots, I always use high-quality potting soil.
- pH Value: Arugula prefers a slightly acidic to neutral pH (between 6.0 and 7.0).
Sowing: How to Get the Seeds in the Ground
Now let’s get down to business! Sowing is really simple:
- Prepare the soil: Fill your planters or garden bed with soil. Loosen the soil slightly and remove any stones or weeds.
- Sowing: Sprinkle the arugula seeds evenly over the surface of the soil. They are very small, so don’t overdo it. A thin layer is perfectly sufficient.
- Covering: Cover the seeds with a thin layer of soil (about 0.5 cm / 0.2 inches).
- Watering: Gently water the soil, preferably with a spray bottle, so the seeds are not washed away. The soil should be moist, but not wet.
- Location: Place the planters in a sunny or partially shaded spot.
Care: Watering, Fertilizing, and More
Arugula is low-maintenance, but regular care is important:
- Watering: Keep the soil moist, but not wet. Water regularly, especially in dry weather. Avoid waterlogging, as this can lead to root rot. I always check with my finger to see if the soil is dry before watering.
- Fertilizing: Arugula doesn’t need much fertilizer. If you wish, you can use an organic liquid fertilizer or compost tea every few weeks. I usually don’t fertilize at all, as the soil in my pots already contains enough nutrients.
- Weeding: Regularly remove weeds that grow around the arugula plants. Weeds can steal nutrients and water.
- Pests: Arugula is relatively resistant to pests. Occasionally, aphids may appear. You can simply rinse them off with a jet of water or treat them with a mild soap solution.
- Preventing Bolting: When arugula flowers (bolts), the leaves become bitter. To prevent this, you should regularly remove the flower stalks. However, you can also eat the flowers! They are edible and have a slightly peppery taste.
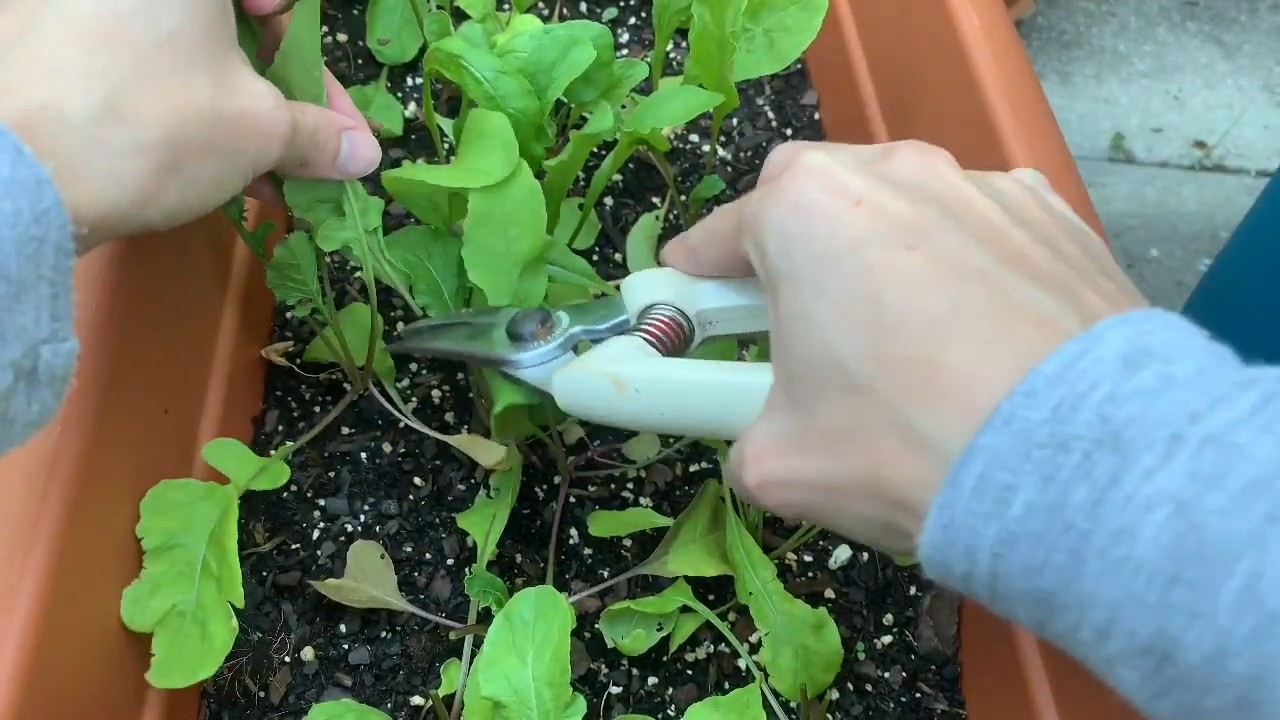
Harvest: When and How to Harvest Your Arugula
The wait is over! The harvest is the best part:
- Harvest Time: Arugula can be harvested as early as 3-4 weeks after sowing. The leaves should be about 5-10 cm (2-4 inches) long by then.
- Harvesting Method: Cut the leaves with scissors or a knife just above the ground. You can either harvest all the leaves at once or just the outer leaves, allowing the plant to continue growing. I prefer to harvest only the outer leaves, as this allows me to harvest over a longer period.
- Multiple Harvests: If you don’t let the plants flower and harvest regularly, you can harvest for several weeks or even months.
- Storage: Arugula does not keep for very long. It’s best to use it immediately after harvesting. If you need to store it, wrap it in a damp paper towel and keep it in the refrigerator.
Sowing in Stages: For a Continuous Harvest
To ensure you always have fresh arugula available, I recommend sowing in stages. This means you sow a new batch of seeds every 2-3 weeks. This way, you always have young plants ready to be harvested.
Arugula in a Pot: How it Works on the Balcony
Arugula is excellent for growing in pots. Here are a few tips:
- Pot Size: Choose a pot with a diameter of at least 20 cm (8 inches).
- Soil: Use high-quality potting soil.
- Drainage: Make sure the pot has drainage holes so excess water can escape.
- Location: Place the pot in a sunny or partially shaded spot.
- Watering: Water regularly, especially in dry weather.
- Fertilizing: Fertilize occasionally with an organic liquid fertilizer.
Arugula in Winter: How to Extend the Season
You can also grow arugula in winter if you keep a few things in mind:
- Location: Place the plants in a bright, cool spot, e.g., on a windowsill or in a greenhouse.
- Supplemental Lighting: If there isn’t enough natural light, you can use a grow light.
- Watering: Water less than in the summer, as the plants need less water.
- Variety Selection: Choose varieties that are cold-resistant.
Recipes: What You Can Do with Your Homegrown Arugula
Arugula is incredibly versatile. Here are a few ideas:
- Salad: Mix arugula with other types of lettuce, tomatoes, cucumbers, cheese, and a dressing of your choice.
- Pizza: Sprinkle fresh arugula over your pizza after baking.
- Pesto: Replace basil with arugula in your pesto recipe.
- Soup: Add arugula to your soup at the end of the cooking time.
- Sandwich: Top your sandwich with arugula for a zesty kick.
- Smoothie: Add a handful of arugula to your smoothie for an extra dose of nutrients.
Common Problems and Solutions
Problems can also arise when growing arugula. Here are a few common issues and how you can solve them:
Leaves turn bitter: This can be caused by too much sun, dryness, or bolting. Move the plants to a partially shaded spot, water regularly, and remove flower stalks.
Conclusion
So, there you have it! Growing arugula at home is not only achievable, but it’s also incredibly rewarding. Forget those wilted, overpriced greens from the supermarket. Imagine stepping out into your garden or onto your balcony and harvesting a handful of fresh, peppery arugula whenever you need it. The flavor is simply unmatched – a vibrant, zesty kick that elevates any salad, pizza, or sandwich.
This DIY trick is a must-try for several reasons. First and foremost, it puts you in control of the quality of your food. You know exactly what goes into your arugula – no pesticides, no questionable fertilizers, just pure, natural goodness. Secondly, it’s incredibly cost-effective. A single packet of arugula seeds can yield multiple harvests, saving you money in the long run. Thirdly, it’s a fantastic way to connect with nature and experience the satisfaction of growing your own food. Even if you only have a small space, you can still enjoy the benefits of homegrown arugula.
But the best part? The possibilities are endless! Experiment with different varieties of arugula, such as wild arugula for a more intense flavor or baby arugula for a milder taste. Try growing arugula in containers of various sizes and materials to see what works best for your environment. You can even companion plant arugula with other herbs and vegetables to create a thriving, self-sustaining garden ecosystem. Consider planting it alongside carrots, radishes, or lettuce for a mutually beneficial relationship.
Don’t be afraid to get creative with your arugula harvest, too. Beyond salads, try adding it to pesto, smoothies, or even soups for a peppery twist. Saute it with garlic and olive oil for a simple and delicious side dish. The only limit is your imagination!
We wholeheartedly encourage you to give this DIY trick a try. It’s easier than you think, and the rewards are well worth the effort. Start small, experiment, and don’t be discouraged if you encounter a few challenges along the way. Gardening is a learning process, and every mistake is an opportunity to grow (pun intended!).
Once you’ve experienced the joy of harvesting your own fresh arugula, we’d love to hear about it! Share your experiences, tips, and photos with us in the comments below. Let’s build a community of arugula enthusiasts and inspire others to embrace the joys of homegrown goodness. What are you waiting for? Get planting and discover the deliciousness of growing **arugula at home**!
Frequently Asked Questions (FAQ)
What is the best time of year to plant arugula?
Arugula thrives in cool weather, making spring and fall the ideal times to plant. In most regions, you can sow seeds in early spring, as soon as the soil is workable, and again in late summer or early fall for a fall harvest. Avoid planting during the hottest months of summer, as high temperatures can cause arugula to bolt (go to seed) and become bitter. If you live in a region with mild winters, you may even be able to grow arugula year-round.
How much sunlight does arugula need?
Arugula prefers full sun, but it can also tolerate partial shade, especially in warmer climates. Aim for at least 6 hours of direct sunlight per day for optimal growth. If you’re growing arugula indoors, place it near a sunny window or use grow lights to provide adequate illumination.
What kind of soil is best for growing arugula?
Arugula prefers well-drained, fertile soil with a pH between 6.0 and 7.0. Amend your soil with compost or other organic matter to improve drainage and fertility. If you’re growing arugula in containers, use a high-quality potting mix.
How often should I water arugula?
Keep the soil consistently moist, but not waterlogged. Water arugula regularly, especially during dry periods. Avoid overhead watering, as this can promote fungal diseases. Instead, water at the base of the plants.
How long does it take for arugula to germinate?
Arugula seeds typically germinate within 5-7 days. Keep the soil consistently moist during this time.
How often can I harvest arugula?
You can start harvesting arugula leaves as soon as they are large enough to eat, typically about 3-4 weeks after planting. Harvest outer leaves first, allowing the inner leaves to continue growing. You can harvest arugula multiple times from the same plant.
How do I prevent arugula from bolting?
Bolting is a common problem with arugula, especially in hot weather. To prevent bolting, plant arugula in partial shade, water regularly, and harvest frequently. You can also choose bolt-resistant varieties of arugula.
What are some common pests and diseases that affect arugula?
Arugula is generally pest-resistant, but it can be susceptible to flea beetles, aphids, and slugs. Control pests with organic methods, such as handpicking, insecticidal soap, or diatomaceous earth. Arugula can also be affected by fungal diseases, such as downy mildew. Prevent fungal diseases by providing good air circulation and avoiding overhead watering.
Can I grow arugula indoors?
Yes, you can grow arugula indoors, especially during the winter months. Use a well-draining potting mix and provide plenty of light. Place your arugula near a sunny window or use grow lights.
How do I store harvested arugula?
Store harvested arugula in the refrigerator in a plastic bag or container. Arugula is best used fresh, but it can be stored for up to a week. Wash arugula just before using it.
Can I save arugula seeds for next year?
Yes, you can save arugula seeds for next year. Allow a few plants to bolt and go to seed. Once the seed pods are dry and brown, harvest them and store the seeds in a cool, dry place.
What are some good companion plants for arugula?
Good companion plants for arugula include carrots, radishes, lettuce, spinach, and garlic. These plants can help to deter pests and improve soil health.
Is arugula good for you?
Yes, arugula is a very nutritious vegetable. It is a good source of vitamins A, C, and K, as well as folate, calcium, and potassium. Arugula is also low in calories and high in fiber.
What are some creative ways to use arugula?
Beyond salads, arugula can be used in a variety of dishes. Try adding it to pesto, smoothies, soups, or pizzas. You can also saute it with garlic and olive oil for a simple and delicious side dish.
How do I know when my arugula is ready to harvest?
Arugula is ready to harvest when the leaves are about 2-3 inches long. The leaves should be a vibrant green color and have a peppery flavor. Harvest outer leaves first, allowing the inner leaves to continue growing.
Leave a Comment