
Growing Arugula at Home can seem daunting, but trust me, it’s easier than you think! Have you ever dreamt of snipping fresh, peppery greens right from your backyard to add a zing to your salad or pizza? Well, dream no more! This guide is packed with simple, DIY tricks and hacks that will transform your garden (or even your windowsill!) into an arugula haven.
Arugula, also known as rocket, has a rich history dating back to Roman times, where it was prized for its distinctive flavor and believed to be an aphrodisiac. While we can’t guarantee any romantic side effects, we can promise a delicious and rewarding gardening experience.
In today’s world, where fresh, organic produce can be expensive and hard to come by, learning how to grow your own food is more important than ever. Plus, there’s something incredibly satisfying about nurturing a plant from seed to harvest. This DIY guide will empower you to bypass the grocery store and enjoy the vibrant taste of homegrown arugula, all while saving money and reducing your environmental footprint. I’m excited to share my favorite tips and tricks for growing arugula at home successfully, even if you’re a complete beginner. Let’s get started!
Growing Arugula at Home: A DIY Guide for a Peppery Harvest
Hey there, fellow garden enthusiasts! I’m so excited to share my experience with growing arugula at home. It’s surprisingly easy, and nothing beats the fresh, peppery taste of homegrown arugula in salads, on pizzas, or even as a vibrant pesto. This guide will walk you through every step, from choosing the right spot to harvesting your delicious greens. Let’s get started!
Choosing the Right Location and Preparing the Soil
Arugula, also known as rocket, is a cool-season crop, which means it thrives in cooler temperatures. This makes it perfect for spring and fall planting. Here’s what you need to consider:
* Sunlight: Arugula needs at least 6 hours of sunlight per day. However, in hotter climates, providing some afternoon shade can prevent the leaves from becoming too bitter.
* Soil: Well-draining soil is crucial. Arugula doesn’t like to sit in soggy soil.
* pH: A slightly acidic to neutral pH (around 6.0 to 7.0) is ideal.
* Space: Arugula doesn’t need a lot of space. You can grow it in containers, raised beds, or directly in the ground.
Now, let’s get our hands dirty and prepare the soil!
1. Clear the Area: Remove any weeds, rocks, or debris from the planting area. I like to use a garden fork to loosen the soil and make it easier to work with.
2. Amend the Soil: Arugula benefits from soil that’s rich in organic matter. I usually add compost or well-rotted manure to the soil. This improves drainage, adds nutrients, and helps retain moisture. Spread a 2-3 inch layer of compost over the area and work it into the top 6-8 inches of soil.
3. Test the pH (Optional): If you’re unsure about your soil’s pH, you can use a soil testing kit. These are readily available at garden centers. If the pH is too high (alkaline), you can amend the soil with sulfur. If it’s too low (acidic), you can add lime.
4. Rake Smooth: Once you’ve amended the soil, rake the area smooth to create a level planting surface. This will ensure even germination.
Sowing the Seeds
Arugula seeds are small and easy to sow. You can either direct sow them into the garden or start them indoors. I prefer direct sowing because it’s less work and arugula germinates quickly.
* Timing: Sow arugula seeds in early spring (as soon as the soil can be worked) or in late summer/early fall. Avoid planting during the hottest months of summer, as the heat can cause the leaves to become bitter.
* Spacing: Arugula plants don’t need a lot of space. Sow seeds about 1/4 inch deep and 1 inch apart in rows that are 6-8 inches apart.
* Watering: After sowing, gently water the area to moisten the soil. Be careful not to wash away the seeds.
Here’s the step-by-step process:
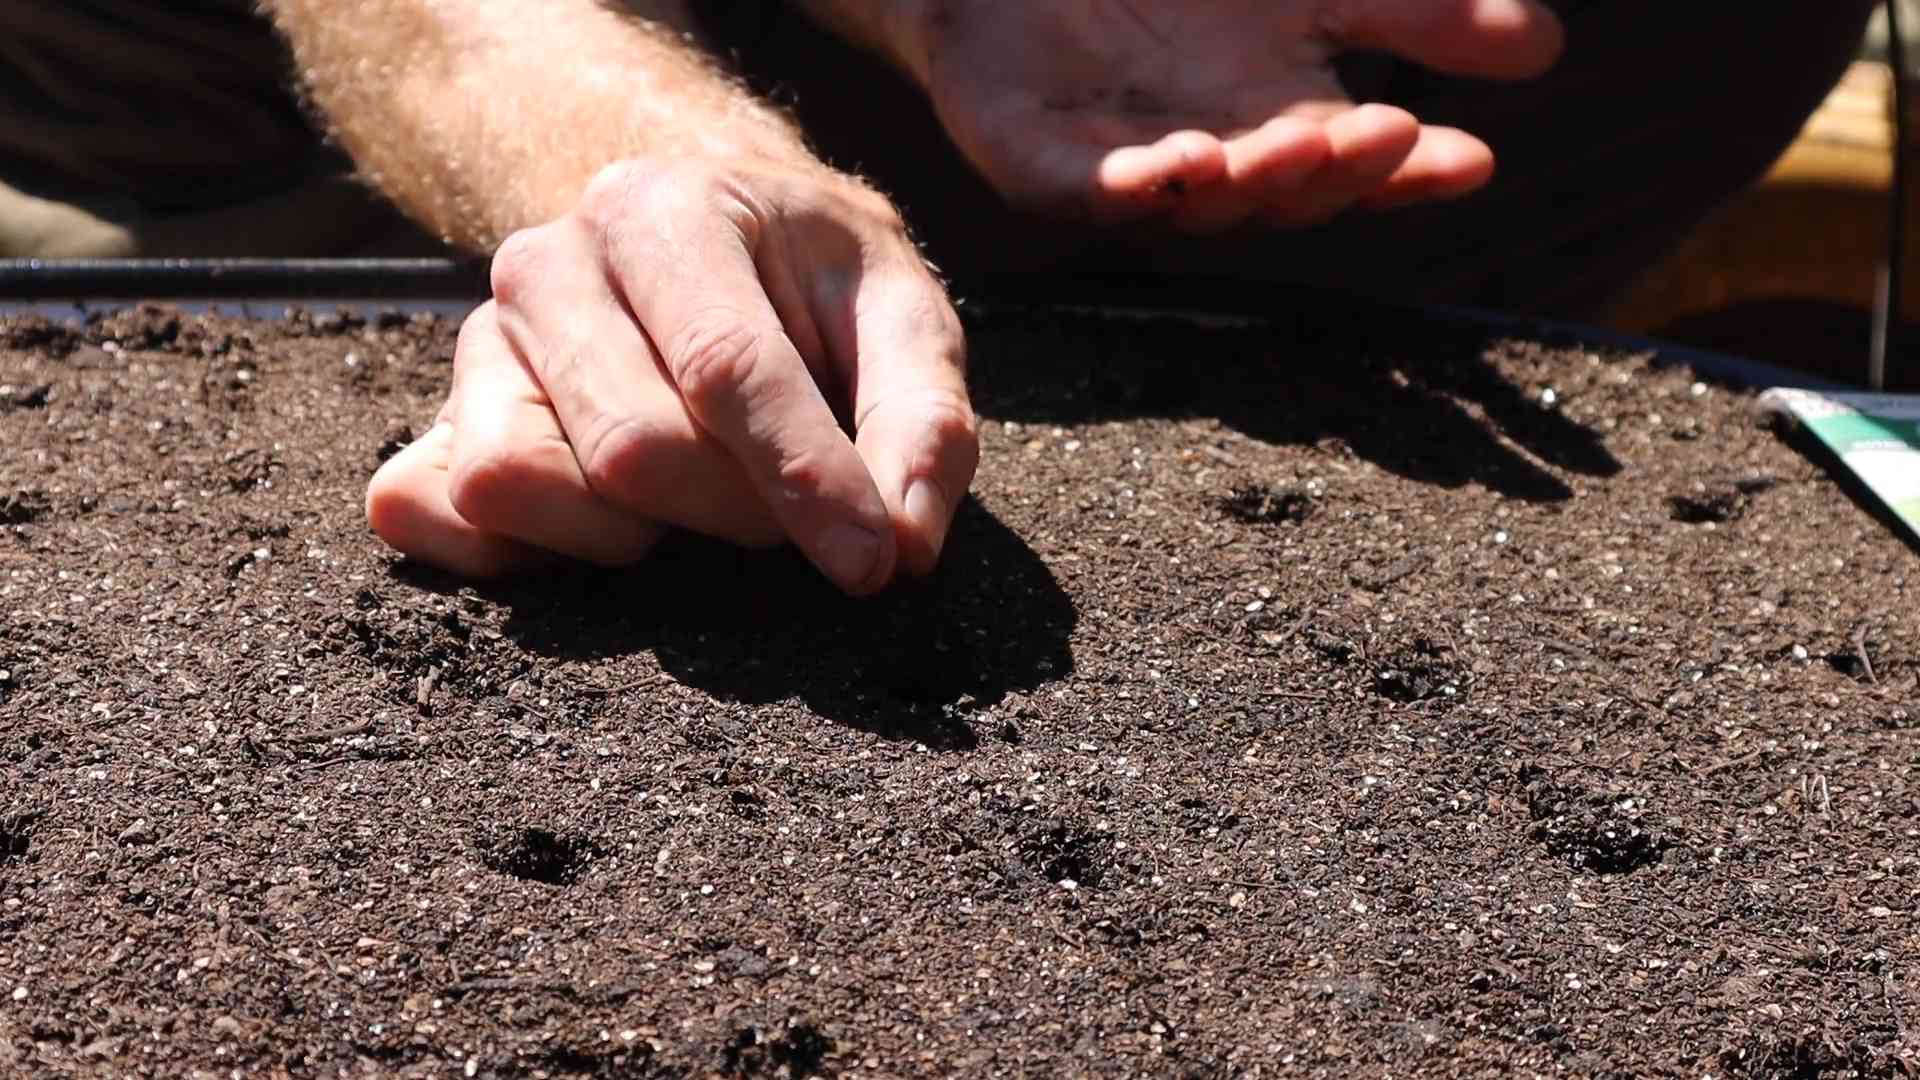
1. Create Furrows: Use your finger or a small tool to create shallow furrows in the soil, about 1/4 inch deep and 1 inch apart.
2. Sow the Seeds: Sprinkle the arugula seeds evenly into the furrows. Don’t overcrowd them.
3. Cover the Seeds: Gently cover the seeds with a thin layer of soil.
4. Water Gently: Use a watering can with a gentle rose attachment to water the area. You want to moisten the soil without disturbing the seeds.
5. Label the Rows: It’s always a good idea to label your rows so you know what you’ve planted. I use plant markers or even just popsicle sticks.
Caring for Your Arugula Plants
Arugula is relatively low-maintenance, but there are a few things you can do to ensure a healthy and abundant harvest.
* Watering: Keep the soil consistently moist, but not waterlogged. Water deeply whenever the top inch of soil feels dry.
* Weeding: Regularly remove any weeds that pop up around your arugula plants. Weeds compete for nutrients and water.
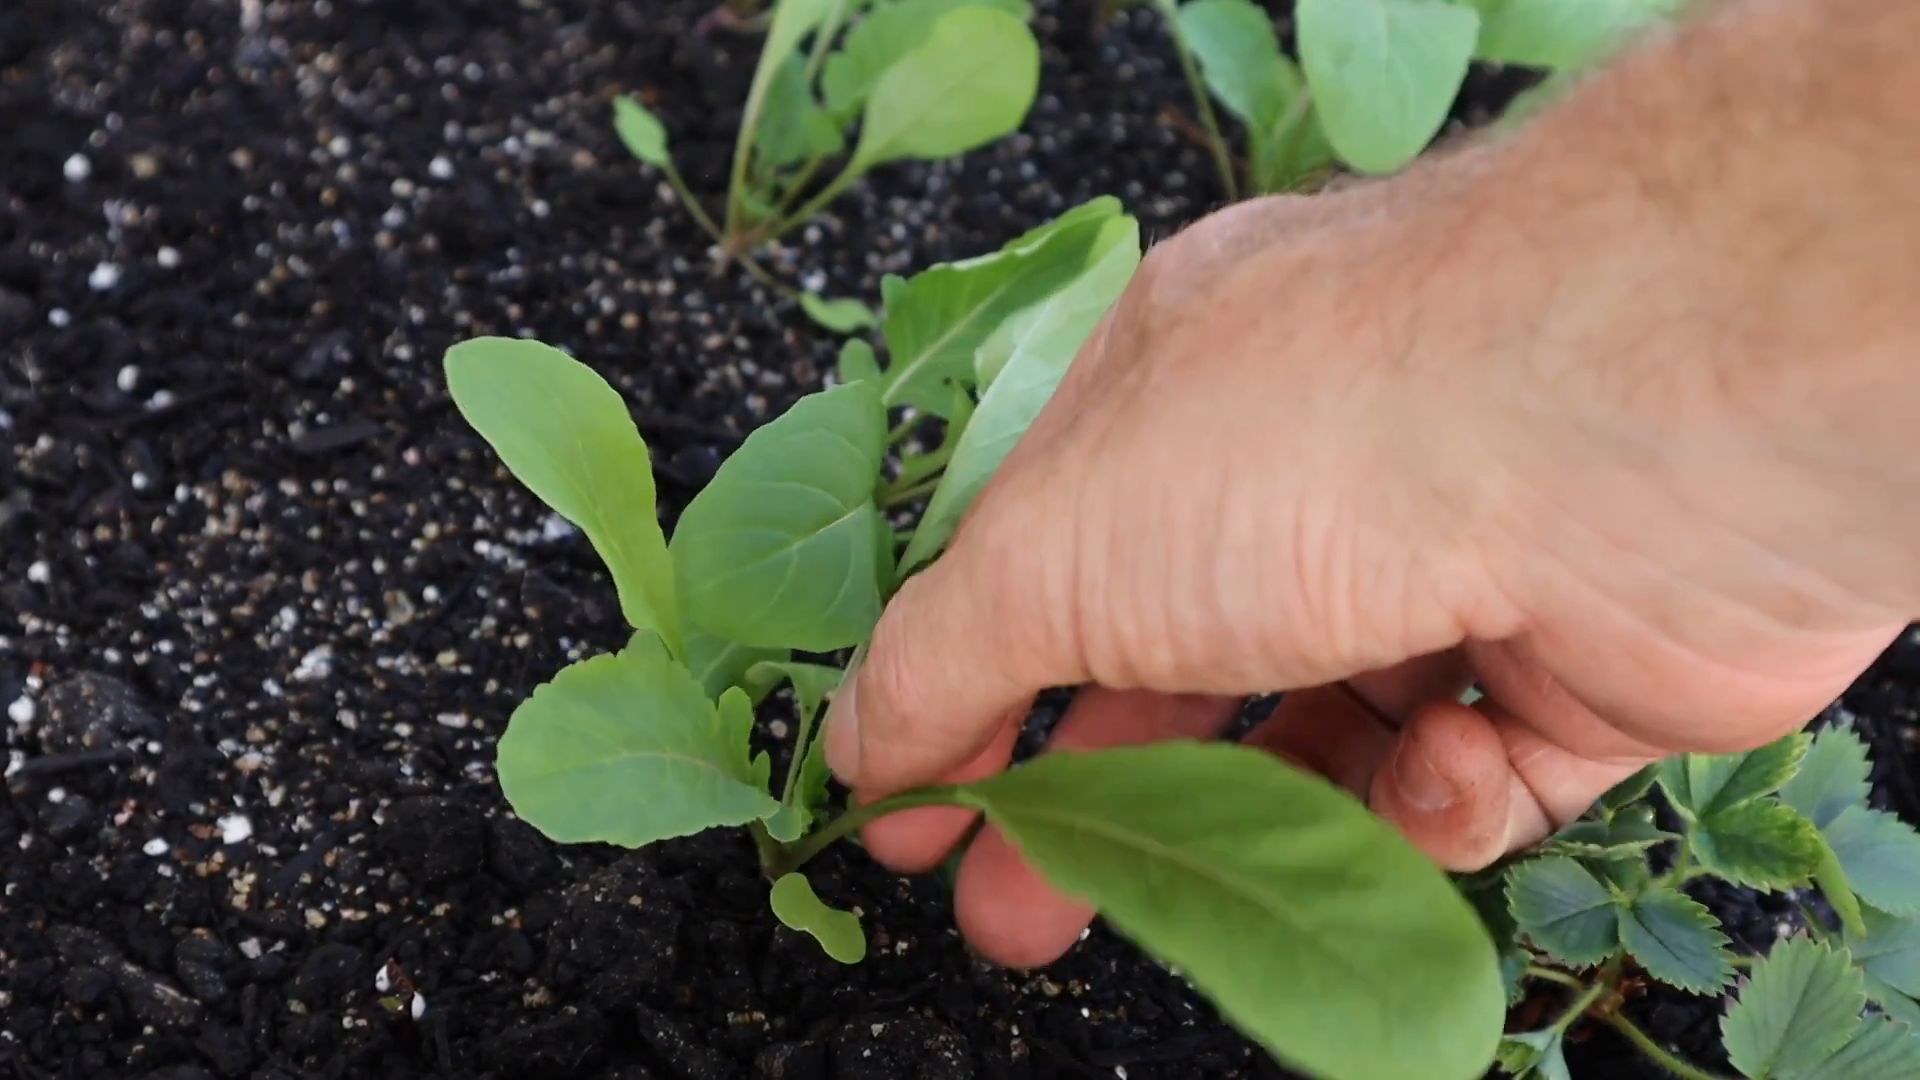
* Thinning: Once the seedlings emerge, thin them to about 2-3 inches apart. This will give them enough space to grow and prevent overcrowding. You can eat the thinnings!
* Fertilizing: Arugula doesn’t need a lot of fertilizer. However, you can give it a boost by side-dressing with compost or a balanced organic fertilizer a few weeks after planting.
* Pest Control: Arugula is generally pest-resistant, but it can be susceptible to flea beetles. These tiny beetles can chew small holes in the leaves. To prevent flea beetles, you can cover your plants with row covers. You can also use insecticidal soap if necessary.
Let’s break down the care steps:
1. Watering Schedule: Check the soil moisture daily. If the top inch feels dry, water deeply. Avoid overhead watering, as this can encourage fungal diseases. I prefer to water at the base of the plants.
2. Weeding Regularly: I like to weed my garden at least once a week. This prevents weeds from getting established and competing with my arugula plants.
3. Thinning Seedlings: Once the seedlings have a few true leaves (the leaves that look like arugula leaves, not the initial seed leaves), thin them to about 2-3 inches apart. Gently pull out the extra seedlings. Don’t throw them away! You can add them to your salad.
4. Fertilizing (Optional): If your arugula plants are looking pale or growing slowly, you can fertilize them. I use a balanced organic fertilizer, following the instructions on the package.
5. Flea Beetle Prevention: Flea beetles can be a nuisance, but they’re usually not a major problem. If you see small holes in the leaves, check for tiny black beetles. You can cover your plants with row covers to prevent them from reaching the leaves. Alternatively, you can spray the plants with insecticidal soap.
Harvesting Your Arugula
The best part of growing arugula is, of course, harvesting and eating it! You can start harvesting arugula leaves as soon as they are large enough to eat, usually about 4-6 inches long.
* Harvesting Technique: Use scissors or a knife to cut the leaves at the base of the plant. You can harvest the entire plant at once, or you can harvest individual leaves as needed.
* Cut-and-Come-Again: Arugula is a “cut-and-come-again” crop, which means that it will continue to produce new leaves after you harvest it. Just be sure to leave a few leaves on the plant so it can continue to grow.
* Harvesting Time: Harvest arugula in the morning, before the sun gets too hot. This will help to prevent the leaves from wilting.
* Bolting: Arugula will bolt (go to seed) in hot weather. When this happens, the leaves will become bitter. To prevent bolting, provide shade during the hottest part of the day and water regularly. If your arugula does bolt, you can still eat the flowers and seed pods. They have a similar peppery flavor to the leaves.
Here’s how I harvest my arugula:
1. Choose Your Leaves: Select the largest, most mature leaves. I usually harvest the outer leaves first, leaving the smaller inner leaves to continue growing.
2. Cut the Leaves: Use scissors or a sharp knife to cut the leaves at the base of the plant, about an inch above the soil.
3. Wash and Enjoy: Wash the harvested leaves thoroughly to remove any dirt or debris. Then, enjoy them in your favorite salad, sandwich, or dish!
Extending Your Arugula Season
Since arugula is a cool-season crop, you can extend your growing season by using a few simple techniques.
* Succession Planting: Sow new seeds every 2-3 weeks to ensure a continuous harvest.
* Row Covers: Use row covers to protect your plants from frost in the spring and fall.
* Shade Cloth: Provide shade during the hottest part of the day to prevent bolting.
* Container Gardening: Grow arugula in containers so you can move them to a sheltered location during extreme weather.
Here are some tips for extending your arugula season:
1. Succession Planting Schedule: I usually sow new arugula seeds every two weeks during the spring and fall. This ensures that I always have a fresh supply of arugula.
2. Row Cover Installation: In the spring and fall, I cover my arugula plants with row covers to protect them from frost. This allows me to start harvesting earlier in the spring and continue harvesting later in the fall.
3. Shade Cloth Application:
Conclusion
So, there you have it! Growing arugula at home is not only achievable, but it’s also incredibly rewarding. Forget those wilted, overpriced bags of greens from the grocery store. Imagine stepping into your garden or onto your balcony and harvesting a handful of fresh, peppery arugula whenever you need it. The difference in taste and texture between homegrown and store-bought is truly remarkable. You’ll experience a vibrant, crispness that you simply can’t find anywhere else.
This DIY trick is a must-try for several reasons. First, it’s incredibly cost-effective. A single packet of arugula seeds can yield multiple harvests, saving you money in the long run. Second, it’s environmentally friendly. You’re reducing your carbon footprint by eliminating the need for transportation and packaging associated with store-bought produce. Third, it’s empowering. There’s a unique satisfaction in knowing you grew your own food, from seed to table. Finally, and perhaps most importantly, it’s delicious!
But don’t stop there! Experiment with different varieties of arugula. Try ‘Sylvetta’ for a more intense, wild flavor, or ‘Slow Bolt’ for a variety that’s more resistant to bolting in warmer weather. You can also try growing arugula in containers of different sizes and materials to see what works best for your space. Consider companion planting with herbs like basil or chives to deter pests and enhance the flavor of your arugula.
Ready to take the plunge and grow your own arugula? We encourage you to give this DIY trick a try. It’s easier than you think, and the results are well worth the effort. Don’t be afraid to experiment and find what works best for your growing conditions.
Once you’ve harvested your first batch of homegrown arugula, we’d love to hear about your experience! Share your tips, tricks, and photos in the comments below. Let’s build a community of arugula enthusiasts and inspire others to embrace the joys of growing their own food. We are confident that you will find that growing arugula at home is a simple and satisfying way to add fresh, flavorful greens to your diet.
Frequently Asked Questions (FAQ)
What is the best time of year to plant arugula?
Arugula thrives in cool weather, making spring and fall the ideal times to plant. In most regions, you can sow seeds directly into the garden or containers as soon as the soil can be worked in the spring, typically a few weeks before the last expected frost. For a fall harvest, plant seeds in late summer or early fall, about 6-8 weeks before the first expected frost. In areas with mild winters, you may even be able to grow arugula year-round. Avoid planting during the hottest months of summer, as high temperatures can cause arugula to bolt (go to seed) and become bitter.
How much sunlight does arugula need?
Arugula prefers full sun, which means at least 6 hours of direct sunlight per day. However, it can also tolerate partial shade, especially in hotter climates. If you’re growing arugula in a container on a balcony or patio, try to position it in a spot that receives morning sun and afternoon shade. This will help protect the plants from the intense heat of the midday sun, which can cause them to bolt prematurely. If you notice your arugula leaves are pale or leggy, it may not be getting enough sunlight.
What kind of soil is best for growing arugula?
Arugula prefers well-drained, fertile soil with a pH between 6.0 and 7.0. Before planting, amend the soil with compost or other organic matter to improve drainage and nutrient content. If you’re growing arugula in containers, use a high-quality potting mix that is specifically formulated for vegetables. Avoid using garden soil in containers, as it can become compacted and prevent proper drainage. You can also add a slow-release fertilizer to the soil at planting time to provide a steady supply of nutrients throughout the growing season.
How often should I water arugula?
Arugula needs consistent moisture to thrive. Water regularly, especially during dry periods, to keep the soil evenly moist but not waterlogged. Check the soil moisture by sticking your finger about an inch deep into the soil. If it feels dry, it’s time to water. Avoid overhead watering, as this can promote fungal diseases. Instead, water at the base of the plants using a watering can or a soaker hose. Mulching around the plants can also help retain moisture and suppress weeds.
How do I harvest arugula?
Arugula can be harvested as soon as the leaves are large enough to eat, typically about 3-4 weeks after planting. You can harvest individual leaves or cut the entire plant back to about an inch above the soil. If you cut the entire plant back, it will usually regrow, providing you with multiple harvests. To harvest individual leaves, simply snip them off at the base of the plant using scissors or your fingers. Harvest in the morning, when the leaves are at their freshest.
What are some common pests and diseases that affect arugula?
Arugula is generally a relatively pest-free plant, but it can be susceptible to certain pests and diseases, including flea beetles, aphids, and downy mildew. Flea beetles are small, jumping insects that can create small holes in the leaves. Aphids are small, sap-sucking insects that can cause the leaves to become distorted and yellow. Downy mildew is a fungal disease that can cause white or gray patches on the leaves. To prevent pests and diseases, practice good garden hygiene, such as removing weeds and debris from around the plants. You can also use organic pest control methods, such as insecticidal soap or neem oil, to control pests.
How do I prevent arugula from bolting?
Bolting is when a plant prematurely goes to seed, which can cause the leaves to become bitter. Arugula is more likely to bolt in hot weather. To prevent bolting, plant arugula in the spring or fall, when temperatures are cooler. You can also provide shade for the plants during the hottest part of the day. Water regularly to keep the soil evenly moist, and harvest the leaves frequently to encourage new growth. Choose bolt-resistant varieties like ‘Slow Bolt’ to further reduce the risk of bolting.
Can I grow arugula indoors?
Yes, you can grow arugula indoors, especially during the winter months. Choose a sunny location, such as a south-facing window, or use grow lights to provide adequate light. Use a well-draining potting mix and water regularly to keep the soil evenly moist. You may need to fertilize the plants more frequently when growing indoors, as the nutrients in the potting mix can be depleted quickly.
What are some ways to use homegrown arugula?
Homegrown arugula is incredibly versatile and can be used in a variety of dishes. Add it to salads for a peppery kick, use it as a topping for pizzas or sandwiches, or blend it into pesto. You can also sauté it with garlic and olive oil for a simple side dish, or add it to soups and stews for extra flavor. The possibilities are endless!
Leave a Comment