
Growing Basil Kitchen Garden: Imagine stepping into your kitchen, not just to cook, but to snip fresh, fragrant basil leaves straight from your own little garden oasis. Sounds dreamy, right? Well, it’s more achievable than you think! For centuries, basil has been more than just a culinary herb; it’s been a symbol of love, good fortune, and even protection in various cultures. From ancient Greece, where it was associated with royalty, to Italian families who cherish its aroma in their Sunday sauces, basil boasts a rich and vibrant history.
But let’s be honest, sometimes the idea of a flourishing garden feels daunting. Maybe you’ve tried before and ended up with sad, droopy leaves. Or perhaps you’re convinced you don’t have a “green thumb.” That’s where this DIY guide comes in! I’m here to share some simple, effective tricks and hacks that will transform your kitchen into a thriving growing basil kitchen garden haven, even if you’re a complete beginner. We’ll cover everything from choosing the right container and soil to watering techniques and pest control, ensuring you have a constant supply of fresh basil to elevate your meals and impress your friends. Get ready to unleash your inner gardener – let’s get growing!
Your Basil Kitchen Garden: It’s This Easy!
Hey everyone! I love fresh basil. Nothing beats the aroma and taste of homegrown basil, especially when it comes straight from the kitchen. That’s why today I’m showing you how to create your own small basil kitchen garden. It’s easier than you think and will provide you with fresh herbs all year round!
What you need:
Before we get started, here is a list of everything you’ll need for your basil kitchen garden:
- Basil seeds or young plants: You can either start with seeds (takes a bit longer) or buy young plants directly. I personally find young plants easier to start with.
- Pots or planters: Choose pots with good drainage. Clay or plastic pots work well. The size should be at least 15 cm (6 inches) in diameter so the roots have enough space.
- High-quality potting soil: Use a well-draining potting mix that is rich in nutrients. Special herb soil is ideal, but regular potting soil works too.
- Drainage material: Expanded clay, gravel, or clay shards for the bottom of the pots to prevent waterlogging.
- Watering can or spray bottle: For watering your basil plants.
- A sunny spot: Basil loves the sun! A windowsill with at least 6 hours of sunlight per day is perfect.
- Optional: Liquid fertilizer for herbs to promote growth.
Step-by-Step Guide:
Here is a detailed guide on how to create your basil kitchen garden:
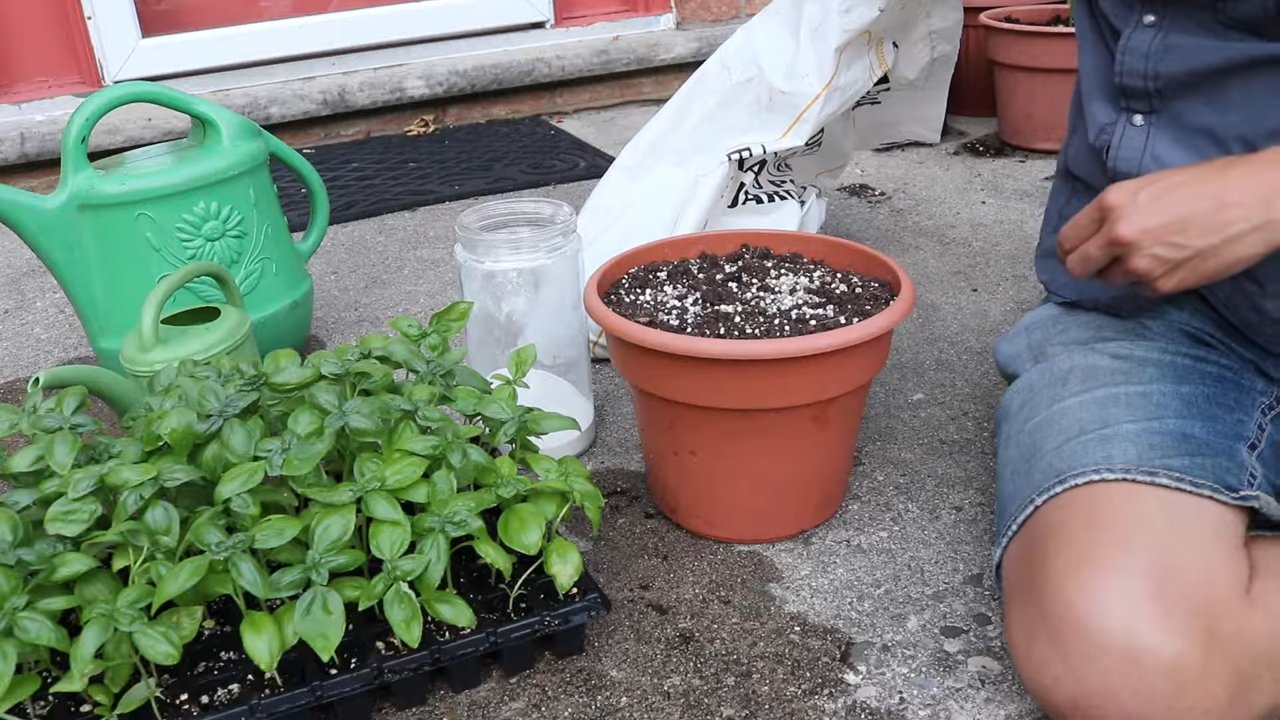
Phase 1: Preparing the Pots
- Prepare the pots: Clean your pots thoroughly with warm water and dish soap. This is important to remove any potential pathogens.
- Create drainage: Fill the bottom of each pot with a layer of drainage material (expanded clay, gravel, or clay shards). This prevents waterlogging, which basil really dislikes. A layer of about 2-3 cm (about 1 inch) is ideal.
- Fill with soil: Fill the pots with potting soil. Leave about 2-3 cm (about 1 inch) of space to the rim of the pot. Press the soil down lightly, but not too firmly.
Phase 2: Planting Basil
- Sow seeds (optional): If you are starting with seeds, distribute them evenly on the surface of the soil. Cover them lightly with a thin layer of soil (approx. 0.5 cm or 1/4 inch). Gently moisten the soil with a spray bottle.
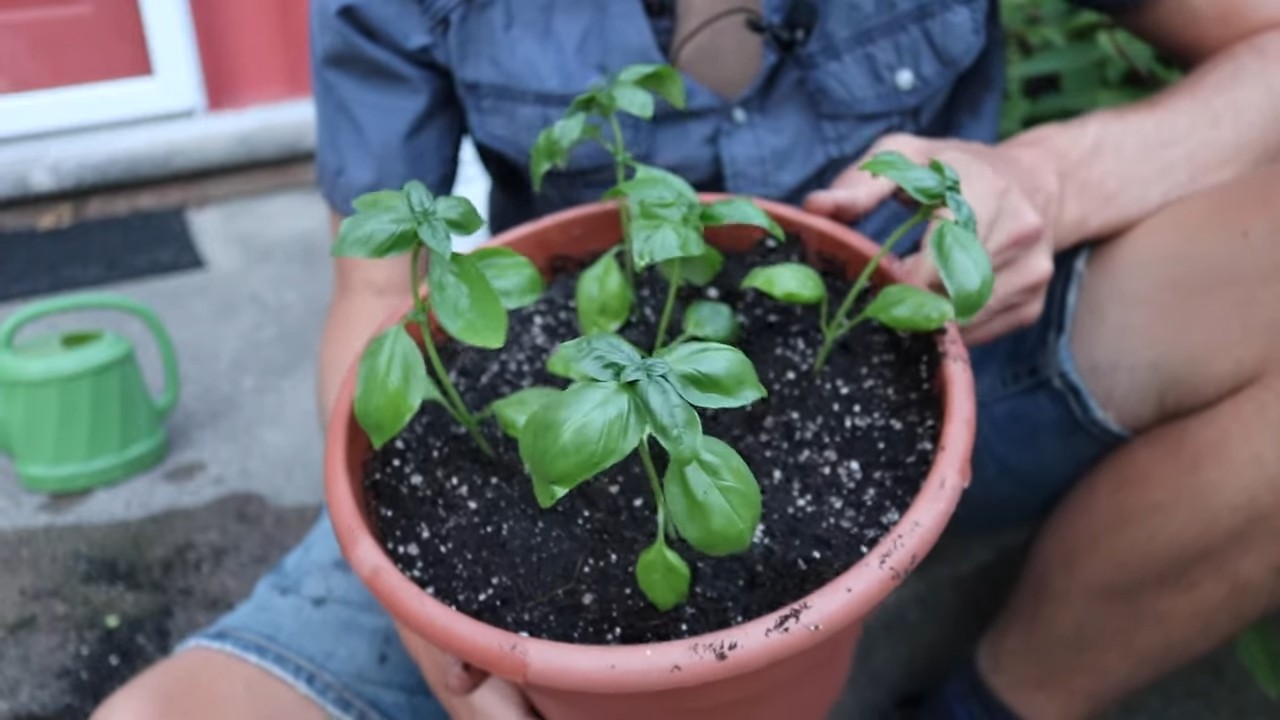
- Plant young plants: If you are using young plants, carefully remove them from their nursery pots. Gently loosen the roots before planting them in the prepared pots.
- Planting: Dig a small hole in the soil, large enough to accommodate the roots of the young plant. Place the plant in and fill the hole with soil. Press the soil down lightly. Make sure the plant is not sitting too deep – the root collar should be just above the soil.
- Mind the spacing: If you are planting multiple plants in one pot, ensure a spacing of at least 10-15 cm (4-6 inches) between the plants so they have enough space to grow.
Phase 3: Caring for Your Basil
- Watering: Water your basil plants regularly, but avoid waterlogging. The soil should always be slightly moist, but not soaked. Check the soil’s moisture by sticking your finger about 2 cm (1 inch) deep into the soil. If the soil feels dry, it’s time to water. It’s best to water in the morning so the leaves can dry during the day.
- Sunlight: Place your basil plants in a sunny spot where they get at least 6 hours of sunlight per day. A south or east-facing windowsill is ideal. If your plants don’t get enough sunlight, they can become pale and weak.
- Fertilizing: Fertilize your basil plants every two to four weeks with a liquid fertilizer for herbs. Follow the instructions on the fertilizer package. Over-fertilizing can cause leaf burn, so be careful.
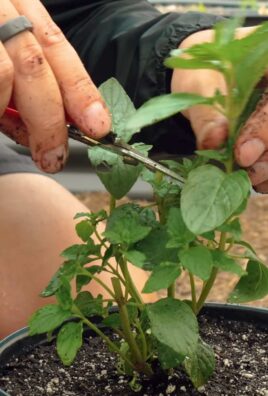
- Pruning: Regular pruning promotes growth and prevents the plants from flowering. When basil flowers, it loses its flavor. Prune the shoot tips regularly, just above a leaf node. This encourages the plant to form new shoots and become bushier. You can use the cut leaves immediately for cooking or dry them for later use.
- Pests and diseases: Watch for signs of pests or diseases. Aphids, spider mites, and powdery mildew can affect basil. If you discover pests, you can combat them with a mild insecticide or a soap solution. Powdery mildew can be prevented with good ventilation and by avoiding waterlogging.
- Rotating the pots: Rotate the pots regularly so that all sides of the plant receive even sunlight. This prevents the plants from leaning towards the light and growing unevenly.
Common Problems and Solutions:
Here are some common problems that can occur when growing basil, and how you can solve them:
- Yellow leaves: Yellow leaves can be a sign of overwatering, underwatering, or a nutrient deficiency. Check the soil moisture and adjust watering accordingly. Fertilize the plants if necessary.
- Brown leaves: Brown leaves can be caused by sunburn, dryness, or fungal attack. Move the plants to a shadier spot if they are getting too much sun. Water them regularly and ensure good ventilation.
- Wilted leaves: Wilted leaves are often a sign of a lack of water. Water the plants thoroughly and make sure the soil is well-moistened.
- Small leaves: Small leaves can be caused by a nutrient deficiency or too little sunlight. Fertilize the plants regularly and move them to a sunnier spot.
- Aphids: Aphids are small, sucking insects that can settle on the leaves and stems of basil. You can combat them with a mild insecticide or a soap solution.
- Spider mites: Spider mites are tiny pests that form fine webs on the leaves. They can be controlled with an insecticide or by increasing humidity.
- Powdery mildew: Powdery mildew is a fungus that forms a white, powdery coating on the leaves. It can be prevented with good ventilation and by avoiding waterlogging.
Harvest Time!
As soon as your basil plants are large enough, you can start harvesting. It’s best to harvest the leaves in the morning when they are most aromatic. Cut off the shoot tips or individual leaves, depending on how much you need. Regular harvesting promotes growth and ensures your plants become bushier.
Preserving Basil:
If you have more basil than you can use immediately, there are several ways to preserve it:
Freezing: Finely chop the leaves and freeze them in ice cube trays with…
Drying: Dry the leaves in a warm, dry place or in the oven at a low temperature. Store the dried leaves in an airtight container.
Conclusion
So, there you have it! Transforming your kitchen into a fragrant, verdant oasis with your own basil kitchen garden is not only achievable but incredibly rewarding. We’ve walked you through the simple steps, from selecting the right container and soil to nurturing your basil plants for a bountiful harvest. But why is this DIY trick a must-try?
Firstly, the sheer convenience of having fresh basil at your fingertips cannot be overstated. No more last-minute dashes to the grocery store or settling for dried herbs when a recipe calls for that vibrant, peppery kick. Imagine the ease of snipping off a few leaves to garnish your pasta, infuse your olive oil, or add a burst of flavor to your homemade pesto. The difference in taste between store-bought basil and freshly grown basil is truly remarkable. The aroma alone will elevate your cooking experience.
Secondly, growing your own basil is a sustainable and cost-effective choice. You’re reducing your reliance on commercially grown herbs, which often travel long distances and contribute to environmental pollution. Plus, a single packet of basil seeds or a small starter plant can yield a continuous supply of fresh herbs for months, saving you money in the long run.
Thirdly, and perhaps most importantly, nurturing a basil kitchen garden is a deeply satisfying experience. There’s something incredibly grounding about connecting with nature, even in a small way, and watching your plants thrive under your care. It’s a simple pleasure that can bring a sense of calm and accomplishment to your daily life.
Looking for variations? Consider experimenting with different varieties of basil. Genovese basil is a classic choice for pesto, while Thai basil adds a unique anise-like flavor to Asian dishes. Lemon basil offers a citrusy twist, and purple basil adds a beautiful visual element to your garden and your meals. You can also try companion planting. Basil is known to repel certain pests, so planting it alongside tomatoes or peppers can help protect your other garden vegetables.
Another variation is to explore different growing methods. While we’ve focused on container gardening, you can also grow basil indoors using hydroponics or aquaponics systems. These methods can be particularly useful if you have limited space or live in an area with a short growing season.
We encourage you to embrace this DIY trick and create your own thriving basil kitchen garden. It’s a simple, rewarding, and delicious way to enhance your cooking and connect with nature. Don’t be afraid to experiment, learn from your mistakes, and most importantly, have fun!
Now, we want to hear from you! Have you tried growing basil indoors before? What challenges did you face, and what tips would you share with other aspiring gardeners? Share your experiences, photos, and questions in the comments below. Let’s create a community of indoor basil enthusiasts and inspire each other to grow our own fresh, flavorful herbs. We are confident that with a little care and attention, you can enjoy the delightful benefits of a thriving **basil kitchen garden** all year round.
Frequently Asked Questions (FAQ)
What is the best type of basil to grow indoors?
The best type of basil to grow indoors depends on your personal preferences and culinary needs. However, some varieties tend to thrive better in indoor environments than others. Genovese basil is a popular choice due to its classic flavor and relatively compact size. It’s perfect for making pesto and other Italian dishes. Thai basil is another excellent option, especially if you enjoy Asian cuisine. Its anise-like flavor adds a unique twist to stir-fries and soups. Lemon basil offers a refreshing citrusy aroma and flavor, making it ideal for salads and teas. Dwarf basil varieties, such as Spicy Globe basil, are also well-suited for indoor growing as they stay small and bushy. Ultimately, the best way to find your favorite is to experiment with different varieties and see which ones thrive in your specific indoor environment.
How much sunlight does my indoor basil plant need?
Basil plants require a significant amount of sunlight to thrive. Ideally, they need at least 6-8 hours of direct sunlight per day. If you don’t have a south-facing window that provides enough sunlight, you can supplement with artificial grow lights. Fluorescent or LED grow lights are excellent options. Position the lights a few inches above the plants and keep them on for 12-14 hours per day. Signs that your basil plant isn’t getting enough sunlight include leggy growth (long, thin stems), pale leaves, and a lack of aroma. Adjust the position of your plant or the intensity of your grow lights accordingly. Remember that even with supplemental lighting, natural sunlight is still beneficial, so try to place your basil plant near a window whenever possible.
What kind of soil should I use for my indoor basil plant?
The ideal soil for indoor basil plants is a well-draining potting mix that is rich in organic matter. Avoid using garden soil, as it can be too heavy and compact, leading to poor drainage and root rot. A good potting mix will provide adequate aeration and drainage while retaining enough moisture to keep the roots hydrated. You can also amend your potting mix with compost or other organic materials to improve its fertility and water-holding capacity. A slightly acidic to neutral pH (around 6.0-7.0) is ideal for basil. You can test the pH of your soil using a soil testing kit available at most garden centers.
How often should I water my indoor basil plant?
Watering frequency depends on several factors, including the size of your pot, the type of soil you’re using, and the temperature and humidity of your environment. As a general rule, water your basil plant when the top inch of soil feels dry to the touch. Avoid overwatering, as this can lead to root rot. When you water, water thoroughly until water drains out of the bottom of the pot. This ensures that the entire root system is adequately hydrated. Be sure to empty the saucer beneath the pot to prevent the plant from sitting in standing water. During the warmer months, you may need to water more frequently than during the cooler months.
How do I harvest basil from my indoor plant?
Harvesting basil properly encourages bushier growth and prevents the plant from flowering prematurely. The best way to harvest basil is to pinch or cut off the top sets of leaves, just above a node (where leaves emerge from the stem). This will encourage the plant to produce two new stems from that point, resulting in a fuller, more productive plant. Avoid removing more than one-third of the plant’s leaves at any one time, as this can stress the plant. You can harvest basil regularly throughout the growing season, as needed. The more you harvest, the more the plant will produce.
How do I prevent pests and diseases from affecting my indoor basil plant?
While indoor plants are generally less susceptible to pests and diseases than outdoor plants, they can still be affected. To prevent problems, start with healthy plants and use a clean potting mix. Regularly inspect your basil plant for signs of pests, such as aphids, spider mites, or whiteflies. If you find any pests, you can try washing them off with a strong stream of water or using insecticidal soap. Avoid using harsh chemicals, as they can damage the plant. To prevent fungal diseases, ensure good air circulation around the plant and avoid overwatering. If you notice any signs of disease, such as yellowing leaves or spots, remove the affected leaves immediately.
Can I propagate basil from cuttings?
Yes, basil is very easy to propagate from cuttings. This is a great way to create new plants from your existing basil plant. To propagate basil from cuttings, simply take a 4-6 inch cutting from a healthy stem, just below a node. Remove the lower leaves from the cutting, leaving only a few leaves at the top. Place the cutting in a glass of water, making sure that the leaves are above the water line. Place the glass in a bright, indirect light location. Within a week or two, the cutting should develop roots. Once the roots are about an inch long, you can transplant the cutting into a pot filled with well-draining potting mix. Water thoroughly and keep the soil moist until the plant is established.
Leave a Comment