
Growing bitter melon indoors might sound like a challenge, but trust me, it’s a rewarding adventure that brings a touch of the exotic right into your home! For centuries, bitter melon, also known as bitter gourd, has been a staple in Asian cuisine and traditional medicine, revered for its unique flavor and potential health benefits. But you don’t have to live in a tropical climate to enjoy this fascinating fruit.
Have you ever dreamt of harvesting your own fresh, homegrown vegetables, even when the weather outside is frightful? Or perhaps you’re simply looking for a unique and satisfying gardening project? That’s where this DIY guide comes in! Growing bitter melon indoors allows you to control the environment, extending the growing season and protecting your precious plants from pests and unpredictable weather.
Many people struggle with successfully cultivating bitter melon due to its specific needs – warm temperatures, ample sunlight, and proper support for its climbing vines. This article will equip you with all the essential tips and tricks to overcome these hurdles and enjoy a bountiful harvest of your very own homegrown bitter melon, right from the comfort of your living room. Let’s get started and transform your indoor space into a thriving bitter melon oasis!
Bittermelone im Haus anbauen: Dein umfassender DIY-Leitfaden
Hallo liebe Gartenfreunde! Habt ihr Lust, etwas Exotisches anzubauen? Bittermelone, auch bekannt als Bittergurke oder Karela, ist nicht nur gesund, sondern auch eine interessante Pflanze, die man auch im Haus ziehen kann. Ich zeige euch, wie es geht!
Was du brauchst: Die Materialliste
Bevor wir loslegen, hier eine Liste mit allem, was du für dein Bittermelonen-Indoor-Projekt benötigst:
* Bittermelonensamen: Am besten Bio-Samen von einem vertrauenswürdigen Anbieter.
* Anzuchttöpfe oder -schalen: Kleine Töpfe aus Torf oder Kokosfaser sind ideal.
* Anzuchterde: Spezielle Erde für die Anzucht ist nährstoffarm und locker.
* Größere Töpfe: Mindestens 20 Liter Fassungsvermögen pro Pflanze.
* Hochwertige Blumenerde: Eine Mischung aus Kompost, Gartenerde und Sand ist perfekt.
* Rankhilfe: Ein Spalier, Bambusstäbe oder ein Drahtgitter. Bittermelonen sind Kletterpflanzen!
* Pflanzenlampe (optional): Besonders in den dunkleren Monaten hilfreich.
* Sprühflasche: Zum Befeuchten der Erde.
* Gießkanne: Für die Bewässerung.
* Flüssigdünger: Für Gemüse oder Tomaten, um die Pflanzen zu nähren.
* Thermometer: Um die Temperatur im Auge zu behalten.
* Feuchtigkeitsmesser (optional): Hilft, die Bodenfeuchtigkeit zu kontrollieren.
Phase 1: Die Aussaat – Der Start ins Bittermelonen-Glück
Die Aussaat ist der erste und wichtigste Schritt. Hier zeige ich dir, wie du die Samen optimal vorbereitest und zum Keimen bringst.
1. Samen vorbereiten: Bittermelonensamen haben eine harte Schale. Um die Keimung zu beschleunigen, kannst du sie leicht anrauen. Nimm ein Stück Schleifpapier oder eine Nagelfeile und raue die Oberfläche der Samen vorsichtig an. Achte darauf, die Samen nicht zu beschädigen!
2. Einweichen: Lege die angerauten Samen für 24 Stunden in lauwarmes Wasser. Das hilft, die Schale aufzuweichen und die Keimung zu fördern.
3. Aussaat: Fülle die Anzuchttöpfe mit Anzuchterde. Drücke die Erde leicht an und mache mit dem Finger ein kleines Loch (ca. 1-2 cm tief) in die Mitte jedes Topfes. Lege in jedes Loch einen Samen und bedecke ihn mit Erde.
4. Bewässerung: Befeuchte die Erde vorsichtig mit einer Sprühflasche. Die Erde sollte feucht, aber nicht nass sein.
5. Wärme und Feuchtigkeit: Stelle die Anzuchttöpfe an einen warmen Ort (ca. 25-30°C). Ein Mini-Gewächshaus oder eine durchsichtige Plastikfolie über den Töpfen hilft, die Feuchtigkeit zu halten. Achte darauf, regelmäßig zu lüften, um Schimmelbildung zu vermeiden.
6. Geduld: Die Keimung dauert in der Regel 1-3 Wochen. Halte die Erde feucht und warte geduldig.
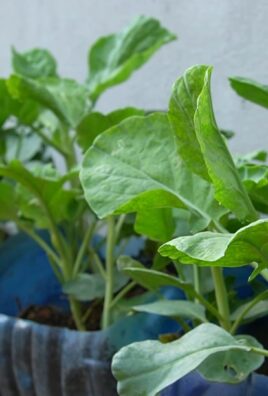
Phase 2: Die Aufzucht – Vom Keimling zur Jungpflanze
Sobald die ersten Keimlinge sprießen, beginnt die Aufzucht. Hier ist, was du beachten musst:
1. Licht: Sobald die Keimlinge aus der Erde kommen, brauchen sie viel Licht. Stelle die Töpfe an einen hellen Ort, z.B. auf eine Fensterbank mit Südausrichtung. Wenn das natürliche Licht nicht ausreicht, verwende eine Pflanzenlampe.
2. Bewässerung: Gieße die Keimlinge regelmäßig, aber vermeide Staunässe. Die Erde sollte immer leicht feucht sein.
3. Vereinzeln: Wenn mehrere Keimlinge in einem Topf gewachsen sind, solltest du sie vereinzeln. Wähle den stärksten Keimling aus und entferne die anderen vorsichtig.
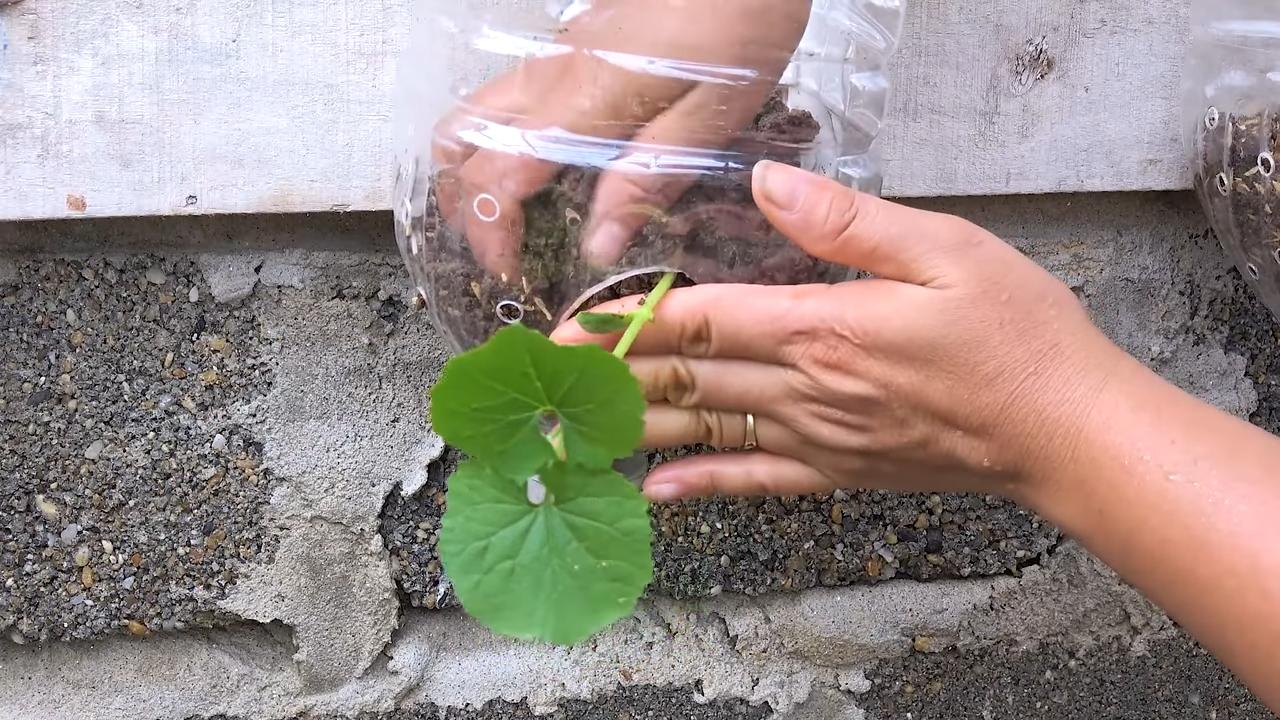
4. Umtopfen: Sobald die Keimlinge einige Blätter entwickelt haben und die Wurzeln aus den Anzuchttöpfen herauswachsen, ist es Zeit, sie in größere Töpfe umzutopfen.
5. Vorbereitung der größeren Töpfe: Fülle die größeren Töpfe mit hochwertiger Blumenerde. Mische die Erde mit etwas Kompost, um die Pflanzen mit Nährstoffen zu versorgen.
6. Umtopfen: Grabe ein Loch in die Mitte des Topfes, das groß genug ist, um den Wurzelballen des Keimlings aufzunehmen. Nimm den Keimling vorsichtig aus dem Anzuchttopf und setze ihn in das Loch. Fülle den Topf mit Erde auf und drücke sie leicht an.
7. Bewässerung: Gieße die umgetopften Pflanzen gründlich.
Phase 3: Die Pflege – Damit deine Bittermelone prächtig gedeiht
Die richtige Pflege ist entscheidend für eine reiche Ernte. Hier sind meine Tipps:
1. Standort: Bittermelonen lieben Wärme und Sonne. Stelle die Töpfe an einen sonnigen und warmen Ort. Eine Temperatur zwischen 20-30°C ist ideal.
2. Bewässerung: Gieße die Pflanzen regelmäßig, besonders während der Blüte- und Fruchtbildungsphase. Die Erde sollte immer feucht sein, aber vermeide Staunässe.
3. Düngung: Dünge die Pflanzen regelmäßig mit einem Flüssigdünger für Gemüse oder Tomaten. Beginne mit der Düngung etwa 2-3 Wochen nach dem Umtopfen. Befolge die Anweisungen auf der Düngemittelpackung.
4. Rankhilfe: Bittermelonen sind Kletterpflanzen und brauchen eine Rankhilfe. Stelle ein Spalier, Bambusstäbe oder ein Drahtgitter in den Topf, an dem die Pflanzen hochklettern können.
5. Beschneiden: Um die Fruchtbildung zu fördern, kannst du die Seitentriebe der Pflanze beschneiden. Entferne auch gelbe oder kranke Blätter.
6. Bestäubung: Bittermelonen sind einhäusig, d.h. sie haben männliche und weibliche Blüten auf derselben Pflanze. In Innenräumen kann die Bestäubung jedoch schwierig sein. Du kannst die Bestäubung von Hand vornehmen, indem du mit einem kleinen Pinsel Pollen von den männlichen Blüten auf die weiblichen Blüten überträgst. Die weiblichen Blüten erkennst du an dem kleinen Fruchtansatz direkt hinter der Blüte.
7. Schädlinge und Krankheiten: Achte auf Schädlinge wie Blattläuse oder Spinnmilben. Bei Befall kannst du die Pflanzen mit einem biologischen Schädlingsbekämpfungsmittel behandeln. Achte auch auf Anzeichen von Krankheiten wie Mehltau. Sorge für eine gute Belüftung, um Krankheiten vorzubeugen.
Phase 4: Die Ernte – Der Lohn deiner Mühe
Nach etwa 2-3 Monaten kannst du die ersten Bittermelonen ernten.
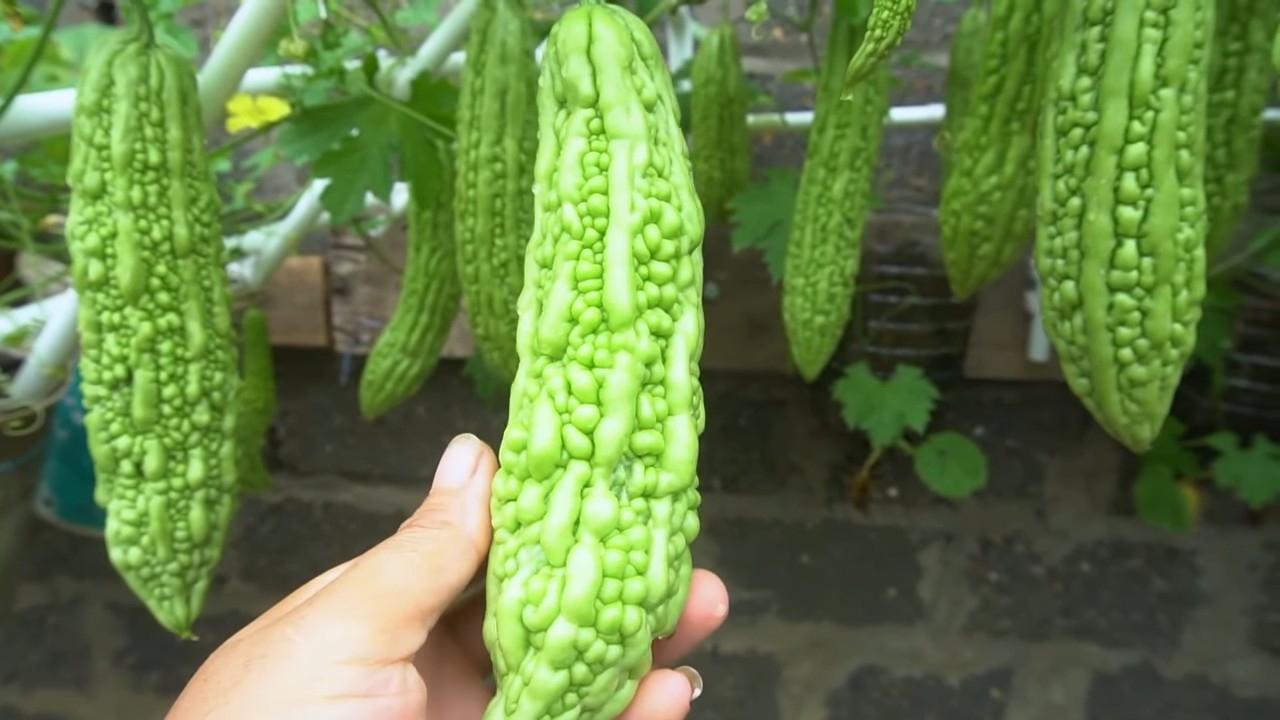
1. Erntezeitpunkt: Die Bittermelonen sind reif, wenn sie eine grüne Farbe haben und sich leicht vom Stiel lösen lassen. Sie sollten noch nicht gelb oder orange sein, da sie dann überreif und bitter werden.
2. Erntetechnik: Schneide die Bittermelonen mit einem scharfen Messer oder einer Schere vom Stiel ab.
3. Lagerung: Bittermelonen sind nicht lange haltbar. Du kannst sie im Kühlschrank für einige Tage aufbewahren. Am besten verarbeitest du sie jedoch so schnell wie möglich.
Zusätzliche Tipps für den Erfolg
* Gute Belüftung: Sorge für eine gute Belüftung im Raum, in dem die Bittermelonen stehen. Das hilft, Krankheiten vorzubeugen.
* Regelmäßige Kontrolle: Kontrolliere die Pflanzen regelmäßig auf Schädlinge und Krankheiten. Je früher du Probleme erkennst, desto besser kannst du sie behandeln.
* Geduld: Der Anbau von Bittermelonen erfordert Geduld. Lass dich nicht entmutigen, wenn es nicht sofort klappt. Mit der richtigen Pflege und etwas Glück wirst du bald deine eigenen Bittermelonen ernten können.
* Wäh
Conclusion
So, there you have it! Growing bitter melon indoors might seem like a daunting task, but with the right approach and a little patience, you can successfully cultivate this unique and nutritious vegetable right in your own home. We’ve walked you through the essential steps, from selecting the right seeds and preparing the perfect potting mix to providing adequate light, support, and consistent care.
Why is this DIY trick a must-try? Because it offers a multitude of benefits. First and foremost, it allows you to enjoy fresh, homegrown bitter melon regardless of your climate or outdoor space limitations. Imagine the satisfaction of harvesting your own produce, knowing exactly where it came from and how it was grown. This is especially valuable if you have limited access to fresh, high-quality bitter melon in your local stores.
Furthermore, growing bitter melon indoors gives you complete control over the growing environment. You can regulate temperature, humidity, and light exposure to optimize growth and prevent common pests and diseases. This can lead to a healthier and more productive plant compared to growing it outdoors, where it’s subject to unpredictable weather conditions and external threats.
But the advantages don’t stop there. Indoor gardening is a therapeutic and rewarding hobby that can reduce stress, improve your mood, and connect you with nature. Watching your bitter melon vine climb and produce fruit is a truly fulfilling experience. Plus, you’ll have a constant supply of fresh, bitter melon for your culinary creations.
Looking for variations? Consider experimenting with different varieties of bitter melon. Some are more compact and better suited for indoor growing than others. You can also try different trellising methods to maximize space and create an aesthetically pleasing display. For example, a circular trellis can be a beautiful and functional addition to your indoor garden.
Another variation is to explore different growing mediums. While we recommended a well-draining potting mix, you could also experiment with hydroponics or aquaponics for a more advanced and sustainable approach. These methods can provide even greater control over nutrient delivery and water usage.
Don’t be afraid to get creative with your indoor bitter melon garden. Add companion plants like basil or marigolds to deter pests and attract beneficial insects. Use decorative pots and containers to enhance the visual appeal of your growing space. The possibilities are endless!
We strongly encourage you to try this DIY trick and experience the joy of growing your own bitter melon indoors. It’s a rewarding and educational experience that will connect you with nature and provide you with a constant supply of fresh, nutritious produce.
Once you’ve embarked on your indoor bitter melon growing journey, we’d love to hear about your experiences. Share your tips, tricks, and challenges in the comments section below. Your insights can help other aspiring indoor gardeners succeed. Let’s create a community of passionate bitter melon enthusiasts! Remember, successful **growing bitter melon indoors** is within your reach.
Frequently Asked Questions (FAQ)
1. What is the best variety of bitter melon to grow indoors?
The best varieties for indoor growing are typically the more compact ones. Look for cultivars labeled as “dwarf” or “bush” varieties. These tend to be more manageable in a confined space. Some popular choices include ‘Baby Bitter Melon’ or smaller Asian varieties. Research the specific size and growth habits of each variety before making your selection. Consider the amount of vertical space you have available and choose a variety that will thrive within those limitations. Also, check the seed packet or online descriptions for information on disease resistance, as this can be particularly important in the controlled environment of an indoor garden.
2. How much light does bitter melon need when grown indoors?
Bitter melon requires a significant amount of light to thrive. Ideally, it needs at least 6-8 hours of direct sunlight per day. If you don’t have a south-facing window that provides sufficient sunlight, you’ll need to supplement with artificial grow lights. Full-spectrum LED grow lights are an excellent choice, as they provide the necessary wavelengths for photosynthesis and are energy-efficient. Position the grow lights about 6-12 inches above the plants and adjust as they grow. Monitor the plants closely for signs of insufficient light, such as leggy growth or pale leaves. If you notice these symptoms, increase the light intensity or duration.
3. What type of soil is best for growing bitter melon in pots?
Bitter melon needs well-draining soil that is rich in organic matter. A good potting mix should consist of a combination of peat moss, perlite, and vermiculite. You can also add compost or aged manure to improve fertility and drainage. Avoid using garden soil, as it can be too heavy and may contain pests or diseases. The ideal pH range for bitter melon is between 6.0 and 6.8. Before planting, you can amend the soil with lime to raise the pH or sulfur to lower it. Ensure that the pots have drainage holes to prevent waterlogging, which can lead to root rot.
4. How often should I water my indoor bitter melon plants?
Water your bitter melon plants regularly, keeping the soil consistently moist but not waterlogged. The frequency of watering will depend on factors such as temperature, humidity, and pot size. Check the soil moisture level daily by sticking your finger about an inch into the soil. If it feels dry, it’s time to water. Water deeply, allowing the excess water to drain out of the bottom of the pot. Avoid overhead watering, as this can promote fungal diseases. Instead, water at the base of the plant. During hot weather or when the plants are actively growing, you may need to water more frequently.
5. How do I pollinate bitter melon flowers indoors?
Bitter melon plants have separate male and female flowers. In an outdoor setting, insects typically handle pollination. However, indoors, you’ll need to hand-pollinate the flowers to ensure fruit production. Identify the male and female flowers. Male flowers have a long, thin stem, while female flowers have a small, immature fruit at the base. Use a small paintbrush or cotton swab to collect pollen from the male flower and gently transfer it to the stigma of the female flower. It’s best to do this in the morning when the flowers are fully open. Repeat the process every day for several days to increase the chances of successful pollination.
6. What are some common pests and diseases that affect indoor bitter melon plants?
Common pests that can affect indoor bitter melon plants include aphids, spider mites, and whiteflies. These pests can suck the sap from the leaves, causing them to yellow and wilt. Regularly inspect your plants for signs of infestation and take action promptly. You can control these pests by spraying the plants with insecticidal soap or neem oil. Fungal diseases, such as powdery mildew and downy mildew, can also be a problem in humid indoor environments. Ensure good air circulation around the plants and avoid overhead watering to prevent these diseases. If you notice signs of fungal infection, treat the plants with a fungicide.
7. How long does it take for bitter melon to mature and be ready for harvest?
The time it takes for bitter melon to mature and be ready for harvest depends on the variety and growing conditions. Generally, it takes about 60-90 days from planting to harvest. The fruits are typically ready to harvest when they are about two-thirds of their mature size and still green. Overripe fruits will turn yellow or orange and become bitter. Use a sharp knife or scissors to cut the fruits from the vine, leaving a short stem attached. Harvest regularly to encourage continued fruit production.
8. Can I save seeds from my indoor-grown bitter melon for future planting?
Yes, you can save seeds from your indoor-grown bitter melon for future planting. Allow a few fruits to fully mature on the vine until they turn yellow or orange. Once the fruits are ripe, cut them open and scoop out the seeds. Rinse the seeds thoroughly to remove any pulp. Spread the seeds out on a paper towel to dry completely. Store the dried seeds in an airtight container in a cool, dark, and dry place. Properly stored seeds can remain viable for several years. However, keep in mind that seeds saved from hybrid varieties may not produce plants that are true to type.


Leave a Comment