
Growing Brussels Sprouts in Containers might seem like a challenge reserved for seasoned gardeners with sprawling acres, but I’m here to tell you it’s totally achievable, even if your “garden” is a sunny balcony or a small patio! Forget the image of endless rows of crops; we’re bringing the farm-to-table experience right to your doorstep, one sprout at a time.
For centuries, Brussels sprouts have been a staple in European cuisine, with their cultivation dating back to, you guessed it, Brussels, Belgium! These mini cabbages were carefully bred to be a winter crop, providing essential nutrients during colder months. Now, you can continue that tradition, no matter where you live, by learning how to grow them yourself.
Why bother with growing Brussels sprouts in containers? Well, imagine plucking fresh, vibrant sprouts right before dinner, knowing exactly where they came from and what went into them. Plus, container gardening gives you ultimate control over soil quality, sunlight exposure, and pest management. No more bland, store-bought sprouts! This DIY guide will walk you through every step, from choosing the right container to harvesting your delicious, homegrown bounty. Get ready to impress your friends and family with your green thumb and enjoy the satisfaction of nurturing your own food source. Let’s get started!
Growing Brussels Sprouts in Containers: A Complete DIY Guide
Hey there, fellow gardening enthusiasts! Brussels sprouts often get a bad rap, but trust me, when you grow your own, they taste absolutely amazing. Plus, growing them in containers is totally doable, even if you don’t have a huge garden. I’m going to walk you through everything you need to know to successfully grow Brussels sprouts in containers, from choosing the right variety to harvesting your delicious little green gems.
Choosing the Right Brussels Sprouts Variety
Not all Brussels sprouts are created equal, especially when it comes to container gardening. You’ll want to pick a variety that’s compact and matures relatively quickly. Here are a few of my favorites:
* ‘Jade Cross E’: This is a classic choice, known for its high yields and uniform sprouts. It’s also relatively early maturing, which is a bonus.
* ‘Long Island Improved’: An heirloom variety that’s been around for ages. It’s reliable and produces good-sized sprouts.
* ‘Redarling’: If you want something a little different, try this red Brussels sprout variety. It adds a pop of color to your garden and has a slightly sweeter flavor.
* ‘Franklin’: A newer variety bred for smaller gardens and container growing. It produces a good yield of tasty sprouts.
Gathering Your Supplies
Before we get started, let’s make sure you have everything you need. Here’s a checklist:
* Container: You’ll need a large container, at least 12 inches in diameter and 12 inches deep. A 5-gallon bucket or a large planter pot will work perfectly. Make sure it has drainage holes!
* Potting Mix: Use a high-quality potting mix, not garden soil. Potting mix is lighter and drains better, which is crucial for container gardening.
* Brussels Sprouts Seedlings or Seeds: You can start your own seeds indoors or buy seedlings from a local nursery. I usually opt for seedlings to save time.
* Fertilizer: A balanced slow-release fertilizer is ideal. You can also use a liquid fertilizer every few weeks.
* Watering Can or Hose: For watering your plants, of course!
* Trowel: For planting and transplanting.
* Optional:
* Stakes or cages: To support the plants as they grow tall.
* Mulch: To help retain moisture and suppress weeds.
* Pest control: Insecticidal soap or neem oil, just in case.
Planting Your Brussels Sprouts
Now for the fun part! Let’s get those Brussels sprouts planted.
1. Prepare the Container: Fill your container with potting mix, leaving a few inches of space at the top.
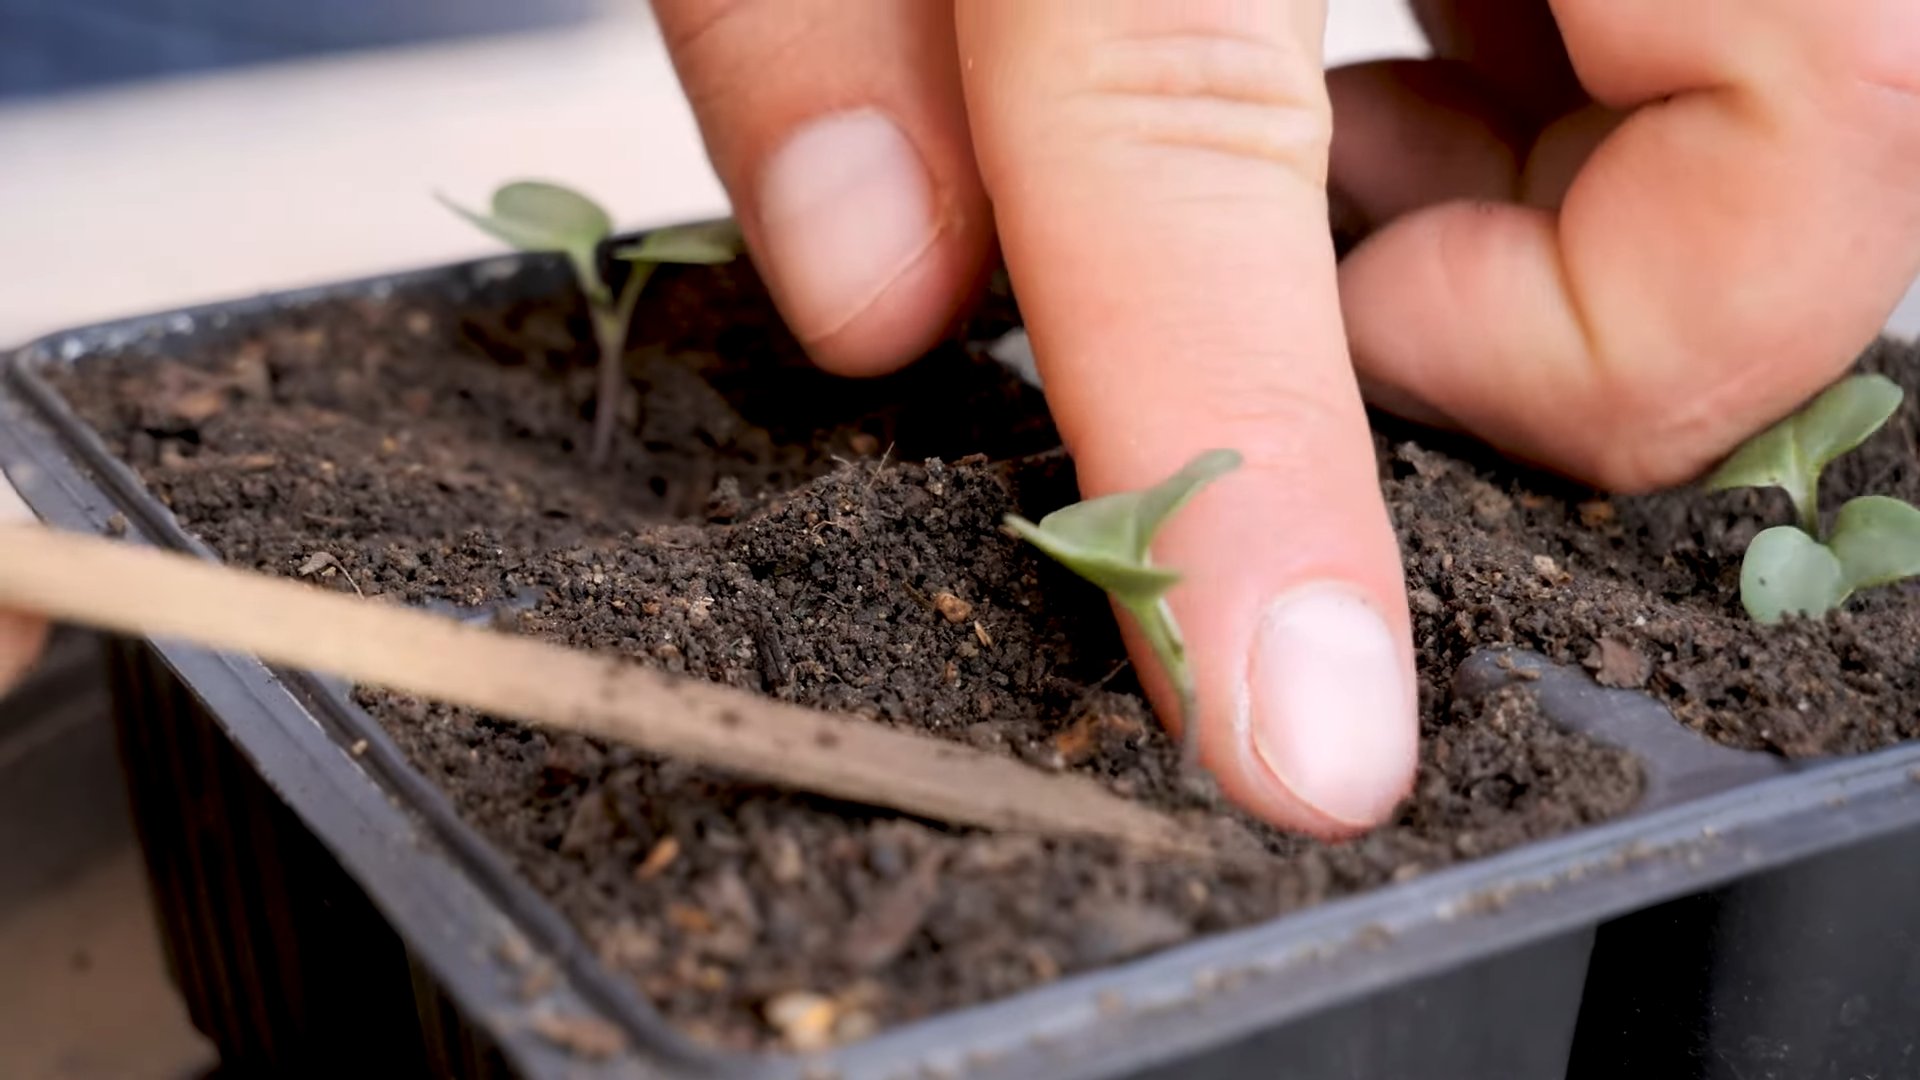
2. Planting Seedlings: If you’re using seedlings, gently remove them from their pots and loosen the roots a bit. Dig a hole in the potting mix that’s large enough to accommodate the root ball. Place the seedling in the hole and backfill with potting mix, gently firming the soil around the base of the plant. Space seedlings about 18-24 inches apart if you’re planting multiple plants in the same container.
3. Planting Seeds: If you’re starting from seed, sow the seeds about ½ inch deep and 2-3 inches apart. Once the seedlings emerge and have a few true leaves, thin them out to 18-24 inches apart, selecting the strongest seedlings to keep.
4. Water Thoroughly: After planting, water the seedlings or seeds thoroughly until the water drains out of the bottom of the container. This helps settle the soil and encourages root growth.
5. Add Fertilizer: Sprinkle a slow-release fertilizer around the base of the plants, following the instructions on the package.
Caring for Your Brussels Sprouts
Brussels sprouts need consistent care to thrive. Here’s what you need to do:
1. Watering: Water your Brussels sprouts regularly, especially during hot, dry weather. The soil should be consistently moist, but not waterlogged. Check the soil moisture by sticking your finger into the soil. If the top inch feels dry, it’s time to water.
2. Fertilizing: Brussels sprouts are heavy feeders, so they need regular fertilization. In addition to the slow-release fertilizer you added at planting, you can supplement with a liquid fertilizer every 2-3 weeks. Choose a fertilizer that’s high in nitrogen, especially during the early stages of growth. Once the sprouts start to form, switch to a fertilizer that’s higher in phosphorus and potassium.
3. Sunlight: Brussels sprouts need at least 6 hours of sunlight per day. Place your container in a sunny spot in your yard or on your balcony.
4. Support: As your Brussels sprouts plants grow taller, they may need support to prevent them from falling over. You can use stakes or cages to provide support. Insert the stakes or cages into the container when you plant the seedlings or seeds to avoid damaging the roots later on.
5. Pest Control: Brussels sprouts are susceptible to a few common pests, such as aphids, cabbage worms, and flea beetles. Inspect your plants regularly for signs of pests. If you find any, you can treat them with insecticidal soap or neem oil. Follow the instructions on the package carefully. You can also handpick cabbage worms off the plants.
6. Weed Control: Keep the container free of weeds. Weeds compete with your Brussels sprouts for nutrients and water. You can hand-pull weeds or use a hoe to remove them. Mulching around the plants can also help suppress weeds.
7. Remove Yellowing Leaves: As the plants grow, the lower leaves may start to yellow and die. Remove these leaves to improve air circulation and prevent disease.
Encouraging Sprout Formation
One of the tricks to getting good sprout formation is to “top” the plant. This means cutting off the top of the main stem. This encourages the plant to put its energy into developing the sprouts rather than growing taller.
1. When to Top: You should top your Brussels sprouts plants about 3-4 weeks before you want to harvest the sprouts. This is usually in late summer or early fall.
2. How to Top: Use a sharp knife or pruning shears to cut off the top of the main stem, just above the top set of sprouts.
Harvesting Your Brussels Sprouts
The moment you’ve been waiting for! Harvesting your homegrown Brussels sprouts.
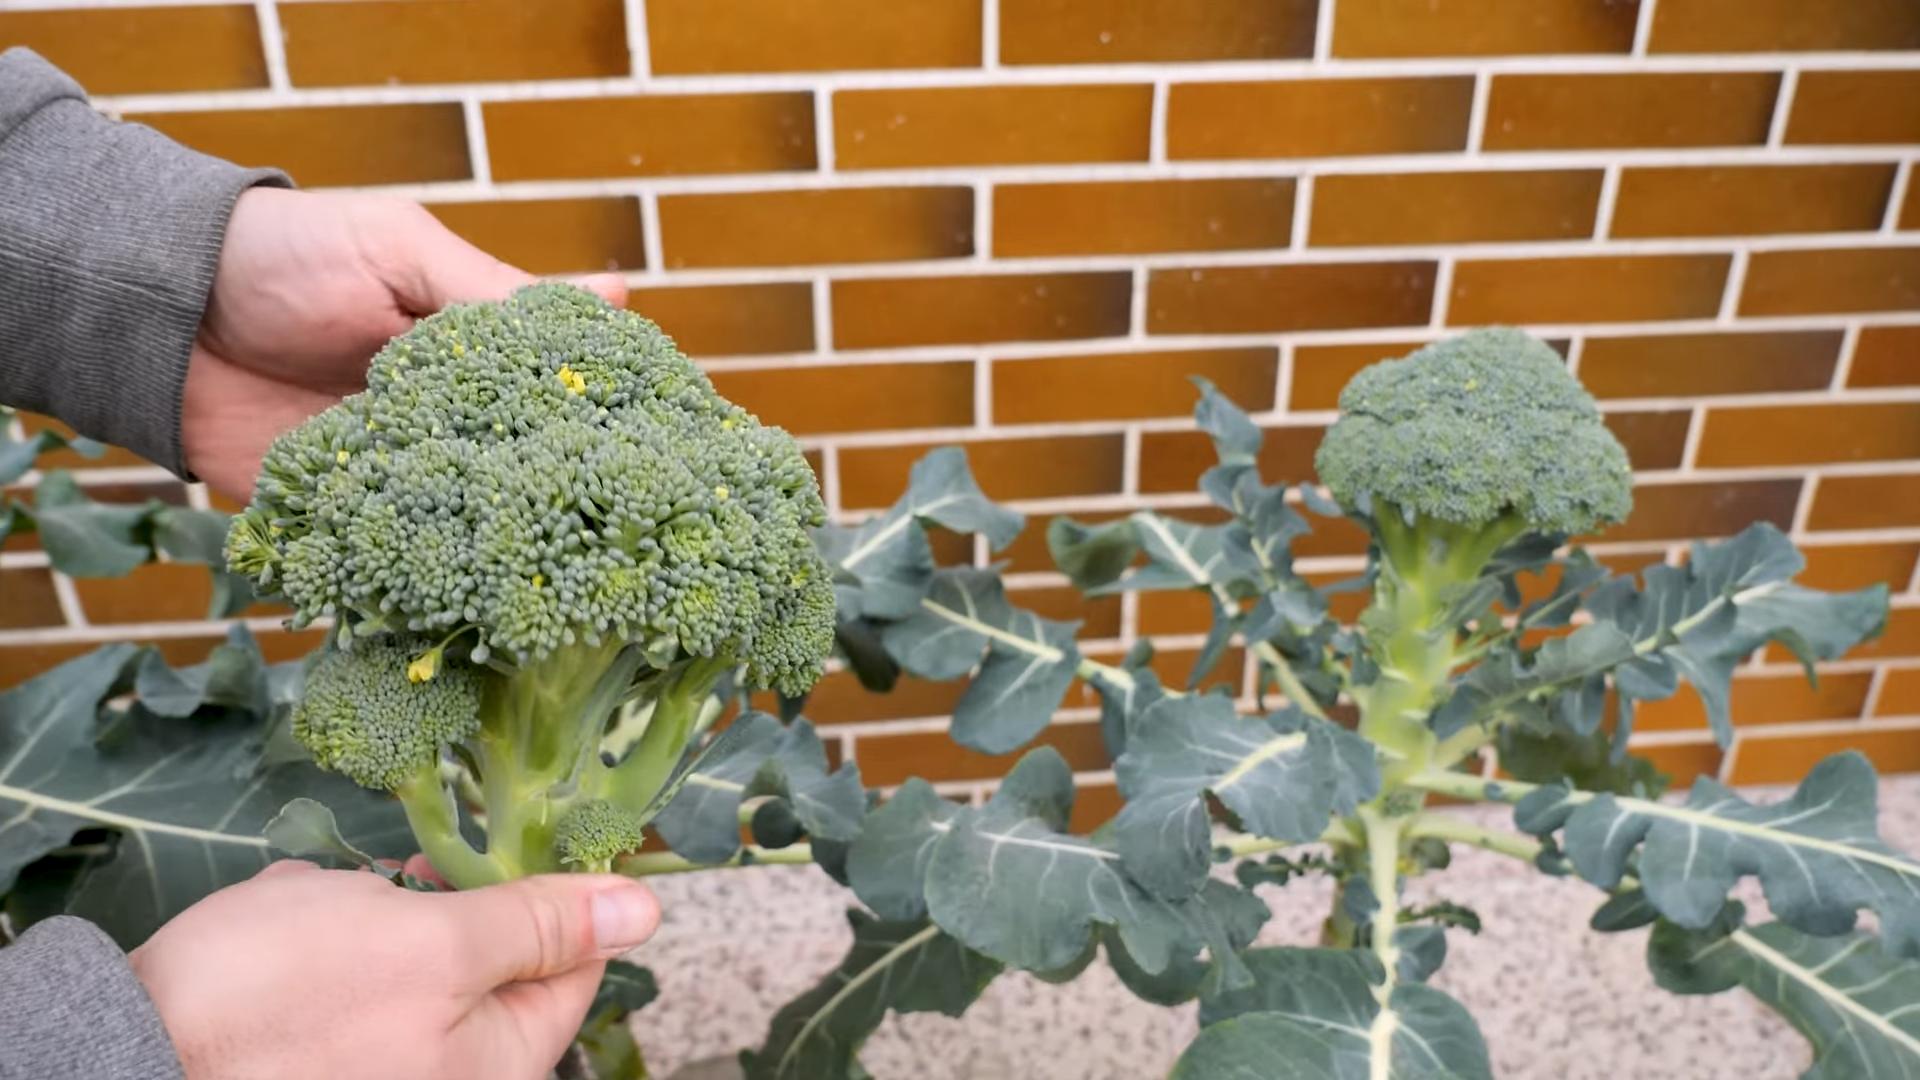
1. When to Harvest: Brussels sprouts are typically ready to harvest in the fall or early winter, about 90-100 days after planting. The sprouts should be firm and about 1-2 inches in diameter. The lower sprouts will mature first, so you can harvest them as they become ready.
2. How to Harvest: To harvest Brussels sprouts, simply twist them off the stem. Start with the lower sprouts and work your way up. You can harvest the sprouts over a period of several weeks.
3. After Harvesting: After you’ve harvested all the sprouts, you can cut down the main stem and compost it.
Troubleshooting
Even with the best care, you might encounter a few problems along the way. Here are some common issues and how to deal with them:
* Sprouts Not Forming: This could be due to a lack of sunlight, insufficient fertilization, or not topping the plant. Make sure your plants are getting enough sunlight, fertilize them regularly, and top them at the appropriate time.
* Sprouts Are Loose and Leafy: This is often caused by warm weather. Brussels sprouts prefer cool weather. If you’re growing them in a warm climate, try to provide some shade during the hottest part of the day.
* Pest Infestations: As mentioned earlier, Brussels sprouts are susceptible to aphids, cabbage worms, and flea beetles. Inspect your plants regularly and treat them with insecticidal soap or neem oil if necessary.
* Disease: Brussels sprouts can be affected by diseases such as clubroot and downy mildew. Choose disease-resistant varieties and practice good sanitation to prevent disease.
Extending the Harvest
If you live in a mild climate, you can extend the harvest by protecting your plants from frost. You can cover them with a blanket or tarp when frost is predicted. You can also move the containers to a sheltered location, such as a garage or shed.
Enjoying Your Homegrown Brussels Sprouts
Now that you’ve harvested your Brussels sprouts, it’s time to enjoy them! There are so many ways to cook them. Here are a few of my favorites:
* Roasted: Toss Brussels sprouts with olive oil, salt, and pepper, and roast them in the oven at 400°F (200°C) for 20-25 minutes, or until they’re tender and slightly browned.
* Sautéed: Sauté Brussels sprouts in a pan with butter or olive oil until they’re tender and
Conclusion
So, there you have it! Growing Brussels sprouts in containers isn’t just a possibility; it’s a rewarding and surprisingly accessible way to enjoy fresh, homegrown vegetables, even if you’re short on space. We’ve walked through the essential steps, from selecting the right container and soil to nurturing your plants and protecting them from pests. But why should you actually *do* it?
The answer is simple: **freshness and control.** Imagine stepping outside your door and harvesting perfectly ripe Brussels sprouts, knowing exactly where they came from and what went into growing them. No more bland, store-bought sprouts that have traveled miles and lost their flavor. You’ll have crisp, delicious sprouts bursting with nutrients, ready to be roasted, sautéed, or shaved into a vibrant salad.
Beyond the taste, growing your own Brussels sprouts offers unparalleled control over the growing process. You can choose organic fertilizers, avoid harmful pesticides, and tailor the environment to your plants’ specific needs. This means healthier plants, healthier food, and a healthier you.
But the benefits don’t stop there. Container gardening is also incredibly therapeutic. There’s something deeply satisfying about nurturing a plant from seed to harvest, watching it grow and thrive under your care. It’s a chance to connect with nature, de-stress, and enjoy the simple pleasures of life.
Ready to take your Brussels sprouts game to the next level? Consider these variations:
* **Experiment with different varieties:** ‘Long Island Improved’ is a classic choice, but don’t be afraid to try ‘Redarling’ for a splash of color or ‘Jade Cross’ for early maturity.
* **Companion planting:** Plant marigolds around your Brussels sprouts to deter pests, or interplant with herbs like thyme or rosemary to enhance flavor and attract beneficial insects.
* **Succession planting:** Start new seedlings every few weeks to extend your harvest season.
Growing Brussels sprouts in containers is a journey, not a destination. There will be challenges along the way, but the rewards are well worth the effort. Don’t be afraid to experiment, learn from your mistakes, and most importantly, have fun!
We’re confident that with a little patience and dedication, you can successfully grow your own delicious Brussels sprouts, even in the smallest of spaces. So, grab a container, some soil, and some seeds, and get ready to experience the joy of homegrown goodness.
Now, we want to hear from you! Have you tried growing Brussels sprouts in containers before? What tips and tricks have you learned? Share your experiences in the comments below. We’re all in this together, and we can learn so much from each other. Let’s create a community of container gardening enthusiasts and help each other grow the best Brussels sprouts possible! We are excited to see your **Brussels sprouts container** gardens!
Frequently Asked Questions (FAQ)
What is the ideal container size for growing Brussels sprouts?
Brussels sprouts need ample space for their root systems to develop properly. A minimum of 12 inches in diameter and 12 inches deep is recommended for a single plant. However, a larger container, such as a 5-gallon bucket or a half-barrel planter, is even better. Larger containers provide more room for root growth, which translates to healthier plants and a more abundant harvest. If you plan to grow multiple plants in a single container, ensure it’s large enough to accommodate them without overcrowding. Overcrowding can lead to stunted growth and increased susceptibility to pests and diseases.
What type of soil is best for container-grown Brussels sprouts?
Brussels sprouts thrive in well-draining, nutrient-rich soil. A good potting mix specifically formulated for vegetables is ideal. Avoid using garden soil, as it can be too heavy and compact in containers, hindering drainage and root development. Amend your potting mix with compost or other organic matter to improve its fertility and water-holding capacity. A slightly acidic to neutral pH (around 6.0 to 7.0) is optimal for Brussels sprouts. You can test your soil’s pH using a soil testing kit and adjust it accordingly with lime (to raise pH) or sulfur (to lower pH).
How often should I water my container-grown Brussels sprouts?
Watering frequency depends on several factors, including the size of the container, the weather conditions, and the stage of plant growth. Generally, you should water your Brussels sprouts whenever the top inch of soil feels dry to the touch. Water deeply, ensuring that the entire root ball is thoroughly moistened. Avoid overwatering, as this can lead to root rot. During hot, dry weather, you may need to water daily, while during cooler, wetter periods, you can reduce the frequency. Monitor your plants closely and adjust your watering schedule accordingly.
How much sunlight do Brussels sprouts need?
Brussels sprouts require at least 6 hours of direct sunlight per day to thrive. Choose a sunny location for your container garden, where your plants will receive ample sunlight throughout the day. If you live in a particularly hot climate, provide some afternoon shade to prevent the plants from overheating. If you don’t have access to a sunny location, you can supplement with artificial grow lights.
What are some common pests and diseases that affect Brussels sprouts, and how can I control them?
Common pests that attack Brussels sprouts include aphids, cabbage worms, and flea beetles. Aphids can be controlled with insecticidal soap or a strong blast of water from a hose. Cabbage worms can be handpicked or treated with Bacillus thuringiensis (Bt), a natural insecticide. Flea beetles can be deterred with row covers or treated with pyrethrin-based insecticides. Common diseases that affect Brussels sprouts include clubroot and blackleg. Clubroot can be prevented by ensuring good soil drainage and avoiding planting in contaminated soil. Blackleg can be controlled with crop rotation and the use of disease-free seeds. Regularly inspect your plants for signs of pests and diseases and take action promptly to prevent them from spreading.
How do I fertilize my container-grown Brussels sprouts?
Brussels sprouts are heavy feeders and require regular fertilization to produce a good harvest. Use a balanced fertilizer specifically formulated for vegetables, following the instructions on the label. You can also amend your soil with compost or other organic matter to provide a slow-release source of nutrients. Fertilize your plants every 2-3 weeks during the growing season. Avoid over-fertilizing, as this can lead to excessive foliage growth at the expense of sprout development.
When are Brussels sprouts ready to harvest?
Brussels sprouts are typically ready to harvest about 90-100 days after planting. The sprouts should be firm, tightly closed, and about 1-2 inches in diameter. Start harvesting from the bottom of the plant upwards, as the lower sprouts mature first. Twist or cut the sprouts off the stem, leaving the upper sprouts to continue developing. You can harvest Brussels sprouts over a period of several weeks, as they mature at different rates.
Can I grow Brussels sprouts in containers indoors?
While it’s possible to grow Brussels sprouts indoors, it can be challenging to provide them with the necessary sunlight and space. They require at least 6 hours of direct sunlight per day, which can be difficult to achieve indoors without supplemental lighting. They also need a relatively cool environment (around 60-70°F) to thrive. If you do decide to grow Brussels sprouts indoors, choose a sunny location near a south-facing window and supplement with grow lights if necessary. Ensure that the container is large enough to accommodate the plant’s root system.
How do I store harvested Brussels sprouts?
Harvested Brussels sprouts can be stored in the refrigerator for up to a week. Store them unwashed in a plastic bag or container. You can also freeze Brussels sprouts for longer storage. To freeze them, blanch them in boiling water for 3-5 minutes, then plunge them into ice water to stop the cooking process. Drain them thoroughly and store them in freezer bags or containers.
Leave a Comment