
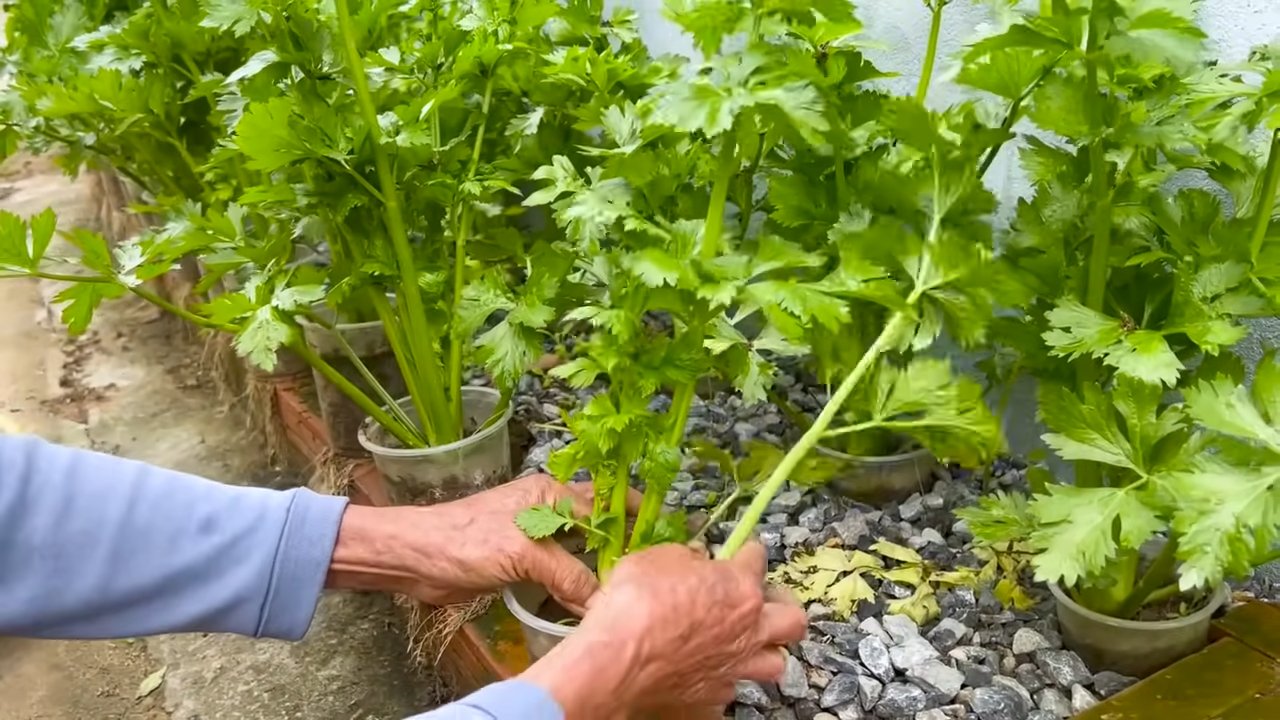
Growing Celery on Stones: Sounds a little unconventional, right? I know, when I first heard about it, I was skeptical too! But trust me, this simple DIY trick can revolutionize your celery-growing game, especially if you’re short on space or dealing with less-than-ideal soil conditions. Forget sprawling garden beds; we’re taking celery cultivation to a whole new level – a level of smooth stones and happy, hydrated roots!
Celery, with its crisp stalks and refreshing flavor, has been enjoyed for centuries. Originating in the Mediterranean, it was initially valued for its medicinal properties before becoming a culinary staple. Now, you can easily grow it at home. But why this stone method? Well, many of us dream of a thriving garden, but face limitations like small apartments, balconies, or even just poor soil quality. This is where the magic of growing celery on stones comes in.
This clever hack provides excellent drainage, prevents root rot, and allows for easy access to water and nutrients. Plus, it’s incredibly satisfying to watch your celery thrive in such a simple, natural setup. So, if you’re ready to ditch the traditional garden bed and embrace a more innovative approach to growing your own fresh, delicious celery, keep reading! I’m going to walk you through everything you need to know to get started.
Sellerie auf Steinen ziehen: Ein DIY-Projekt für den Fenstergarten
Hallo liebe Gartenfreunde! Habt ihr euch jemals gefragt, ob man Sellerie einfach so auf Steinen ziehen kann? Die Antwort ist: Ja, das geht! Und es ist ein super einfaches und lohnendes DIY-Projekt, das perfekt für den Fenstergarten oder sogar für kleine Balkone geeignet ist. Ich zeige euch, wie ihr aus einem gekauften Stangensellerie neue, frische Sellerieblätter und sogar eine kleine Knolle ziehen könnt. Los geht’s!
Was ihr braucht:
* Ein Bund Stangensellerie (am besten Bio, da diese oft besser wurzeln)
* Ein Messer
* Ein Glas oder eine Schale
* Steine (Kieselsteine, Flusssteine oder ähnliches)
* Wasser
* Geduld und etwas Liebe!
Schritt-für-Schritt-Anleitung:
1. **Sellerie vorbereiten:** Zuerst nehmt ihr euren Bund Stangensellerie und schneidet die Stangen etwa 5-7 cm vom unteren Ende ab. Das untere Ende, das wir behalten, sollte den Wurzelansatz enthalten. Achtet darauf, dass ihr einen sauberen Schnitt macht, um Fäulnis zu vermeiden. Die abgeschnittenen Stangen könnt ihr natürlich für Suppen, Salate oder Smoothies verwenden – Verschwendung ist keine Option!
2. **Steine vorbereiten:** Sucht euch eure Steine aus und reinigt sie gründlich. Sie sollten sauber und frei von Erde oder Algen sein. Die Steine dienen als Stütze für den Sellerie und sorgen dafür, dass er nicht direkt im Wasser liegt, was Fäulnis begünstigen könnte.
3. **Glas oder Schale vorbereiten:** Wählt ein Glas oder eine Schale, die groß genug ist, um den Sellerieansatz und die Steine aufzunehmen. Reinigt das Gefäß gründlich, um Bakterienwachstum zu verhindern.
4. **Steine platzieren:** Füllt das Glas oder die Schale mit den Steinen. Sie sollten etwa die Hälfte des Gefäßes füllen. Achtet darauf, dass die Steine stabil liegen und eine gute Basis für den Sellerie bilden.
5. **Sellerie platzieren:** Setzt den Sellerieansatz vorsichtig auf die Steine. Er sollte stabil stehen und nicht umkippen. Die Steine sollten den Sellerie so stützen, dass der untere Teil, wo die Wurzeln wachsen sollen, nicht direkt im Wasser steht.
6. **Wasser hinzufügen:** Füllt das Glas oder die Schale mit Wasser, bis der Wasserstand knapp unter dem Sellerieansatz liegt. Das Wasser sollte die untere Kante des Selleries berühren, aber nicht den gesamten Ansatz bedecken.
7. **Standort wählen:** Stellt das Glas oder die Schale an einen hellen Ort, aber nicht in die pralle Sonne. Ein Fensterbrett ist ideal. Sellerie braucht Licht, um zu wachsen, aber zu viel direkte Sonne kann ihn austrocknen.
8. **Wasser wechseln:** Wechselt das Wasser alle 1-2 Tage, um Fäulnis zu verhindern und das Wachstum zu fördern. Achtet darauf, dass das Wasser immer sauber und frisch ist.
9. **Beobachten und Geduld haben:** Jetzt heißt es abwarten und beobachten! Nach einigen Tagen solltet ihr sehen, wie kleine Wurzeln aus dem Sellerieansatz sprießen. Auch neue, grüne Blätter werden sich bilden. Das ist ein Zeichen dafür, dass euer Sellerie erfolgreich Wurzeln schlägt.
Die nächste Phase: Einpflanzen in Erde
Sobald die Wurzeln etwa 2-3 cm lang sind und sich neue Blätter gebildet haben, ist es Zeit, den Sellerie in Erde einzupflanzen. Das gibt ihm mehr Nährstoffe und ermöglicht ihm, zu einer größeren Pflanze heranzuwachsen.
1. **Topf vorbereiten:** Wählt einen Topf, der groß genug ist, um den Sellerie aufzunehmen. Ein Topf mit einem Durchmesser von mindestens 15 cm ist ideal. Füllt den Topf mit hochwertiger Blumenerde.
2. **Sellerie einpflanzen:** Macht ein Loch in die Erde, das groß genug ist, um den Sellerieansatz aufzunehmen. Setzt den Sellerie vorsichtig in das Loch und bedeckt die Wurzeln mit Erde. Achtet darauf, dass die neuen Blätter nicht mit Erde bedeckt werden.
3. **Angießen:** Gießt den Sellerie nach dem Einpflanzen gründlich an. Das hilft der Erde, sich um die Wurzeln zu setzen und dem Sellerie, sich an seinen neuen Standort zu gewöhnen.
4. **Standort beibehalten:** Stellt den Topf an einen hellen Ort, aber nicht in die pralle Sonne. Gießt den Sellerie regelmäßig, aber vermeidet Staunässe. Die Erde sollte immer leicht feucht sein.
5. **Düngen (optional):** Wenn ihr möchtet, könnt ihr den Sellerie regelmäßig mit einem organischen Dünger düngen. Das fördert das Wachstum und sorgt für kräftige, gesunde Blätter.
Pflege und Ernte
Die Pflege des Selleries ist relativ einfach. Achtet darauf, dass er genügend Licht und Wasser bekommt und regelmäßig gedüngt wird.
* **Gießen:** Gießt den Sellerie regelmäßig, aber vermeidet Staunässe. Die Erde sollte immer leicht feucht sein.
* **Düngen:** Düngt den Sellerie alle 2-3 Wochen mit einem organischen Dünger.
* **Schädlinge:** Achtet auf Schädlinge wie Blattläuse oder Schnecken. Bei Bedarf könnt ihr natürliche Schädlingsbekämpfungsmittel verwenden.
* **Ernte:** Ihr könnt die Sellerieblätter nach Bedarf ernten. Schneidet einfach die äußeren Blätter ab. Die inneren Blätter wachsen weiter und sorgen für neuen Nachschub. Wenn ihr eine Knolle ernten möchtet, müsst ihr etwas Geduld haben. Es dauert einige Monate, bis sich eine Knolle bildet. Ihr könnt die Knolle ernten, wenn sie die gewünschte Größe erreicht hat.
Tipps und Tricks für den erfolgreichen Sellerieanbau
* Verwendet Bio-Sellerie: Bio-Sellerie hat oft eine höhere Chance, Wurzeln zu schlagen, da er nicht mit Pestiziden behandelt wurde, die das Wachstum hemmen könnten.
* Sauberes Wasser ist wichtig: Wechselt das Wasser regelmäßig, um Fäulnis zu verhindern.
* Geduld ist eine Tugend: Es kann einige Tage oder sogar Wochen dauern, bis der Sellerie Wurzeln schlägt. Gebt nicht auf!
* Experimentiert mit verschiedenen Sorten: Es gibt verschiedene Selleriesorten. Probiert verschiedene Sorten aus, um herauszufinden, welche am besten in eurem Garten oder Fenstergarten wachsen.
* Achtet auf die Temperatur: Sellerie bevorzugt moderate Temperaturen. Vermeidet extreme Hitze oder Kälte.
* Sonneneinstrahlung: Sellerie braucht Licht, aber keine pralle Sonne. Ein halbschattiger Standort ist ideal.
* Sellerie als Insektenabwehr: Sellerie kann auch als natürliche Insektenabwehr dienen. Der Duft der Blätter hält einige Schädlinge fern.
Warum Sellerie auf Steinen ziehen?
Es gibt viele Gründe, warum es Spaß macht, Sellerie auf Steinen zu ziehen:
* Es ist einfach und kostengünstig: Ihr braucht keine teuren Materialien oder spezielle Kenntnisse.
* Es ist nachhaltig: Ihr könnt aus einem gekauften Sellerie neue Pflanzen ziehen und so Lebensmittelverschwendung reduzieren.
* Es ist lehrreich: Ihr könnt den Wachstumsprozess des Selleries hautnah miterleben und viel über Pflanzen lernen.
* Es ist dekorativ: Der Sellerie auf den Steinen ist ein schöner Blickfang im Fenstergarten oder auf dem Balkon.
* Es ist gesund: Ihr habt immer frische Sellerieblätter zur Hand, die ihr für Salate, Suppen oder Smoothies verwenden könnt.
Ich hoffe, diese Anleitung hat euch inspiriert, euer eigenes Sellerie-Experiment zu starten. Es ist ein tolles Projekt für Anfänger und erfahrene Gärtner gleichermaßen. Viel Spaß beim Gärtnern! Und vergesst nicht, eure Erfolge mit mir zu teilen! Ich bin gespannt auf eure Sellerie-Geschichten!

Conclusion
So, there you have it! Growing celery on stones isn’t just a quirky gardening experiment; it’s a genuinely effective way to breathe new life into those celery stalks you might otherwise toss in the compost. It’s a testament to the resilience of nature and a fantastic opportunity to engage with the growing process on a more intimate level. This simple DIY trick transforms kitchen scraps into a source of fresh, crisp celery, ready to add a vibrant crunch to your salads, soups, and snacks.
But why is this method a must-try? Beyond the obvious benefit of reducing food waste, growing celery on stones offers a unique learning experience. It’s a visual demonstration of plant regeneration, perfect for teaching children about botany or simply satisfying your own curiosity about how plants work. Plus, it’s incredibly rewarding to nurture something from what seems like nothing and watch it flourish.
Don’t be afraid to experiment with variations! While water is the standard medium, you could try adding a diluted liquid fertilizer to the water every couple of weeks to boost growth. Just be sure to use a balanced fertilizer and avoid over-fertilizing, which can harm the celery. Another variation involves the type of container you use. While a simple glass or jar works perfectly well, you could also use a shallow dish or even a repurposed plastic container. The key is to ensure the celery base has access to water and light.
For those looking to take their celery growing to the next level, consider transplanting the rooted celery base into a pot filled with soil. This will allow the plant to develop more fully and produce larger, more robust stalks. Choose a pot that’s at least 8 inches in diameter and use a well-draining potting mix. Place the pot in a sunny location and water regularly, keeping the soil consistently moist but not waterlogged.
We wholeheartedly encourage you to give this DIY trick a try. It’s easy, inexpensive, and incredibly satisfying. You’ll be amazed at how quickly your celery starts to regrow, and you’ll have a constant supply of fresh celery on hand. More importantly, you’ll be contributing to a more sustainable lifestyle by reducing food waste and growing your own food.
Once you’ve tried growing celery on stones, we’d love to hear about your experience! Share your photos, tips, and any variations you’ve tried in the comments below. Let’s build a community of celery-growing enthusiasts and learn from each other’s successes (and occasional failures!). Your insights could inspire others to embrace this simple yet effective method and discover the joy of regrowing their own food. So, grab a celery stalk, some stones, and a glass of water, and get ready to witness the magic of regeneration! This is a great way to learn about growing celery and contribute to a more sustainable lifestyle.
FAQ
What kind of celery works best for regrowing on stones?
The best celery for regrowing is fresh, crisp celery with a healthy-looking base. Avoid celery that is wilted, slimy, or has a brown or mushy base. The fresher the celery, the better its chances of successfully regrowing. Organic celery is often preferred as it hasn’t been treated with chemicals that might inhibit growth, but conventional celery will also work. Look for celery with a tightly packed base, as this indicates that it’s still relatively young and vigorous.
How long does it take for celery to start regrowing?
You should start to see new growth within 5-7 days. Small leaves will begin to emerge from the center of the celery base. The speed of growth depends on factors like temperature, light, and the overall health of the celery. Ensure the celery receives adequate sunlight and that the water is changed regularly to prevent bacterial growth. If you don’t see any growth after a week, try refreshing the celery base by trimming a thin slice from the bottom.
What kind of stones should I use?
Any small, clean stones will work. River rocks, pebbles, or even marbles are all suitable options. The purpose of the stones is simply to support the celery base and keep it partially submerged in water. Avoid using stones that are treated with chemicals or that might leach harmful substances into the water. Wash the stones thoroughly before using them to remove any dirt or debris.
How often should I change the water?
Change the water every 1-2 days to prevent bacterial growth and keep the celery healthy. Stagnant water can lead to rot and inhibit growth. When changing the water, gently rinse the celery base to remove any accumulated slime or debris. Use fresh, clean water each time.
How much sunlight does the celery need?
Celery needs bright, indirect sunlight to thrive. Place the celery in a location that receives several hours of sunlight each day, but avoid direct sunlight, which can scorch the leaves. A windowsill that faces east or west is often ideal. If you don’t have access to a sunny windowsill, you can use a grow light to supplement the natural light.
Can I transplant the celery into soil after it regrows?
Yes, absolutely! Once the celery has developed a good root system (usually after a couple of weeks), you can transplant it into a pot filled with soil. Choose a pot that’s at least 8 inches in diameter and use a well-draining potting mix. Gently remove the celery from the water and plant it in the soil, being careful not to damage the roots. Water thoroughly after planting and place the pot in a sunny location.
What kind of soil is best for growing celery?
Celery prefers a rich, well-draining soil that is high in organic matter. A good potting mix that contains compost, peat moss, or other organic amendments is ideal. You can also amend your existing soil with compost or well-rotted manure to improve its fertility and drainage. Ensure the soil is loose and friable to allow the roots to grow easily.
How often should I water the celery after transplanting it into soil?
Water the celery regularly, keeping the soil consistently moist but not waterlogged. Celery needs plenty of water to thrive, but overwatering can lead to root rot. Check the soil moisture regularly and water when the top inch of soil feels dry to the touch. During hot weather, you may need to water more frequently.
Can I grow celery indoors permanently?
While you can grow celery indoors, it may not reach its full potential in terms of size and yield. Celery needs plenty of sunlight and consistent moisture to thrive, which can be challenging to provide indoors. However, with proper care and attention, you can certainly grow celery indoors and enjoy fresh celery leaves for salads and other dishes. Consider using a grow light to supplement the natural light and ensure the celery receives adequate illumination.
What are some common problems when growing celery and how can I fix them?
Some common problems when growing celery include yellowing leaves, stunted growth, and pest infestations. Yellowing leaves can be caused by nutrient deficiencies, overwatering, or underwatering. Ensure the celery is receiving adequate nutrients by fertilizing it regularly with a balanced fertilizer. Adjust your watering schedule as needed to keep the soil consistently moist but not waterlogged. Stunted growth can be caused by insufficient sunlight or poor soil quality. Ensure the celery is receiving plenty of sunlight and that the soil is rich in organic matter. Pest infestations can be treated with insecticidal soap or neem oil. Regularly inspect your celery plants for signs of pests and take action promptly to prevent infestations from spreading.


Leave a Comment