
Growing Chamomile at Home is easier than you might think, and I’m here to show you how! Forget those expensive herbal teas from the store; imagine stepping into your own backyard and harvesting fresh, fragrant chamomile to brew a calming cup. Sounds idyllic, right? Well, it’s totally achievable, even if you don’t have a sprawling garden.
Chamomile has a rich history, dating back to ancient Egypt, where it was used for medicinal purposes and even offered to the gods. The Romans also valued it for its healing properties and brought it throughout their empire. For centuries, cultures around the world have cherished chamomile for its soothing effects and delicate floral aroma.
In today’s fast-paced world, we all need a little help unwinding. That’s where growing chamomile at home comes in. Not only does it provide you with a natural remedy for stress and anxiety, but it also adds a touch of beauty to your garden or windowsill. Plus, it’s a fantastic project for beginners! I’ll guide you through simple DIY tricks and hacks to successfully cultivate this wonderful herb, regardless of your gardening experience. Get ready to enjoy the delightful benefits of homegrown chamomile!

DIY: Growing Chamomile at Home – Your Guide for a Calming Garden
I love chamomile! Not just for the calming tea, but also for its delicate scent and pretty, daisy-like flowers. And the best part? It’s super easy to grow chamomile yourself! Whether you have a large garden or just a small balcony, with this guide, you can soon be harvesting your own chamomile.
What you need:
- Chamomile seeds or young plants: You can choose between German Chamomile (Matricaria chamomilla) and Roman Chamomile (Chamaemelum nobile). German chamomile is an annual and grows taller, while Roman chamomile is a perennial and is suitable as a ground cover.
- Seedling pots or a seedbed: For starting the seeds.
- Seed starting mix: It is finer and lower in nutrients than regular potting soil, which is ideal for germination.
- Potting soil: For transplanting into larger pots or into the garden bed.
- Watering can or spray bottle: For gentle watering.
- Garden tools: Spade, shovel, possibly a small rake.
- Location: A sunny spot is ideal, but partial shade also works.
- Optional: Compost or organic fertilizer for soil improvement.
Sowing and Starting Indoors:
Chamomile can either be sown directly into the garden bed or started indoors. I prefer starting it indoors because I can control the conditions and protect the small seedlings from slugs.
1. Preparing the seedling pots:
- Fill the seedling pots with seed starting mix. Press the soil down lightly, but not too firmly.
- Moisten the soil with a spray bottle. It should be damp, but not wet.
2. Sowing the chamomile seeds:
- Chamomile is a light germinator, which means the seeds need light to germinate. Therefore, just sprinkle the seeds lightly on the soil and do not press them in.
- You can also cover the seeds very lightly with a thin layer of sand.
- Spray the seeds carefully with water.
3. Creating the right environment:
- Place the seedling pots in a bright, warm place. A windowsill is ideal.
- The ideal germination temperature is between 18 and 22 degrees Celsius (64-72°F).
- Keep the soil moist, but not wet. Spray it regularly with water.
- You can also cover the pots with a clear film or a lid to increase humidity. But be sure to ventilate regularly to prevent mold.
4. Patience is required:
- Germination usually takes 10 to 14 days.
- As soon as the first seedlings appear, remove the film or lid.
Transplanting:
Once the chamomile seedlings are large enough (about 5-10 cm high), they can be transplanted.
1. Preparing the bed or pots:
- Choose a sunny location for your chamomile.
- Loosen the soil and remove weeds.
- Improve the soil with compost or organic fertilizer.
- If you are planting chamomile in pots, choose pots with adequate drainage.
2. Transplanting the chamomile seedlings:
- Carefully lift the chamomile seedlings out of the seedling pots. Be careful not to damage the roots.
- Plant the chamomile seedlings at a distance of about 20-30 cm.
- Fill the holes with soil and press down lightly.
- Water the chamomile seedlings thoroughly.
Care:
Chamomile is relatively low-maintenance.
1. Watering:
- Water the chamomile regularly, especially during dry periods.
- Avoid waterlogging.
2. Fertilizing:
- Chamomile does not need much fertilizer. An occasional application of compost or organic fertilizer is sufficient.
3. Weed control:
- Remove weeds regularly to avoid competition for the chamomile.
4. Pruning:
- You can prune the chamomile after flowering to encourage the formation of new flowers.
- With Roman chamomile, you can also mow the plant regularly to keep it as a ground cover.
Harvest:
The chamomile flowers can be harvested as soon as they are fully open.
1. The right time:
- The best time to harvest is on a sunny morning after the dew has evaporated.
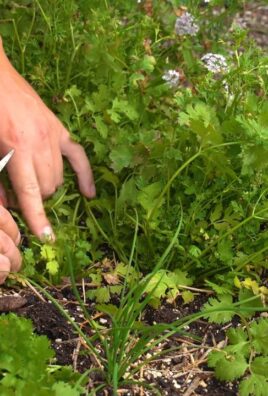
2. The harvesting method:
- Cut the flowers with scissors or a knife.
- You can also pluck off the entire flower heads.
3. Drying:
- Spread the chamomile flowers on a clean cloth or a screen.
- Place them in a dry, airy, and shady place.
- Turn the flowers regularly so they dry evenly.
- Drying usually takes 1-2 weeks.
- The flowers are dry when they crumble easily.
4. Storage:
- Store the dried chamomile flowers in an airtight container in a cool, dark, and dry place.
- They will keep for up to a year this way.
Use:
The dried chamomile flowers can be used for tea, bath additives, or for making cosmetic products.
- Chamomile tea: Pour hot water over 1-2 teaspoons of dried chamomile flowers and let the tea steep for 5-10 minutes.
- Bath additive: Add a handful of dried chamomile flowers to a warm bath.
- Cosmetics: Chamomile extract is used in many skincare products because it has anti-inflammatory and soothing properties.
Difference between German and Roman Chamomile:
It’s important to know which type of chamomile you are growing, as there are differences in growth and use.
- German Chamomile (Matricaria chamomilla): Is an annual, grows taller (up to 60 cm), has a more intense scent, and is mainly used for tea. The flower heads are hollow.
- Roman Chamomile (Chamaemelum nobile): Is a perennial, grows creeping as a ground cover (up to 30 cm), has a less intense scent, and can also be used for lawns. The flower heads are solid.
Common Problems and Solutions:
Problems can also arise when growing chamomile. Here are some common problems and how you can solve them:
- Slugs: Slugs love chamomile! Protect your plants with slug pellets or slug fences. You can also sprinkle coffee grounds around the plants, which repels slugs.
- Aphids: Aphids can infest chamomile. Spray the plants with a soap solution.
- Fungal diseases: Fungal diseases can occur if the humidity is too high. Ensure good ventilation and avoid waterlogging.
- No flowers: If your chamomile does not produce flowers, it could be due to too little sun or too much fertilizer. Move the plants to a sunnier location and reduce fertilization.
Additional Tips:
Companion planting: Chamomile gets along well with…
Bee-friendly: Chamomile is a great source of food for bees!
Conclusion
So, there you have it! Growing chamomile at home is not only achievable, but it’s also a deeply rewarding experience that brings a touch of tranquility and natural goodness right to your doorstep. From the delicate fragrance that fills your garden to the soothing tea you can brew with your own homegrown blossoms, the benefits are numerous and far outweigh the minimal effort required.
Why is this DIY trick a must-try? Because it empowers you to take control of the quality and source of your chamomile. You know exactly what goes into your plants – no harsh chemicals, no hidden pesticides, just pure, natural goodness. Store-bought chamomile, while convenient, can sometimes lack the freshness and potency of homegrown varieties. Plus, there’s an undeniable satisfaction in nurturing a plant from seed to bloom and then harvesting its bounty for your own enjoyment.
Beyond the basic method we’ve outlined, there are plenty of ways to personalize your chamomile growing experience. Consider experimenting with different varieties of chamomile. German chamomile is known for its strong flavor and is ideal for tea, while Roman chamomile is a creeping variety that makes a beautiful ground cover and releases a delightful aroma when walked upon. You could also try companion planting chamomile with other herbs and vegetables. It’s said to deter certain pests and even improve the flavor of some plants.
Another variation to explore is how you dry and store your chamomile flowers. Air drying is the most common method, but you can also use a dehydrator for faster results. Once dried, store your chamomile in an airtight container in a cool, dark place to preserve its flavor and potency. You can even infuse oils or vinegars with chamomile for use in skincare or culinary creations.
We wholeheartedly encourage you to give growing chamomile at home a try. It’s a simple, sustainable, and incredibly satisfying project that will bring joy to your garden and your cup. Don’t be afraid to experiment, learn from your experiences, and adapt the techniques to suit your own environment and preferences.
And most importantly, we want to hear about your journey! Share your successes, your challenges, and your tips with us in the comments below. Let’s create a community of chamomile enthusiasts who can learn from each other and celebrate the joys of homegrown goodness. What are you waiting for? Get your seeds, prepare your soil, and embark on your own chamomile adventure today! This is a great way to ensure you always have fresh chamomile on hand.
Frequently Asked Questions (FAQ)
What is the best time of year to plant chamomile?
The ideal time to plant chamomile depends on your climate. In general, it’s best to sow chamomile seeds in early spring after the last frost or in late summer for a fall harvest. Spring planting allows the plants to establish themselves before the heat of summer, while late summer planting provides a milder growing season. If you live in a warmer climate, you may be able to plant chamomile year-round. Consider your local climate and growing conditions when determining the best planting time.
How much sunlight does chamomile need?
Chamomile thrives in full sun, which means it needs at least six hours of direct sunlight per day. However, it can also tolerate partial shade, especially in hotter climates. If you’re growing chamomile indoors, place it near a sunny window or use a grow light to provide adequate illumination. Insufficient sunlight can result in leggy growth and reduced flowering.
What type of soil is best for growing chamomile?
Chamomile prefers well-drained soil that is slightly acidic to neutral (pH 6.0-7.0). It’s not particularly fussy about soil fertility, and in fact, overly rich soil can lead to excessive foliage growth at the expense of flowers. Amend heavy clay soils with compost or other organic matter to improve drainage. Sandy soils may need to be amended with compost to improve water retention. A well-draining potting mix is suitable for growing chamomile in containers.
How often should I water chamomile?
Water chamomile regularly, especially during dry periods. Keep the soil consistently moist but not waterlogged. Overwatering can lead to root rot, so it’s important to allow the soil to dry slightly between waterings. Check the soil moisture by inserting your finger into the soil. If the top inch feels dry, it’s time to water. Reduce watering frequency during cooler months.
How do I harvest chamomile flowers?
Harvest chamomile flowers when they are fully open and the petals are still white and firm. The best time to harvest is in the morning after the dew has dried. Use scissors or your fingers to gently pluck the flowers from the stems. Avoid harvesting flowers that are wilted or discolored. Regular harvesting encourages the plant to produce more flowers.
How do I dry chamomile flowers?
There are several ways to dry chamomile flowers. The most common method is air drying. Spread the flowers in a single layer on a screen or tray in a cool, dry, and well-ventilated area. Turn the flowers occasionally to ensure even drying. It usually takes about one to two weeks for the flowers to dry completely. You can also use a dehydrator set to a low temperature (around 95°F or 35°C) to dry the flowers more quickly. Once dried, store the flowers in an airtight container in a cool, dark place.
Can I grow chamomile in containers?
Yes, chamomile grows well in containers. Choose a pot that is at least 6 inches in diameter and has drainage holes. Use a well-draining potting mix and water regularly. Place the container in a sunny location. Container-grown chamomile may need more frequent watering than chamomile grown in the ground.
Is chamomile susceptible to any pests or diseases?
Chamomile is generally resistant to pests and diseases, but it can occasionally be affected by aphids, spider mites, or powdery mildew. Inspect your plants regularly for signs of infestation or disease. Treat any problems promptly with organic pest control methods or fungicides. Good air circulation and proper watering can help prevent many common problems.
Can I use chamomile for anything besides tea?
Yes, chamomile has a variety of uses beyond tea. It can be used in skincare products, such as lotions and creams, to soothe irritated skin. Chamomile essential oil is used in aromatherapy to promote relaxation and reduce stress. You can also use chamomile to make a natural hair rinse to lighten and brighten blonde hair. In the garden, chamomile can be used as a companion plant to deter pests and improve the flavor of some vegetables.
Is chamomile safe for everyone?
Chamomile is generally considered safe for most people, but some individuals may experience allergic reactions. People who are allergic to ragweed, chrysanthemums, marigolds, or daisies may also be allergic to chamomile. Pregnant or breastfeeding women should consult with their doctor before using chamomile. Chamomile may also interact with certain medications, so it’s important to talk to your doctor if you are taking any medications before using chamomile regularly.
Leave a Comment