
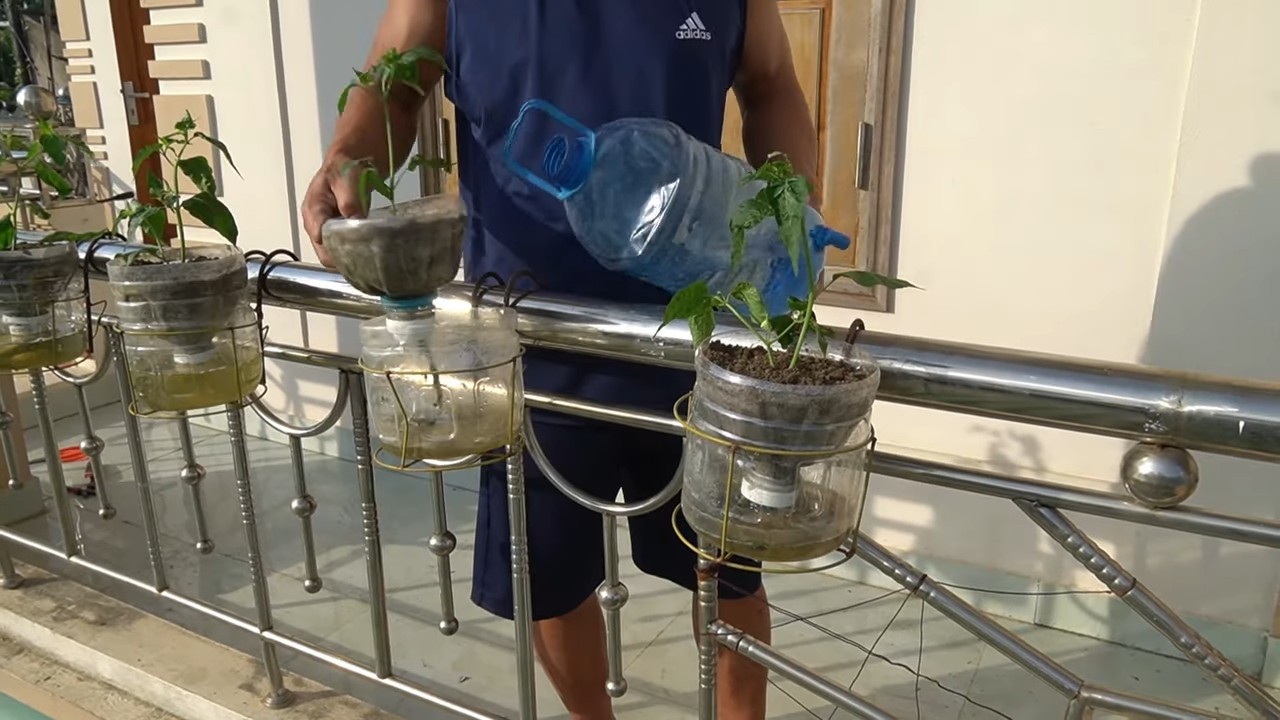
Growing Chili Peppers at Home can seem daunting, but trust me, it’s easier than you think! Imagine plucking fiery, vibrant chili peppers straight from your own garden, ready to spice up your favorite dishes. Forget those bland, store-bought peppers – we’re talking about homegrown flavor explosions!
For centuries, chili peppers have been cultivated and cherished across cultures, from the ancient Aztecs who used them in rituals to the fiery cuisines of Asia and beyond. They’re not just about heat; they’re about adding depth, complexity, and a touch of adventure to your meals.
But why should you bother with growing your own? Well, for starters, you’ll have access to varieties you simply can’t find in supermarkets. Plus, you’ll know exactly what went into growing them – no nasty pesticides or questionable practices. More importantly, growing chili peppers at home is incredibly rewarding. There’s something truly special about nurturing a plant from seed to harvest, and the satisfaction of using your own peppers in your cooking is unmatched. In this article, I’m going to share some simple, DIY tricks and hacks that will help you cultivate a thriving chili pepper garden, even if you’re a complete beginner. So, grab your gardening gloves, and let’s get started!

Chili-Anbau für Jedermann: So ziehst du scharfe Schoten zu Hause!
Hey Chili-Liebhaber! Du träumst von einer eigenen Chili-Ernte, die deine Gerichte mit feuriger Schärfe veredelt? Dann bist du hier genau richtig! Ich zeige dir, wie du ganz einfach zu Hause deine eigenen Chili-Pflanzen ziehen kannst – egal ob auf dem Balkon, der Terrasse oder im Garten. Keine Angst, es ist einfacher als du denkst!
Was du für den Chili-Anbau brauchst:
* Chili-Samen: Wähle deine Lieblingssorten! Von milden Jalapeños bis zu höllisch scharfen Habaneros ist alles möglich. Achte auf qualitativ hochwertige Samen von vertrauenswürdigen Anbietern.
* Anzuchterde: Diese ist nährstoffarm und locker, ideal für die Keimung der Samen.
* Anzuchtgefäße: Kleine Töpfe, Anzuchtschalen oder Torfquelltöpfe sind perfekt.
* Pflanztöpfe: Größere Töpfe (mindestens 10 Liter Volumen) für die ausgewachsenen Pflanzen.
* Blumenerde: Nährstoffreiche Erde für das Wachstum der Chili-Pflanzen.
* Dünger: Flüssigdünger oder Langzeitdünger speziell für Gemüse oder Chili-Pflanzen.
* Gießkanne oder Sprühflasche: Für die Bewässerung.
* Pflanzstäbe (optional): Für Sorten, die dazu neigen, umzuknicken.
* Handschuhe: Zum Schutz deiner Hände.
* Ein sonniger Standort: Chili-Pflanzen lieben die Sonne!
* Geduld und Liebe: Das Wichtigste!
Die Anzucht: Der Start ins Chili-Abenteuer
Die Anzucht ist der erste und wichtigste Schritt. Hier legst du den Grundstein für eine reiche Ernte. Ich starte meistens schon im Februar oder März mit der Anzucht, damit die Pflanzen genügend Zeit haben, bis zum Sommer groß und stark zu werden.
1. Vorbereitung der Anzuchtgefäße: Fülle deine Anzuchtgefäße mit Anzuchterde. Drücke die Erde leicht an.
2. Aussaat der Samen: Lege pro Gefäß ein bis zwei Chili-Samen auf die Erde. Bedecke die Samen mit einer dünnen Schicht Erde (ca. 0,5 cm).
3. Bewässerung: Befeuchte die Erde vorsichtig mit einer Sprühflasche. Die Erde sollte feucht, aber nicht nass sein.
4. Das Mini-Gewächshaus: Decke die Anzuchtgefäße mit einer transparenten Folie oder einem Deckel ab, um ein feuchtwarmes Klima zu schaffen. Das fördert die Keimung. Du kannst auch ein Mini-Gewächshaus verwenden.
5. Der Standort: Stelle die Anzuchtgefäße an einen warmen und hellen Ort. Eine Temperatur von 22-28°C ist ideal. Eine Fensterbank über der Heizung ist oft perfekt.
6. Geduld ist gefragt: Die Keimung kann je nach Sorte und Temperatur 1-3 Wochen dauern. Halte die Erde feucht und lüfte das Mini-Gewächshaus regelmäßig, um Schimmelbildung zu vermeiden.
7. Die ersten Blättchen: Sobald die ersten Keimlinge ihre Blätter zeigen, kannst du die Folie oder den Deckel entfernen.
Pikieren: Den kleinen Chili-Pflanzen mehr Raum geben
Sobald die Chili-Pflänzchen ihre ersten richtigen Blätter (neben den Keimblättern) entwickelt haben, ist es Zeit zum Pikieren. Das bedeutet, dass du die kleinen Pflanzen in größere Töpfe umsetzt, damit sie mehr Platz zum Wachsen haben.
1. Vorbereitung der Töpfe: Fülle kleine Töpfe (ca. 8-10 cm Durchmesser) mit Blumenerde.
2. Die Chili-Pflänzchen vorsichtig ausheben: Löse die Chili-Pflänzchen vorsichtig mit einem Pikierstab oder einem Löffel aus der Anzuchterde. Achte darauf, die Wurzeln nicht zu beschädigen.
3. Einpflanzen: Setze jedes Chili-Pflänzchen in einen eigenen Topf. Die Pflanze sollte etwas tiefer sitzen als zuvor.
4. Bewässerung: Gieße die Chili-Pflänzchen nach dem Pikieren vorsichtig an.
5. Der Standort: Stelle die pikierten Chili-Pflanzen an einen hellen und warmen Ort.
Die Pflege: Damit deine Chili-Pflanzen prächtig gedeihen
Nach dem Pikieren beginnt die eigentliche Pflege der Chili-Pflanzen. Hier sind ein paar Tipps, damit deine Pflanzen gesund und stark werden:
* Bewässerung: Gieße die Chili-Pflanzen regelmäßig, aber vermeide Staunässe. Die Erde sollte immer leicht feucht sein.
* Düngung: Dünge die Chili-Pflanzen regelmäßig mit einem Flüssigdünger oder Langzeitdünger. Beginne damit etwa 2-3 Wochen nach dem Pikieren. Achte auf die Dosierungsanleitung des Herstellers.
* Lüften: Sorge für eine gute Belüftung, besonders wenn du die Pflanzen im Haus hältst.
* Schädlinge: Kontrolliere die Pflanzen regelmäßig auf Schädlinge wie Blattläuse oder Spinnmilben. Bei Befall kannst du natürliche Schädlingsbekämpfungsmittel einsetzen.
* Ausgeizen (optional): Bei einigen Chili-Sorten kann es sinnvoll sein, die Seitentriebe (Geiztriebe) auszugeizen, um die Bildung von Früchten zu fördern. Informiere dich, ob das für deine Sorte empfehlenswert ist.
Auspflanzen: Ab nach draußen!
Sobald die Temperaturen steigen und keine Frostgefahr mehr besteht (meistens ab Mitte Mai), kannst du die Chili-Pflanzen ins Freie auspflanzen.
1. Vorbereitung der Töpfe oder des Beetes: Wähle große Töpfe (mindestens 10 Liter Volumen) oder bereite ein Beet im Garten vor. Die Erde sollte locker und nährstoffreich sein.
2. Die Chili-Pflanzen abhärten: Bevor du die Pflanzen auspflanzt, solltest du sie langsam an die Sonne und die Außentemperaturen gewöhnen. Stelle sie dazu tagsüber für ein paar Stunden ins Freie und hole sie abends wieder rein.
3. Auspflanzen: Setze die Chili-Pflanzen in die vorbereiteten Töpfe oder das Beet. Achte auf einen Abstand von ca. 40-50 cm zwischen den Pflanzen.
4. Bewässerung: Gieße die Chili-Pflanzen nach dem Auspflanzen gut an.
5. Der Standort: Stelle die Töpfe an einen sonnigen und windgeschützten Ort.
Die Ernte: Endlich scharfe Schoten!
Je nach Sorte und Witterung kannst du ab Juli oder August die ersten Chilis ernten.
* Der Reifezustand: Die Chilis sind reif, wenn sie ihre endgültige Farbe erreicht haben (z.B. rot, gelb, orange oder braun) und sich leicht vom Stiel lösen lassen.
* Die Ernte: Schneide die Chilis mit einer Schere oder einem Messer ab. Trage dabei am besten Handschuhe, um Hautreizungen zu vermeiden.
* Die Verwendung: Du kannst die Chilis frisch verwenden, trocknen, einlegen oder zu Soßen und Pulvern verarbeiten.
Zusätzliche Tipps für eine erfolgreiche Chili-Ernte:
* Wähle den richtigen Standort: Chili-Pflanzen brauchen viel Sonne (mindestens 6 Stunden pro Tag).
* Verwende hochwertige Erde: Eine gute Erde ist die Basis für gesundes Wachstum.
* Gieße richtig: Vermeide Staunässe und lasse die Erde zwischen den Wassergaben leicht antrocknen.
* Dünge regelmäßig: Chili-Pflanzen sind Starkzehrer und brauchen ausreichend Nährstoffe.
* Schütze die Pflanzen vor Schädlingen: Kontrolliere die Pflanzen regelmäßig und bekämpfe Schädlinge frühzeitig.
* Sei geduldig: Chili-Pflanzen brauchen Zeit, um zu wachsen und Früchte zu tragen.
Ich hoffe, diese Anleitung hilft dir dabei
Conclusion
So, there you have it – a straightforward, cost-effective, and incredibly rewarding way to cultivate your own fiery bounty. Growing chili peppers at home isn’t just about saving money; it’s about connecting with the food you eat, controlling the quality of your produce, and experiencing the sheer joy of nurturing life from a tiny seed to a vibrant, pepper-laden plant.
This DIY approach, focusing on [mention a key aspect of the article, e.g., “container gardening” or “using repurposed materials”], offers a sustainable and accessible entry point for anyone, regardless of their gardening experience. Imagine the satisfaction of adding your own homegrown heat to your favorite dishes, knowing exactly where your ingredients came from and how they were grown.
But the journey doesn’t end here! Feel free to experiment with different varieties of chili peppers, from the mild and fruity poblano to the scorching ghost pepper. Try different soil mixes, fertilizer combinations, and even companion planting techniques to optimize your yields and create a thriving mini-ecosystem in your backyard or balcony.
Consider exploring hydroponic systems for an even more controlled and efficient growing environment. Or, if you’re short on space, try growing your chili peppers indoors under grow lights. The possibilities are endless!
Don’t be afraid to get creative and adapt this method to suit your specific needs and preferences. Perhaps you’ll discover a new and improved way to nurture your chili plants, or maybe you’ll develop a unique recipe that showcases the incredible flavor of your homegrown peppers.
The most important thing is to take the plunge and give it a try. You might be surprised at how easy and enjoyable it is to grow your own chili peppers at home. And once you’ve tasted the difference between store-bought and homegrown, you’ll never look back.
We encourage you to share your experiences with us! Post photos of your chili pepper plants, tell us about your successes (and even your failures!), and let us know what varieties you’re growing. Your insights and tips can help other aspiring chili growers on their journey. Let’s build a community of passionate pepper enthusiasts, all united by our love of homegrown heat. So, grab some seeds, get your hands dirty, and prepare to embark on a flavorful adventure! This **growing chili peppers at home** guide is just the beginning.
Frequently Asked Questions (FAQ)
Q: What is the best time of year to start growing chili peppers?
A: The ideal time to start growing chili peppers depends on your climate. In general, chili peppers need a long growing season with warm temperatures. If you live in a region with mild winters, you can start seeds indoors 6-8 weeks before the last expected frost. If you live in a colder climate, you may need to start your seeds even earlier. The key is to ensure that the seedlings are large and strong enough to transplant outdoors once the weather warms up and the risk of frost has passed. You can also purchase starter plants from a local nursery if you prefer to skip the seed-starting process.
Q: What kind of soil is best for growing chili peppers?
A: Chili peppers thrive in well-draining soil that is rich in organic matter. A good soil mix should retain moisture but not become waterlogged. You can create your own mix by combining equal parts of potting soil, compost, and perlite or vermiculite. The compost provides essential nutrients, while the perlite or vermiculite improves drainage and aeration. Avoid using heavy clay soil, as it can suffocate the roots and lead to stunted growth. If you’re growing in containers, make sure the pots have drainage holes to prevent water from accumulating at the bottom.
Q: How much sunlight do chili peppers need?
A: Chili peppers are sun-loving plants and require at least 6-8 hours of direct sunlight per day to produce a bountiful harvest. Choose a location in your garden or on your balcony that receives plenty of sunshine throughout the day. If you’re growing indoors, you’ll need to supplement with grow lights to provide adequate light. LED grow lights are a good option as they are energy-efficient and produce the right spectrum of light for plant growth. Rotate your plants regularly to ensure that all sides receive equal exposure to sunlight.
Q: How often should I water my chili pepper plants?
A: The watering frequency for chili pepper plants depends on several factors, including the weather, the type of soil, and the size of the plant. In general, you should water your plants when the top inch of soil feels dry to the touch. Avoid overwatering, as this can lead to root rot. Water deeply and thoroughly, allowing the water to drain out of the bottom of the pot. During hot and dry weather, you may need to water more frequently. Mulching around the base of the plants can help to retain moisture in the soil.
Q: What kind of fertilizer should I use for chili peppers?
A: Chili peppers benefit from regular fertilization, especially during the flowering and fruiting stages. Use a balanced fertilizer with an NPK ratio of 5-10-10 or 10-10-10. This means it contains 5 or 10 parts Nitrogen, 10 parts Phosphorus, and 10 parts Potassium. Nitrogen promotes leafy growth, phosphorus encourages flowering and fruiting, and potassium strengthens the plant and improves disease resistance. You can use a liquid fertilizer diluted according to the package instructions or a slow-release granular fertilizer. Avoid over-fertilizing, as this can burn the roots and damage the plants. Organic fertilizers, such as compost tea or fish emulsion, are also excellent options.
Q: How do I protect my chili pepper plants from pests and diseases?
A: Chili peppers can be susceptible to various pests and diseases, including aphids, spider mites, whiteflies, and fungal infections. Regularly inspect your plants for signs of infestation or disease. If you spot any problems, take action immediately. For aphids, spider mites, and whiteflies, you can try spraying the plants with a strong stream of water or using insecticidal soap. For fungal infections, such as powdery mildew or leaf spot, you can use a fungicide. Proper air circulation and well-draining soil can also help to prevent fungal problems. Companion planting with herbs like basil or marigolds can help to repel pests.
Q: When are chili peppers ready to harvest?
A: The time it takes for chili peppers to mature depends on the variety. In general, most chili peppers are ready to harvest 60-90 days after transplanting. The peppers will change color as they ripen, typically from green to red, yellow, or orange, depending on the variety. The peppers should also feel firm and slightly waxy to the touch. You can harvest the peppers at any stage of ripeness, but they will be at their peak flavor and heat when fully ripe. Use pruning shears or scissors to cut the peppers from the plant, leaving a small stem attached.
Q: Can I save seeds from my chili peppers to grow next year?
A: Yes, you can save seeds from your chili peppers to grow next year, but there are a few things to keep in mind. If you grew hybrid varieties, the seeds may not produce plants that are true to type. This means that the offspring may not have the same characteristics as the parent plant. If you grew open-pollinated varieties, the seeds will generally produce plants that are similar to the parent plant. To save seeds, allow the peppers to fully ripen on the plant. Then, carefully remove the seeds from the pepper and spread them out on a paper towel to dry. Once the seeds are completely dry, store them in an airtight container in a cool, dark place.
Leave a Comment