
Growing Cilantro at Home can feel like a culinary quest, a fragrant adventure right in your own backyard! Have you ever dreamed of snipping fresh, vibrant cilantro leaves just moments before adding them to your tacos, salsa, or that perfect bowl of pho? I know I have! But let’s be honest, sometimes that grocery store cilantro just doesn’t cut it – it’s either wilted, flavorless, or gone bad before you even get a chance to use it.
Cilantro, also known as coriander (for its seeds), has a rich history, dating back thousands of years. Evidence suggests it was used in ancient Egypt and even found in the tomb of Tutankhamun! Cultures around the world have embraced its unique flavor, making it a staple in cuisines from Mexico and Southeast Asia to the Mediterranean. But why rely on store-bought cilantro when you can easily cultivate your own supply?
That’s where this DIY guide comes in! I’m going to share my favorite tricks and hacks for successfully growing cilantro at home, even if you don’t have a green thumb. We’ll cover everything from choosing the right seeds and soil to preventing bolting (that dreaded premature flowering that ruins the flavor). Imagine the satisfaction of harvesting your own fresh, flavorful cilantro whenever you need it. Say goodbye to limp, lifeless herbs and hello to a vibrant, aromatic addition to your home cooking. Let’s get started!
Growing Cilantro at Home: Your DIY Guide for Fresh Greens
I love cilantro! That fresh, citrusy flavor is simply unbeatable in tacos, soups, and salads. But cilantro from the supermarket can be expensive and often wilts quickly. That’s why I decided to grow my own cilantro, and I can tell you, it’s easier than you think! In this article, I’ll show you how to successfully grow cilantro at home, whether you have a garden, a balcony, or just a sunny windowsill.
What you need:
- Cilantro seeds: You can find them online, in garden centers, or even in some supermarkets. Make sure to buy seeds that are meant for planting, not those intended for cooking.
- Suitable soil: A well-draining potting mix is ideal. I like to use a mixture of potting soil, compost, and a little perlite to improve drainage.
- Container: Choose a pot or container with sufficient drainage. Cilantro has long roots, so it should be at least 15-20 cm (6-8 inches) deep.
- Sunny location: Cilantro needs at least 6 hours of sunlight per day. A south-facing window is perfect, or a sunny spot in the garden or on the balcony.
- Watering can or spray bottle: To keep the soil moist, but not overwatered.
- (Optional) Grow light: If you don’t have enough sunlight, a grow light can help.
Sowing Cilantro: Step-by-Step Guide
- Prepare the seeds (optional, but recommended): Cilantro seeds are actually small fruits that contain two seeds. To speed up germination, you can gently press the seeds to split them. Place the seeds between two hard surfaces (e.g., two cutting boards) and roll lightly with a rolling pin or a glass. Don’t press too hard, you don’t want to crush the seeds! Alternatively, you can soak the seeds overnight in water.
- Prepare the container: Fill your pot or container with potting soil. Leave about 2-3 cm (about 1 inch) of space to the rim.
- Sow the seeds: Distribute the cilantro seeds evenly on the soil. Press them down lightly so they are about 0.5-1 cm (1/4 to 1/2 inch) deep in the soil.
- Water: Gently water the soil until it is evenly moist. Avoid flooding the soil.
- Choose a location: Place the container in a sunny location.
- Maintain moisture: Keep the soil moist, but not wet. Spray the soil regularly with a spray bottle, especially when it’s warm and dry.
- Be patient: Cilantro seeds usually take 7-14 days to germinate.
Caring for Cilantro: Tips and Tricks for a Bountiful Harvest
- Watering: Cilantro likes it moist, but not wet. Water regularly, especially in warm weather. Make sure the water can drain well to avoid waterlogging. I always check the soil before I water. If the top layer feels dry, it’s time to water.
- Fertilizing: Cilantro doesn’t need much fertilizer. If you like, you can use a diluted liquid fertilizer for herbs every few weeks. I like to use organic fertilizer, such as compost tea.
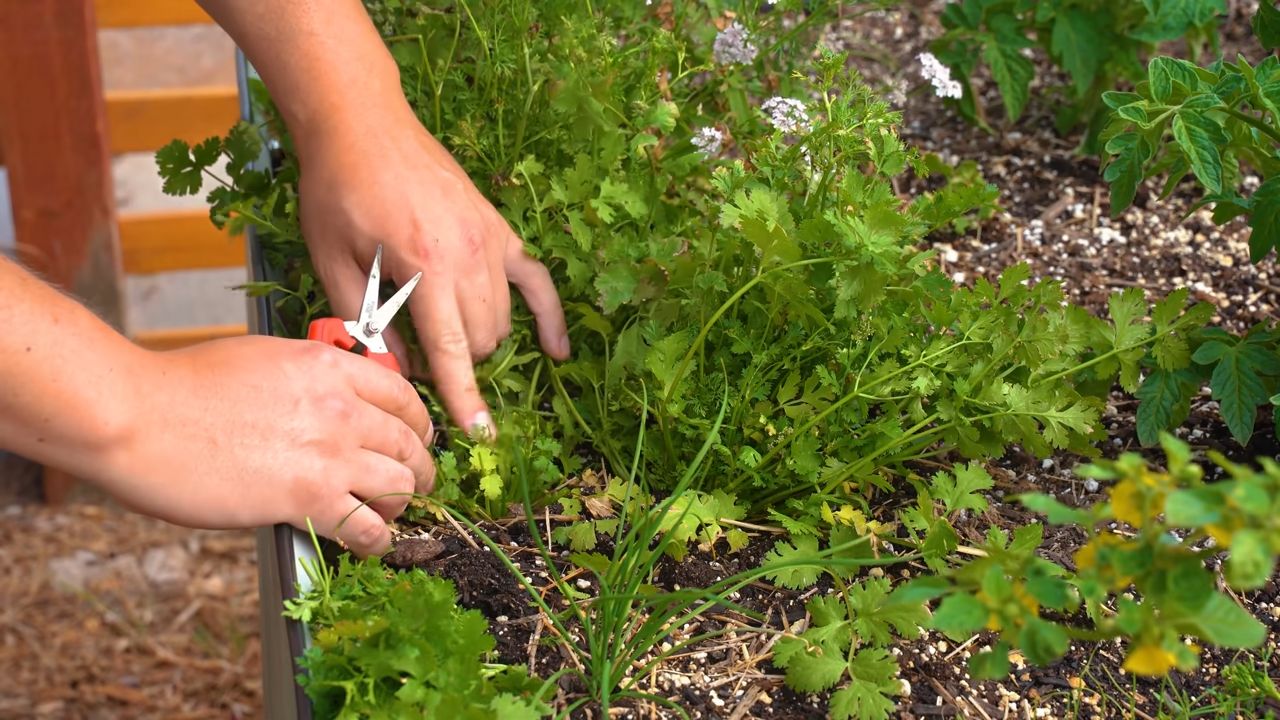
- Pruning: Regular cutting promotes growth and prevents the cilantro from bolting too quickly. Cut the leaves regularly when they are about 10-15 cm (4-6 inches) long. Cut the stems just above the ground to encourage new growth.
- Preventing bolting: Cilantro tends to bolt (flower quickly) in hot weather. To prevent this, you can place the cilantro in a cooler location or shade it with a shade cloth. Regular cutting also helps to delay bolting.
- Pests and diseases: Cilantro is relatively resistant to pests and diseases. Occasionally, aphids may appear. You can rinse them off with a strong jet of water or treat them with a mild soap solution.
Harvesting Cilantro: How to Get Fresh Greens
- When to harvest: You can harvest cilantro as soon as the leaves are large enough to use. This is usually about 4-6 weeks after sowing.
- How to harvest: Cut the stems just above the ground. You can harvest either individual leaves or entire stems.
- Storage: Fresh cilantro keeps in the refrigerator for about a week. Wrap it in a damp paper towel and place it in a plastic bag. You can also freeze cilantro. To do this, chop it finely and freeze it in ice cube trays with a little water.
Cilantro in Different Phases:
Phase 1: Germination
In this phase, it’s important to keep the soil moist and place the container in a warm location. Avoid direct sunlight, as the young seedlings are sensitive. I spray the soil several times a day with a spray bottle to keep it moist. You can also place a clear plastic film over the container to increase humidity. But be sure to ventilate the film regularly to prevent mold growth.
Phase 2: Growth
Once the seedlings have emerged, they need a lot of sunlight. Place the container in a sunny location or use a grow light. Water regularly, but avoid waterlogging. I thin out the seedlings when they are too close together. This gives the plants more space to grow.
Phase 3: Harvest
As soon as the leaves are large enough, you can start harvesting. Cut the stems just above the ground. Regular cutting promotes growth and prevents the cilantro from bolting too quickly. I harvest my cilantro several times a week to always have fresh greens on hand.
Common Problems and Solutions:
- Cilantro bolts quickly: As mentioned, cilantro tends to bolt in hot weather. To prevent this, you can place the cilantro in a cooler location or shade it with a shade cloth. Regular cutting also helps to delay bolting. If the cilantro has already bolted, you can harvest the seeds and save them for the next sowing.
- Yellow leaves: Yellow leaves can be a sign of overwatering or a nutrient deficiency. Check if the soil is too wet and let it dry out a bit if necessary. If you suspect a nutrient deficiency, you can use a diluted liquid fertilizer for herbs.
- Poor germination: Poor germination can have various causes. The seeds may be too old, the soil may be too dry or too wet, or the temperature may be too low. Make sure to use fresh seeds, keep the soil moist, and place the container in a warm location.
Additional Tips:
Saving cilantro seeds: If you want to save cilantro seeds, let some plants flower and…
Succession sowing: To have a continuous supply of fresh cilantro, you can sow new seeds every few weeks.
Growing cilantro in winter: You can also grow cilantro in winter if you place it in a bright, cool location and use a grow light.

Conclusion
So, there you have it! Growing cilantro at home isn’t just a fun project; it’s a game-changer for your culinary adventures. Forget those sad, wilted bunches from the grocery store that seem to lose their flavor the moment you get them home. With a little effort and these simple steps, you can have a constant supply of fresh, vibrant cilantro right at your fingertips.
Why is this a must-try? Because the difference between store-bought and homegrown cilantro is astounding. The flavor is brighter, more intense, and adds a whole new dimension to your favorite dishes. Plus, you’ll be saving money, reducing food waste, and enjoying the satisfaction of nurturing something from seed to table. It’s a win-win-win!
But the benefits don’t stop there. Growing your own cilantro allows you to control the entire process, ensuring that your herbs are free from harmful pesticides and chemicals. You know exactly what you’re putting into your body, and that peace of mind is priceless.
Ready to take your cilantro game to the next level? Consider these variations and suggestions:
* Succession Planting: Cilantro is notorious for bolting (going to seed) quickly, especially in warmer weather. To ensure a continuous harvest, practice succession planting. Sow new seeds every two to three weeks. This way, you’ll always have fresh cilantro ready to pick.
* Container Gardening: If you’re short on space, don’t worry! Cilantro thrives in containers. Choose a pot that’s at least 6 inches deep and wide, and make sure it has good drainage. You can even grow cilantro indoors near a sunny window.
* Companion Planting: Cilantro is a great companion plant for many vegetables, including tomatoes, peppers, and carrots. It helps to repel pests and attract beneficial insects.
* Seed Saving: Once your cilantro plants bolt, don’t discard them! Allow the seeds to mature and dry on the plant. Then, collect them and store them in a cool, dry place for planting next season. This is a fantastic way to save money and ensure a continuous supply of cilantro.
* Cilantro Pesto: Don’t limit yourself to using cilantro as a garnish. Blend it with garlic, nuts, Parmesan cheese, and olive oil to create a delicious and unique pesto. It’s perfect for pasta, sandwiches, or as a dip.
* Cilantro Lime Rice: Add a burst of flavor to your rice by stirring in chopped cilantro and lime juice. It’s a simple yet delicious side dish that pairs well with a variety of cuisines.
* Experiment with Varieties: While common cilantro is widely available, consider trying different varieties like ‘Slow Bolt’ or ‘Santo’ for improved heat tolerance and longer harvests.
We’re confident that once you experience the joy of growing your own cilantro, you’ll never go back to store-bought again. It’s a simple, rewarding, and delicious way to enhance your cooking and connect with nature.
So, what are you waiting for? Grab some seeds, find a sunny spot, and get growing! We can’t wait to hear about your experiences. Share your tips, tricks, and photos in the comments below. Let’s build a community of cilantro enthusiasts! Remember, mastering the art of growing cilantro at home is easier than you think, and the rewards are well worth the effort. Happy gardening!
Frequently Asked Questions (FAQ)
Why is my cilantro bolting so quickly?
Bolting, or going to seed, is a common issue with cilantro, especially in hot weather. Cilantro is a cool-season herb and prefers temperatures between 50°F and 85°F (10°C and 29°C). When temperatures rise above this range, the plant will often bolt in an attempt to reproduce before it dies. To prevent bolting, try these tips:
* Plant in partial shade: Provide some afternoon shade to protect your cilantro from the hottest sun.
* Water regularly: Keep the soil consistently moist, but not waterlogged. Dry soil can stress the plant and trigger bolting.
* Succession planting: As mentioned earlier, sow new seeds every few weeks to ensure a continuous supply of cilantro.
* Choose bolt-resistant varieties: Look for cilantro varieties that are specifically bred to resist bolting, such as ‘Slow Bolt’ or ‘Santo’.
* Harvest frequently: Regularly harvesting the leaves will encourage the plant to produce more foliage and delay bolting.
How much sunlight does cilantro need?
Cilantro needs at least 6 hours of sunlight per day to thrive. However, in hot climates, it benefits from some afternoon shade. If you’re growing cilantro indoors, place it near a sunny window that receives plenty of light. You may also need to supplement with artificial light, especially during the winter months.
What kind of soil is best for growing cilantro?
Cilantro prefers well-draining soil that is rich in organic matter. A good potting mix or garden soil amended with compost is ideal. The soil pH should be between 6.0 and 7.5. Avoid heavy clay soils, as they can retain too much moisture and lead to root rot.
How often should I water my cilantro plants?
Water your cilantro plants regularly, keeping the soil consistently moist but not waterlogged. The frequency of watering will depend on the weather, soil type, and size of the container. In general, water deeply when the top inch of soil feels dry to the touch. Avoid overhead watering, as this can promote fungal diseases.
Can I grow cilantro indoors?
Yes, you can definitely grow cilantro indoors! Choose a pot that’s at least 6 inches deep and wide, and make sure it has good drainage. Place the pot near a sunny window that receives at least 6 hours of sunlight per day. You may also need to supplement with artificial light. Water regularly, keeping the soil moist but not waterlogged.
How do I harvest cilantro?
Harvest cilantro leaves when they are young and tender. Simply snip off the leaves with scissors or pinch them off with your fingers. Avoid harvesting more than one-third of the plant at a time, as this can stress the plant. Regular harvesting will encourage the plant to produce more foliage.
What can I do with cilantro seeds?
Cilantro seeds, also known as coriander, are a versatile spice that can be used in a variety of dishes. You can use them whole or ground. Coriander has a warm, citrusy flavor that complements many cuisines, including Indian, Mexican, and Asian. You can also save the seeds to plant next season.
My cilantro leaves are turning yellow. What’s wrong?
Yellowing leaves can be a sign of several problems, including:
* Overwatering: Soggy soil can lead to root rot, which can cause the leaves to turn yellow. Make sure your cilantro plants are in well-draining soil and avoid overwatering.
* Nutrient deficiency: Cilantro needs adequate nutrients to thrive. If the soil is lacking in nutrients, the leaves may turn yellow. Fertilize your plants with a balanced fertilizer or compost tea.
* Pests or diseases: Check your plants for signs of pests or diseases. Aphids, spider mites, and fungal diseases can all cause yellowing leaves. Treat any infestations or diseases promptly.
How can I attract pollinators to my cilantro plants?
Cilantro flowers attract a variety of pollinators, including bees, butterflies, and hoverflies. To attract even more pollinators, plant cilantro near other flowering plants that attract pollinators, such as lavender, sunflowers, and zinnias. Avoid using pesticides, as they can harm pollinators.
Is cilantro the same as coriander?
Yes and no. In the United States, the leaves of the plant are called cilantro, while the seeds are called coriander. In other parts of the world, such as the UK, the entire plant is referred to as coriander. So, technically, they are the same plant, but the different parts have different names.


Leave a Comment