
Growing garlic in a plastic bag might sound a little unconventional, right? But trust me, this simple DIY trick can unlock a surprisingly bountiful harvest, even if you’re short on space or gardening experience. For centuries, garlic has been revered not only for its pungent flavor but also for its medicinal properties. From ancient Egypt, where it fueled the pyramid builders, to traditional Chinese medicine, garlic has been a staple in cultures worldwide.
But let’s face it, not everyone has a sprawling garden to dedicate to this flavorful bulb. That’s where this clever hack comes in! Imagine enjoying fresh, homegrown garlic without the hassle of tilling soil or worrying about garden pests taking over. This method is perfect for apartment dwellers, balcony gardeners, or anyone who wants to experiment with a low-effort, high-reward gardening project.
I’m going to show you how growing garlic in a plastic bag is not only possible but incredibly easy and fun. You’ll be amazed at how simple it is to transform a humble plastic bag into a mini garlic farm, providing you with a steady supply of fresh, flavorful cloves for all your culinary adventures. So, grab a bag, some soil, and let’s get started on this exciting gardening journey together!
Growing Garlic in a Plastic Bag: A Surprisingly Simple DIY Guide
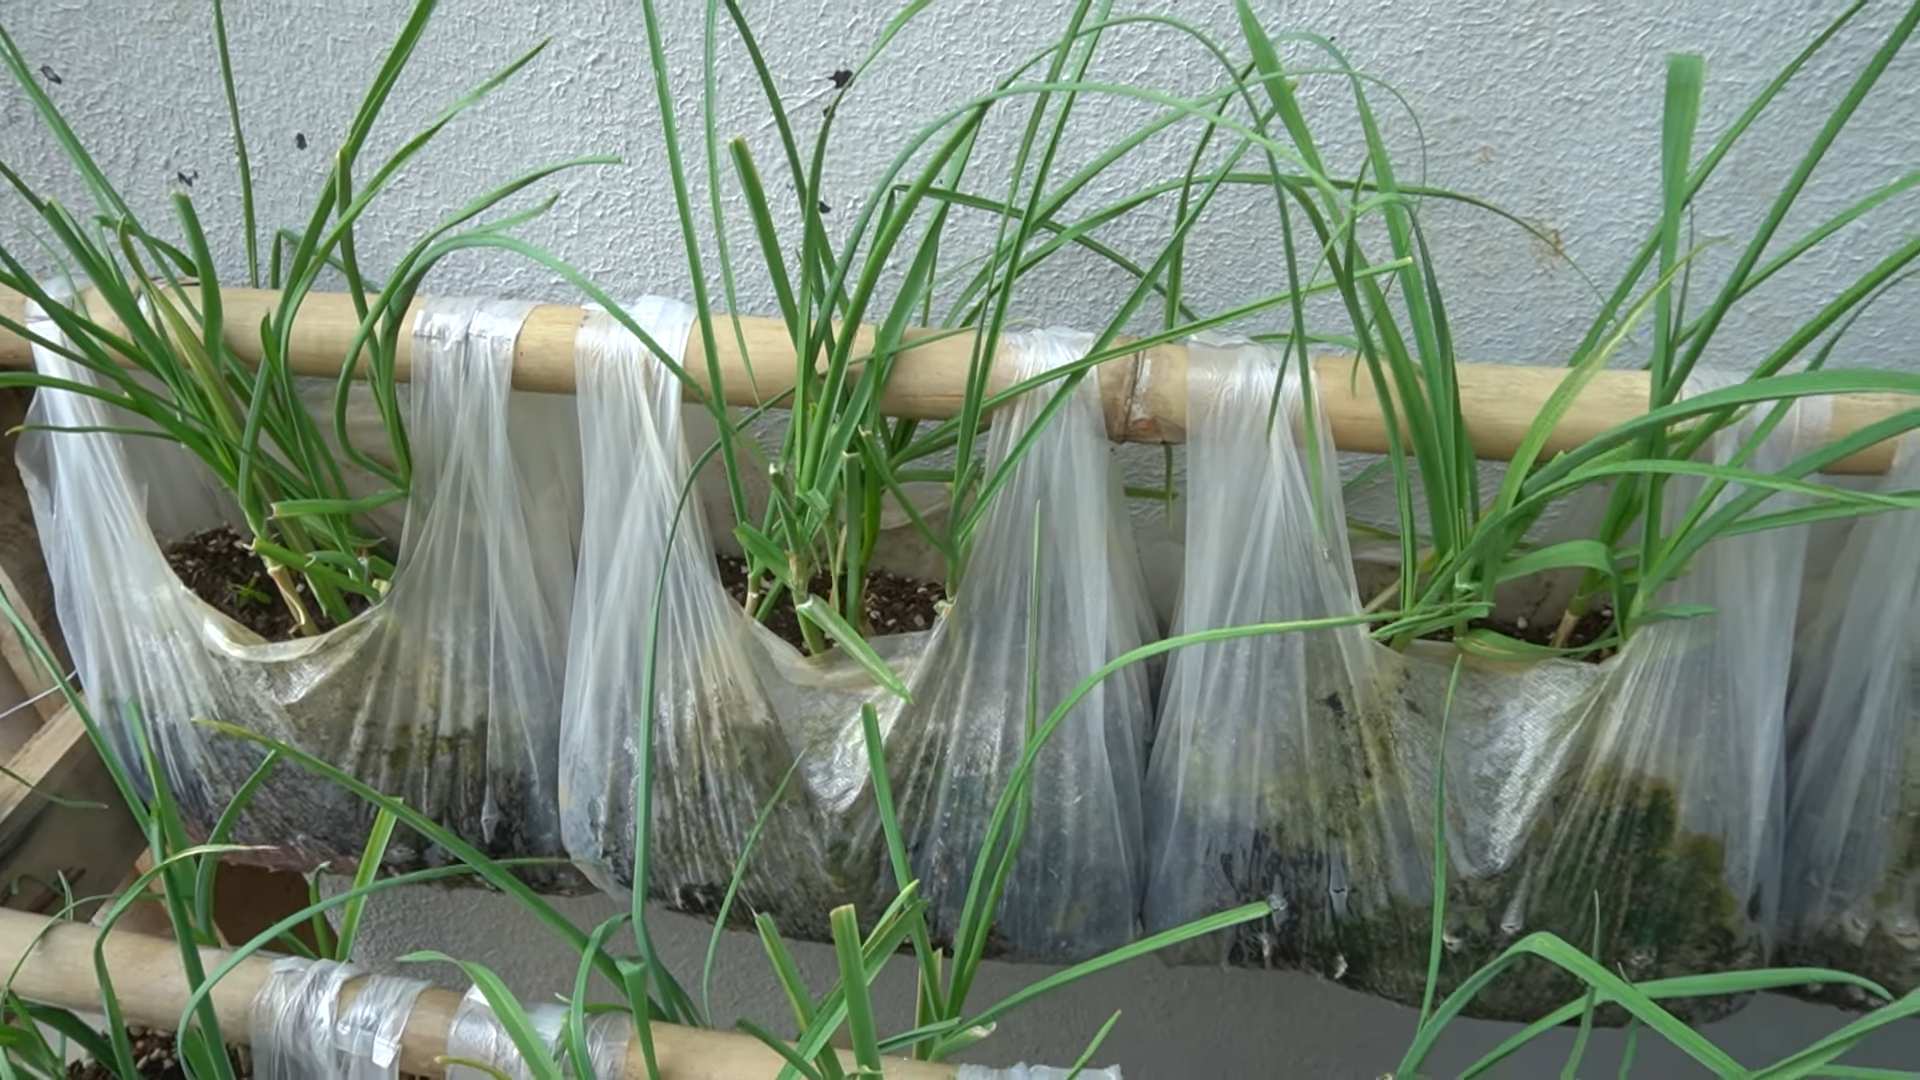
Hey there, fellow gardening enthusiasts! Are you short on space but still dreaming of fresh, pungent garlic? Well, I’ve got a fantastic solution for you: growing garlic in a plastic bag! Yes, you read that right. It’s a surprisingly effective and space-saving method that I’ve personally tried and tested with great success. Let me walk you through the process, step-by-step, so you can enjoy your own homegrown garlic, even if you only have a balcony or a sunny windowsill.
What You’ll Need
Before we dive in, let’s gather our supplies. This is a pretty low-cost project, which is always a win in my book!
* Garlic Cloves: Choose organic garlic from a local farmer’s market or grocery store. Avoid supermarket garlic that may have been treated to prevent sprouting. Look for plump, healthy cloves. I usually go for the biggest ones I can find – bigger cloves tend to produce bigger bulbs.
* Plastic Bag: A sturdy, resealable plastic bag (like a gallon-sized freezer bag) is perfect. Make sure it’s clean and doesn’t have any holes. You can also reuse a heavy-duty shopping bag, but make sure it’s opaque to protect the roots from light.
* Potting Mix: Use a high-quality potting mix that drains well. Avoid garden soil, as it can compact and hinder drainage. I prefer a mix that contains perlite or vermiculite for added aeration.
* Water: Regular tap water is fine, but let it sit out for a day to allow chlorine to evaporate.
* Spray Bottle (Optional): This is handy for misting the soil.
* Small Stones or Gravel (Optional): For drainage at the bottom of the bag.
* Scissors or a Knife: For making drainage holes.
* Sunny Location: Garlic needs at least 6 hours of sunlight per day.
Preparing the Bag and Soil
This is a crucial step to ensure your garlic has a happy home.
1. Prepare the Bag: First, inspect your plastic bag for any tears or holes. If you’re reusing a bag, give it a good wash with soap and water to remove any residue. Next, create drainage holes at the bottom of the bag. I usually make about 5-6 small holes using scissors or a knife. This is essential to prevent waterlogging, which can rot your garlic.
2. Add Drainage Layer (Optional): If you’re concerned about drainage, you can add a thin layer of small stones or gravel to the bottom of the bag before adding the soil. This will help improve drainage and prevent the roots from sitting in water.
3. Fill with Potting Mix: Now, it’s time to fill the bag with potting mix. Leave about 2-3 inches of space at the top of the bag. Gently pat down the soil to remove any air pockets. Don’t pack it too tightly, as you want the roots to be able to grow easily.
4. Moisten the Soil: Before planting the garlic cloves, moisten the potting mix with water. You want the soil to be damp, but not soggy. Use a spray bottle to mist the soil evenly, or gently pour water into the bag until the soil is moistened throughout.
Planting the Garlic Cloves
This is where the magic happens!
1. Separate the Cloves: Carefully separate the cloves from the garlic bulb. Leave the papery skin on each clove intact, as this protects the clove from drying out.
2. Select the Best Cloves: Choose the largest and healthiest-looking cloves for planting. Discard any cloves that are soft, discolored, or damaged.
3. Plant the Cloves: Make small holes in the soil, about 2-3 inches deep and 4-6 inches apart. Place each clove in a hole, pointy side up. This is important because the green shoots will emerge from the pointy end.
4. Cover the Cloves: Gently cover the cloves with potting mix, and lightly pat down the soil.
5. Water Again: After planting, water the soil again to settle the cloves in place.
Caring for Your Garlic
Now that your garlic is planted, it’s time to provide it with the care it needs to thrive.
1. Sunlight: Place the bag in a sunny location where it will receive at least 6 hours of direct sunlight per day. A south-facing window or balcony is ideal.
2. Watering: Water the garlic regularly, keeping the soil consistently moist but not soggy. Check the soil moisture by sticking your finger into the soil. If the top inch feels dry, it’s time to water. Avoid overwatering, as this can lead to root rot.
3. Fertilizing (Optional): You can fertilize your garlic every few weeks with a balanced liquid fertilizer. Follow the instructions on the fertilizer package. I usually use a diluted fish emulsion or seaweed extract.
4. Weeding: Keep the bag free of weeds. Gently pull out any weeds that appear.
5. Pest Control: Keep an eye out for pests, such as aphids or spider mites. If you notice any pests, treat them with an insecticidal soap or neem oil.
6. Cold Treatment (Optional): Garlic typically needs a period of cold temperatures (vernalization) to form bulbs properly. If you live in a warm climate, you can simulate this by placing the bag in the refrigerator for a few weeks before planting. This isn’t strictly necessary, but it can improve bulb formation.
Harvesting Your Garlic
The most rewarding part!
1. When to Harvest: Garlic is typically ready to harvest in late spring or early summer, about 8-9 months after planting. Look for signs that the leaves are starting to turn yellow and brown.
2. Harvesting: Gently loosen the soil around the garlic bulbs with your fingers or a small trowel. Carefully pull the bulbs out of the bag.
3. Curing: After harvesting, cure the garlic bulbs by hanging them in a cool, dry, and well-ventilated place for 2-3 weeks. This allows the bulbs to dry out and develop their flavor.
4. Storing: Once the garlic is cured, you can store it in a cool, dry, and dark place for several months. Braid the garlic stalks together and hang them up, or store the bulbs in a mesh bag.
Troubleshooting
Even with the best intentions, things can sometimes go wrong. Here are a few common problems and how to fix them:
* Yellowing Leaves: This could be a sign of overwatering, underwatering, or nutrient deficiency. Check the soil moisture and adjust your watering accordingly. If the soil is dry, water more frequently. If the soil is soggy, water less frequently. You can also try fertilizing with a balanced fertilizer.
* Slow Growth: This could be due to insufficient sunlight, poor soil, or cold temperatures. Make sure the bag is in a sunny location and that the soil is well-draining. If you live in a cold climate, you may need to provide some protection from the cold.
* Root Rot: This is caused by overwatering. Make sure the bag has adequate drainage and that you’re not watering too frequently. If you suspect root rot, you can try transplanting the garlic to a fresh bag with new potting mix.
* Pests: Keep an eye out for pests and treat them promptly with an insecticidal soap or neem oil.
Tips and Tricks for Success
Here are a few extra tips to help you grow the best garlic possible in a plastic bag:
* Choose the Right Garlic: Softneck garlic varieties are generally better suited for warmer climates, while hardneck varieties are better suited for colder climates. Do some research to find the best variety for your area.
* Rotate Your Crops: If you’re growing garlic in the same bag year after year, it’s important to rotate your crops to prevent soilborne diseases.
* Add Compost: Adding compost to the potting mix can improve drainage and provide essential nutrients.
* Mulch: Mulching the soil with straw or wood chips can help retain moisture and suppress weeds.
* Experiment: Don’t be afraid to experiment with different varieties of garlic and different growing techniques. The best way to learn is by doing!
Growing garlic in a plastic bag is a fun and rewarding project that anyone can do. With a little bit of care and attention, you can enjoy your own homegrown garlic, even if you only have a small space. So, grab a bag, some garlic cloves, and get planting! Happy gardening!

Conclusion
So, there you have it! Growing garlic in a plastic bag might sound unconventional, but it’s a surprisingly effective and space-saving method, especially if you’re short on garden space or live in an apartment. This DIY trick offers a fantastic way to enjoy fresh, homegrown garlic without the commitment of a traditional garden plot. It’s also a great project for beginners, as it’s relatively low-maintenance and provides a quick and rewarding harvest.
Why is this a must-try? Because it democratizes garlic cultivation! No longer is fresh, flavorful garlic reserved for those with sprawling gardens. This method allows anyone, anywhere, to experience the joy of nurturing their own food. Plus, it’s incredibly satisfying to harvest your own garlic, knowing exactly where it came from and how it was grown. The flavor of homegrown garlic is noticeably superior to store-bought varieties, offering a richer, more pungent taste that will elevate your culinary creations.
Beyond the basic method, there’s plenty of room for experimentation. Try using different types of plastic bags – heavy-duty freezer bags, reusable shopping bags, or even repurposed rice sacks can all work. Just ensure they have adequate drainage. You can also experiment with different soil mixes. While a standard potting mix works well, consider adding compost or other organic matter to enrich the soil and provide your garlic with extra nutrients. Another variation is to try growing different varieties of garlic. Softneck varieties, which are more adaptable to warmer climates, might be a better choice if you live in a region with mild winters. Hardneck varieties, on the other hand, are known for their robust flavor and the production of delicious scapes.
Don’t be afraid to get creative with your setup. You can hang your garlic-filled bags from a balcony railing, place them on a sunny windowsill, or even create a vertical garden using multiple bags. The possibilities are endless!
We wholeheartedly encourage you to give this DIY trick a try. It’s a fun, rewarding, and ultimately delicious way to grow your own garlic. Once you’ve harvested your first crop, you’ll be hooked! And most importantly, we want to hear about your experience. Share your photos, tips, and stories with us in the comments below. Let’s build a community of plastic bag garlic growers and learn from each other’s successes and challenges. Let us know what worked for you, what didn’t, and any creative variations you came up with. Your feedback will help others discover the joys of growing garlic in a plastic bag and inspire them to embark on their own garlic-growing adventures. So, grab a bag, some soil, and a few cloves of garlic, and get growing! You’ll be amazed at how easy and rewarding it is to cultivate your own fresh, flavorful garlic.
Frequently Asked Questions (FAQ)
Q: What kind of garlic should I use for growing in a plastic bag?
A: You can use either softneck or hardneck garlic varieties. Softneck varieties are generally more adaptable to warmer climates and store well. Hardneck varieties are known for their stronger flavor and produce edible scapes (curly flower stalks) in the spring. Elephant garlic, while technically a type of leek, can also be grown using this method, but keep in mind that it requires more space. Ultimately, the best choice depends on your climate and personal preference. Experiment with different varieties to see which ones thrive in your specific conditions.
Q: What kind of soil should I use?
A: A well-draining potting mix is ideal. You can also amend the potting mix with compost or other organic matter to provide extra nutrients. Avoid using garden soil, as it can be too heavy and may not drain well, leading to root rot. The key is to ensure that the soil is loose and airy, allowing the garlic roots to breathe and absorb nutrients effectively. A mix of equal parts potting mix, compost, and perlite or vermiculite can create an excellent growing medium.
Q: How much sunlight does the garlic need?
A: Garlic needs at least 6-8 hours of sunlight per day. Place your plastic bag in a sunny location, such as a south-facing balcony or windowsill. If you don’t have enough natural sunlight, you can supplement with grow lights. Insufficient sunlight can result in smaller bulbs and a less intense flavor. Rotate the bag regularly to ensure that all sides receive equal exposure to sunlight.
Q: How often should I water the garlic?
A: Water thoroughly when the top inch of soil feels dry to the touch. Avoid overwatering, as this can lead to root rot. Ensure that the plastic bag has adequate drainage holes to prevent water from accumulating at the bottom. The frequency of watering will depend on the weather conditions and the type of soil you’re using. Check the soil moisture regularly and adjust your watering schedule accordingly.
Q: How do I know when the garlic is ready to harvest?
A: The garlic is typically ready to harvest when the lower leaves start to turn yellow and brown. This usually occurs in late spring or early summer. You can also gently dig around the base of the plant to check the size of the bulb. If the bulb is plump and well-formed, it’s likely ready to harvest. Don’t wait too long to harvest, as the bulbs can start to split and deteriorate if left in the ground for too long.
Q: Can I reuse the plastic bag for growing garlic again?
A: Yes, you can reuse the plastic bag, but it’s important to clean it thoroughly before replanting. Wash the bag with soap and water to remove any residual soil or debris. You can also disinfect the bag with a diluted bleach solution to kill any potential pathogens. However, keep in mind that plastic bags can degrade over time, especially when exposed to sunlight. If the bag is damaged or worn, it’s best to replace it with a new one.
Q: What are some common problems I might encounter when growing garlic in a plastic bag?
A: Some common problems include root rot (due to overwatering), pest infestations (such as aphids or mites), and nutrient deficiencies. To prevent root rot, ensure that the plastic bag has adequate drainage and avoid overwatering. Regularly inspect your plants for pests and take appropriate action if you find any. You can use insecticidal soap or neem oil to control pests. If your plants are showing signs of nutrient deficiencies, such as yellowing leaves, you can fertilize them with a balanced fertilizer.
Q: Can I grow other vegetables in a plastic bag using the same method?
A: Yes, you can grow other vegetables in a plastic bag using a similar method. Some good options include herbs, lettuce, spinach, and radishes. However, keep in mind that different vegetables have different requirements for sunlight, water, and nutrients. Research the specific needs of the vegetables you want to grow and adjust your growing conditions accordingly.
Q: How do I store the harvested garlic?
A: After harvesting, cure the garlic by hanging it in a cool, dry, and well-ventilated place for 2-3 weeks. This allows the outer layers of the bulb to dry and harden, which helps to prevent spoilage. Once the garlic is cured, you can store it in a cool, dark, and dry place for several months. Avoid storing garlic in the refrigerator, as this can cause it to sprout or become moldy.
Q: Is growing garlic in a plastic bag organic?
A: Growing garlic in a plastic bag can be organic if you use organic potting mix, organic fertilizer, and avoid using synthetic pesticides or herbicides. Look for potting mixes and fertilizers that are certified organic by a reputable organization. You can also use natural pest control methods, such as insecticidal soap or neem oil.

Leave a Comment