
Growing grapevines from grapes might sound like something only seasoned horticulturalists can achieve, but I’m here to tell you it’s more accessible than you think! Forget those expensive nursery starts; imagine cultivating your own thriving vineyard, all from the humble grape you enjoy snacking on.
Grapevines have a rich and fascinating history, dating back thousands of years. From ancient civilizations in the Mediterranean, where wine was integral to religious ceremonies and daily life, to the sprawling vineyards of modern-day California, grapes have always held a special place in human culture. The ability to propagate them has been passed down through generations, a testament to our enduring connection with the land.
But why bother with this DIY project? Well, for starters, it’s incredibly rewarding to nurture a plant from its very beginning. Plus, it’s a fantastic way to save money and experiment with different grape varieties. Maybe you’ve tasted a particularly delicious grape and wondered if you could grow it yourself. This is your chance! Growing grapevines from grapes allows you to customize your garden with unique cultivars that might not be readily available at your local garden center.
This article will guide you through the entire process, from selecting the right grapes to nurturing your seedlings into strong, healthy vines. Get ready to roll up your sleeves and embark on a fulfilling gardening adventure!

Weinreben aus Trauben ziehen: Ein DIY-Leitfaden für Anfänger
Hallo Weinliebhaber und Gartenfreunde! Habt ihr euch jemals gefragt, ob man Weinreben direkt aus den Kernen von gekauften Trauben ziehen kann? Die Antwort ist: Ja, es ist möglich! Es ist zwar ein bisschen knifflig und erfordert Geduld, aber es ist ein unglaublich lohnendes Projekt. Ich zeige euch, wie es geht.
Was du brauchst:
* Trauben: Wähle kernhaltige Trauben aus dem Supermarkt oder vom Markt. Achte auf gesunde, reife Früchte. Am besten eignen sich Tafeltrauben, da sie oft widerstandsfähiger sind.
* Kleine Töpfe oder Anzuchtschalen: Diese sollten Drainagelöcher haben.
* Anzuchterde: Eine leichte, gut durchlässige Erde ist ideal.
* Feuchtigkeitsspeicherndes Material: Vermiculit oder Perlit helfen, die Feuchtigkeit zu halten.
* Plastiktüten oder eine Mini-Gewächshaus: Um eine hohe Luftfeuchtigkeit zu gewährleisten.
* Geduld: Das Wichtigste!
Die Vorbereitung der Traubenkerne
Dieser Schritt ist entscheidend für den Erfolg. Wir müssen die Kerne aus den Trauben holen und sie auf die Keimung vorbereiten.
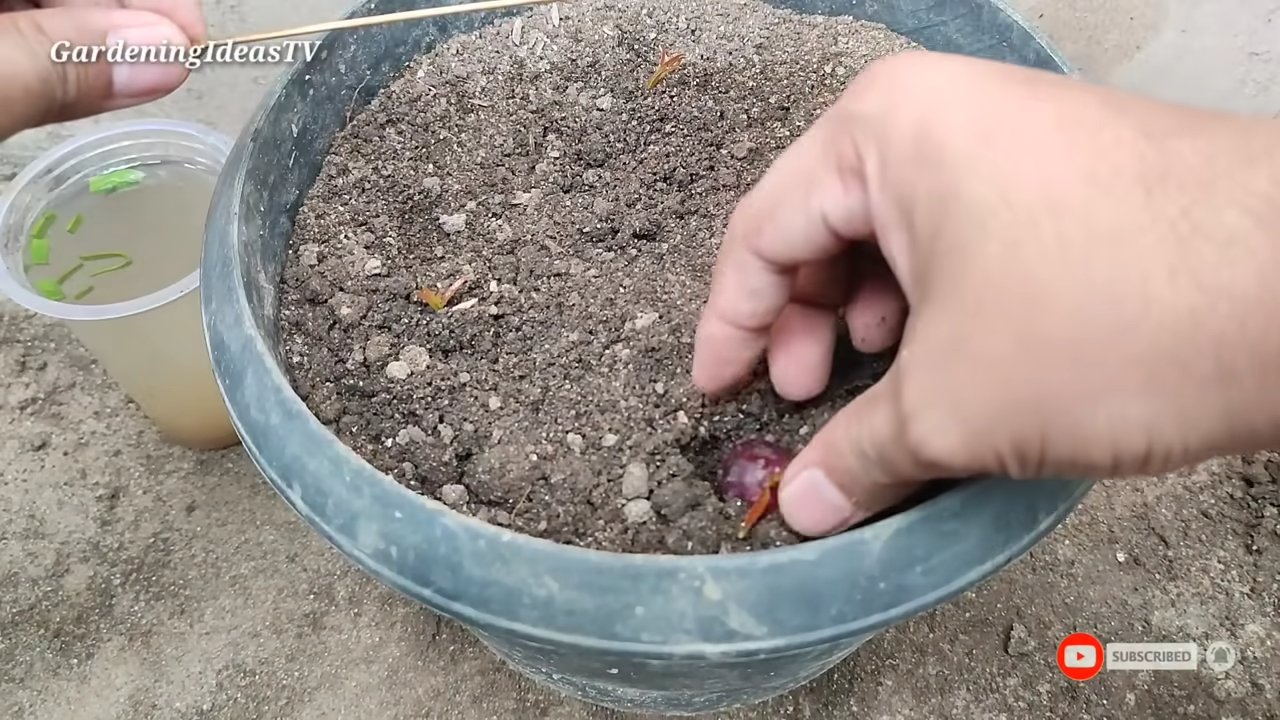
1. Kerne extrahieren: Schneide die Trauben auf und entferne vorsichtig die Kerne. Versuche, die Kerne nicht zu beschädigen.
2. Reinigen: Spüle die Kerne gründlich unter fließendem Wasser ab, um Fruchtfleischreste zu entfernen. Fruchtfleisch kann Schimmel verursachen und die Keimung behindern.
3. Trocknen: Lege die gereinigten Kerne auf ein Papiertuch und lasse sie einige Tage an einem kühlen, trockenen Ort trocknen. Achte darauf, dass sie nicht zusammenkleben.
Die Stratifizierung: Der Kälteschock für die Kerne
Weinrebenkerne benötigen eine Kälteperiode, um ihre Keimruhe zu brechen. Dieser Prozess wird Stratifizierung genannt.
1. Vorbereitung: Befeuchte ein Papiertuch leicht. Es sollte feucht, aber nicht nass sein.
2. Einwickeln: Lege die getrockneten Kerne auf das feuchte Papiertuch und falte es zusammen.
3. Verpacken: Lege das Papiertuch mit den Kernen in einen kleinen, wiederverschließbaren Plastikbeutel.
4. Kühlen: Lege den Beutel in den Kühlschrank. Die ideale Temperatur liegt zwischen 1°C und 5°C.
5. Geduld (Teil 2): Die Kerne müssen mindestens 60 bis 90 Tage im Kühlschrank bleiben. Überprüfe sie regelmäßig (alle paar Wochen), um sicherzustellen, dass das Papiertuch feucht bleibt und sich kein Schimmel bildet. Wenn du Schimmel entdeckst, entsorge die betroffenen Kerne und verwende ein neues Papiertuch.
Aussaat der stratifizierten Kerne
Nach der Kältebehandlung sind die Kerne bereit für die Aussaat.
1. Vorbereitung der Töpfe: Fülle die kleinen Töpfe oder Anzuchtschalen mit Anzuchterde. Mische etwas Vermiculit oder Perlit unter die Erde, um die Drainage zu verbessern und die Feuchtigkeit zu halten.
2. Aussaat: Nimm die stratifizierten Kerne aus dem Kühlschrank und pflanze sie etwa 1 cm tief in die Erde. Lege pro Topf 2-3 Kerne, um die Chancen auf eine erfolgreiche Keimung zu erhöhen.
3. Bewässerung: Gieße die Erde vorsichtig an, bis sie gleichmäßig feucht ist. Vermeide Staunässe.
4. Feuchtigkeit: Decke die Töpfe mit Plastiktüten oder stelle sie in ein Mini-Gewächshaus, um die Luftfeuchtigkeit hoch zu halten.
5. Standort: Stelle die Töpfe an einen warmen, hellen Ort, aber vermeide direkte Sonneneinstrahlung. Eine Temperatur zwischen 20°C und 25°C ist ideal.
Pflege der Sämlinge
Sobald die Sämlinge aus der Erde sprießen, beginnt die eigentliche Arbeit.
1. Belüftung: Sobald die ersten Keimlinge erscheinen, lüfte die Töpfe regelmäßig, um Schimmelbildung zu vermeiden. Entferne die Plastiktüten oder öffne das Mini-Gewächshaus für einige Stunden am Tag.
2. Bewässerung: Halte die Erde feucht, aber nicht nass. Gieße, wenn die oberste Erdschicht trocken ist.
3. Licht: Sorge für ausreichend Licht. Wenn die Sämlinge zu lang und dünn werden (vergeilen), benötigen sie mehr Licht. Du kannst eine Pflanzenlampe verwenden, um ihnen zusätzliches Licht zu geben.
4. Ausdünnen: Wenn mehrere Kerne in einem Topf gekeimt sind, dünne die Sämlinge aus, sobald sie ein paar Zentimeter groß sind. Lasse nur den stärksten Sämling pro Topf stehen.
5. Düngen: Beginne nach einigen Wochen mit dem Düngen. Verwende einen milden Flüssigdünger für junge Pflanzen. Befolge die Anweisungen auf der Verpackung.
Umpflanzen in größere Töpfe
Wenn die Sämlinge größer werden, benötigen sie mehr Platz.
1. Wann umpflanzen: Umpflanze die Sämlinge in größere Töpfe, sobald ihre Wurzeln aus den Drainagelöchern wachsen oder die Pflanzen zu groß für ihre aktuellen Töpfe werden.
2. Vorbereitung: Fülle die größeren Töpfe mit einer Mischung aus Anzuchterde und etwas Kompost.
3. Umpflanzen: Nimm die Sämlinge vorsichtig aus ihren alten Töpfen und pflanze sie in die neuen Töpfe. Achte darauf, dass die Wurzeln nicht beschädigt werden.
4. Bewässerung: Gieße die Pflanzen nach dem Umpflanzen gründlich an.
Aushärten der Pflanzen
Bevor du die Weinreben ins Freie pflanzt, musst du sie an die Bedingungen im Freien gewöhnen. Dieser Prozess wird Aushärten genannt.
1. Beginn: Stelle die Pflanzen für einige Stunden am Tag an einen geschützten Ort im Freien.
2. Steigerung: Verlängere die Zeit, die die Pflanzen im Freien verbringen, jeden Tag um ein paar Stunden.
3. Schutz: Schütze die Pflanzen vor direkter Sonneneinstrahlung und starkem Wind.
4. Dauer: Das Aushärten sollte etwa eine Woche dauern.
Das Auspflanzen ins Freie
Nach dem Aushärten sind die Weinreben bereit für das Auspflanzen.
1. Standort: Wähle einen sonnigen Standort mit gut durchlässigem Boden. Weinreben benötigen mindestens 6 Stunden Sonne pro Tag.
2. Bodenvorbereitung: Grabe ein Loch, das doppelt so breit und tief ist wie der Wurzelballen der Pflanze. Verbessere den Boden mit Kompost oder anderem organischen Material.
3. Pflanzen: Nimm die Weinrebe vorsichtig aus dem Topf und pflanze sie in das Loch. Achte darauf, dass der Wurzelballen auf gleicher Höhe mit dem umgebenden Boden ist.
4. Bewässerung: Gieße die Pflanze nach dem Pflanzen gründlich an.
5. Stütze: Weinreben benötigen eine Stütze, um zu wachsen. Installiere einen Pfahl oder ein Spalier in der Nähe der Pflanze.
Pflege der Weinreben im Freien
Die Pflege der Weinreben ist entscheidend für eine erfolgreiche Ernte.
1. Bewässerung: Gieße die Weinreben regelmäßig, besonders während trockener Perioden.
2. Düngung: Dünge die Weinreben im Frühjahr mit einem ausgewogenen Dünger.
3. Schnitt: Der Schnitt ist wichtig, um die Form der Weinrebe zu erhalten und die Fruchtbildung zu fördern. Informiere dich über die spezifischen Schnitttechniken für deine Rebsorte.
4. Schutz: Schütze die Weinreben vor Schädlingen und Krankheiten. Überwache die Pflanzen regelmäßig und ergreife bei Bedarf Maßnahmen.
Conclusion
So, there you have it – a comprehensive guide to growing grapevines from grapes! It might seem a little unconventional, perhaps even a touch ambitious, but the rewards of nurturing your own grapevine from seed to fruit are immeasurable. Forget the sterile, mass-produced vines from the nursery; this is about connecting with the very essence of the plant, understanding its life cycle from the ground up, and ultimately, enjoying the fruits (literally!) of your labor.
Why is this DIY trick a must-try? Because it’s more than just gardening; it’s an experiment in patience, a lesson in resilience, and a testament to the power of nature. You’re not just planting a vine; you’re cultivating a legacy. You’re creating a living, breathing piece of your own personal history. And let’s be honest, there’s a certain undeniable satisfaction in knowing that the delicious grapes you’re enjoying came from a vine you painstakingly nurtured from a single seed.
But beyond the sentimental value, there are practical benefits too. Growing grapevines from grapes allows you to select varieties that are perfectly suited to your specific climate and soil conditions. You’re not limited to what the local nursery offers; you can experiment with rare or heirloom varieties, creating a truly unique and personalized vineyard experience. Plus, it’s a fantastic way to save money compared to buying established vines, especially if you’re planning a larger planting.
Variations and Suggestions:
Don’t be afraid to experiment! Try different grape varieties to see which ones thrive in your area. Consider using different stratification methods, such as burying the seeds in a pot of soil outdoors during the winter months. You can also try grafting your seedling onto a more established rootstock for increased vigor and disease resistance.
For those living in colder climates, consider growing your grapevines in containers so you can move them indoors during the winter. This allows you to enjoy the beauty and bounty of grapevines even if you don’t have the ideal outdoor growing conditions.
And remember, patience is key. Growing grapevines from grapes is not a quick process. It takes time, dedication, and a little bit of luck. But the journey is just as rewarding as the destination.
We wholeheartedly encourage you to embark on this exciting adventure. Try growing grapevines from grapes and witness the magic unfold before your very eyes. Share your experiences with us! We’d love to hear about your successes, your challenges, and any tips or tricks you discover along the way. Let’s build a community of passionate grape growers, sharing knowledge and inspiring each other to cultivate our own little pieces of paradise.
So, grab some grapes, get your hands dirty, and prepare to be amazed. The world of grape growing awaits!
Frequently Asked Questions (FAQ)
Q: How long does it take to grow a grapevine from a grape?
A: Growing grapevines from grapes is a long-term project. It can take anywhere from 3 to 5 years for a grapevine grown from seed to produce its first significant crop of grapes. The first year is primarily focused on germination and initial seedling growth. The second and third years are dedicated to developing a strong root system and establishing the vine’s structure. By the fourth or fifth year, you should start to see a noticeable yield of grapes. However, the quality and quantity of the grapes will continue to improve as the vine matures. Remember that patience is crucial in this process.
Q: What type of grapes are best for growing grapevines from grapes?
A: While you can technically try growing grapevines from any type of grape, some varieties are more likely to be successful than others. Seeded grapes are generally preferred over seedless varieties, as seedless grapes are often the result of genetic mutations that can affect their ability to reproduce. Look for grapes that are known to be hardy and disease-resistant in your region. Heirloom varieties or grapes that are native to your area are often a good choice. Experimenting with different varieties is part of the fun, but starting with grapes that are known to thrive in your climate will increase your chances of success.
Q: What kind of soil is best for growing grapevines from grapes?
A: Grapevines prefer well-draining soil that is rich in organic matter. A slightly acidic to neutral pH (around 6.0 to 7.0) is ideal. Before planting, amend your soil with compost, aged manure, or other organic materials to improve its fertility and drainage. Avoid heavy clay soils, as they can retain too much moisture and lead to root rot. If you have clay soil, consider planting your grapevines in raised beds or containers to improve drainage. A soil test can help you determine the pH and nutrient levels of your soil and make any necessary adjustments.
Q: How much sunlight do grapevines need?
A: Grapevines require at least 6-8 hours of direct sunlight per day to thrive. Choose a planting location that receives plenty of sunlight throughout the growing season. Insufficient sunlight can lead to poor fruit production and increased susceptibility to diseases. If you live in a particularly hot climate, some afternoon shade may be beneficial to prevent the grapes from scorching.
Q: How often should I water my grapevines?
A: Newly planted grapevines need regular watering to establish a strong root system. Water deeply and regularly, especially during dry periods. Once the vines are established, they are relatively drought-tolerant and don’t require as much watering. However, it’s still important to water them during prolonged periods of drought, especially when the grapes are developing. Avoid overwatering, as this can lead to root rot.
Q: Do I need to prune my grapevines?
A: Yes, pruning is essential for maintaining the health and productivity of your grapevines. Pruning helps to control the size and shape of the vine, improve air circulation, and promote fruit production. The best time to prune grapevines is during the dormant season, typically in late winter or early spring before new growth begins. There are different pruning methods depending on the variety of grape and the desired training system. Research the best pruning techniques for your specific grape variety.
Q: How do I protect my grapevines from pests and diseases?
A: Grapevines can be susceptible to various pests and diseases, such as aphids, Japanese beetles, powdery mildew, and black rot. Regular monitoring and preventative measures are key to protecting your vines. Encourage beneficial insects, such as ladybugs and lacewings, to control pests. Use organic pesticides or fungicides as needed, following the manufacturer’s instructions carefully. Good air circulation and proper pruning can also help to prevent diseases.
Q: Can I grow grapevines in containers?
A: Yes, you can successfully grow grapevines in containers, especially if you live in a colder climate where you need to move the vines indoors during the winter. Choose a large container with good drainage holes. Use a well-draining potting mix that is rich in organic matter. Select a grape variety that is well-suited for container growing, such as dwarf or compact varieties. Provide a trellis or other support structure for the vine to climb. Water regularly and fertilize as needed.
Q: What if my grape seeds don’t germinate?
A: Germination rates can vary depending on the grape variety and the stratification process. If your grape seeds don’t germinate, don’t give up! Try a different stratification method or try again with a new batch of seeds. Make sure the seeds are kept consistently moist during stratification, but not waterlogged. Patience is key, and sometimes it takes a few tries to find the right conditions for germination.
Q: Is growing grapevines from grapes worth the effort?
A: Absolutely! While it requires patience and dedication, growing grapevines from grapes is a rewarding experience that allows you to connect with nature and cultivate your own unique vineyard. The satisfaction of harvesting your own grapes and enjoying the fruits of your labor is well worth the effort. Plus, you’ll gain a deeper understanding of the plant’s life cycle and the art of grape growing.
Leave a Comment