
Growing green beans can seem daunting, especially if you’re new to home gardening. But trust me, with a few clever tricks and DIY hacks, you can be harvesting a bumper crop of these delicious veggies in no time! Forget those bland, store-bought beans – imagine the satisfaction of serving up a plate of fresh, crisp green beans that you nurtured from seed to table.
The history of green beans stretches back centuries, with evidence suggesting they were cultivated in South America as early as 7,000 years ago. Over time, they spread across the globe, becoming a staple in cuisines worldwide. From the classic “three sisters” planting method used by Native Americans (combining beans, corn, and squash) to the French technique of “haricots verts,” cultures have long valued the versatility and nutritional benefits of green beans.
But why do you need these DIY tricks? Well, let’s face it, gardening can be tricky! Pests, diseases, and unpredictable weather can all throw a wrench in your plans. That’s where these simple, effective hacks come in. I’m going to share my favorite tips for growing green beans successfully, even if you have limited space or a less-than-green thumb. These aren’t just random tips; they’re tried-and-true methods that will help you maximize your yield, minimize problems, and enjoy the process of growing your own food. So, grab your gardening gloves, and let’s get started!
DIY: From Seed to Sprout: Growing Green Beans Like a Pro!
Okay, green bean lovers, gather ’round! I’m going to walk you through everything you need to know to grow your own delicious, crisp green beans right in your backyard (or even in containers!). Trust me, there’s nothing quite like the taste of freshly picked, homegrown green beans. It’s easier than you think, and I’m here to break it down step-by-step.
Choosing Your Green Bean Variety
Before we even get our hands dirty, let’s talk beans! There are two main types: bush beans and pole beans.
* **Bush Beans:** These are compact and don’t need support. They’re great for smaller gardens or containers. They produce most of their beans at once, so you’ll have a big harvest all at the same time.
* **Pole Beans:** These are climbers! They need a trellis or some kind of support to grow on. They produce beans over a longer period, giving you a steady supply.
Some popular varieties include:
* **Bush:** Blue Lake Bush, Contender, Provider
* **Pole:** Kentucky Wonder, Blue Lake Pole, Scarlet Runner (these are beautiful and edible!)
I personally love Kentucky Wonder pole beans because they’re super productive and taste amazing. But feel free to experiment and find your favorite!
Preparing Your Garden Bed
Okay, time to get our hands dirty! Green beans need a sunny spot with well-drained soil.
* **Sunlight:** Aim for at least 6-8 hours of direct sunlight per day.
* **Soil:** Green beans aren’t too picky, but they do best in well-drained soil that’s rich in organic matter.
Here’s how I prepare my garden bed:
1. **Clear the Area:** Remove any weeds, rocks, or debris from the area where you’ll be planting.
2. **Amend the Soil:** This is crucial! I like to add compost or well-rotted manure to improve the soil’s fertility and drainage. Spread a 2-3 inch layer of compost over the area.
3. **Till or Dig:** Use a garden fork or tiller to work the compost into the soil. Aim for a depth of about 6-8 inches. This loosens the soil and makes it easier for the bean roots to grow.
4. **Rake it Smooth:** Rake the area to create a smooth, even surface. This will make planting easier.
Planting Your Green Bean Seeds
Now for the fun part! Planting those little seeds that will turn into delicious beans.
* **Timing:** Green beans are warm-weather crops, so you need to wait until the soil has warmed up to at least 60°F (15°C). A good rule of thumb is to plant after the last frost in your area.
* **Direct Sowing:** Green beans are best direct-sown, meaning you plant the seeds directly into the garden. They don’t transplant well.
Here’s how I plant my green bean seeds:
1. **Create Rows:** Use a hoe or your finger to create shallow rows in the soil. For bush beans, space the rows about 18-24 inches apart. For pole beans, space the rows about 3-4 feet apart.
2. **Plant the Seeds:** Plant the seeds about 1 inch deep and 2-3 inches apart for bush beans, and 4-6 inches apart for pole beans.
3. **Cover the Seeds:** Gently cover the seeds with soil and pat it down lightly.
4. **Water Thoroughly:** Water the area well after planting. This helps the seeds germinate.
Setting Up Support for Pole Beans
If you’re growing pole beans, you’ll need to provide them with some kind of support to climb on. There are several options:
* **Trellis:** A trellis is a classic choice. You can buy a pre-made trellis or build your own.
* **Tepee:** A tepee is a fun and easy option. Simply stick several bamboo poles or branches into the ground in a circle, and then tie them together at the top.
* **Fence:** If you have a fence, you can train your pole beans to climb on it.
Here’s how I set up my tepee for pole beans:
1. **Choose a Location:** Select a sunny spot in your garden.
2. **Gather Materials:** You’ll need 5-6 bamboo poles or sturdy branches, twine, and a pair of scissors.
3. **Create a Circle:** Stick the poles into the ground in a circle, spacing them about 1-2 feet apart.
4. **Tie the Top:** Gather the tops of the poles together and tie them securely with twine.
5. **Add Horizontal Supports (Optional):** For extra support, you can tie horizontal pieces of twine between the poles.
Caring for Your Green Bean Plants
Once your green bean plants have sprouted, it’s important to provide them with proper care.
* **Watering:** Water regularly, especially during dry perio
Okay, green bean lovers, gather ’round! I’m going to walk you through everything you need to know to grow your own delicious, crisp green beans right in your backyard (or even in containers!). Trust me, there’s nothing quite like the taste of freshly picked, homegrown green beans. It’s easier than you think, and I’m here to break it down step-by-step.
Choosing Your Green Bean Variety
Before we even get our hands dirty, let’s talk beans! There are two main types: bush beans and pole beans.
* **Bush Beans:** These are compact and don’t need support. They’re great for smaller gardens or containers. They produce most of their beans at once, so you’ll have a big harvest all at the same time.
* **Pole Beans:** These are climbers! They need a trellis or some kind of support to grow on. They produce beans over a longer period, giving you a steady supply.
Some popular varieties include:
* **Bush:** Blue Lake Bush, Contender, Provider
* **Pole:** Kentucky Wonder, Blue Lake Pole, Scarlet Runner (these are beautiful and edible!)
I personally love Kentucky Wonder pole beans because they’re super productive and taste amazing. But feel free to experiment and find your favorite!
Preparing Your Garden Bed
Okay, time to get our hands dirty! Green beans need a sunny spot with well-drained soil.
* **Sunlight:** Aim for at least 6-8 hours of direct sunlight per day.
* **Soil:** Green beans aren’t too picky, but they do best in well-drained soil that’s rich in organic matter.
Here’s how I prepare my garden bed:
1. **Clear the Area:** Remove any weeds, rocks, or debris from the area where you’ll be planting.
2. **Amend the Soil:** This is crucial! I like to add compost or well-rotted manure to improve the soil’s fertility and drainage. Spread a 2-3 inch layer of compost over the area.
3. **Till or Dig:** Use a garden fork or tiller to work the compost into the soil. Aim for a depth of about 6-8 inches. This loosens the soil and makes it easier for the bean roots to grow.
4. **Rake it Smooth:** Rake the area to create a smooth, even surface. This will make planting easier.
Planting Your Green Bean Seeds
Now for the fun part! Planting those little seeds that will turn into delicious beans.
* **Timing:** Green beans are warm-weather crops, so you need to wait until the soil has warmed up to at least 60°F (15°C). A good rule of thumb is to plant after the last frost in your area.
* **Direct Sowing:** Green beans are best direct-sown, meaning you plant the seeds directly into the garden. They don’t transplant well.
Here’s how I plant my green bean seeds:
1. **Create Rows:** Use a hoe or your finger to create shallow rows in the soil. For bush beans, space the rows about 18-24 inches apart. For pole beans, space the rows about 3-4 feet apart.
2. **Plant the Seeds:** Plant the seeds about 1 inch deep and 2-3 inches apart for bush beans, and 4-6 inches apart for pole beans.
3. **Cover the Seeds:** Gently cover the seeds with soil and pat it down lightly.
4. **Water Thoroughly:** Water the area well after planting. This helps the seeds germinate.
Setting Up Support for Pole Beans
If you’re growing pole beans, you’ll need to provide them with some kind of support to climb on. There are several options:
* **Trellis:** A trellis is a classic choice. You can buy a pre-made trellis or build your own.
* **Tepee:** A tepee is a fun and easy option. Simply stick several bamboo poles or branches into the ground in a circle, and then tie them together at the top.
* **Fence:** If you have a fence, you can train your pole beans to climb on it.
Here’s how I set up my tepee for pole beans:
1. **Choose a Location:** Select a sunny spot in your garden.
2. **Gather Materials:** You’ll need 5-6 bamboo poles or sturdy branches, twine, and a pair of scissors.
3. **Create a Circle:** Stick the poles into the ground in a circle, spacing them about 1-2 feet apart.
4. **Tie the Top:** Gather the tops of the poles together and tie them securely with twine.
5. **Add Horizontal Supports (Optional):** For extra support, you can tie horizontal pieces of twine between the poles.
Caring for Your Green Bean Plants
Once your green bean plants have sprouted, it’s important to provide them with proper care.
* **Watering:** Water regularly, especially during dry periods. Green beans need about 1 inch of water per week. Water deeply, soaking the soil around the roots. Avoid watering the foliage, as this can lead to fungal diseases.
* **Weeding:** Keep the area around your green bean plants free of weeds. Weeds compete with the beans for water and nutrients.
* **Fertilizing:** Green beans don’t need a lot of fertilizer, but you can give them a boost with a side dressing of compost or a balanced fertilizer a few weeks after they sprout.
* **Pest Control:** Keep an eye out for pests like aphids, bean beetles, and slugs. You can control these pests with insecticidal soap, neem oil, or by hand-picking them off the plants.
* **Support Training (Pole Beans):** As your pole beans grow, gently guide them onto the trellis or support. They’ll eventually start climbing on their own.
Harvesting Your Green Beans
The moment we’ve all been waiting for! Harvesting those delicious green beans.
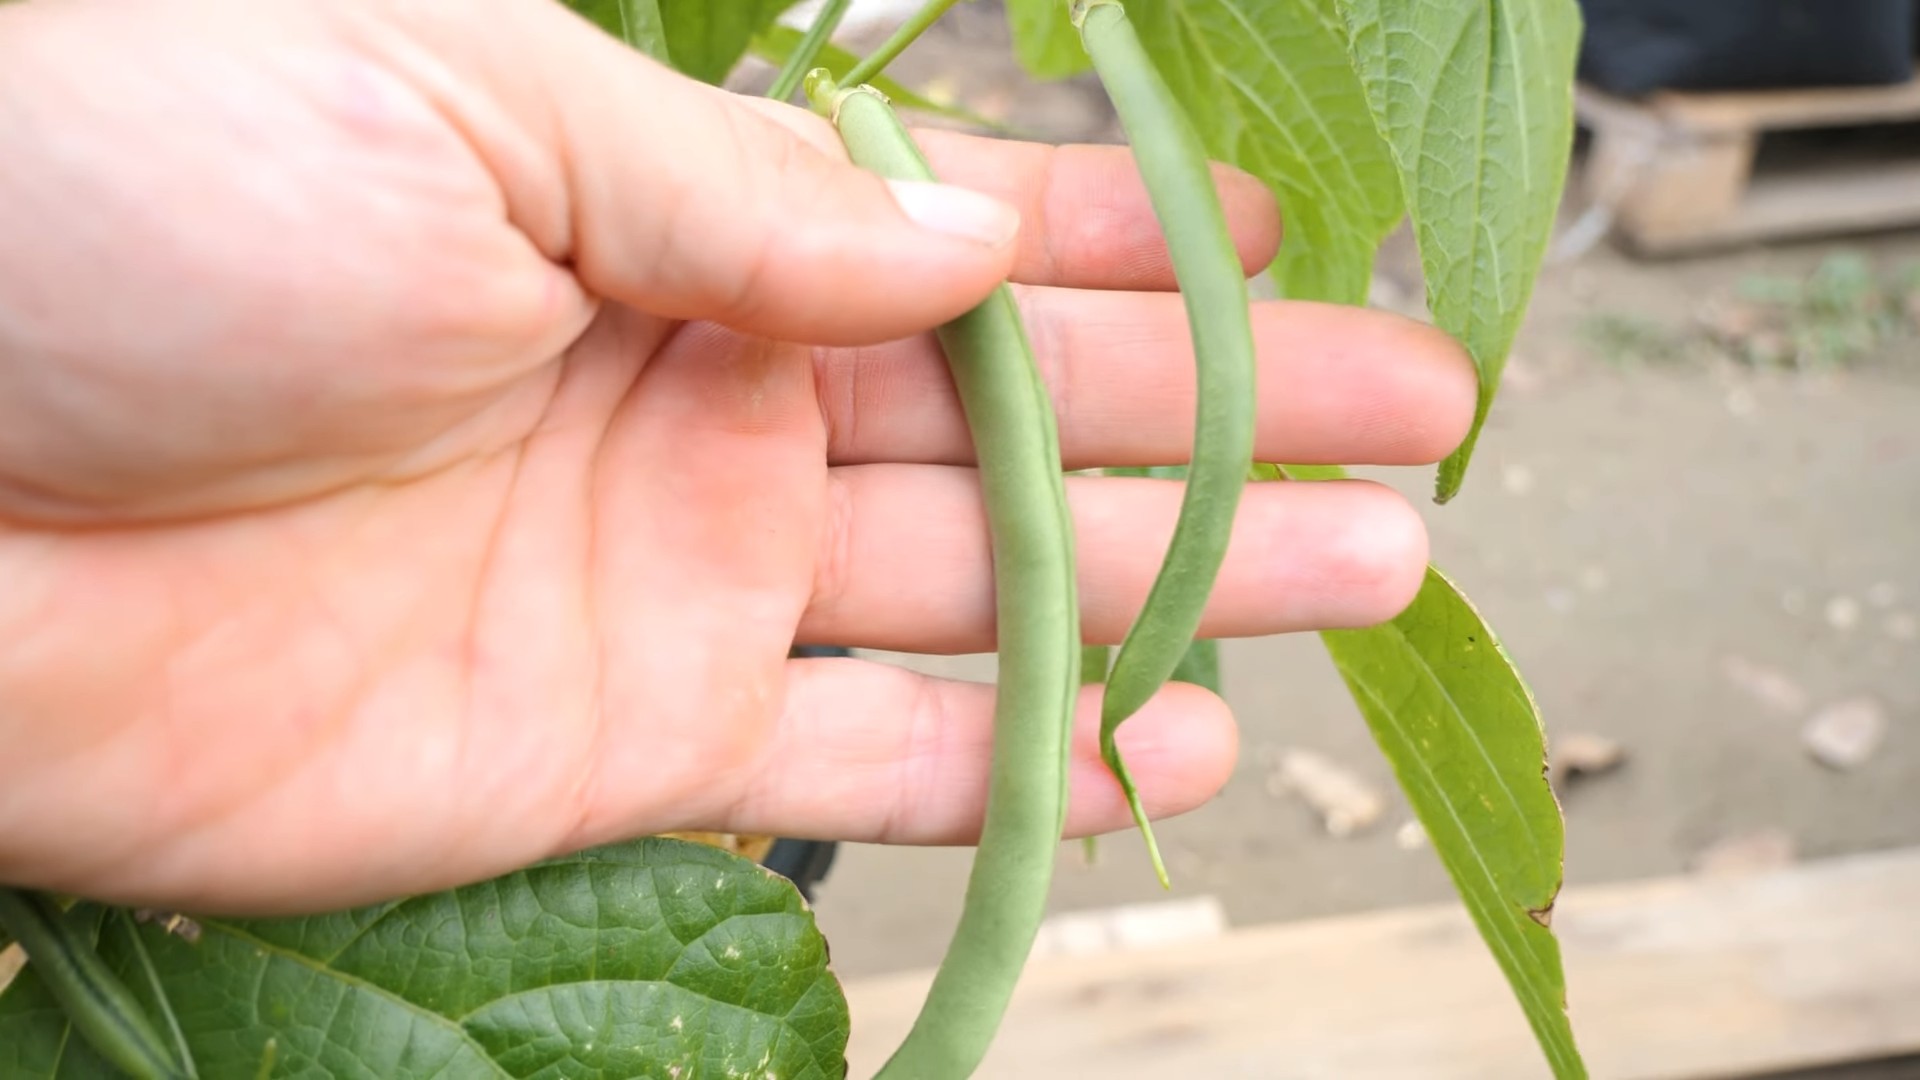
* **Timing:** Green beans are usually ready to harvest about 50-60 days after planting. The pods should be firm, crisp, and snap easily when bent.
* **Harvesting Technique:** Gently snap the beans off the plant, being careful not to damage the stems. Harvest regularly to encourage continued production.
Here’s how I harvest my green beans:
1. **Check for Ripeness:** Look for beans that are firm, crisp, and snap easily.
2. **Gently Snap:** Hold the bean pod near the stem and gently snap it off.
3. **Harvest Regularly:** Harvest your beans every few days to encourage the plant to produce more.
Dealing with Common Problems
Even with the best care, you might encounter some problems while growing green beans. Here are a few common issues and how to deal with them:
* **Yellow Leaves:** This could be a sign of nutrient deficiency. Try adding some compost or a balanced fertilizer to the soil.
* **Bean Beetles:** These pests can damage the leaves and pods. Hand-pick them off the plants or use insecticidal soap.
* **Powdery Mildew:** This fungal disease can cause a white, powdery coating on the leaves. Improve air circulation around the plants and avoid watering the foliage. You can also use a fungicide if necessary.
* **Poor Germination:** This could be due to cold soil, poor-quality seeds, or overwatering. Make sure the soil is warm enough before planting, use fresh seeds, and avoid overwatering.
Extending Your Harvest
Want to enjoy fresh green beans for as long as possible? Here are a few tips for extending your harvest:
* **Succession Planting:** Plant a new batch of green bean seeds every 2-3 weeks to ensure a continuous supply.
* **Choose Different Varieties:** Plant both bush and pole beans to get a longer harvest period. Bush beans will produce a large crop all at once, while pole beans will produce beans over a longer period.
* **Proper Watering and Fertilizing:** Keep your plants healthy and productive by providing them with adequate water and nutrients.
* **Pick Regularly:** Harvest your beans regularly to encourage the plant to produce more.
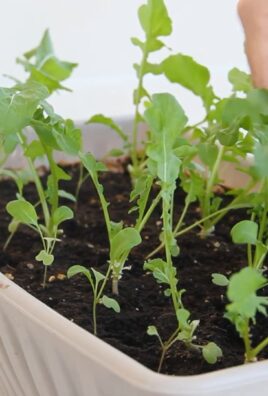
Container Gardening with Green Beans
Don’t have a garden? No problem! You can still grow green beans in containers.
* **Choose the Right Container:** Select a container that is at least 12 inches deep and wide. Make sure it has drainage holes.
* **Use a Good Potting Mix:** Use a high-quality potting mix that drains well.
* **Choose Bush Bean Varieties:** Bush beans are generally better suited for containers than pole beans.
* **Provide Support (If Needed):** If you’re growing pole beans in a container, you’ll need to provide them with a trellis or other support.
* **Water and Fertilize Regularly:** Container plants dry out more quickly than plants in the ground, so you’ll need to water them more often. Fertilize them regularly with a balanced fertilizer.
I’ve grown bush

Conclusion
So, there you have it! Growing green beans at home, especially using our simple DIY trick, is not just a rewarding experience; it’s a game-changer for your garden and your plate. We’ve shown you how to bypass some of the common pitfalls and maximize your yield with minimal effort. Think about it: fresh, crisp green beans, bursting with flavor, picked straight from your backyard and onto your dinner table. You simply can’t beat that!
This method is a must-try because it’s not only cost-effective but also environmentally friendly. You’re reducing your reliance on store-bought produce, which often travels long distances and may be treated with pesticides. Plus, you get the satisfaction of knowing exactly where your food comes from and how it was grown. It’s a win-win situation for you and the planet.
But don’t just take our word for it. We encourage you to experiment with different varieties of green beans. Bush beans are great for smaller spaces, while pole beans offer a more vertical growing option. Consider adding companion plants like marigolds to deter pests or basil to enhance the flavor of your beans. You can even try succession planting, sowing new seeds every few weeks, to ensure a continuous harvest throughout the growing season.
For those looking to get even more creative, consider building a simple trellis system using bamboo stakes or repurposed materials. This not only provides support for your green bean plants but also adds a touch of rustic charm to your garden. You can also explore different soil amendments to improve drainage and nutrient content. Compost, aged manure, and worm castings are all excellent options.
The beauty of gardening lies in its adaptability. What works in one region may not work in another, so don’t be afraid to tweak our DIY trick to suit your specific climate and growing conditions. Pay attention to your plants, observe their growth patterns, and adjust your approach as needed. Remember, every gardening experience is a learning opportunity.
Ultimately, the goal is to enjoy the process and reap the delicious rewards of your labor. We are confident that our DIY trick will help you achieve a bountiful harvest of fresh, flavorful green beans. So, grab your seeds, gather your supplies, and get ready to embark on a green bean growing adventure!
We’re eager to hear about your experiences. Did our DIY trick work for you? Did you encounter any challenges along the way? What varieties of green beans did you grow? Share your stories, tips, and photos in the comments section below. Let’s create a community of green bean enthusiasts and learn from each other. Happy gardening! And remember, mastering the art of growing green beans is within your reach with a little patience and our helpful guide.
Frequently Asked Questions (FAQ)
What is the best time to plant green beans?
The ideal time to plant green beans is after the last frost when the soil has warmed to at least 60°F (15°C). Green beans are sensitive to cold temperatures, so planting too early can stunt their growth or even kill them. In most regions, this typically falls between late spring and early summer. To determine the best planting time for your specific area, consult your local extension office or gardening resources. They can provide information on average frost dates and optimal growing conditions. Remember, a little patience can go a long way in ensuring a successful green bean harvest.
How much sunlight do green beans need?
Green beans thrive in full sun, requiring at least 6-8 hours of direct sunlight per day. Sunlight is essential for photosynthesis, the process by which plants convert light energy into chemical energy for growth. Insufficient sunlight can lead to leggy plants with reduced yields. Choose a planting location that receives ample sunlight throughout the day. If you live in a particularly hot climate, some afternoon shade may be beneficial to prevent the plants from overheating. Monitor your plants closely and adjust their location if necessary to ensure they are receiving adequate sunlight.
What kind of soil is best for growing green beans?
Green beans prefer well-drained, fertile soil with a pH between 6.0 and 7.0. Soil that is too acidic or alkaline can hinder nutrient uptake and affect plant growth. Before planting, amend your soil with compost, aged manure, or other organic matter to improve drainage, fertility, and water retention. Avoid heavy clay soils, as they can become waterlogged and suffocate the roots. If you have clay soil, consider adding sand or perlite to improve drainage. A soil test can help you determine the pH and nutrient levels of your soil and guide you in making necessary amendments.
How often should I water my green beans?
Green beans need consistent moisture, especially during flowering and pod development. Water deeply and regularly, aiming to keep the soil consistently moist but not waterlogged. The frequency of watering will depend on factors such as weather conditions, soil type, and plant size. In general, water your green beans every 2-3 days, or more frequently during hot, dry spells. Use a soaker hose or drip irrigation to deliver water directly to the roots, minimizing water loss through evaporation and reducing the risk of fungal diseases. Avoid overhead watering, as it can wet the foliage and create favorable conditions for disease development.
What are some common pests and diseases that affect green beans?
Green beans are susceptible to a variety of pests and diseases, including aphids, bean beetles, spider mites, powdery mildew, and bean rust. Regularly inspect your plants for signs of infestation or disease. Early detection and treatment are crucial for preventing widespread damage. Use organic pest control methods such as insecticidal soap, neem oil, or diatomaceous earth to control pests. Ensure good air circulation around your plants to reduce the risk of fungal diseases. Remove and destroy any infected plant material to prevent the spread of disease. Crop rotation can also help to reduce the buildup of pests and diseases in the soil.
How do I know when my green beans are ready to harvest?
Green beans are typically ready to harvest 50-60 days after planting. The pods should be firm, crisp, and snap easily when bent. Avoid harvesting beans that are overly mature, as they can become tough and stringy. Harvest your green beans regularly to encourage continued production. Use scissors or pruning shears to cut the pods from the plant, being careful not to damage the stems. Store harvested green beans in the refrigerator for up to a week.
Can I grow green beans in containers?
Yes, green beans can be successfully grown in containers, especially bush bean varieties. Choose a container that is at least 12 inches deep and wide to provide adequate space for root growth. Use a well-draining potting mix and ensure the container has drainage holes to prevent waterlogging. Place the container in a sunny location that receives at least 6-8 hours of direct sunlight per day. Water regularly and fertilize every few weeks with a balanced fertilizer. Provide support for the plants if necessary, such as a small trellis or stakes.
What are some good companion plants for green beans?
Companion planting can be a beneficial strategy for growing green beans. Some good companion plants for green beans include marigolds (to deter pests), basil (to enhance flavor and repel insects), carrots (to improve soil structure), and cucumbers (to provide shade). Avoid planting green beans near onions or garlic, as they can inhibit growth.
How can I improve the yield of my green bean plants?
To maximize the yield of your green bean plants, ensure they receive adequate sunlight, water, and nutrients. Amend your soil with compost or other organic matter to improve fertility and drainage. Provide support for the plants if necessary, such as a trellis or stakes. Harvest your green beans regularly to encourage continued production. Consider succession planting, sowing new seeds every few weeks, to ensure a continuous harvest throughout the growing season. Monitor your plants for pests and diseases and take prompt action to prevent damage.
Leave a Comment