
Growing Kale at Home can seem daunting, but trust me, it’s easier than you think! Have you ever dreamt of stepping into your backyard and harvesting fresh, vibrant kale for a healthy smoothie or a delicious salad? Well, dream no more! This DIY guide is packed with simple tricks and hacks that will transform your garden into a kale-producing powerhouse, even if you’re a complete beginner.
Kale, a nutritional powerhouse, has a rich history dating back to ancient Greece and Rome, where it was a staple food. Over centuries, it has spread across the globe, becoming a symbol of healthy eating and sustainable living. But let’s be honest, buying organic kale at the grocery store can be expensive. That’s where the magic of DIY comes in!
Imagine saving money, reducing your carbon footprint, and enjoying the freshest, most flavorful kale imaginable. This article will equip you with the knowledge and confidence to successfully start growing kale at home. We’ll cover everything from choosing the right variety and preparing your soil to protecting your plants from pests and harvesting your bounty. So, grab your gardening gloves, and let’s get started on this exciting journey to homegrown kale goodness!

Growing Kale: Your DIY Guide for Your Own Garden
Hey garden friends! I love harvesting fresh vegetables directly from the garden, and kale is at the top of my list. It’s super healthy, versatile, and surprisingly easy to grow, even if you don’t have a huge garden. In this guide, I’ll show you how to grow your own kale—step by step and without any complicated technical knowledge. Let’s get started!
What you need: The Preparation
Before we get started, let’s make sure we have everything ready. Here is a list of the things you’ll need for your kale adventure:
- Kale seeds: Choose a variety you like! There are many different types, from curly to smooth-leaved. I personally really like “Nero di Toscana” (also known as Lacinato kale).
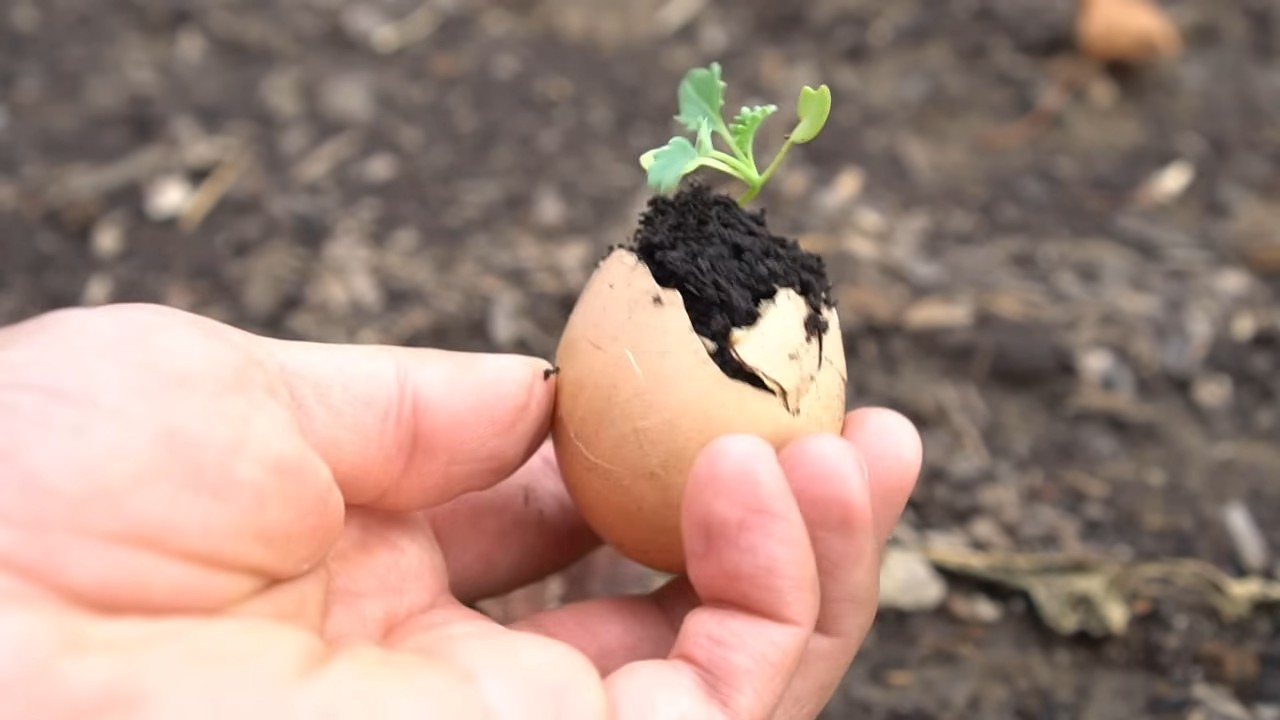
- Starter pots or trays: For starting the seeds. Small pots made of peat or coconut fiber are ideal, as you can simply transplant the seedlings later without damaging the roots.
- Seed-starting mix: This is low in nutrients and loose, perfect for the germination of the seeds.
- Garden soil or compost: For the bed or pot where the kale will later grow.
- Watering can or spray bottle: For watering the seeds and plants.
- Planting trowel or scoop: For transplanting and planting.
- (Optional) Fertilizer: Organic fertilizer like horn shavings or compost tea can promote growth.
- (Optional) Slug protection: Unfortunately, kale is very popular with slugs.
Phase 1: Starting Seeds – Small Seeds, Big Dreams
Starting seeds is the first step to getting healthy kale plants. I usually start in the spring (March/April) so that I can harvest in the fall and winter.
- Prepare the pots: Fill the starter pots or trays with seed-starting mix. Press the soil down lightly, but not too firmly.
- Sow the seeds: Place 2-3 kale seeds in each pot. They should be about 1 cm (0.4 inches) deep in the soil.
- Cover with soil: Cover the seeds with a thin layer of seed-starting mix.
- Water: Gently moisten the soil with a spray bottle or watering can. The soil should be damp, but not wet.
- Keep it warm: Place the pots in a warm, bright location. A windowsill or a greenhouse is ideal. The optimal germination temperature is around 18-22°C (64-72°F).
- Keep it moist: Make sure the soil does not dry out during germination. Spray it regularly with water.
- Be patient: The first seedlings should appear after about 5-10 days.
Phase 2: Pricking Out – Giving the Strong Ones a Chance
As soon as the seedlings have developed a few leaves (about 2-3 weeks after germination), it’s time for pricking out. This means you select the strongest plants and transplant them into larger pots.
- Preparation: Fill larger pots (about 8-10 cm / 3-4 inches in diameter) with garden soil or a mixture of garden soil and compost.
- Selection: Choose the strongest seedlings. They should have healthy leaves and a stable stem.
- Transplanting: Carefully lift the seedlings out of the starter pots with a planting trowel or a dibber. Be careful not to damage the roots.
- Placing: Place the seedlings in the prepared pots. The roots should be completely covered with soil.
- Watering: Water the plants gently.
- Bright location: Place the pricked-out plants in a bright, but not too sunny, location.
Phase 3: Planting Out – Into the Bed (or Pot)!
After the pricked-out plants have grown in their pots for a few weeks and developed strong roots, it’s time to plant them in the garden bed or in larger pots.
- Choose the time: Wait until there is no more danger of frost. This is usually the case from mid-May onwards.
- Prepare the location: Kale loves sunny to partially shaded locations. The soil should be loose, nutrient-rich, and well-draining.
- Improve the soil: If your soil is not ideal, you can improve it with compost or organic fertilizer.
- Dig planting holes: Dig planting holes that are slightly larger than the root balls of the plants.
- Place the plants: Carefully remove the plants from the pots and place them in the planting holes. The top of the root ball should be level with the soil surface.
- Mind the spacing: Ensure there is sufficient space between the plants. Depending on the variety, you should leave about 40-60 cm (16-24 inches) of space.
- Hilling: Fill the planting holes with soil and press it down lightly.
- Watering: Water the plants thoroughly.
- Slug protection: Protect the young plants from slugs. There are various options, such as slug fences, slug pellets (use with caution!), or sprinkling coffee grounds.
Phase 4: Care – So Your Kale Thrives
After planting out, it’s important to care for the kale well so that it thrives magnificently.
- Water regularly: Kale needs regular water, especially during dry periods. Make sure the soil is always slightly moist.
- Fertilize: Fertilize the kale regularly with organic fertilizer like horn shavings or compost tea. This promotes growth and leaf formation.
- Weed: Keep the bed weed-free. Weeds compete with the kale for nutrients and water.
- Combat pests: Watch out for pests like cabbage white butterflies or aphids. You can combat them with natural remedies, e.g., with nettle tea or a garlic brew.
- Loosen the soil: Loosen the soil regularly so that it is well-aerated.
- Remove wilted leaves: Regularly remove wilted or yellow leaves. This encourages the formation of new leaves.
Phase 5: Harvest – Finally, Enjoy Kale!
The harvest season for kale usually begins in the fall and lasts into the winter.
Storage: Kale only keeps in the refrigerator for a few days. It’s best to process it directly after harvesting. However, you can also blanch and freeze it.
Harvest time: You can harvest kale as soon as the leaves are large enough. It tastes best after the first frost, as the bitter compounds are then broken down.
Harvesting technique: Cut the outer leaves with a sharp knife. Leave the heart of the plant so that it can continue to grow.
Harvest regularly: The more often you harvest, the more new leaves the plant will form.
Conclusion
So, there you have it! Growing kale at home is not only achievable, but it’s also a rewarding experience that brings fresh, nutritious greens right to your kitchen. We’ve walked through the simple steps, from choosing the right variety to harvesting your bountiful crop. But why is this DIY trick a must-try?
Firstly, consider the unparalleled freshness. Store-bought kale, even when organic, can’t compete with the vibrant flavor and crisp texture of kale picked straight from your garden. You control the growing environment, ensuring your kale is free from unwanted pesticides and herbicides. This means you’re feeding yourself and your family the healthiest possible greens.
Secondly, growing kale at home is incredibly cost-effective. A single packet of seeds can yield a continuous supply of kale for months, far exceeding the cost of buying it regularly at the grocery store. Think of all the delicious kale salads, smoothies, and side dishes you can create without breaking the bank!
Thirdly, it’s a fantastic way to connect with nature and learn about the food you eat. Gardening is a therapeutic activity that reduces stress and promotes well-being. Watching your kale plants grow from tiny seedlings to leafy greens is a truly satisfying experience.
But the benefits don’t stop there!
Here are a few suggestions and variations to elevate your kale-growing game:
* **Experiment with different varieties:** Beyond the common curly kale, explore options like Lacinato (dinosaur) kale, Red Russian kale, or even ornamental kale for a splash of color in your garden. Each variety offers a unique flavor and texture profile.
* **Succession planting:** Plant new kale seeds every few weeks to ensure a continuous harvest throughout the growing season. This prevents you from being overwhelmed with kale all at once and keeps your supply fresh.
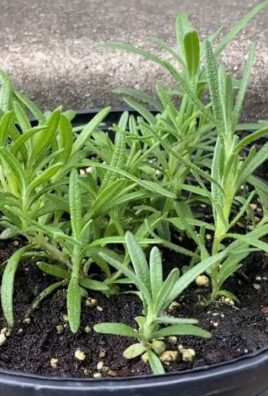
* **Companion planting:** Plant kale alongside beneficial companion plants like marigolds (to deter pests) or herbs like rosemary and thyme (to improve flavor and attract pollinators).
* **Kale chips galore:** When you have an abundance of kale, turn it into crispy, healthy kale chips. Simply toss the leaves with olive oil, salt, and your favorite spices, then bake until crispy.
* **Freezing for later:** If you can’t use all your kale at once, blanch it briefly in boiling water, then freeze it for later use in soups, stews, and smoothies.
We’ve provided you with the knowledge and inspiration to embark on your kale-growing journey. Now, it’s your turn to get your hands dirty! We wholeheartedly encourage you to try growing kale at home. It’s easier than you think, and the rewards are well worth the effort.
Once you’ve harvested your first batch of homegrown kale, we’d love to hear about your experience! Share your tips, tricks, and favorite kale recipes in the comments below. Let’s build a community of kale-loving gardeners and inspire others to embrace the joys of growing their own food. Happy gardening! Remember, mastering the art of growing kale at home is a journey, and every gardener’s experience is unique.
Frequently Asked Questions (FAQ)
What is the best time of year to plant kale?
The best time to plant kale depends on your climate. In cooler regions, you can plant kale in early spring for a summer harvest or in late summer for a fall/winter harvest. In warmer regions, plant kale in the fall or winter for a spring harvest, as kale prefers cooler temperatures. Avoid planting during the hottest months of summer, as the heat can cause the plants to bolt (go to seed).
How much sunlight does kale need?
Kale thrives in full sun, which means at least 6 hours of direct sunlight per day. However, it can tolerate partial shade, especially in hotter climates. If you’re growing kale indoors, use grow lights to supplement natural sunlight. Insufficient sunlight can result in leggy plants with weak growth.
What kind of soil is best for growing kale?
Kale prefers well-drained soil that is rich in organic matter. Amend your soil with compost or aged manure before planting to improve its fertility and drainage. The ideal soil pH for kale is between 6.0 and 7.5. You can test your soil pH with a soil testing kit and adjust it accordingly with lime (to raise pH) or sulfur (to lower pH).
So, there you have it! Growing kale at home is not only achievable, but it’s also a rewarding experience that brings fresh, nutritious greens right to your kitchen. We’ve walked through the simple steps, from choosing the right variety to harvesting your bountiful crop. But why is this DIY trick a must-try?
Firstly, consider the unparalleled freshness. Store-bought kale, even when organic, can’t compete with the vibrant flavor and crisp texture of kale picked straight from your garden. You control the growing environment, ensuring your kale is free from unwanted pesticides and herbicides. This means you’re feeding yourself and your family the healthiest possible greens.
Secondly, growing kale at home is incredibly cost-effective. A single packet of seeds can yield a continuous supply of kale for months, far exceeding the cost of buying it regularly at the grocery store. Think of all the delicious kale salads, smoothies, and side dishes you can create without breaking the bank!
Thirdly, it’s a fantastic way to connect with nature and learn about the food you eat. Gardening is a therapeutic activity that reduces stress and promotes well-being. Watching your kale plants grow from tiny seedlings to leafy greens is a truly satisfying experience.
But the benefits don’t stop there!
Here are a few suggestions and variations to elevate your kale-growing game:
* **Experiment with different varieties:** Beyond the common curly kale, explore options like Lacinato (dinosaur) kale, Red Russian kale, or even ornamental kale for a splash of color in your garden. Each variety offers a unique flavor and texture profile.
* **Succession planting:** Plant new kale seeds every few weeks to ensure a continuous harvest throughout the growing season. This prevents you from being overwhelmed with kale all at once and keeps your supply fresh.
* **Companion planting:** Plant kale alongside beneficial companion plants like marigolds (to deter pests) or herbs like rosemary and thyme (to improve flavor and attract pollinators).
* **Kale chips galore:** When you have an abundance of kale, turn it into crispy, healthy kale chips. Simply toss the leaves with olive oil, salt, and your favorite spices, then bake until crispy.
* **Freezing for later:** If you can’t use all your kale at once, blanch it briefly in boiling water, then freeze it for later use in soups, stews, and smoothies.
We’ve provided you with the knowledge and inspiration to embark on your kale-growing journey. Now, it’s your turn to get your hands dirty! We wholeheartedly encourage you to try growing kale at home. It’s easier than you think, and the rewards are well worth the effort.
Once you’ve harvested your first batch of homegrown kale, we’d love to hear about your experience! Share your tips, tricks, and favorite kale recipes in the comments below. Let’s build a community of kale-loving gardeners and inspire others to embrace the joys of growing their own food. Happy gardening! Remember, mastering the art of growing kale at home is a journey, and every gardener’s experience is unique.
Frequently Asked Questions (FAQ)
What is the best time of year to plant kale?
The best time to plant kale depends on your climate. In cooler regions, you can plant kale in early spring for a summer harvest or in late summer for a fall/winter harvest. In warmer regions, plant kale in the fall or winter for a spring harvest, as kale prefers cooler temperatures. Avoid planting during the hottest months of summer, as the heat can cause the plants to bolt (go to seed).
How much sunlight does kale need?
Kale thrives in full sun, which means at least 6 hours of direct sunlight per day. However, it can tolerate partial shade, especially in hotter climates. If you’re growing kale indoors, use grow lights to supplement natural sunlight. Insufficient sunlight can result in leggy plants with weak growth.
What kind of soil is best for growing kale?
Kale prefers well-drained soil that is rich in organic matter. Amend your soil with compost or aged manure before planting to improve its fertility and drainage. The ideal soil pH for kale is between 6.0 and 7.5. You can test your soil pH with a soil testing kit and adjust it accordingly with lime (to raise pH) or sulfur (to lower pH).
How often should I water kale?
Water kale regularly, especially during dry periods. Aim to keep the soil consistently moist but not waterlogged. Water deeply at the base of the plants, avoiding wetting the leaves, which can promote fungal diseases. Mulching around the plants can help retain moisture and suppress weeds.
What are some common pests and diseases that affect kale?
Common pests that affect kale include aphids, cabbage worms, flea beetles, and slugs. You can control these pests with organic methods such as handpicking, insecticidal soap, or Bacillus thuringiensis (Bt). Common diseases that affect kale include black rot, clubroot, and downy mildew. Prevent these diseases by practicing crop rotation, ensuring good air circulation, and avoiding overhead watering.
How do I harvest kale?
You can begin harvesting kale leaves when they are about 6-8 inches long. Start by harvesting the outer leaves, leaving the inner leaves to continue growing. This allows you to harvest kale continuously for several weeks or even months. Avoid harvesting more than one-third of the plant at a time to ensure it continues to produce.
Can I grow kale in containers?
Yes, kale grows well in containers. Choose a container that is at least 12 inches in diameter and depth. Use a well-draining potting mix and provide adequate sunlight and water. Container-grown kale may require more frequent watering and fertilization than kale grown in the ground.
How do I fertilize kale?
Fertilize kale regularly with a balanced fertilizer or a fertilizer specifically formulated for leafy greens. Apply fertilizer according to the package directions. You can also side-dress kale with compost or aged manure during the growing season. Avoid over-fertilizing, as this can lead to excessive leaf growth and reduced flavor.
My kale plants are bolting (going to seed). What should I do?
Bolting is a natural process that occurs when kale plants are exposed to prolonged periods of heat or stress. Once kale bolts, the leaves become bitter and less palatable. To prevent bolting, plant kale at the appropriate time of year, provide adequate water and shade during hot weather, and harvest leaves regularly. If your kale plants do bolt, you can still harvest the leaves, but they may not taste as good. You can also allow the plants to go to seed and collect the seeds for future planting.
Is kale a good source of nutrients?
Yes, kale is an excellent source of nutrients. It is rich in vitamins A, C, and K, as well as minerals like calcium, iron, and potassium. Kale is also a good source of fiber and antioxidants. Adding kale to your diet can help improve your overall health and well-being.


Leave a Comment