
Growing onions in containers might sound like a challenge reserved for seasoned gardeners, but trust me, it’s a surprisingly simple and rewarding DIY project that anyone can tackle! Forget those sad, overpriced onions at the grocery store. Imagine stepping out onto your balcony or patio and harvesting fresh, flavorful onions whenever you need them.
Onions have been cultivated for thousands of years, with evidence suggesting their use dates back to ancient Egypt and beyond. They were valued not only for their culinary properties but also for their medicinal and even symbolic significance. Now, you can continue this rich history in your own small way, right in your own home!
Why should you try growing onions in containers? Well, for starters, it’s incredibly space-efficient, perfect for apartment dwellers or anyone with limited garden space. Plus, container gardening allows you to control the soil quality and growing conditions, leading to healthier, more robust onions. I’m going to show you some clever DIY tricks and hacks that will make growing onions in containers a breeze, even if you’ve never gardened before. Get ready to enjoy the satisfaction of harvesting your own homegrown onions – it’s easier than you think!
Zwiebeln im Topf ziehen: So geht’s!
Ich liebe es, frische Zutaten direkt vor der Haustür zu haben. Und Zwiebeln sind da keine Ausnahme! Sie sind so vielseitig und ein Muss in fast jedem Gericht. Das Beste daran? Du brauchst keinen riesigen Garten, um deine eigenen Zwiebeln anzubauen. Mit ein paar Töpfen und etwas Geduld kannst du auch auf dem Balkon oder der Terrasse eine reiche Ernte erzielen. Lass uns loslegen!
Was du brauchst:
* Zwiebelsetzlinge oder Zwiebeln aus dem Supermarkt: Setzlinge sind einfacher, aber du kannst auch Zwiebeln verwenden, die bereits ausgetrieben haben.
* Töpfe: Wähle Töpfe mit einem Durchmesser von mindestens 20 cm und einer Tiefe von 25 cm. Je größer der Topf, desto besser!
* Hochwertige Blumenerde: Verwende eine gut durchlässige Blumenerde, die reich an Nährstoffen ist.
* Organischer Dünger: Kompost oder Hornspäne sind ideal, um deine Zwiebeln mit den nötigen Nährstoffen zu versorgen.
* Gießkanne: Zum regelmäßigen Gießen.
* Geduld: Zwiebeln brauchen Zeit, um zu wachsen!
Die richtige Vorbereitung:
Bevor wir mit dem Pflanzen beginnen, ist es wichtig, alles vorzubereiten. Das spart Zeit und sorgt für einen reibungslosen Ablauf.
1. Töpfe vorbereiten: Stelle sicher, dass deine Töpfe Drainagelöcher haben, damit überschüssiges Wasser ablaufen kann. Fülle die Töpfe mit Blumenerde, lasse aber etwa 5 cm Platz bis zum Rand.
2. Erde anreichern: Mische organischen Dünger (Kompost oder Hornspäne) unter die Blumenerde. Das gibt deinen Zwiebeln einen guten Start.
3. Zwiebeln auswählen: Wenn du Zwiebeln aus dem Supermarkt verwendest, wähle solche, die bereits grüne Triebe haben.
Zwiebeln pflanzen: Schritt für Schritt
Jetzt kommt der spannende Teil: das Pflanzen der Zwiebeln!
1. Löcher graben: Grabe kleine Löcher in die Erde, etwa 5 cm tief und 10 cm voneinander entfernt. Wenn du mehrere Zwiebeln in einem Topf pflanzt, achte darauf, dass sie genügend Platz haben.
2. Zwiebeln einsetzen: Setze die Zwiebeln mit den Trieben nach oben in die Löcher. Bedecke die Zwiebeln mit Erde, sodass nur die Spitze der Triebe herausschaut.
3. Angießen: Gieße die Zwiebeln vorsichtig an, bis die Erde gut durchfeuchtet ist. Vermeide Staunässe!
Die richtige Pflege:
Damit deine Zwiebeln prächtig gedeihen, ist die richtige Pflege entscheidend.
1. Standort: Stelle die Töpfe an einen sonnigen Standort. Zwiebeln brauchen mindestens 6 Stunden Sonnenlicht pro Tag.
2. Gießen: Gieße die Zwiebeln regelmäßig, besonders während trockener Perioden. Die Erde sollte immer leicht feucht sein, aber nicht nass.
3. Düngen: Dünge die Zwiebeln alle paar Wochen mit einem organischen Dünger. Das fördert das Wachstum und die Bildung großer Zwiebeln.
4. Unkraut entfernen: Entferne regelmäßig Unkraut aus den Töpfen, damit die Zwiebeln nicht um Nährstoffe konkurrieren müssen.
5. Schädlinge kontrollieren: Achte auf Schädlinge wie Zwiebelfliegen oder Thripse. Bei Bedarf kannst du natürliche Schädlingsbekämpfungsmittel einsetzen.
Erntezeit:
Die Erntezeit hängt von der Zwiebelsorte und den Wachstumsbedingungen ab. In der Regel kannst du deine Zwiebeln nach etwa 3-4 Monaten ernten.
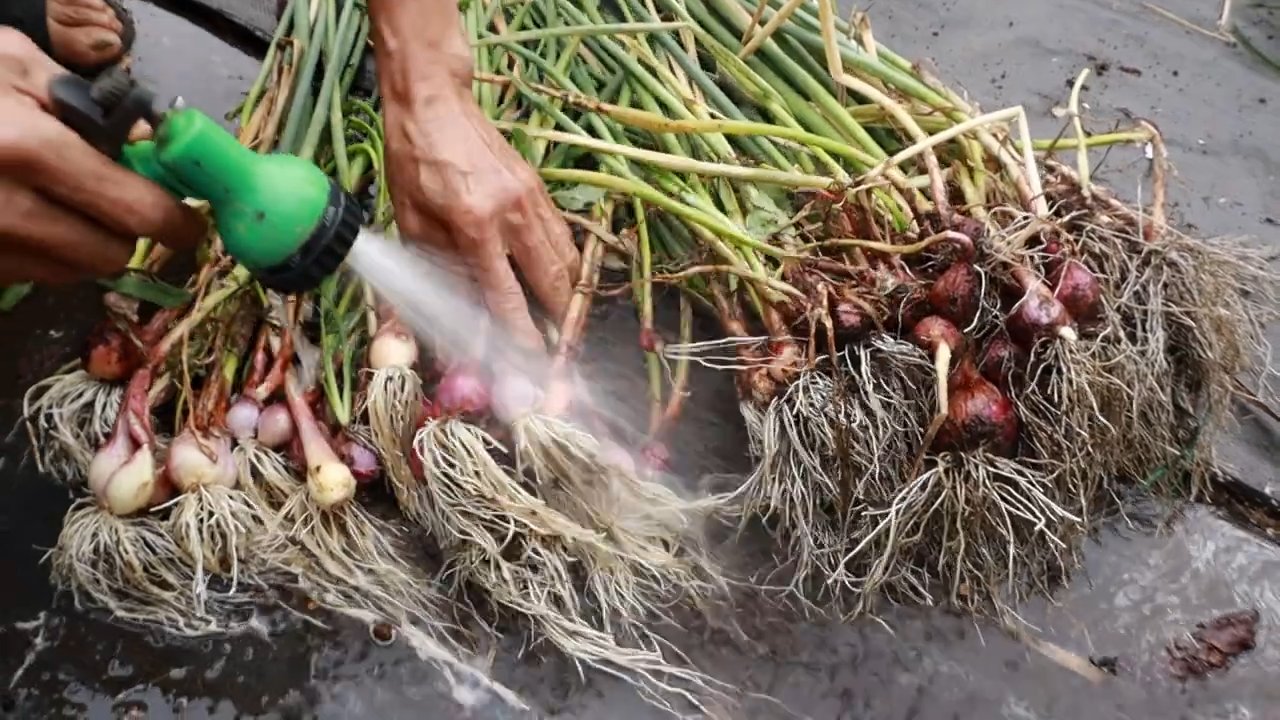
1. Reife erkennen: Die Zwiebeln sind reif, wenn die Blätter gelb werden und umknicken.
2. Ernten: Ziehe die Zwiebeln vorsichtig aus der Erde.
3. Trocknen: Lasse die Zwiebeln an einem trockenen, luftigen Ort trocknen, bevor du sie lagerst.
Spezielle Tipps und Tricks:
Hier sind noch ein paar zusätzliche Tipps, die dir helfen können, deine Zwiebelernte zu optimieren:
* Zwiebeln aus dem Supermarkt: Wenn du Zwiebeln aus dem Supermarkt verwendest, schneide die Spitze ab, bevor du sie pflanzt. Das fördert das Wachstum der Triebe.
* Begleitpflanzung: Pflanze neben deine Zwiebeln Karotten oder Kamille. Diese Pflanzen können Schädlinge abwehren und das Wachstum der Zwiebeln fördern.
* Zwiebelblüten: Wenn deine Zwiebeln blühen, entferne die Blütenstände. Das lenkt die Energie der Pflanze in die Bildung der Zwiebel.
* Verschiedene Sorten: Experimentiere mit verschiedenen Zwiebelsorten, um herauszufinden, welche am besten in deinem Klima und in deinen Töpfen gedeihen. Es gibt rote, gelbe, weiße und sogar Frühlingszwiebeln, die du anbauen kannst.
* Frühlingszwiebeln: Für eine schnelle Ernte kannst du Frühlingszwiebeln anbauen. Diese sind bereits nach wenigen Wochen erntereif. Du kannst sie einfach abschneiden und die Zwiebeln weiterwachsen lassen.
* Zwiebeln lagern: Lagere deine geernteten Zwiebeln an einem kühlen, trockenen und dunklen Ort. So halten sie sich mehrere Monate. Du kannst sie auch einfrieren, aber sie werden dann weicher.
* Zwiebelgrün verwenden: Das grüne Zwiebelgrün ist essbar und kann wie Schnittlauch verwendet werden. Schneide es einfach ab und verwende es in Salaten, Suppen oder als Garnitur.
* Bodenverbesserung: Wenn du merkst, dass deine Zwiebeln nicht gut wachsen, kann es an der Bodenqualität liegen. Mische Kompost oder andere organische Materialien unter die Erde, um sie zu verbessern.
* Schutz vor Frost: Wenn es Frost gibt, solltest du deine Zwiebeln schützen. Du kannst die Töpfe mit Vlies abdecken oder sie an einen geschützten Ort stellen.
* Zwiebeln vermehren: Du kannst Zwiebeln auch aus Samen ziehen. Das ist zwar etwas aufwendiger, aber es ermöglicht dir, eine größere Vielfalt an Sorten anzubauen.
Häufige Probleme und Lösungen:
Auch beim Zwiebelanbau im Topf können Probleme auftreten. Hier sind einige häufige Probleme und wie du sie lösen kannst:
* Gelbe Blätter: Gelbe Blätter können ein Zeichen für Nährstoffmangel, Überwässerung oder Schädlingsbefall sein. Überprüfe die Bodenfeuchtigkeit, dünge die Zwiebeln und kontrolliere sie auf Schädlinge.
* Kleine Zwiebeln: Kleine Zwiebeln können durch zu wenig Sonnenlicht, zu wenig Dünger oder zu dichte Bepflanzung verursacht werden. Stelle die Töpfe an einen sonnigeren Standort, dünge die Zwiebeln regelmäßig und achte darauf, dass sie genügend Platz haben.
* Schädlinge: Zwiebelfliegen und Thripse können deine Zwiebeln befallen. Verwende natürliche Schädlingsbekämpfungsmittel wie Neemöl oder Insektizidseife.
* Pilzkrankheiten: Pilzkrankheiten können durch zu hohe Luftfeuchtigkeit oder schlechte Belüftung verursacht werden. Sorge für eine gute Belüftung und vermeide es, die Blätter beim Gießen zu benetzen.
Fazit:
Zwiebeln im Topf anzubauen ist einfacher als du denkst! Mit ein wenig Vorbereitung, der richtigen Pflege und etwas Geduld kannst du schon bald deine eigenen, frischen Zwiebeln ernten. Es ist ein tolles Gefühl, zu wissen, woher deine Zutaten kommen und wie sie gewachsen sind. Also, worauf wartest du noch? Hol dir ein paar Töpfe, Blumenerde und Zwiebeln und leg los! Ich wünsche dir viel Erfolg und eine reiche Ernte!

Conclusion
So, there you have it! Growing onions in containers is not just a possibility; it’s a surprisingly rewarding and accessible gardening endeavor, even if you’re short on space or new to the world of gardening. We’ve walked through the essential steps, from selecting the right container and soil to nurturing your onion plants to a bountiful harvest. But why should you take the plunge and try this DIY trick?
Firstly, the convenience is undeniable. Container gardening allows you to control the growing environment, protecting your onions from pests and diseases that might plague them in a traditional garden bed. You can easily move your containers to chase the sun or shelter them from harsh weather. This level of control translates to healthier, more productive onion plants.
Secondly, the satisfaction of harvesting your own homegrown onions is immense. Imagine the burst of flavor and freshness you’ll add to your meals with onions you’ve nurtured from tiny sets or seeds. Knowing exactly where your food comes from and the care that went into growing it is a truly special experience.
Thirdly, growing onions in containers is a fantastic way to maximize your gardening space. Even a small balcony or patio can become a thriving onion patch. This makes it an ideal option for apartment dwellers, urban gardeners, or anyone with limited outdoor space.
But the journey doesn’t end here! Feel free to experiment with different onion varieties. Try growing red onions, yellow onions, or even shallots in separate containers to add variety to your harvest. You can also companion plant herbs like rosemary or thyme in the same container to deter pests and enhance the flavor of your onions.
Consider using different types of containers as well. Terracotta pots, plastic containers, or even repurposed buckets can all work well, as long as they have adequate drainage. Get creative and find what works best for your space and aesthetic.
Don’t be afraid to adjust the watering schedule based on your local climate and the specific needs of your onion plants. Regularly check the soil moisture and water accordingly. Remember, consistent moisture is key to healthy onion growth.
Finally, remember that growing onions in containers is a learning process. Don’t be discouraged if you encounter challenges along the way. Every gardening experience is an opportunity to learn and improve.
We wholeheartedly encourage you to give this DIY trick a try. It’s a simple, rewarding, and space-saving way to enjoy fresh, homegrown onions. And most importantly, share your experiences with us! We’d love to hear about your successes, challenges, and any tips or tricks you discover along the way. Post pictures of your container onion gardens, share your favorite onion recipes, and let’s build a community of container gardening enthusiasts. Happy growing!
Frequently Asked Questions (FAQ)
What is the best type of container for growing onions?
The best type of container for growing onions is one that is at least 8-10 inches deep and wide. This allows sufficient space for the onion bulbs to develop properly. Terracotta pots, plastic containers, and even repurposed buckets can be used, provided they have adequate drainage holes. Ensure the container is sturdy enough to support the weight of the soil and plants, especially when the onions mature. Consider the material of the container as well; terracotta tends to dry out faster than plastic, so you may need to water more frequently. Dark-colored containers can also heat up more quickly in direct sunlight, which could affect root health.
How many onion plants can I grow in one container?
The number of onion plants you can grow in one container depends on the size of the container and the variety of onion you’re growing. As a general rule, space onion plants about 3-4 inches apart. For a container that is 12 inches in diameter, you can typically grow 3-4 onion plants. Avoid overcrowding, as this can lead to competition for nutrients and water, resulting in smaller bulbs. If you’re growing larger onion varieties, you may need to reduce the number of plants per container. Observe your plants regularly and thin them out if they appear to be struggling due to overcrowding.
What type of soil is best for growing onions in containers?
Onions thrive in well-draining, fertile soil that is rich in organic matter. A good potting mix specifically formulated for vegetables is ideal. You can also create your own mix by combining equal parts of potting soil, compost, and perlite or vermiculite. The compost provides essential nutrients, while the perlite or vermiculite improves drainage and aeration. Avoid using garden soil in containers, as it can become compacted and hinder root growth. Ensure the soil pH is slightly acidic to neutral, around 6.0 to 7.0. You can test the soil pH using a soil testing kit and amend it accordingly if necessary.
How often should I water my container onions?
Watering frequency depends on several factors, including the weather, the type of container, and the stage of growth. Generally, you should water your container onions whenever the top inch of soil feels dry to the touch. During hot, dry weather, you may need to water daily, while during cooler, wetter periods, you may only need to water every few days. Avoid overwatering, as this can lead to root rot. Ensure the container has adequate drainage to prevent water from pooling at the bottom. When watering, water deeply until water drains out of the drainage holes.
What kind of fertilizer do onions need when grown in containers?
Onions are heavy feeders and require regular fertilization to thrive in containers. Use a balanced fertilizer with an NPK ratio of 10-10-10 or 14-14-14. Apply the fertilizer according to the package instructions, typically every 2-3 weeks during the growing season. You can also supplement with organic fertilizers such as compost tea or fish emulsion. Avoid over-fertilizing, as this can lead to excessive foliage growth at the expense of bulb development. As the onions mature, you can reduce the frequency of fertilization.
How much sunlight do container onions need?
Onions need at least 6-8 hours of direct sunlight per day to grow properly. Choose a location for your container onions that receives ample sunlight throughout the day. If you live in a particularly hot climate, you may need to provide some afternoon shade to prevent the plants from overheating. If you don’t have access to enough natural sunlight, you can supplement with grow lights. Rotate the containers regularly to ensure that all sides of the plants receive adequate sunlight.
How do I protect my container onions from pests and diseases?
Container gardening can help reduce the risk of pests and diseases, but it’s still important to take precautions. Regularly inspect your plants for signs of pests such as aphids, thrips, or onion maggots. If you find any pests, you can treat them with insecticidal soap or neem oil. To prevent fungal diseases, ensure good air circulation around the plants and avoid overwatering. You can also apply a fungicide if necessary. Consider companion planting with herbs like rosemary or thyme, which can help deter pests.
When are container onions ready to harvest?
Container onions are typically ready to harvest when the tops begin to fall over and turn yellow or brown. This usually occurs about 90-120 days after planting, depending on the variety. Once the tops have fallen over, stop watering the onions and allow the bulbs to dry out in the soil for a few days. Then, gently pull the onions from the container and cure them in a warm, dry place for 1-2 weeks. Curing helps to toughen the outer skin and prevent spoilage.
Can I grow onions from seed in containers?
Yes, you can grow onions from seed in containers, although it takes longer than growing from sets or transplants. Start the seeds indoors about 8-10 weeks before the last expected frost. Sow the seeds in a seed-starting mix and keep them moist until they germinate. Once the seedlings are large enough to handle, transplant them into individual pots or cells. Harden them off gradually before transplanting them into their final containers outdoors. Growing onions from seed allows you to choose from a wider variety of onion types.
What are some good companion plants for container onions?
Several plants can benefit from being grown alongside onions in containers. Carrots, chamomile, marigolds, rosemary, and thyme are all good companion plants for onions. Carrots deter onion flies, while onions deter carrot flies. Chamomile is believed to improve the flavor of onions. Marigolds help to repel nematodes and other soil pests. Rosemary and thyme deter onion maggots and other pests. Avoid planting onions near beans or peas, as they can inhibit each other’s growth.
Leave a Comment