
Growing Onions in Plastic Bottles: Sounds a little crazy, right? But trust me, this ingenious DIY trick is about to revolutionize your home gardening game! Forget sprawling garden beds and back-breaking weeding; we’re taking onion cultivation vertical and compact.
For centuries, onions have been a staple in cuisines worldwide, their pungent flavor adding depth to countless dishes. From ancient Egypt, where they were revered and even used as offerings, to modern-day kitchens, onions have held a place of honor. But what if you could grow your own supply, even without a traditional garden? That’s where this clever hack comes in!
In today’s world, space is a premium. Many of us dream of fresh, homegrown produce but are limited by small apartments, balconies, or simply a lack of time for extensive gardening. That’s precisely why growing onions in plastic bottles is such a game-changer. It’s a sustainable, space-saving, and surprisingly effective method that allows anyone, regardless of their living situation, to enjoy the satisfaction of harvesting their own delicious onions. Plus, it’s a fantastic way to recycle those plastic bottles that might otherwise end up in a landfill. I’m excited to show you how easy it is to get started!
Zwiebeln ziehen in Plastikflaschen: Ein DIY-Gartenprojekt für kleine Räume
Hallo Gartenfreunde! Habt ihr auch nur einen kleinen Balkon oder eine winzige Terrasse, aber trotzdem Lust auf frische, selbstgezogene Zwiebeln? Dann habe ich hier genau das Richtige für euch: Zwiebeln ziehen in Plastikflaschen! Das ist nicht nur super platzsparend, sondern auch eine tolle Möglichkeit, Plastikmüll zu recyceln und gleichzeitig euren grünen Daumen zu beweisen. Ich zeige euch, wie es geht!
Was ihr braucht:
* Plastikflaschen: Am besten eignen sich große PET-Flaschen (z.B. von Wasser oder Saft). Je größer die Flasche, desto mehr Platz haben die Zwiebeln zum Wachsen.
* Erde: Normale Blumenerde oder Gartenerde ist perfekt. Ihr könnt auch eine Mischung aus Erde, Kompost und Sand verwenden.
* Zwiebeln: Entweder kleine Steckzwiebeln oder Zwiebeln, die bereits ausgetrieben haben. Letzteres ist eine super Möglichkeit, Zwiebeln zu verwerten, die im Kühlschrank schon etwas länger liegen.
* Messer oder Schere: Zum Zuschneiden der Plastikflaschen.
* Bohrmaschine oder Nagel: Für die Drainage-Löcher.
* Gießkanne oder Sprühflasche: Zum Bewässern der Zwiebeln.
* Optional: Kies oder Blähton für die Drainage.
Schritt-für-Schritt-Anleitung:
1. Flaschen vorbereiten:
* Zuerst müsst ihr die Plastikflaschen gründlich reinigen. Entfernt alle Etiketten und spült sie mit warmem Wasser und Spülmittel aus.
* Schneidet die Flaschen dann in der Mitte durch. Ihr könnt entweder beide Hälften verwenden oder nur die untere Hälfte. Wenn ihr beide Hälften verwendet, könnt ihr die obere Hälfte umgedreht als eine Art Mini-Gewächshaus auf die untere Hälfte setzen. Das ist besonders am Anfang hilfreich, um die Zwiebeln vor Wind und Wetter zu schützen.
* Bohrt oder stecht mit einem Nagel mehrere Löcher in den Boden der Flaschen. Diese Löcher sind wichtig für die Drainage, damit das Wasser ablaufen kann und die Zwiebeln nicht faulen.
2. Drainage anlegen (optional):
* Um Staunässe zu vermeiden, könnt ihr eine Drainageschicht am Boden der Flaschen anlegen. Gebt dazu eine Schicht Kies oder Blähton (ca. 2-3 cm hoch) in die Flaschen.
3. Erde einfüllen:
* Füllt die Flaschen mit Erde. Lasst dabei etwa 2-3 cm Platz bis zum Rand, damit ihr beim Gießen nicht gleich alles überschwemmt.
* Drückt die Erde leicht an.
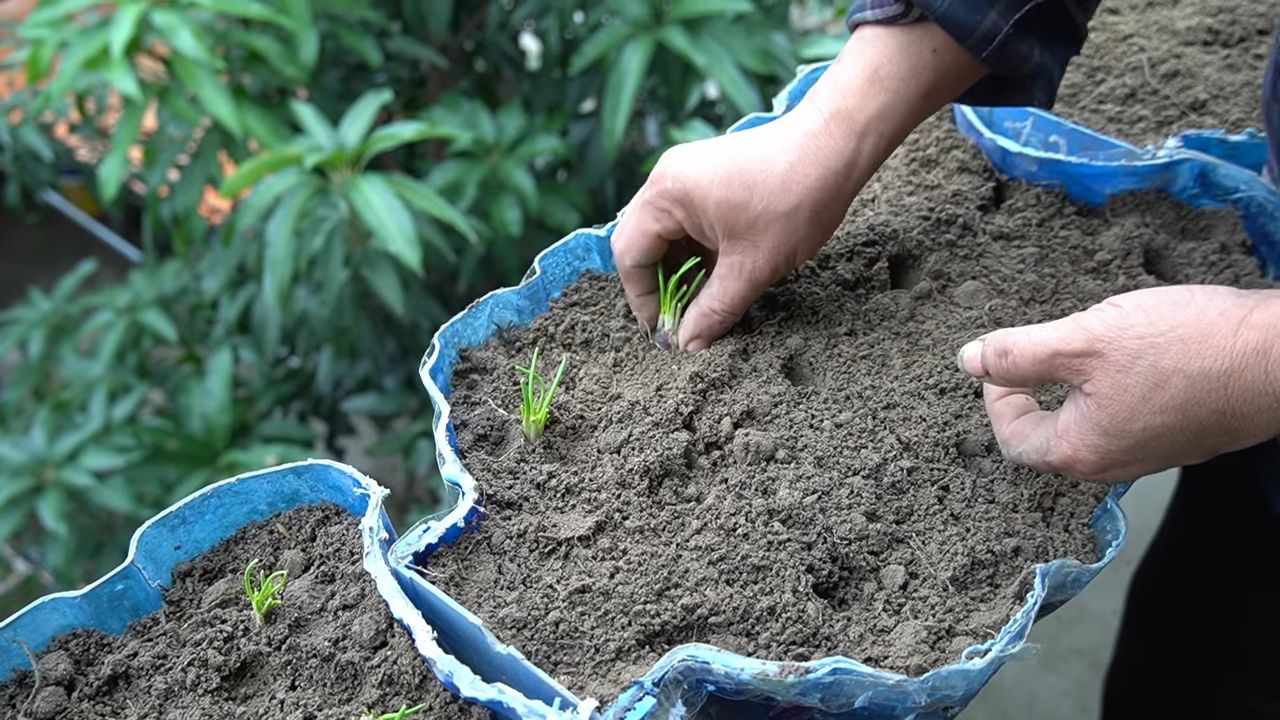
4. Zwiebeln pflanzen:
* Macht kleine Löcher in die Erde, die etwas größer sind als die Zwiebeln.
* Setzt die Zwiebeln mit der Spitze nach oben in die Löcher.
* Bedeckt die Zwiebeln mit Erde, so dass nur noch die Spitze herausschaut.
* Achtet darauf, dass die Zwiebeln genügend Abstand zueinander haben, damit sie genug Platz zum Wachsen haben.
5. Gießen:
* Gießt die Zwiebeln vorsichtig an. Die Erde sollte feucht, aber nicht nass sein.
* Achtet darauf, dass das Wasser gut ablaufen kann.
6. Standort wählen:
* Stellt die bepflanzten Flaschen an einen sonnigen Standort. Zwiebeln brauchen viel Sonne, um gut zu wachsen.
* Ein windgeschützter Platz ist ideal, damit die Zwiebeln nicht umknicken.
7. Pflege:
* Gießt die Zwiebeln regelmäßig, aber nicht zu viel. Die Erde sollte immer leicht feucht sein.
* Entfernt regelmäßig Unkraut, das in den Flaschen wächst.
* Düngen ist in der Regel nicht notwendig, da die Erde ausreichend Nährstoffe enthält. Wenn ihr aber das Gefühl habt, dass die Zwiebeln nicht gut wachsen, könnt ihr etwas organischen Dünger (z.B. Komposttee) ins Gießwasser geben.
Weitere Tipps und Tricks:
* Sortenwahl: Es gibt verschiedene Zwiebelsorten, die sich für den Anbau in Töpfen eignen. Besonders empfehlenswert sind kleine, frühe Sorten wie z.B. Frühlingszwiebeln oder Schalotten.
* Mehrere Zwiebeln pro Flasche: Je nach Größe der Flasche könnt ihr auch mehrere Zwiebeln pro Flasche pflanzen. Achtet aber darauf, dass sie genügend Abstand zueinander haben.
* Beschriftung: Beschriftet die Flaschen mit dem Namen der Zwiebelsorte und dem Pflanzdatum. So behaltet ihr den Überblick.
* Schutz vor Schädlingen: Zwiebeln können von verschiedenen Schädlingen befallen werden, z.B. von Zwiebelfliegen oder Lauchmotten. Kontrolliert die Pflanzen regelmäßig und entfernt befallene Blätter. Bei starkem Befall könnt ihr biologische Schädlingsbekämpfungsmittel einsetzen.
* Ernte: Je nach Sorte sind die Zwiebeln nach einigen Monaten erntereif. Ihr erkennt das daran, dass die Blätter gelb werden und umknicken. Zieht die Zwiebeln vorsichtig aus der Erde.
Zwiebeln aus Küchenabfällen ziehen:
Eine besonders nachhaltige Variante ist es, Zwiebeln aus Küchenabfällen zu ziehen. Das geht ganz einfach:
1. Zwiebelreste sammeln:
* Hebt die unteren Enden von Zwiebeln auf, die ihr beim Kochen verwendet habt. Achtet darauf, dass die Wurzeln noch vorhanden sind.
2. In Wasser stellen:
* Stellt die Zwiebelreste in ein Glas mit Wasser. Die Wurzeln sollten im Wasser stehen, der Rest der Zwiebel sollte trocken bleiben.
3. Wurzeln bilden lassen:
* Stellt das Glas an einen hellen Ort, aber nicht in die direkte Sonne.
* Wechselt das Wasser regelmäßig, am besten alle 1-2 Tage.
* Nach einigen Tagen sollten sich neue Wurzeln bilden.
4. Einpflanzen:
* Sobald die Wurzeln etwa 2-3 cm lang sind, könnt ihr die Zwiebelreste in die vorbereiteten Plastikflaschen einpflanzen.
* Geht dabei genauso vor wie oben beschrieben.
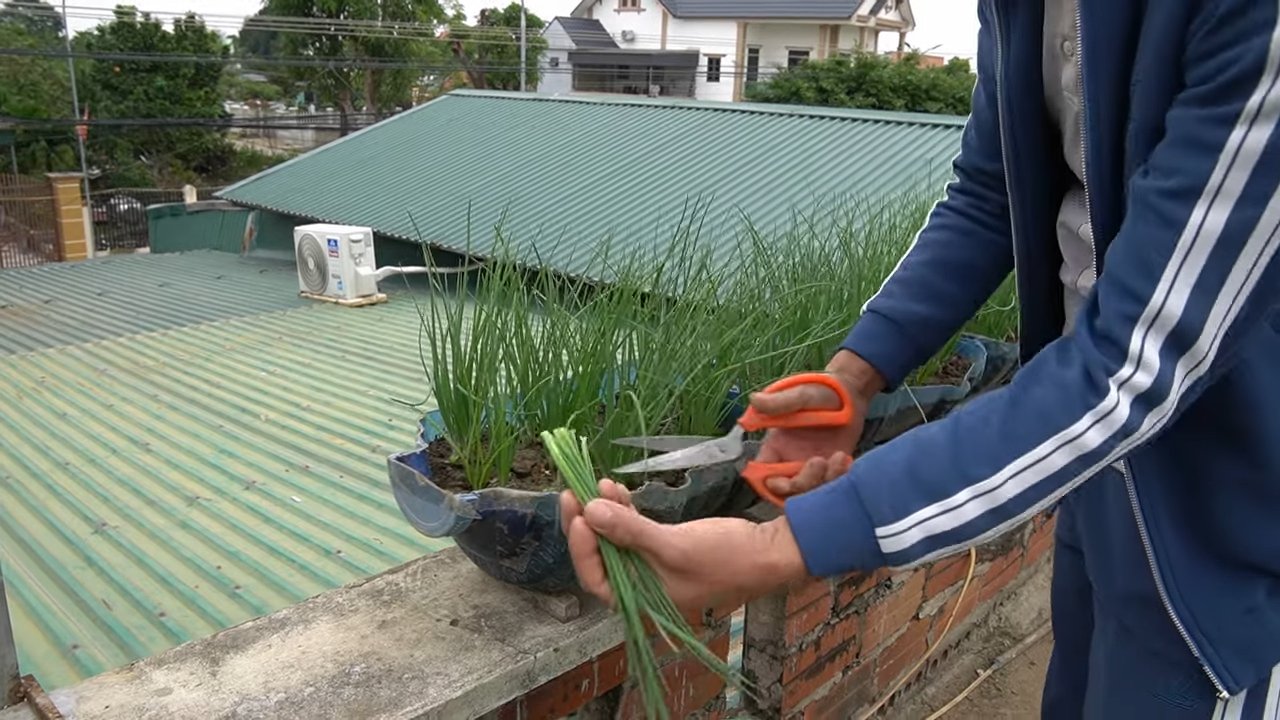
Frühlingszwiebeln immer wieder nachwachsen lassen:
Frühlingszwiebeln sind besonders einfach nachzuziehen. Ihr könnt sie immer wieder nachwachsen lassen, indem ihr nur den grünen Teil abschneidet und den weißen Teil mit den Wurzeln in der Erde lasst.
1. Frühlingszwiebeln ernten:
* Schneidet den grünen Teil der Frühlingszwiebeln ab, so dass etwa 2-3 cm des weißen Teils mit den Wurzeln in der Erde bleiben.
2. Gießen:
* Gießt die Frühlingszwiebeln regelmäßig.
3. Nachwachsen lassen:
* Nach einigen Tagen werden die Frühlingszwiebeln wieder austreiben und ihr könnt sie erneut ernten.
Problemlösung:
* Zwiebeln faulen: Wenn die Zwiebeln faulen, liegt das meistens an Staunässe. Achtet darauf, dass das Wasser gut ablaufen kann und gießt nicht zu viel.
* Zwiebeln wachsen nicht: Wenn die Zwiebeln nicht wachsen, kann das an zu wenig Sonne oder Nährstoffen liegen. Stellt die Flaschen an einen sonnigeren Standort und düngt die Zwiebeln gegebenenfalls.
* Schädlinge: Bei Schädlingsbefall solltet ihr die befallenen Blätter entfernen und gegebenenfalls biologische Schädlingsbekämpfungsmittel einsetzen.
Ich hoffe, diese Anleitung hilft euch dabei, eure eigenen Zwiebeln in Plastikflaschen zu ziehen. Es ist ein wirklich lohnendes Projekt, das nicht nur Spaß macht, sondern auch noch leckere, frische Zwiebeln liefert. Viel
Conclusion
So, there you have it! Growing onions in plastic bottles isn’t just a quirky gardening experiment; it’s a genuinely effective method for maximizing space, minimizing waste, and enjoying a bountiful harvest of fresh, flavorful onions, even if you’re short on garden real estate. This innovative approach allows you to cultivate onions vertically, transforming balconies, patios, and even sunny windowsills into miniature onion farms.
The beauty of this DIY trick lies in its simplicity and accessibility. You’re likely already throwing away plastic bottles, so you’re essentially recycling waste into a valuable resource. Plus, the controlled environment within the bottles can help protect your onions from pests and diseases, leading to healthier and more productive plants. The transparent nature of the bottles also allows you to easily monitor the soil moisture and root development, giving you a clear picture of your onions’ progress.
But don’t just take our word for it! We highly encourage you to try this method yourself. Start with a small batch of onions in a few bottles and see the results firsthand. You might be surprised at how easy and rewarding it is.
Ready to take your onion growing to the next level? Consider these variations:
* Experiment with different onion varieties: While this method works well for most onion types, some varieties might thrive better than others in the confined space. Try growing shallots, scallions, or even smaller bulb onions like pearl onions.
* Add companion plants: Plant herbs like basil or thyme alongside your onions in the bottles. These herbs can help deter pests and improve the overall health of your onion plants.
* Use different types of plastic bottles: While standard water bottles work well, you can also experiment with larger juice or soda bottles for growing larger onion varieties. Just make sure to adjust the drainage holes accordingly.
* Get creative with your setup: Stack the bottles vertically to create a living wall of onions, or hang them from a balcony railing for a unique and eye-catching display.
This method of growing onions in plastic bottles is not only sustainable but also incredibly satisfying. Imagine the pride of harvesting your own homegrown onions, knowing that you’ve contributed to reducing waste and creating a more sustainable food system.
We’re confident that you’ll find this DIY trick to be a game-changer in your gardening endeavors. So, grab some plastic bottles, gather your onion sets or seeds, and get ready to experience the joy of growing your own delicious onions, no matter how limited your space may be.
Don’t forget to share your experiences with us! We’d love to see your photos and hear about your successes (and any challenges you encounter) in the comments below. Let’s build a community of bottle-gardening enthusiasts and inspire others to embrace this innovative and eco-friendly approach to growing their own food. Happy gardening!
Frequently Asked Questions (FAQ)
What type of onions are best for growing in plastic bottles?
While you can grow most onion varieties in plastic bottles, smaller varieties like shallots, scallions (green onions), and pearl onions tend to thrive best due to the limited space. Bulb onions can also be grown, but you might need to use larger bottles and provide more support as they mature. Experimenting with different varieties is part of the fun!
How many onions can I grow in one plastic bottle?
This depends on the size of the bottle and the type of onion you’re growing. For standard water bottles (around 16-20 ounces), it’s generally recommended to plant one to two onion sets or seedlings per bottle. For larger bottles, you can increase the number accordingly, but be sure to provide adequate spacing for each plant to develop properly. Overcrowding can lead to stunted growth and increased susceptibility to diseases.
What kind of soil should I use for growing onions in plastic bottles?
A well-draining potting mix is essential for growing onions in plastic bottles. Avoid using garden soil, as it can become compacted and waterlogged in the confined space. A good potting mix should contain a blend of peat moss, perlite, and vermiculite to provide adequate drainage and aeration. You can also add some compost to the mix to provide additional nutrients for your onion plants.
How often should I water my onions grown in plastic bottles?
Water your onions regularly, keeping the soil consistently moist but not waterlogged. The frequency of watering will depend on the weather conditions and the type of potting mix you’re using. Check the soil moisture level regularly by sticking your finger into the soil. If the top inch feels dry, it’s time to water. Be sure to water thoroughly, allowing excess water to drain out of the drainage holes at the bottom of the bottle.
How much sunlight do onions need when grown in plastic bottles?
Onions need at least 6-8 hours of direct sunlight per day to thrive. Place your plastic bottle onion gardens in a sunny location, such as a south-facing window, balcony, or patio. If you don’t have access to enough natural sunlight, you can supplement with grow lights.
Do I need to fertilize my onions grown in plastic bottles?
Yes, onions are heavy feeders and will benefit from regular fertilization. Use a balanced liquid fertilizer diluted to half strength every two to three weeks. You can also add slow-release fertilizer granules to the potting mix at planting time. Avoid over-fertilizing, as this can lead to excessive foliage growth and reduced bulb development.
How do I prevent pests and diseases when growing onions in plastic bottles?
The controlled environment of plastic bottles can help reduce the risk of pests and diseases, but it’s still important to take preventative measures. Inspect your plants regularly for signs of pests or diseases. If you notice any problems, treat them promptly with appropriate organic pesticides or fungicides. Good air circulation is also important for preventing fungal diseases. Avoid overcrowding your plants and ensure that the bottles are well-ventilated.
How long does it take to grow onions in plastic bottles?
The time it takes to grow onions in plastic bottles depends on the variety of onion you’re growing and the growing conditions. Scallions (green onions) can be harvested in as little as 30-60 days, while bulb onions may take 90-120 days or longer to mature. Be patient and monitor your plants regularly. You’ll know your onions are ready to harvest when the tops start to turn yellow and fall over.
Can I reuse the plastic bottles for growing onions again?
Yes, you can reuse the plastic bottles for growing onions multiple times. However, it’s important to clean and disinfect the bottles thoroughly between plantings to prevent the spread of diseases. Wash the bottles with soap and water, and then rinse them with a solution of bleach and water (1 part bleach to 9 parts water). Allow the bottles to dry completely before reusing them.
What are the benefits of growing onions in plastic bottles compared to traditional gardening?
Growing onions in plastic bottles offers several advantages over traditional gardening, including:
* Space-saving: Ideal for small spaces like balconies, patios, and apartments.
* Waste reduction: Reuses plastic bottles that would otherwise end up in landfills.
* Pest and disease control: The controlled environment can help protect plants from pests and diseases.
* Easy monitoring: The transparent bottles allow you to easily monitor soil moisture and root development.
* Portability: You can easily move the bottles to different locations to optimize sunlight exposure.
* Educational: A great way to teach children about gardening and sustainability.
Can I grow other vegetables in plastic bottles using the same method?
Absolutely! The plastic bottle gardening method can be adapted to grow a wide variety of vegetables, herbs, and flowers. Some popular choices include tomatoes, peppers, lettuce, spinach, strawberries, and basil. Just be sure to choose the right size bottle and provide appropriate growing conditions for each plant.
Leave a Comment