
Growing Sage at Home doesn’t have to be a daunting task! Imagine stepping outside your door and snipping fresh, fragrant sage leaves to add a burst of flavor to your favorite dishes. No more trips to the grocery store for wilted herbs – just vibrant, homegrown goodness at your fingertips.
For centuries, sage has been revered not only for its culinary uses but also for its medicinal properties. Ancient Romans considered it a sacred herb, believing it could grant immortality! While we can’t promise eternal life, we can promise that growing your own sage will enrich your life in countless ways.
In today’s busy world, finding moments of peace and connection with nature is more important than ever. That’s where the magic of growing sage at home comes in. It’s a simple, rewarding activity that can transform your backyard, balcony, or even a sunny windowsill into a thriving herb garden. Plus, learning these DIY tricks and hacks will save you money and reduce your reliance on store-bought herbs, which often lack the intense flavor of freshly grown sage. I’m excited to share some easy and effective methods to help you cultivate a flourishing sage plant, regardless of your gardening experience. Let’s get started!
Growing Sage at Home: Your Comprehensive DIY Guide
Hello garden friends! I’m so excited to show you today how you can easily grow sage at home. Sage is not only an aromatic herb that is versatile in the kitchen, but also a beautiful plant that enriches your garden or balcony. And the best part? It’s really not difficult! Let’s get started!
Why Grow Sage Yourself?
Before we get into the details, I’d like to briefly mention why it’s worth growing your own sage:
- Freshness and Flavor: Homegrown sage is incomparably fresh and more aromatic than dried sage from the supermarket.
- Cost-Effectiveness: Once planted, sage will provide you with fresh leaves for years.
- Decorative: Sage is an attractive plant with silvery-green leaves that also looks great visually.
- Health Benefits: Sage has traditionally been valued for its healing properties.
- Sustainability: You know exactly where your sage comes from and can do without pesticides.
What You Need: The Materials and Tools
Before we start planting, make sure you have everything on hand. Here is a list of the things you’ll need:
- Sage seeds or a sage plant: You can either start with seeds or buy a pre-grown plant. I recommend a plant for beginners, as it’s faster and the chances of success are higher.
- Starter pots or trays (if you’re starting with seeds): Small pots or trays with drainage holes are ideal for starting seeds.
- Potting soil: Good quality is important. It’s best to use special herb soil or a mixture of potting soil and sand.
- A larger pot (if you want to repot the plant): Choose a pot that is slightly larger than the plant’s current pot.
- Watering can or spray bottle: For watering the plants.
- Garden shears or a knife: For harvesting the leaves.
- Optional: Fertilizer for herbs (organic or mineral).
Growing Sage: A Step-by-Step Guide
Now let’s get down to it! Here is a detailed guide on how to successfully grow sage:
Growing Sage from Seed (optional)
If you’ve decided to grow from seed, follow these steps:
- Prepare the starter pots: Fill the starter pots or trays with seed-starting mix. Press the soil down lightly.
- Sow the seeds: Sprinkle the sage seeds evenly over the soil. Cover them only lightly with a thin layer of soil. Sage is a light germinator, which means the seeds need light to sprout.
- Water: Gently moisten the soil with a spray bottle. Make sure the soil is damp, but not wet.
- Location: Place the starter pots in a bright, warm location. A temperature of 20-25°C (68-77°F) is ideal.
- Germination: The seeds usually germinate within 10-21 days. Keep the soil moist during this time.
- Pricking out: As soon as the seedlings are large enough (about 5-7 cm / 2-3 inches high), you can transplant them into larger pots.
Planting Sage (from a plant or seedling)
Whether you’ve bought a pre-grown plant or grown your own seedlings, these steps are important for planting:
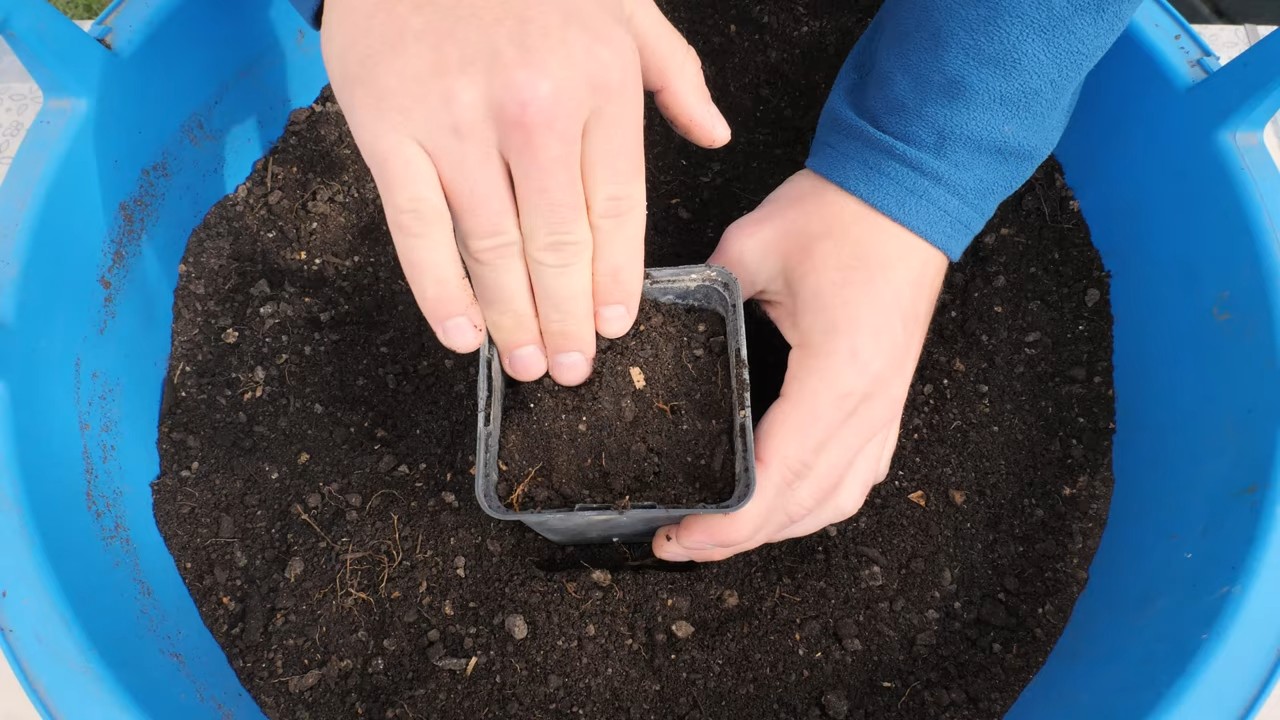
- Prepare the pot: Choose a pot with sufficient drainage holes. Place a layer of clay shards or gravel at the bottom of the pot to prevent waterlogging.
- Fill the pot: Fill the pot with potting soil. Leave about 2-3 cm (1 inch) of space at the top of the pot.
- Remove the plant from the old pot: Gently squeeze the pot to loosen the plant. Carefully pull the plant out by the stem. Be careful not to damage the roots.
- Place the plant: Put the sage plant in the prepared pot. The top of the root ball should be roughly level with the soil surface.
- Fill with soil: Fill the pot with soil and press it down lightly.
- Water: Water the plant thoroughly until water runs out of the drainage holes.
The Right Location for Your Sage
Sage loves the sun! Choose a location that gets at least 6 hours of sunlight per day. A sunny balcony, a windowsill, or a spot in the garden is ideal. Make sure the location is well-ventilated to prevent fungal diseases.
Caring for Sage: Watering, Fertilizing, and Pruning
Proper care is crucial for a healthy and productive sage plant. Here are some tips:
- Watering: Water the sage regularly, but not too much. The soil should be slightly moist, but not wet. Avoid waterlogging, as this can lead to root rot. Let the soil dry out slightly between waterings.
- Fertilizing: Sage does not need much fertilizer. An occasional feeding with an organic herb fertilizer or compost is sufficient. It’s best to fertilize in the spring and summer.
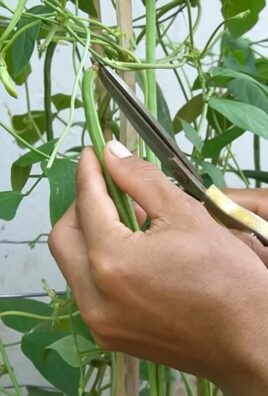
- Pruning: Regular pruning promotes growth and prevents the sage from becoming woody. Cut the plant back in the spring and after flowering. Also, remove dead or diseased shoots. You can also regularly harvest leaves to stimulate growth.
- Overwintering: Sage is hardy, but in cold regions, it can be a good idea to protect the plant in winter. Move the pot to a sheltered location or cover the plant with brushwood.
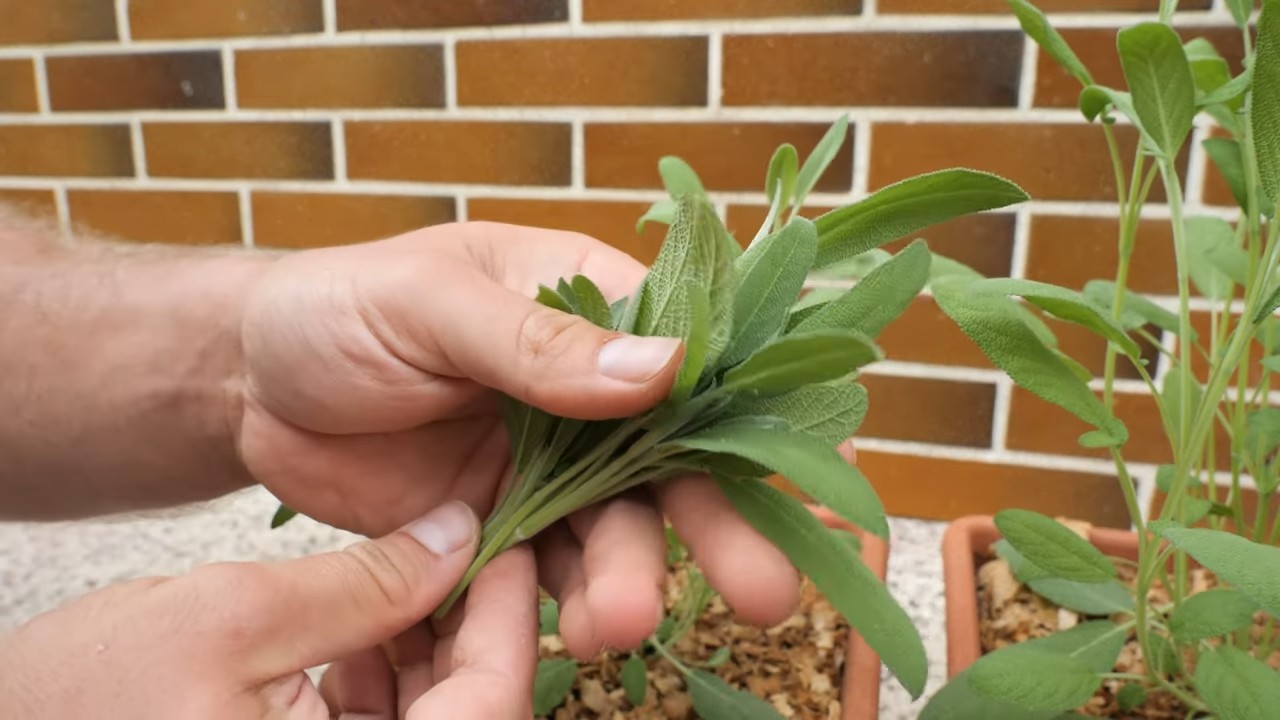
Harvesting Sage: When and How
You can harvest sage all year round, but the best time is just before flowering, as the leaves are most aromatic then. Cut the leaves with garden shears or a knife. You can use the leaves fresh or dry them.
Drying Sage
To dry sage, bundle the sprigs and hang them upside down in a dry, dark, and well-ventilated place. Alternatively, you can spread the leaves on a baking sheet and dry them in the oven at a low temperature (approx. 50°C / 120°F). You can store the dried leaves in an airtight container.
Common Problems and Solutions
Even when growing sage, problems can occur. Here are some common problems and how you can solve them:
Pests: Sage can be infested by aphids, spider mites, or slugs. Combat the pests with natural remedies like neem oil or insecticidal soap.
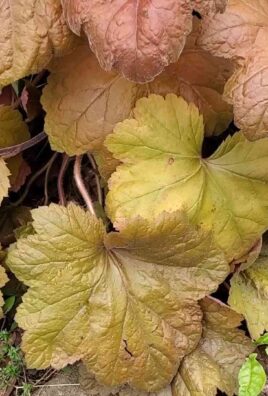
Yellow leaves: Can be caused by overwatering, a nutrient deficiency, or a pest infestation. Check your watering, fertilize the plant, and inspect it for pests.
Fungal diseases: Often occur with high humidity and poor ventilation. Ensure good ventilation and avoid wetting the leaves when watering.
Conclusion
So, there you have it! Growing sage at home isn’t just a gardening project; it’s an investment in flavor, fragrance, and well-being. From the initial thrill of seeing those first tiny leaves emerge to the satisfaction of snipping fresh sprigs for your culinary creations, the entire process is incredibly rewarding. We’ve explored the simple steps, from choosing the right variety and preparing the soil to providing the ideal environment and harvesting your bounty.
But why is this DIY trick a must-try? Because it puts you in control. You know exactly where your sage is coming from, how it’s been grown, and what (if anything) has been used on it. Store-bought herbs, while convenient, often lack the intense flavor and aroma of freshly grown sage. Plus, cultivating your own sage is significantly more cost-effective in the long run. Think of all the delicious dishes you can enhance with your homegrown herb!
Beyond the basic method, there are countless ways to personalize your sage-growing experience. Experiment with different varieties like purple sage for its ornamental value or golden sage for its milder flavor. Consider companion planting – sage thrives alongside rosemary, thyme, and other Mediterranean herbs, creating a fragrant and productive herb garden. You can even dry your excess sage to preserve its flavor for months to come, ensuring you always have a supply on hand. Try creating sage infused olive oil or sage butter for a unique culinary twist.
Don’t be intimidated if you’re a beginner gardener. Growing sage at home is surprisingly easy, even for those without a green thumb. The key is to provide the right conditions – plenty of sunlight, well-drained soil, and regular watering. And remember, even if you encounter a few challenges along the way, the satisfaction of harvesting your own fresh sage will make it all worthwhile.
We truly believe that everyone can benefit from growing their own herbs, and sage is a fantastic place to start. It’s a versatile, flavorful, and relatively low-maintenance plant that will add a touch of magic to your kitchen and garden.
So, what are you waiting for? Grab a pot, some soil, and a sage plant (or seeds!), and embark on your own sage-growing adventure. We’re confident that you’ll be amazed by the results. And most importantly, we want to hear about your experience! Share your tips, tricks, and triumphs in the comments below. Let’s create a community of sage-loving gardeners and inspire others to discover the joy of growing their own herbs. Happy gardening!
Frequently Asked Questions (FAQ)
What is the best time of year to plant sage?
The best time to plant sage depends on whether you’re starting from seeds or cuttings/transplants. If you’re starting from seeds, it’s best to sow them indoors 6-8 weeks before the last expected frost. This gives them a head start. If you’re using cuttings or transplants, you can plant them outdoors in the spring after the last frost or in the early fall, giving them time to establish roots before winter. Spring planting is generally preferred for optimal growth.
How much sunlight does sage need?
Sage thrives in full sun, meaning it needs at least 6-8 hours of direct sunlight per day. Insufficient sunlight can lead to leggy growth, reduced flavor, and increased susceptibility to diseases. If you’re growing sage indoors, place it near a sunny window or use a grow light to supplement natural light.
What kind of soil is best for growing sage?
Sage prefers well-drained soil with a slightly alkaline pH (around 6.0 to 7.0). Heavy clay soils can retain too much moisture, leading to root rot. Amend clay soils with compost, perlite, or sand to improve drainage. A good potting mix for containers should contain a blend of peat moss, perlite, and vermiculite.
How often should I water my sage plant?
Water sage deeply but infrequently, allowing the soil to dry out slightly between waterings. Overwatering is a common mistake that can lead to root rot. Check the soil moisture by sticking your finger about an inch deep. If it feels dry, it’s time to water. During hot, dry weather, you may need to water more frequently.
How do I harvest sage?
You can begin harvesting sage leaves once the plant is established, usually after a few months of growth. The best time to harvest is in the morning, after the dew has dried but before the sun gets too hot. Use sharp scissors or pruning shears to snip off stems, taking care not to remove more than one-third of the plant at a time. This will encourage continued growth.
Can I grow sage indoors?
Yes, sage can be successfully grown indoors, provided you meet its basic needs. Choose a pot that is at least 6 inches in diameter with drainage holes. Use a well-draining potting mix and place the pot in a sunny location, such as a south-facing window. Supplement with a grow light if necessary. Water regularly, allowing the soil to dry out slightly between waterings.
How do I propagate sage?
Sage can be propagated easily from stem cuttings. Take a 4-6 inch cutting from a healthy, non-flowering stem. Remove the lower leaves and dip the cut end in rooting hormone (optional). Plant the cutting in a pot filled with moist potting mix. Cover the pot with a plastic bag or humidity dome to create a humid environment. Keep the soil moist but not soggy. Roots should develop in a few weeks.
What are some common problems with sage plants?
Common problems with sage plants include root rot (caused by overwatering), powdery mildew (a fungal disease that appears as a white powdery coating on the leaves), and pests such as aphids and spider mites. Prevent root rot by ensuring good drainage and avoiding overwatering. Treat powdery mildew with a fungicide or by improving air circulation around the plant. Control aphids and spider mites with insecticidal soap or neem oil.
How do I dry sage?
There are several ways to dry sage. One method is to tie stems together in small bundles and hang them upside down in a cool, dry, well-ventilated place. Another method is to spread the leaves in a single layer on a screen or baking sheet and allow them to air dry. You can also use a dehydrator set to a low temperature. Once the leaves are completely dry and brittle, store them in an airtight container in a cool, dark place.
Can I use sage in cooking?
Absolutely! Sage is a versatile herb that can be used in a wide variety of dishes. It pairs well with poultry, pork, beef, and vegetables. Use it to flavor stuffing, sauces, soups, stews, and roasted meats. Sage can also be used to make sage butter, sage-infused olive oil, and sage tea. Experiment with different recipes to discover your favorite ways to use this flavorful herb.

Leave a Comment