
Growing Sage Indoors doesn’t have to be a daunting task! Imagine fresh, fragrant sage readily available right in your kitchen, ready to elevate your culinary creations. Forget those sad, wilted bunches from the grocery store – with a few simple tricks, you can cultivate your own thriving sage plant, bringing a touch of the Mediterranean to your home.
Sage, with its earthy aroma and slightly peppery flavor, has been cherished for centuries. Ancient Romans revered it as a sacred herb, believing it bestowed wisdom and longevity. In medieval times, it was a staple in medicinal gardens, used for everything from soothing sore throats to aiding digestion. Today, we still appreciate its culinary and therapeutic properties, and growing sage indoors allows us to enjoy its benefits year-round, regardless of the weather outside.
But why bother with DIY sage cultivation? Well, for starters, it’s incredibly rewarding! There’s something truly special about nurturing a plant from a tiny seed or cutting to a flourishing herb. Plus, it’s a fantastic way to save money and reduce your reliance on store-bought herbs, which can often be expensive and lack the vibrant flavor of homegrown varieties. And let’s be honest, who wouldn’t want to impress their friends and family with their green thumb? So, let’s dive into the secrets of successfully growing sage indoors and unlock the potential of this amazing herb!
Growing Sage Indoors: A Comprehensive DIY Guide
Hey there, fellow plant enthusiasts! I’m so excited to share my experience and knowledge on growing sage indoors. It’s easier than you might think, and having fresh sage readily available for cooking or even just enjoying its aroma is a total game-changer. Let’s dive in!
What You’ll Need
Before we get started, let’s gather all the necessary supplies. Trust me, having everything ready beforehand will make the process much smoother.
* Sage Seeds or a Sage Plant: You can start from seeds, which is more rewarding in my opinion, or purchase a small sage plant from a local nursery.
* Pot: Choose a pot that’s at least 6 inches in diameter and has drainage holes. Good drainage is crucial for sage.
* Potting Mix: Use a well-draining potting mix specifically formulated for herbs or vegetables. Avoid using garden soil, as it can become compacted and doesn’t drain well in containers.
* Grow Lights (Optional but Recommended): Sage needs a lot of sunlight, and if you don’t have a sunny windowsill, grow lights are a must.
* Watering Can or Spray Bottle: For gentle watering.
* Small Shovel or Trowel: For planting and transplanting.
* Seed Starting Tray (If starting from seeds): This will help you germinate the seeds before transplanting them.
* Spray Bottle with Water: For misting the seedlings.
Starting from Seeds: A Rewarding Journey
Growing sage from seeds takes a bit more patience, but it’s incredibly satisfying to watch those tiny sprouts emerge. Here’s how I do it:
1. Prepare the Seed Starting Tray: Fill the seed starting tray with your chosen potting mix. Moisten the soil gently with a spray bottle. You want it damp, not soggy.
2. Sow the Seeds: Sprinkle the sage seeds evenly over the surface of the soil. They are quite small, so don’t worry about overcrowding them too much. Lightly cover the seeds with a thin layer of potting mix. Sage seeds need light to germinate, so don’t bury them too deep.
3. Water Gently: Use a spray bottle to mist the surface of the soil again. This will help settle the seeds and ensure they have enough moisture to germinate.
4. Create a Humid Environment: Cover the seed starting tray with a clear plastic lid or plastic wrap to create a humid environment. This will help the seeds germinate faster.
5. Provide Light and Warmth: Place the seed starting tray in a warm location with bright, indirect light. A temperature of around 70-75°F (21-24°C) is ideal. If you don’t have a naturally warm spot, you can use a heat mat designed for seed starting.
6. Monitor and Water: Check the soil moisture daily. Keep the soil consistently moist, but not waterlogged. Mist the soil with a spray bottle as needed.
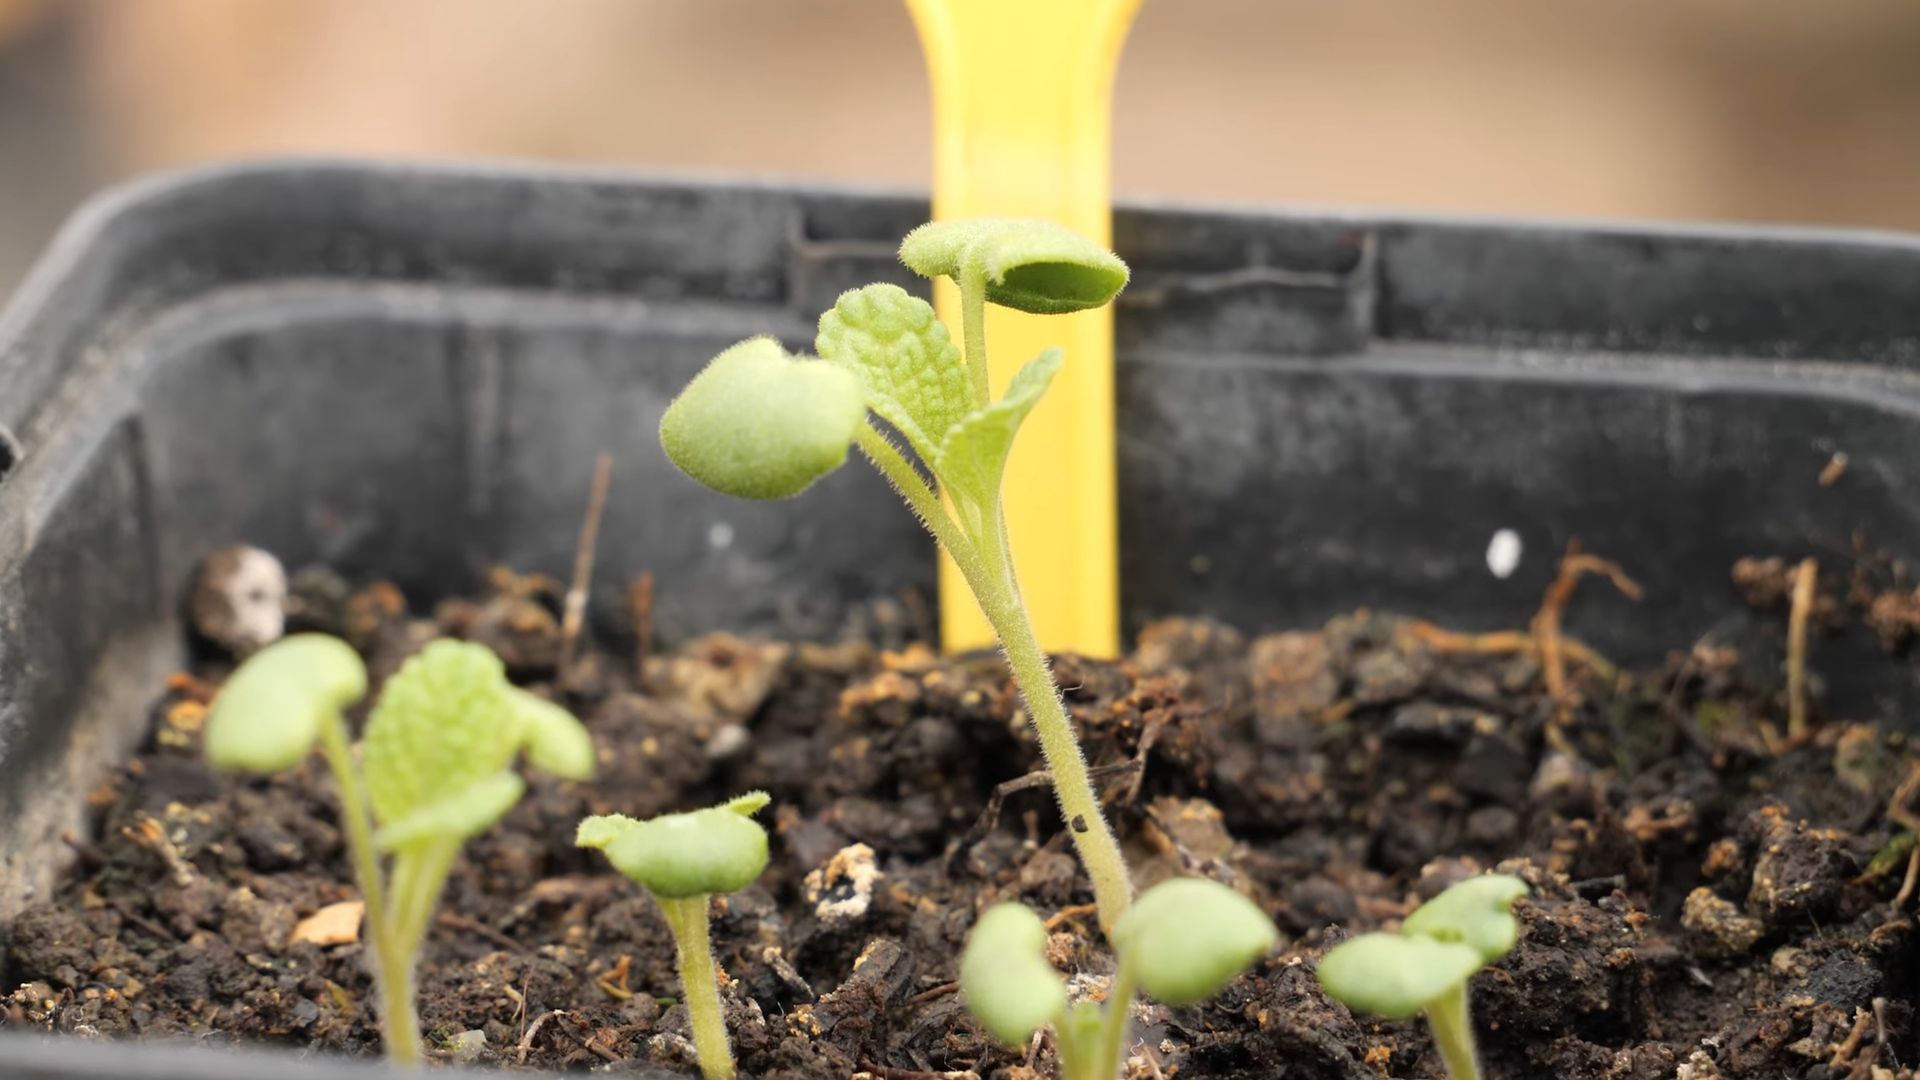
7. Germination: Sage seeds typically germinate in 10-21 days. Once the seedlings emerge, remove the plastic lid or wrap to allow for better air circulation.
8. Provide Adequate Light: Once the seedlings have emerged, they need plenty of light to grow strong and healthy. If you don’t have a sunny windowsill, use grow lights. Position the grow lights a few inches above the seedlings and keep them on for 14-16 hours per day.
9. Thin the Seedlings: Once the seedlings have developed a few sets of true leaves (the leaves that look like miniature sage leaves), thin them out so that they are spaced about 2 inches apart. This will give them enough room to grow.
10. Harden Off the Seedlings: Before transplanting the seedlings into their permanent pots, you need to “harden them off.” This means gradually exposing them to outdoor conditions to help them adjust to the change in environment. Start by placing the seedlings outdoors in a sheltered location for an hour or two each day, gradually increasing the amount of time they spend outdoors over the course of a week.
Planting Sage: Giving Your Sage a Home
Whether you’re transplanting seedlings or planting a purchased sage plant, the process is similar.
1. Prepare the Pot: Fill the pot with your chosen potting mix, leaving about an inch of space at the top.
2. Create a Hole: Dig a hole in the center of the pot that’s large enough to accommodate the root ball of the seedling or plant.
3. Gently Remove the Plant: Carefully remove the seedling or plant from its container. If you’re transplanting a seedling, gently loosen the soil around the roots with your fingers.
4. Place the Plant in the Hole: Place the plant in the hole, making sure that the top of the root ball is level with the surface of the soil.
5. Fill in the Hole: Fill in the hole with potting mix, gently pressing down around the base of the plant to secure it.
6. Water Thoroughly: Water the plant thoroughly until water drains out of the drainage holes.
Caring for Your Indoor Sage: Keeping it Happy and Healthy
Now that your sage is planted, it’s time to provide it with the care it needs to thrive.
1. Light: Sage needs at least 6-8 hours of direct sunlight per day. If you don’t have a sunny windowsill, use grow lights. Position the grow lights a few inches above the plant and keep them on for 14-16 hours per day.
2. Watering: Water your sage plant when the top inch of soil feels dry to the touch. Avoid overwatering, as this can lead to root rot. When you water, water thoroughly until water drains out of the drainage holes.
3. Humidity: Sage prefers relatively low humidity. Avoid placing your sage plant in a humid location, such as a bathroom. If the air in your home is very dry, you can increase the humidity around your sage plant by placing it on a tray filled with pebbles and water. Make sure the bottom of the pot isn’t sitting directly in the water.
4. Temperature: Sage prefers temperatures between 60-70°F (15-21°C). Avoid placing your sage plant near drafts or sources of heat.
5. Fertilizing: Sage doesn’t need a lot of fertilizer. Fertilize your sage plant every 2-3 months with a balanced liquid fertilizer diluted to half strength.
6. Pruning: Prune your sage plant regularly to encourage bushier growth. Pinch off the tips of the stems to promote branching. You can also remove any dead or yellowing leaves.
7. Pest Control: Sage is relatively pest-resistant, but it can occasionally be affected by aphids, spider mites, or whiteflies. If you notice any pests on your sage plant, treat it with insecticidal soap or neem oil.
Harvesting Sage: Enjoying the Fruits (or Leaves!) of Your Labor
Harvesting sage is easy and rewarding. You can start harvesting sage leaves once the plant is established and has grown to a reasonable size.
1. Choose the Right Time: The best time to harvest sage is in the morning, after the dew has dried.
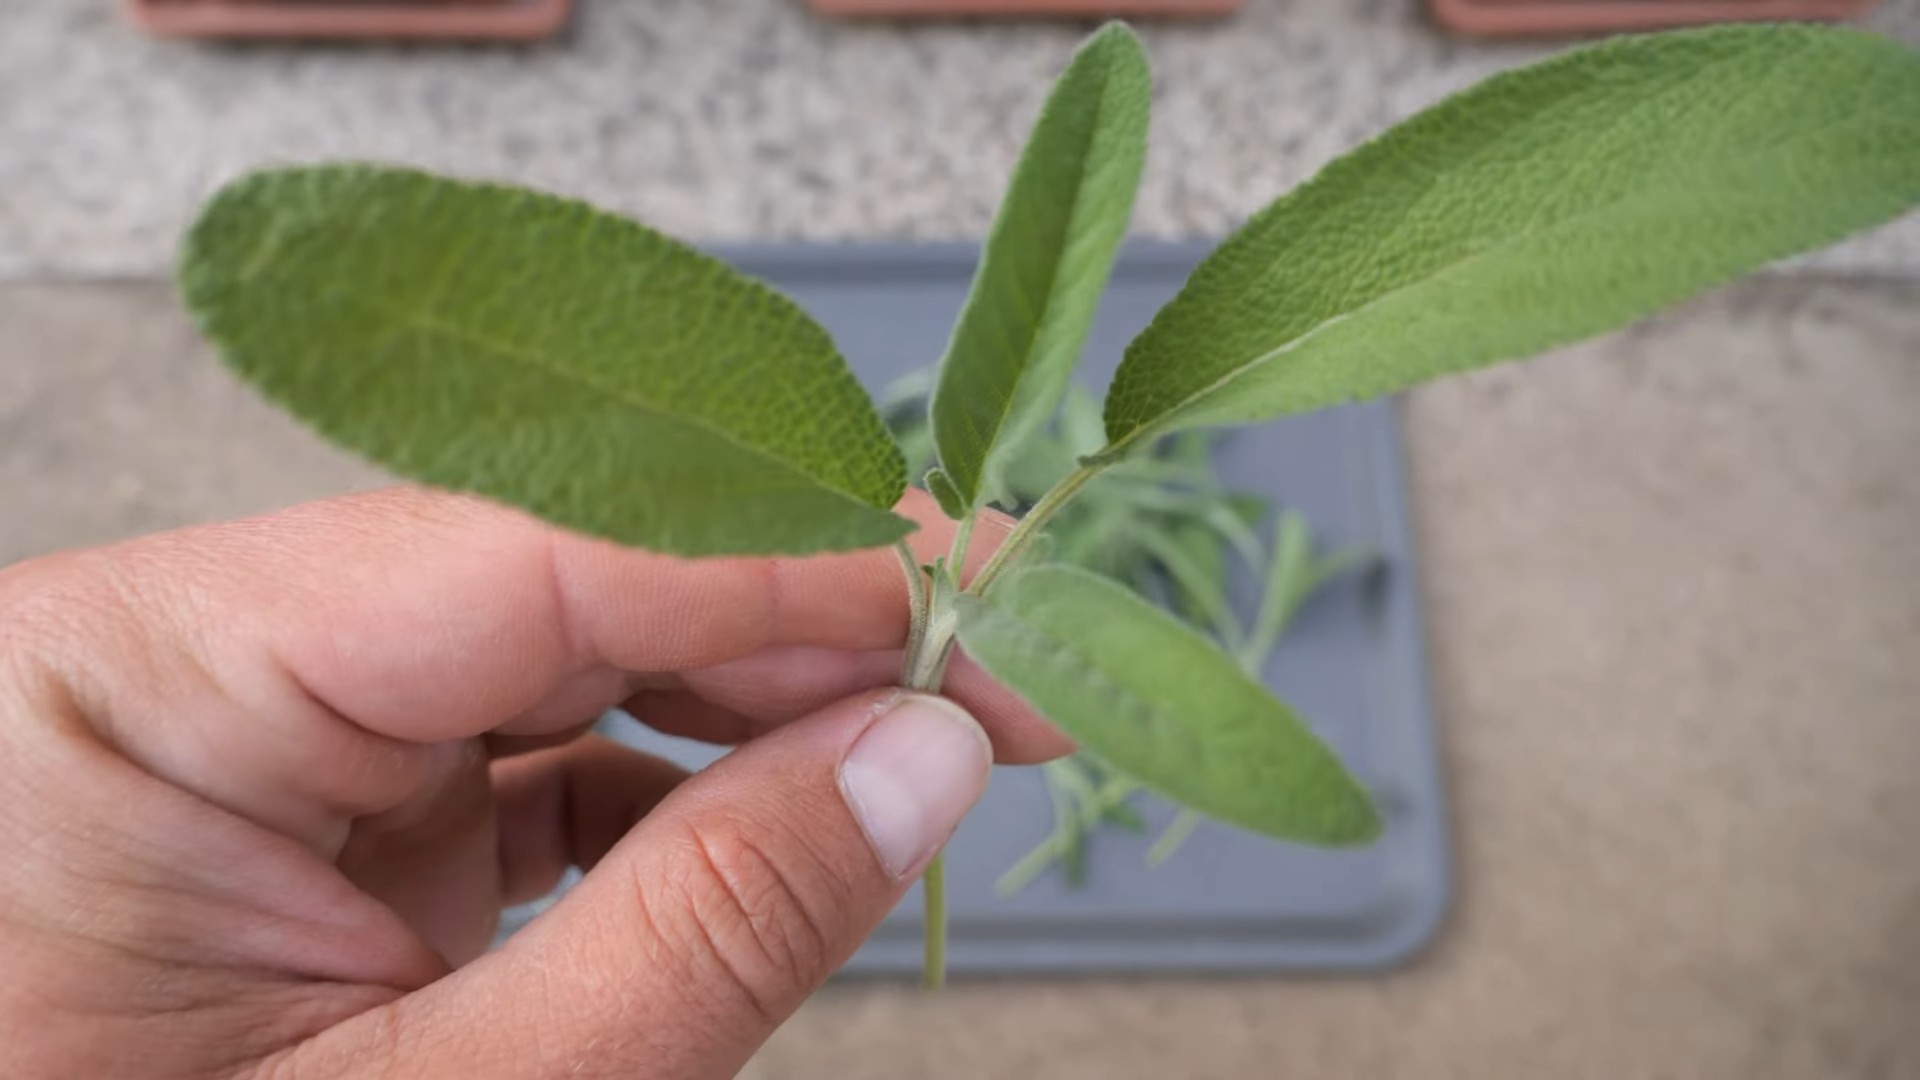
2. Cut the Stems: Use sharp scissors or pruning shears to cut the stems of the sage plant. Cut the stems just above a leaf node (the point where a leaf grows out of the stem).
3. Harvest Regularly: Harvest sage regularly to encourage bushier growth. Don’t remove more than one-third of the plant at a time.
4. Use Fresh or Dried: You can use fresh sage leaves immediately or dry them for later use. To dry sage leaves, tie the stems together and hang them upside down in a cool, dry place. Once the leaves are completely dry, store them in an airtight container.
Troubleshooting: Addressing Common Issues
Even with the best care, you might encounter some issues while growing sage indoors. Here are some common problems and how to address them:
* Yellowing Leaves: Yellowing leaves can be caused by overwatering, underwatering, nutrient deficiencies, or pests. Check the soil moisture and adjust your watering accordingly. Fertilize your sage plant if it’s been a while since you last fertilized it. Inspect the plant for pests and treat it if necessary.
* Leggy Growth: Leggy growth (long, spindly stems with few leaves) is usually caused by insufficient light. Move your sage plant to a sunnier location or provide it with grow lights.
* Root Rot: Root rot is caused by overwatering and poor drainage. Make sure your pot has drainage holes and that you’re not overwatering your sage plant. If you suspect root rot, repot the plant in fresh potting mix.
* Pests: As mentioned earlier, sage can occasionally be affected by aphids, spider mites, or whiteflies. Treat the plant
Conclusion
So, there you have it! Growing sage indoors isn’t just a possibility; it’s a rewarding and surprisingly simple way to bring fresh, aromatic flavor into your kitchen year-round. We’ve walked through the essential steps, from selecting the right variety and providing optimal lighting to ensuring proper watering and addressing potential challenges. But why is this DIY trick a must-try?
Firstly, consider the unparalleled freshness. Store-bought dried sage simply can’t compare to the vibrant, pungent aroma and flavor of freshly harvested leaves. Imagine adding a sprig of homegrown sage to your Thanksgiving stuffing, infusing your roasted chicken with its earthy notes, or brewing a soothing sage tea on a chilly evening. The difference is truly remarkable.
Secondly, think about the convenience. No more last-minute trips to the grocery store when you realize you’re out of sage. With your own indoor sage plant, you’ll always have a readily available supply of this culinary staple. This is especially beneficial for those who use sage frequently in their cooking or herbal remedies.
Thirdly, growing sage indoors is an incredibly cost-effective solution. A single sage plant can provide you with a continuous harvest for months, even years, far outweighing the cost of purchasing dried sage repeatedly. Plus, you have the satisfaction of knowing exactly where your herbs are coming from and how they were grown.
But the benefits extend beyond the practical. Nurturing a plant, watching it grow, and harvesting its bounty is a deeply satisfying experience. It connects you to nature, even in the heart of your home, and provides a sense of accomplishment.
Looking for variations? Consider experimenting with different varieties of sage. Common sage (Salvia officinalis) is a classic choice, but you might also try purple sage for its beautiful foliage and slightly different flavor profile, or golden sage for its vibrant color and milder taste. You can also explore growing other herbs alongside your sage, creating a mini indoor herb garden. Rosemary, thyme, and oregano all thrive in similar conditions and complement sage beautifully in many dishes.
Don’t be afraid to get creative with your sage harvest. Beyond culinary uses, sage can be used to make teas, tinctures, and even homemade cleaning products. Its antibacterial and anti-inflammatory properties make it a valuable addition to your natural medicine cabinet.
We wholeheartedly encourage you to try growing sage indoors. It’s a simple, rewarding, and cost-effective way to enhance your cooking, connect with nature, and enjoy the fresh, aromatic flavor of homegrown herbs year-round. Once you’ve experienced the joy of harvesting your own sage, you’ll never go back to store-bought again.
So, grab a pot, some soil, and a sage seedling or seeds, and embark on this exciting gardening adventure. And most importantly, we want to hear about your experience! Share your tips, successes, and challenges in the comments below. Let’s build a community of indoor sage growers and learn from each other. Happy gardening!
Frequently Asked Questions (FAQ)
What is the best type of sage to grow indoors?
While common sage (Salvia officinalis) is a popular and reliable choice for indoor growing, several other varieties can also thrive indoors. Consider your culinary preferences and the available space when selecting a variety. Purple sage offers beautiful foliage and a slightly different flavor profile, while golden sage provides vibrant color and a milder taste. Dwarf sage varieties are also well-suited for smaller spaces. Ultimately, the best type of sage to grow indoors is the one that you enjoy the most and that adapts well to your indoor environment. Experimenting with different varieties can be a fun way to discover your favorites.
How much sunlight does indoor sage need?
Sage thrives in bright, direct sunlight. Ideally, your indoor sage plant should receive at least six to eight hours of sunlight per day. A south-facing window is typically the best option, but east- or west-facing windows can also work if they provide sufficient light. If you don’t have access to enough natural light, consider supplementing with a grow light. LED grow lights are energy-efficient and provide the full spectrum of light that plants need to thrive. Position the grow light a few inches above the plant and adjust the height as the plant grows. Insufficient light can lead to leggy growth, pale leaves, and reduced flavor.
How often should I water my indoor sage plant?
Watering frequency depends on several factors, including the size of the pot, the type of soil, and the humidity level in your home. As a general rule, water your sage plant when the top inch of soil feels dry to the touch. Avoid overwatering, as this can lead to root rot. Ensure that the pot has drainage holes to allow excess water to escape. When watering, water thoroughly until water drains out of the bottom of the pot. Allow the soil to dry out slightly between waterings. During the winter months, when the plant is not actively growing, you may need to water less frequently.
What kind of soil is best for growing sage indoors?
Sage prefers well-draining soil that is slightly alkaline. A good potting mix for sage should be light and airy, allowing for good drainage and aeration. You can use a commercially available potting mix specifically formulated for herbs, or you can create your own mix by combining equal parts of potting soil, perlite, and vermiculite. Avoid using heavy, clay-based soils, as these can retain too much moisture and lead to root rot. Adding a small amount of lime to the soil can help to increase the pH level, making it more suitable for sage.
How do I harvest sage leaves from my indoor plant?
Harvesting sage leaves is a simple process. Once the plant is established and has several sets of leaves, you can begin harvesting. Use sharp scissors or pruning shears to cut off stems just above a leaf node (the point where leaves emerge from the stem). This will encourage the plant to branch out and produce more leaves. Avoid removing more than one-third of the plant’s foliage at any one time, as this can stress the plant. Harvest leaves in the morning, after the dew has dried, for the best flavor. You can use the fresh leaves immediately or dry them for later use.
How do I dry sage leaves?
There are several ways to dry sage leaves. One common method is to tie small bunches of stems together and hang them upside down in a cool, dry, and well-ventilated place. Avoid direct sunlight, as this can cause the leaves to lose their color and flavor. Another method is to spread the leaves out on a screen or baking sheet and allow them to air dry. You can also use a dehydrator to dry sage leaves quickly. Once the leaves are completely dry and brittle, store them in an airtight container in a cool, dark place.
What are some common problems when growing sage indoors and how do I fix them?
Some common problems when growing sage indoors include pests, diseases, and nutrient deficiencies. Pests such as aphids, spider mites, and whiteflies can infest sage plants. Inspect your plants regularly for signs of infestation and treat them with insecticidal soap or neem oil if necessary. Overwatering can lead to root rot, which can kill the plant. Ensure that the pot has drainage holes and avoid overwatering. Nutrient deficiencies can cause yellowing or stunted growth. Fertilize your sage plant with a balanced liquid fertilizer every few weeks during the growing season.
Can I propagate sage from cuttings?
Yes, sage can be easily propagated from cuttings. Take a 4-6 inch cutting from a healthy stem, removing the lower leaves. Dip the cut end in rooting hormone and plant it in a pot filled with moist potting mix. Cover the pot with a plastic bag or humidity dome to create a humid environment. Keep the soil moist but not soggy. After a few weeks, the cutting should develop roots. Once the roots are established, you can transplant the new sage plant into a larger pot.
How long will my indoor sage plant live?
With proper care, an indoor sage plant can live for several years. Pruning the plant regularly will help to keep it healthy and productive. Repotting the plant every year or two will provide it with fresh soil and nutrients. Monitor the plant for signs of pests or diseases and address any problems promptly. By providing your sage plant with the right conditions and care, you can enjoy its fresh, aromatic leaves for many years to come.

Leave a Comment