
Growing spinach in planters might sound like a small feat, but trust me, it’s a game-changer for anyone craving fresh, vibrant greens right at their fingertips! Imagine stepping onto your balcony or into your backyard and harvesting crisp, vitamin-packed spinach leaves for your salad, smoothie, or even a quick sauté. No more wilted, pre-packaged spinach from the grocery store – just pure, homegrown goodness.
For centuries, spinach has been a staple in diets around the world, revered for its nutritional benefits and versatility. From ancient Persia, where it’s believed to have originated, to its adoption into European cuisine and beyond, spinach has always been a symbol of health and vitality. Now, you can easily bring this tradition into your own home, regardless of your garden size!
Why should you embrace this DIY project? Well, let’s face it, life gets busy. We all want to eat healthier, but finding the time and space for a traditional garden can be a challenge. Growing spinach in planters solves that problem beautifully. It’s a compact, manageable, and incredibly rewarding way to enjoy fresh produce. Plus, it’s a fantastic way to connect with nature, de-stress, and add a touch of green to your living space. I’m excited to share some simple yet effective tricks and hacks that will have you harvesting a bountiful spinach crop in no time!
Growing Spinach in Planters: A Beginner’s Guide
Hey there, fellow garden enthusiasts! I’m so excited to share my experience with growing spinach in planters. It’s surprisingly easy, even if you don’t have a huge backyard. Fresh, homegrown spinach is so much tastier than the store-bought stuff, and knowing you grew it yourself is incredibly rewarding. Let’s dive in!
Choosing the Right Planter and Location
Before we get our hands dirty, let’s talk about the essentials. Picking the right planter and location is crucial for happy, healthy spinach.
* Planter Size: Spinach doesn’t need a super deep container, but it does need space to spread out. I recommend a planter that’s at least 6-8 inches deep and 12 inches wide. This gives the roots enough room to grow without being cramped. You can use individual pots for each plant, or a larger trough-style planter to grow several plants together.
* Drainage: This is non-negotiable! Spinach hates sitting in soggy soil. Make sure your planter has drainage holes at the bottom. If it doesn’t, you can drill some yourself.
* Material: Plastic, terracotta, or even fabric planters work well. I personally like terracotta because it’s breathable and helps prevent overwatering, but plastic is more lightweight and retains moisture better, which can be helpful in hotter climates.
* Location, Location, Location: Spinach thrives in cool weather and needs at least 4-6 hours of sunlight per day. However, in hotter climates, it appreciates some afternoon shade to prevent bolting (going to seed prematurely). A spot that gets morning sun and afternoon shade is ideal. If you’re growing indoors, a sunny windowsill or grow lights will do the trick.
Preparing the Soil
Now, let’s get down to the nitty-gritty – the soil! Spinach needs well-draining, nutrient-rich soil to flourish.
* The Perfect Mix: I like to use a mix of potting soil, compost, and perlite. The potting soil provides a good base, the compost adds nutrients, and the perlite improves drainage. A good ratio is 2 parts potting soil, 1 part compost, and 1 part perlite.
* pH Level: Spinach prefers a slightly acidic to neutral soil pH, around 6.5 to 7.0. You can test your soil’s pH with a soil testing kit, which you can find at most garden centers. If your soil is too acidic, you can add some lime to raise the pH.
* Avoid Garden Soil: Don’t use garden soil in your planters! It’s often too heavy and doesn’t drain well, which can lead to root rot. Potting soil is specifically formulated for container gardening and provides the right balance of drainage and nutrients.
Planting the Spinach Seeds
Alright, time to plant those seeds! This is the fun part.
* Timing is Key: Spinach is a cool-season crop, so the best time to plant it is in early spring or early fall. Avoid planting during the hottest months of summer, as the heat can cause the spinach to bolt.
* Sowing the Seeds: Sow the seeds about ½ inch deep and 1 inch apart. You can either sprinkle the seeds evenly over the surface of the soil or plant them in rows. I prefer planting in rows because it makes it easier to weed later on.
* Watering: Gently water the soil after planting, making sure not to wash away the seeds. Keep the soil consistently moist, but not soggy, until the seeds germinate.
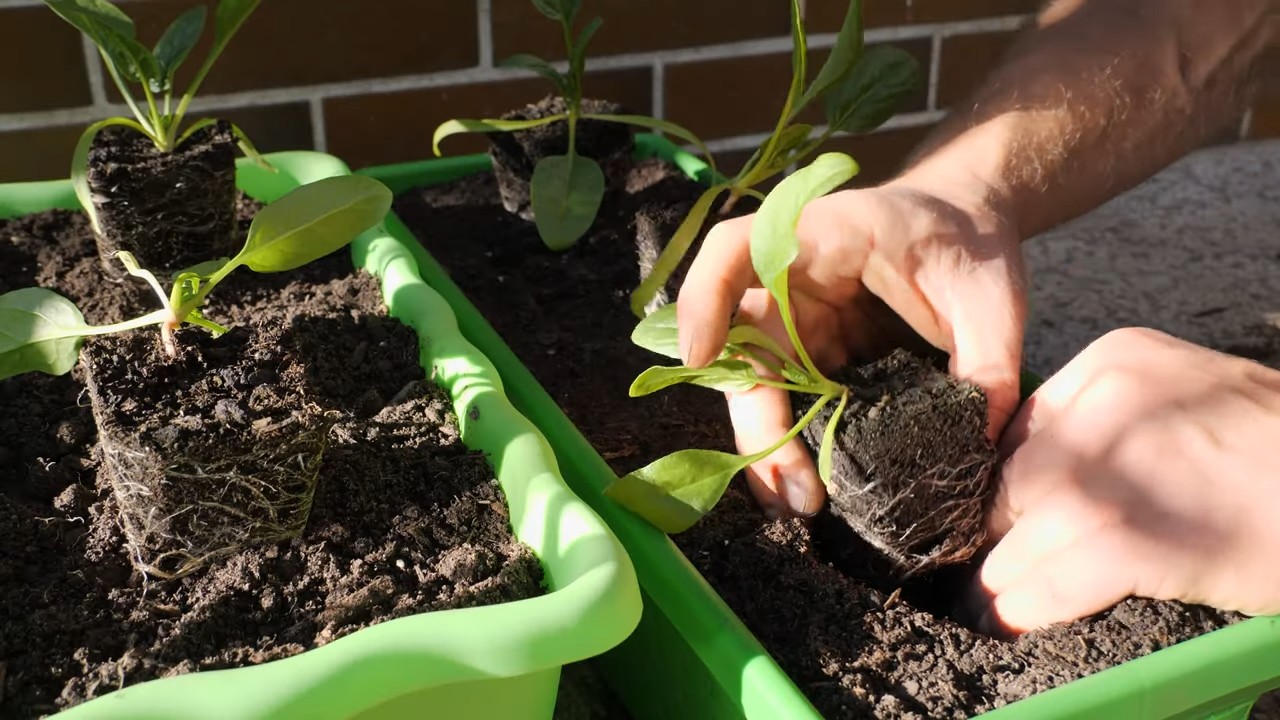
* Germination: Spinach seeds typically germinate in 5-10 days, depending on the temperature. Once the seedlings emerge, thin them out so that they are about 3-4 inches apart. This will give them enough room to grow and prevent overcrowding.
Caring for Your Spinach Plants
Once your spinach plants are established, it’s important to provide them with the right care to keep them healthy and productive.
* Watering: Water your spinach plants regularly, especially during dry spells. The soil should be consistently moist, but not waterlogged. I usually water my spinach plants every other day, or more often if the weather is hot and dry.
* Fertilizing: Spinach is a heavy feeder, so it’s important to fertilize it regularly. I like to use a liquid fertilizer that’s specifically formulated for leafy greens. You can also use compost tea or fish emulsion. Fertilize your spinach plants every 2-3 weeks.
* Weeding: Keep your spinach plants free of weeds. Weeds compete with the spinach for nutrients and water, and they can also harbor pests and diseases. Hand-pull weeds regularly, or use a hoe to cultivate the soil around the plants.
* Pest Control: Spinach is susceptible to a few common pests, such as aphids, slugs, and snails. You can control these pests with organic methods, such as hand-picking, insecticidal soap, or diatomaceous earth.
* Bolting Prevention: As I mentioned earlier, spinach can bolt (go to seed) in hot weather. To prevent bolting, provide your spinach plants with some afternoon shade, water them regularly, and harvest the leaves frequently.
Harvesting Your Spinach
The moment we’ve all been waiting for – harvesting! This is when you get to enjoy the fruits (or rather, leaves) of your labor.
* When to Harvest: You can start harvesting spinach leaves when they are about 4-6 inches long. The younger leaves are more tender and flavorful.
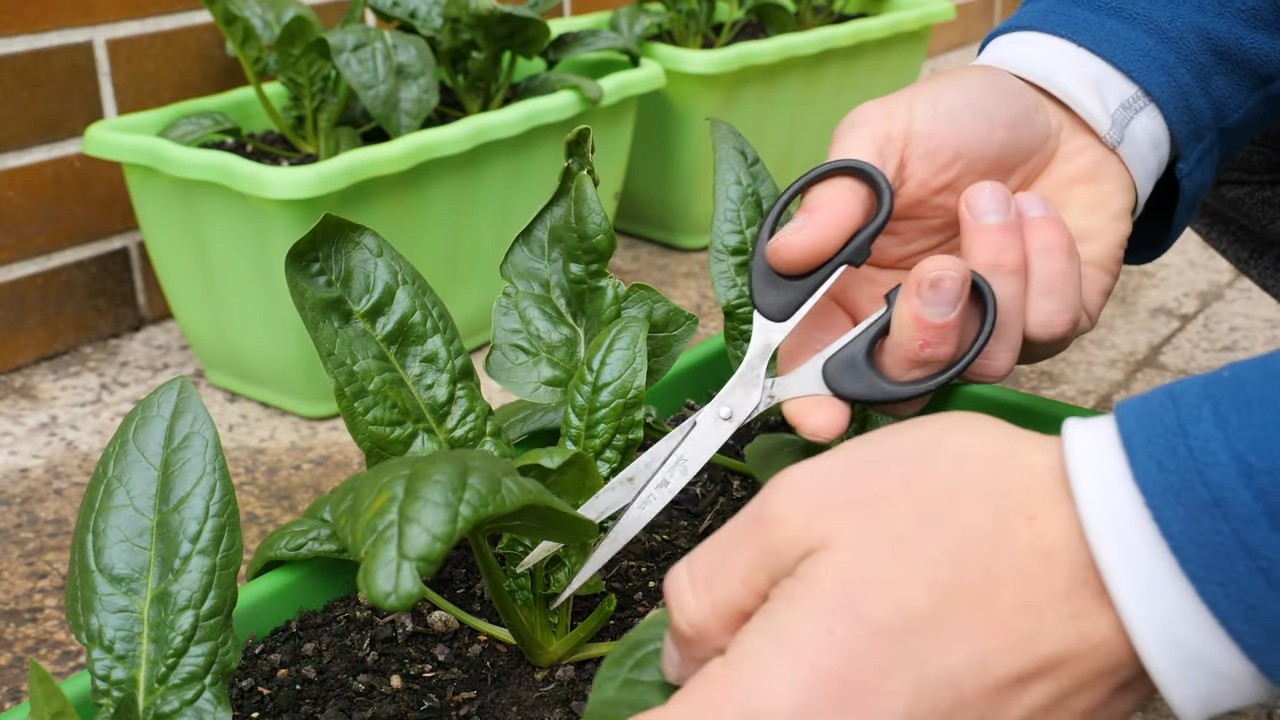
* How to Harvest: You can either harvest the entire plant at once or harvest individual leaves as needed. If you harvest the entire plant, cut it off at the base. If you harvest individual leaves, snip them off with scissors or pinch them off with your fingers.
* Succession Planting: To ensure a continuous supply of spinach, plant new seeds every 2-3 weeks. This is called succession planting.
* Storage: Freshly harvested spinach is best eaten right away. However, you can store it in the refrigerator for up to a week. To store spinach, wash it thoroughly and pat it dry. Then, wrap it in a paper towel and place it in a plastic bag.
Troubleshooting Common Problems
Even with the best care, you might encounter a few problems along the way. Here are some common issues and how to address them:
* Yellowing Leaves: This can be caused by a number of factors, such as nutrient deficiencies, overwatering, or underwatering. Check the soil moisture and pH levels, and fertilize your plants if necessary.
* Stunted Growth: This can be caused by poor soil, lack of sunlight, or pests. Make sure your spinach plants are getting enough sunlight and nutrients, and check for pests.
* Bolting: As mentioned earlier, bolting is caused by hot weather. Provide your spinach plants with some afternoon shade, water them regularly, and harvest the leaves frequently.
* Pest Infestations: Keep an eye out for pests like aphids, slugs, and snails. Use organic pest control methods to get rid of them.
Spinach Varieties to Consider
There are many different varieties of spinach to choose from, each with its own unique characteristics. Here are a few of my favorites:
* Bloomsdale Long Standing: This is a classic variety that’s known for its dark green, crinkled leaves and its resistance to bolting.
* Tyee: This is a smooth-leafed variety that’s very productive and heat-tolerant.
* Space: This is a semi-savoy variety that’s known for its disease resistance and its ability to grow in a wide range of conditions.
* Red Cardinal: This is a beautiful variety with red veins and stems. It’s also very nutritious.
Step-by-Step Instructions: A Quick Recap
Okay, let’s break down the whole process into easy-to-follow steps:
1. Choose your planter: Select a planter that’s at least 6-8 inches deep and has drainage holes.
2. Prepare the soil: Mix potting soil, compost, and perlite in a 2:1:1 ratio.
3. Plant the seeds: Sow the seeds ½ inch deep and 1 inch apart.
4. Water: Gently water the soil after planting.
5. Thin the seedlings: Once the seedlings emerge, thin them out so that they are 3-4 inches apart.
6. Water regularly: Keep the soil consistently moist, but not soggy.
7. Fertilize: Fertilize every 2-3 weeks with a liquid fertilizer or compost tea.
8. Weed: Keep the plants free of weeds.
9. Control pests: Use organic pest control methods to get rid of any pests.
10. Harvest: Harvest the leaves when they are 4-6 inches long.
And that’s it!
Conclusion
So, there you have it! Growing spinach in planters is not only achievable, but it’s also incredibly rewarding. From the convenience of having fresh, nutrient-packed greens right outside your door to the sheer satisfaction of nurturing your own food, this DIY project is a game-changer for any home cook or gardening enthusiast. We’ve walked you through the essential steps, from selecting the right planter and soil to providing optimal sunlight and water.
But why is this DIY trick a must-try? Beyond the obvious benefits of fresh, organic spinach, consider the cost savings. Store-bought spinach can be expensive, especially if you’re buying organic. With a small investment in seeds, soil, and a planter, you can enjoy a continuous supply of spinach for a fraction of the price. Plus, you’ll be reducing your carbon footprint by eliminating the transportation and packaging associated with store-bought produce.
Furthermore, growing your own spinach allows you to control the quality and safety of your food. You’ll know exactly what’s going into your plants, ensuring that you’re consuming spinach that’s free from harmful pesticides and chemicals. This is particularly important for those with dietary restrictions or health concerns.
Now, let’s talk about variations. While we’ve focused on the basics, there are plenty of ways to customize your spinach-growing experience. Consider experimenting with different varieties of spinach, such as baby spinach, savoy spinach, or semi-savoy spinach. Each variety has its own unique flavor and texture, so you can find one that perfectly suits your taste.
Another variation is to try companion planting. Spinach grows well alongside other vegetables and herbs, such as radishes, lettuce, and chamomile. These companion plants can help to deter pests, improve soil health, and even enhance the flavor of your spinach.
For those with limited space, consider using vertical planters or hanging baskets. These options allow you to grow spinach even in the smallest of balconies or patios. You can also try succession planting, which involves planting new seeds every few weeks to ensure a continuous harvest throughout the growing season.
And don’t forget about the power of compost! Adding compost to your soil will provide your spinach plants with essential nutrients and improve drainage. You can make your own compost at home using kitchen scraps and yard waste, or you can purchase it from a local garden center.
Growing spinach in planters is a fantastic way to enjoy fresh, healthy greens while also saving money and reducing your environmental impact. It’s a simple, rewarding project that anyone can do, regardless of their gardening experience.
So, what are you waiting for? Grab a planter, some seeds, and get started today! We’re confident that you’ll be amazed at how easy and enjoyable it is to grow your own spinach.
We encourage you to try this DIY trick and share your experience with us. Post photos of your spinach plants on social media using the hashtag #HomeGrownSpinach, and let us know what tips and tricks you’ve discovered along the way. We’re excited to see your success and learn from your experiences! Happy gardening!
Frequently Asked Questions (FAQ)
What is the best type of planter for growing spinach?
The best type of planter for growing spinach is one that is at least 6-8 inches deep and has good drainage. Spinach has relatively shallow roots, but they still need room to grow. The material of the planter isn’t as crucial as the size and drainage. Terracotta, plastic, or even fabric pots can work well. Just ensure that the planter has drainage holes to prevent waterlogging, which can lead to root rot. Consider the location where you’ll be placing the planter. Dark-colored planters can heat up quickly in direct sunlight, potentially damaging the roots. Lighter-colored planters or those made from materials that don’t retain heat as much are preferable in hot climates. Also, think about the size of the planter in relation to the number of spinach plants you want to grow. A good rule of thumb is to allow at least 4-6 inches of space between plants.
How often should I water my spinach plants in planters?
Watering frequency depends on several factors, including the weather, the type of soil, and the size of the planter. Generally, you should water your spinach plants when the top inch of soil feels dry to the touch. During hot, dry weather, you may need to water them daily. In cooler, more humid weather, you may only need to water them every few days. Avoid overwatering, as this can lead to root rot. When you water, water deeply, ensuring that the water reaches the roots. Water in the morning to allow the foliage to dry before nightfall, which can help prevent fungal diseases. A good way to check if your spinach needs water is to stick your finger into the soil. If the soil feels dry an inch or two down, it’s time to water.
What kind of soil is best for growing spinach in planters?
Spinach prefers well-draining, fertile soil with a pH between 6.5 and 7.0. A good potting mix specifically formulated for vegetables is an excellent choice. You can also amend your own potting mix by adding compost, perlite, and vermiculite. Compost will provide essential nutrients and improve drainage, while perlite and vermiculite will help to aerate the soil and retain moisture. Avoid using garden soil in planters, as it can become compacted and doesn’t drain well. Before planting, mix in some slow-release fertilizer to provide your spinach plants with a steady supply of nutrients. You can also add a layer of mulch to the top of the soil to help retain moisture and suppress weeds.
How much sunlight do spinach plants need?
Spinach needs at least 4-6 hours of sunlight per day. However, it can tolerate partial shade, especially in hot climates. If you live in a hot climate, it’s best to provide your spinach plants with some afternoon shade to prevent them from bolting (going to seed prematurely). Bolting can make the leaves bitter and less palatable. If you’re growing spinach indoors, you’ll need to supplement with artificial light. Grow lights are a great option for providing your spinach plants with the light they need. Place the lights about 6-12 inches above the plants and keep them on for 12-14 hours per day.
How do I prevent pests and diseases from affecting my spinach plants?
There are several things you can do to prevent pests and diseases from affecting your spinach plants. First, choose disease-resistant varieties of spinach. Second, practice good sanitation by removing any dead or diseased leaves from your plants. Third, water your plants in the morning to allow the foliage to dry before nightfall. Fourth, avoid overcrowding your plants, as this can create a humid environment that is conducive to fungal diseases. Fifth, inspect your plants regularly for pests and diseases. If you find any pests, you can try hand-picking them off or using insecticidal soap. For diseases, you can try using a fungicide. Companion planting can also help to deter pests. For example, planting marigolds near your spinach can help to repel aphids.
When is the best time to harvest spinach?
Spinach can be harvested as soon as the leaves are large enough to eat, typically about 4-6 weeks after planting. You can harvest the entire plant at once, or you can harvest individual leaves as needed. To harvest individual leaves, simply snip them off at the base of the plant. Avoid harvesting more than one-third of the leaves at a time, as this can stress the plant. The best time to harvest spinach is in the morning, before the sun has had a chance to heat up the leaves. This will help to keep the leaves crisp and fresh. Spinach can be stored in the refrigerator for up to a week. To store it, wrap it in a damp paper towel and place it in a plastic bag.
Can I grow spinach in planters during the winter?
Yes, you can grow spinach in planters during the winter, especially in milder climates. In colder climates, you may need to provide some protection from frost and freezing temperatures. You can do this by moving the planters indoors or covering them with a frost blanket. Choose a variety of spinach that is cold-hardy. Winter spinach varieties are bred to withstand colder temperatures. Also, ensure that your spinach plants are getting enough sunlight. If you’re growing them indoors, you may need to supplement with artificial light. Water your plants less frequently during the winter, as they will not be growing as actively.


Leave a Comment