
Growing Spring Onions in Containers: A Beginner’s Guide to Year-Round Freshness
Growing spring onions in containers has become one of my absolute favorite gardening projects! It’s incredibly rewarding to snip fresh, vibrant green onions directly from your own little urban farm, and this guide will show you exactly how to do it, even if you’ve never gardened before. Forget those limp, flavorless supermarket onions; prepare to experience the intense, sharp taste of homegrown spring onions all year round.
The history of cultivating onions stretches back millennia, with evidence suggesting their cultivation dating back to ancient Egypt and Mesopotamia. These versatile plants have always held a significant place in culinary traditions worldwide, and now, thanks to container gardening, you can easily enjoy this delicious and healthy crop, regardless of your living situation. Whether you have a sunny balcony, a small patio, or even just a windowsill, growing spring onions in containers is entirely achievable.
Why Grow Your Own Spring Onions?
There are so many reasons to try this! Firstly, the flavor difference is astounding. Homegrown spring onions possess a much more intense and vibrant flavor compared to store-bought ones. Secondly, it’s incredibly cost-effective. Once you’ve started, you’ll have a continuous supply, saving you money on grocery bills. Finally, and perhaps most importantly, it’s incredibly satisfying to nurture a plant from seed to harvest, and there’s nothing quite like the pride of using your own homegrown produce in your cooking. This guide will walk you through every step of the process, from choosing the right container to harvesting your delicious spring onions. So let’s get started on your journey to growing spring onions in containers!
Growing Spring Onions in Containers: A Step-by-Step Guide
I love fresh spring onions, but they can be surprisingly expensive to buy regularly. So, I decided to try growing my own in containers – and it’s easier than you think! This guide will walk you through the entire process, from choosing the right containers to harvesting your delicious homegrown onions.
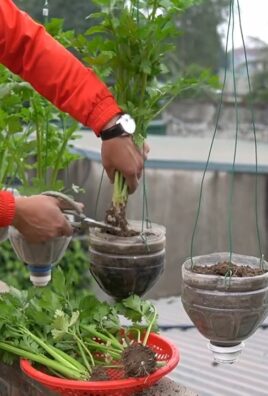
Choosing Your Containers and Location
- Container Size and Material: You don’t need huge containers. Anything from 6 inches deep and 12 inches wide will work perfectly for a small batch. I prefer using plastic containers because they’re lightweight, easy to clean, and retain moisture well. Terracotta pots are also a good option, but they dry out faster, requiring more frequent watering. Make sure your containers have drainage holes to prevent root rot.
- Number of Containers: The number of containers you need depends on how many spring onions you want to grow and how much space you have. Start small – you can always add more containers later.
- Location, Location, Location: Spring onions need at least six hours of sunlight per day. Choose a sunny spot on your patio, balcony, or windowsill. If you’re growing them indoors, make sure the area is well-lit.
Preparing the Soil and Planting
- Gather your supplies: You’ll need your chosen containers, potting mix (a good quality seed-starting mix is ideal), spring onion seeds (or you can use the root ends of store-bought spring onions – more on that later!), and a small watering can.
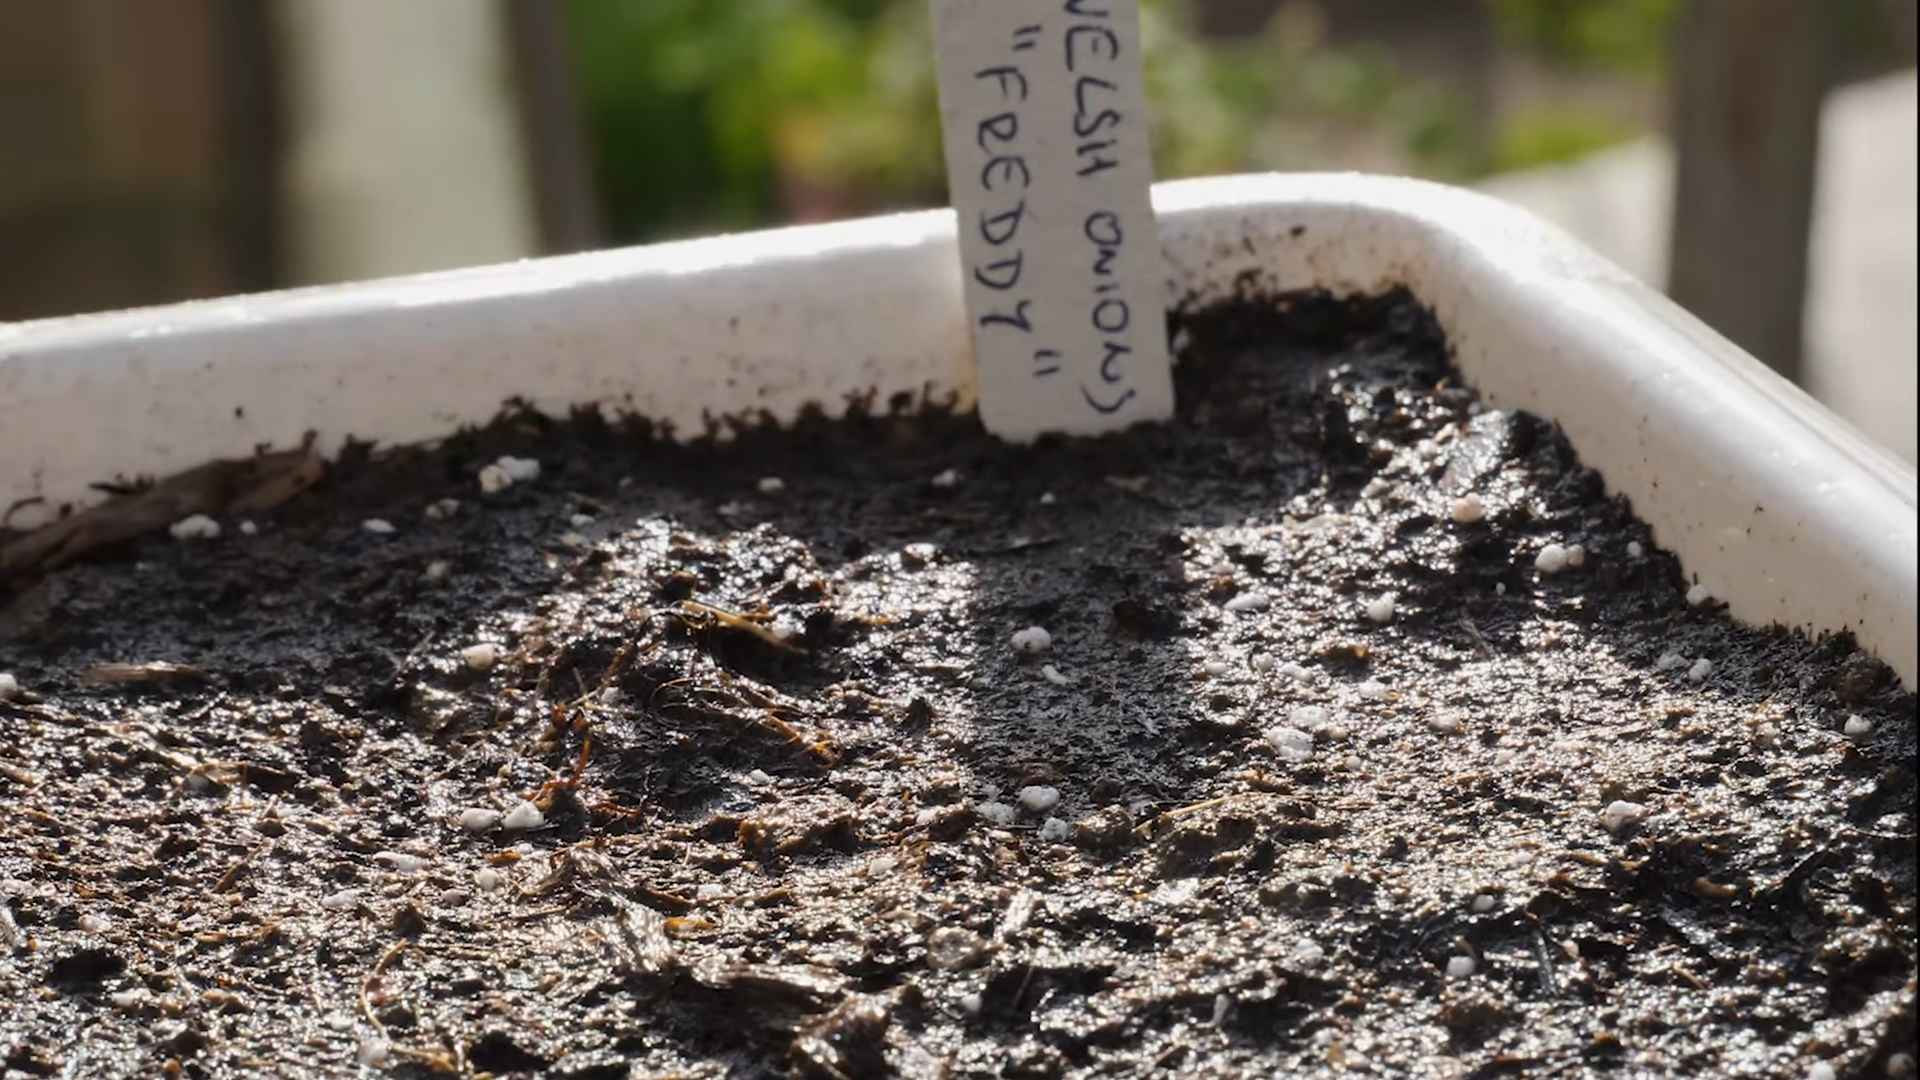
- Fill the containers: Fill your containers with the potting mix, leaving about an inch of space from the top. Gently firm the soil to create a level surface.
- Planting from Seed: If using seeds, sow them about ½ inch deep and 1 inch apart. Cover the seeds with soil and gently water. Keep the soil consistently moist but not soggy.
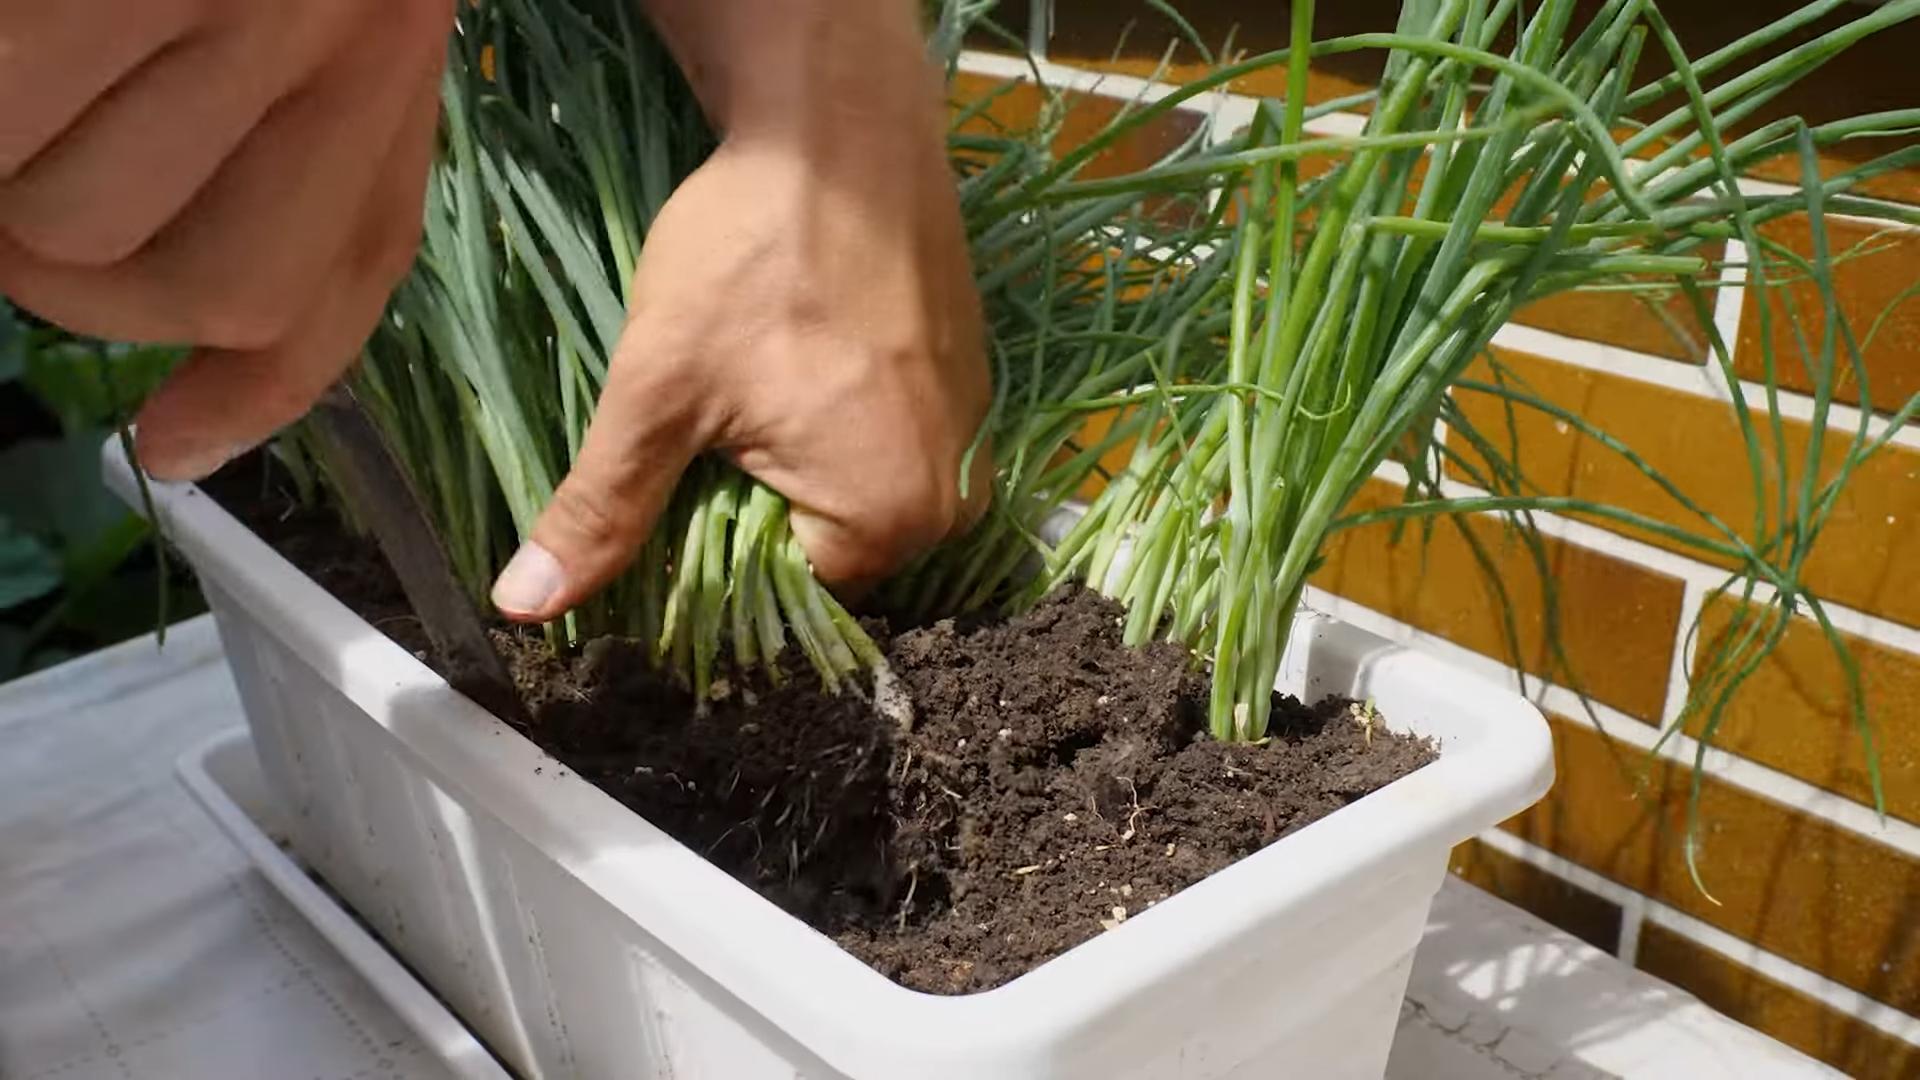
- Planting from Root Ends: This is my favorite method! Take store-bought spring onions, cut off the root end about an inch below the bulb, and plant it directly into the soil, about an inch deep. Make sure the root end is facing down. Water gently.
Caring for Your Spring Onions
- Watering: Water regularly, keeping the soil consistently moist but not waterlogged. Check the soil moisture daily, especially during hot weather. Overwatering can lead to root rot, while underwatering will stunt growth.
- Container Size and Material: You don’t need huge containers. Anything from 6 inches deep and 12 inches wide will work perfectly for a small batch. I prefer using plastic containers because they’re lightweight, easy to clean, and retain moisture well. Terracotta pots are also a good option, but they dry out faster, requiring more frequent watering. Make sure your containers have drainage holes to prevent root rot.
- Number of Containers: The number of containers you need depends on how many spring onions you want to grow and how much space you have. Start small – you can always add more containers later.
- Location, Location, Location: Spring onions need at least six hours of sunlight per day. Choose a sunny spot on your patio, balcony, or windowsill. If you’re growing them indoors, make sure the area is well-lit.
- Gather your supplies: You’ll need your chosen containers, potting mix (a good quality seed-starting mix is ideal), spring onion seeds (or you can use the root ends of store-bought spring onions – more on that later!), and a small watering can.
- Fill the containers: Fill your containers with the potting mix, leaving about an inch of space from the top. Gently firm the soil to create a level surface.
- Planting from Seed: If using seeds, sow them about ½ inch deep and 1 inch apart. Cover the seeds with soil and gently water. Keep the soil consistently moist but not soggy.
- Planting from Root Ends: This is my favorite method! Take store-bought spring onions, cut off the root end about an inch below the bulb, and plant it directly into the soil, about an inch deep. Make sure the root end is facing down. Water gently.
- Watering: Water regularly, keeping the soil consistently moist but not waterlogged. Check the soil moisture daily, especially during hot weather. Overwatering can lead to root rot, while underwatering will stunt growth.
- Fertilizing: Spring onions are not heavy feeders, but a balanced liquid fertilizer diluted to half strength every few weeks will promote healthy growth. Follow the instructions on the fertilizer packaging.
- Thinning (if planting from seed): If you planted from seed, once the seedlings are a few inches tall, thin them out to about 2 inches apart. This gives each plant enough space to grow. You can use the thinned-out seedlings in your cooking!
- Pest and Disease Control: Regularly inspect your plants for pests like aphids or slugs. If you find any, remove them by hand or use an appropriate organic pest control method. Good air circulation helps prevent fungal diseases.
- Harvesting from Seed: You can start harvesting your spring onions when they reach the desired height, usually around 6-8 inches. Use sharp scissors or a knife to cut the leaves about an inch above the soil line. New leaves will regrow from the base.
- Harvesting from Root Ends: You can start harvesting from root ends in about 4-6 weeks. Just like with seedlings, cut the leaves about an inch above the soil line. The plant will continue to produce new leaves for several weeks.
- Continuous Harvesting: The beauty of growing spring onions is that you can harvest them continuously. Just cut the leaves as needed, and the plant will keep producing more.
I love fresh spring onions, but they can be surprisingly expensive to buy regularly. So, I decided to try growing my own in containers – and it’s easier than you think! This guide will walk you through the entire process, from choosing the right containers to harvesting your delicious homegrown onions.
Choosing Your Containers and Location
Preparing the Soil and Planting
Caring for Your Spring Onions
Harvesting Your Spring Onions
Troubleshooting Common Problems
Yellowing Leaves:
Yellowing leaves can indicate overwatering, underwatering, or nutrient deficiency. Check the soil moisture and adjust your watering schedule accordingly. If the problem persists, consider fertilizing your plants.
Slow Growth:
Slow growth can be caused by insufficient sunlight, lack of nutrients, or pests. Ensure your plants are getting enough sunlight and consider fertilizing them. Check for pests and take appropriate action.
Root Rot:
Root rot is a serious problem caused by overwatering. The leaves will wilt and turn yellow or brown. If you suspect root rot, it’s best to discard the affected plants and start again with fresh soil and containers. Make sure your containers have adequate drainage.
Remember to always check your plants regularly for any signs of problems and address them promptly. Happy growing!
Conclusion
So there you have it! A simple, effective, and surprisingly rewarding method for growing spring onions in containers. This DIY trick isn’t just about saving money on grocery bills; it’s about experiencing the unparalleled freshness and flavor of homegrown produce. The satisfying feeling of snipping vibrant green spring onions directly from your own container garden is truly unmatched. This method of growing spring onions in containers transforms a mundane kitchen staple into a rewarding gardening project, perfect for even the most novice gardener. The ease of setup, minimal maintenance, and rapid growth make it an ideal project for busy individuals or those with limited space. You’ll be amazed at how quickly you can go from seed to supper, enjoying the delicious results of your efforts.
Beyond the basic method outlined, there are numerous ways to personalize your spring onion container garden. Experiment with different container sizes and shapes – from repurposed yogurt pots to stylish ceramic planters. Consider adding a layer of gravel or pebbles at the bottom of your container to improve drainage. For a truly aesthetic touch, plant your spring onions alongside other herbs like chives or parsley, creating a miniature herb garden on your windowsill or patio. You can also explore different varieties of spring onions, each offering unique flavor profiles and growth habits. Some varieties are even particularly suited to container growing, offering compact growth and abundant yields.
Don’t be afraid to get creative! The beauty of this DIY approach is its adaptability. Whether you’re a seasoned gardener or a complete beginner, growing spring onions in containers is a fantastic way to connect with nature, enhance your culinary skills, and enjoy the freshest spring onions imaginable. We strongly encourage you to try this method and experience the joy of harvesting your own homegrown produce. Share your experiences, photos, and tips with us – we’d love to see your thriving spring onion container gardens! Let’s build a community of home gardeners, sharing our successes and learning from each other’s experiences. Join the conversation and let’s inspire each other to grow more of our own food.
Remember, the key to success is consistent watering and providing adequate sunlight. With a little care and attention, you’ll be enjoying a continuous supply of fresh, flavorful spring onions throughout the growing season. This simple DIY project is a testament to the fact that even the smallest space can be transformed into a productive and rewarding garden. So, what are you waiting for? Get started today and experience the magic of growing your own spring onions in containers!
Frequently Asked Questions
Q: How often should I water my spring onions in containers?
The frequency of watering depends on several factors, including the size of your container, the type of soil you’re using, and the weather conditions. As a general rule, aim to keep the soil consistently moist but not waterlogged. Check the soil moisture regularly by sticking your finger about an inch into the soil. If it feels dry, it’s time to water. During hot and sunny weather, you may need to water more frequently, possibly even daily. In cooler, wetter conditions, you may need to water less often.
Q: What type of soil is best for growing spring onions in containers?
A well-draining potting mix is ideal for growing spring onions in containers. Avoid using heavy clay soils, which can retain too much water and lead to root rot. A good quality potting mix will provide the necessary nutrients and aeration for healthy growth. You can also amend your potting mix with compost or other organic matter to improve its drainage and fertility.
Q: How much sunlight do spring onions need?
Spring onions thrive in full sun to partial shade. Aim for at least six hours of sunlight per day. If you’re growing them indoors, place your containers near a sunny window. If you’re growing them outdoors, choose a location that receives ample sunlight but is protected from strong winds.
Q: Can I grow spring onions from seeds or from scraps?
You can successfully grow spring onions from both seeds and scraps. Growing from scraps is a particularly easy and fast method, as described in this article. Simply plant the root end of a spring onion in soil, and it will quickly regrow. Growing from seeds requires a bit more patience, but it allows you to grow a larger number of spring onions from a small amount of seed.
Q: What should I do if my spring onions start to bolt (flower)?
Bolting, or flowering, is a natural process that occurs when spring onions are exposed to long days and warm temperatures. While bolting doesn’t necessarily ruin the onions, it can make them tougher and less flavorful. To prevent bolting, try to provide some shade during the hottest part of the day, especially during the summer months. Harvesting your spring onions regularly can also help to prevent bolting.
Q: What are some common problems when growing spring onions in containers and how can I solve them?
Some common problems include pests (like aphids), diseases (like fungal infections), and nutrient deficiencies. Regularly inspect your plants for signs of pests or diseases. If you find pests, you can try using insecticidal soap or neem oil. For diseases, ensure good drainage and avoid overwatering. Nutrient deficiencies can be addressed by using a balanced fertilizer specifically formulated for vegetables. Always follow the instructions on the fertilizer packaging.
Q: Can I use any type of container for growing spring onions?
Yes, you can use a wide variety of containers, as long as they have drainage holes to prevent waterlogging. Repurposed containers like yogurt pots, plastic containers, or even old cans work well. However, ensure they are clean and free of any harmful chemicals before planting. Larger containers will allow for more plants and a larger harvest.
Leave a Comment