
Growing Sprouts at Home is easier than you think, and I’m here to show you how! Forget those expensive trips to the grocery store for a handful of sprouts that might be past their prime. Imagine having a constant supply of fresh, crunchy, and incredibly nutritious sprouts right on your kitchen counter. Sounds amazing, right?
Sprouting, in fact, isn’t a new-fangled health trend. It has roots that stretch back centuries! Ancient cultures, particularly in Asia, recognized the incredible nutritional power packed into these tiny powerhouses. They understood that sprouting grains and legumes unlocked a wealth of vitamins and minerals, making them more digestible and bioavailable. Think of it as nature’s way of supercharging your food!
But why should you bother with growing sprouts at home today? Well, in our fast-paced world, convenience often trumps nutrition. We’re constantly bombarded with processed foods that lack essential nutrients. Sprouts offer a simple, affordable, and incredibly rewarding way to reclaim control over your diet. They’re packed with vitamins, minerals, enzymes, and antioxidants – all vital for a healthy immune system and overall well-being. Plus, they’re incredibly versatile! Add them to salads, sandwiches, smoothies, or even use them as a garnish for your favorite dishes.
In this article, I’m going to share my favorite DIY tricks and hacks for successfully growing sprouts at home, even if you have a black thumb! Get ready to unlock the secrets to a healthier, more vibrant you, one sprout at a time.
Sprossen selber ziehen: Eine einfache Anleitung für Anfänger
Hallo liebe Freunde des gesunden Essens! Ich liebe es, frische Sprossen zu knabbern, und was gibt es Besseres, als sie einfach selbst zu ziehen? Es ist super einfach, kostengünstig und du hast immer frische, vitaminreiche Leckerbissen zur Hand. In diesem Artikel zeige ich dir Schritt für Schritt, wie du zu Hause deine eigenen Sprossen ziehen kannst. Keine Angst, es ist wirklich kinderleicht!
Was du brauchst: Die richtige Ausrüstung
Bevor wir loslegen, lass uns sicherstellen, dass wir alles haben, was wir brauchen. Keine Sorge, die Liste ist kurz und die meisten Dinge hast du wahrscheinlich schon zu Hause.
* Sprossenglas oder Keimgerät: Du kannst ein spezielles Sprossenglas mit einem belüfteten Deckel kaufen, oder ein mehrstöckiges Keimgerät. Ich persönlich mag das Sprossenglas für den Anfang, weil es so unkompliziert ist. Aber auch ein normales Einmachglas mit einem Stück Mulltuch und einem Gummiring funktioniert prima.
* Sprossensamen: Hier hast du die Qual der Wahl! Alfalfa, Brokkoli, Radieschen, Mungbohnen, Linsen, Kresse – die Liste ist endlos. Achte darauf, dass du spezielle Sprossensamen kaufst, da diese unbehandelt sind und eine hohe Keimfähigkeit haben. Ich starte meistens mit Alfalfa, weil sie so mild und vielseitig sind.
* Wasser: Am besten gefiltertes Wasser oder zumindest abgestandenes Leitungswasser.
* Ein dunkler Ort: Während der Keimung mögen es die Samen dunkel. Ein Küchenschrank oder eine Schublade sind ideal.
* Ein heller Ort: Sobald die Sprossen gekeimt sind, brauchen sie Licht, um grün zu werden. Ein Fensterbrett ohne direkte Sonneneinstrahlung ist perfekt.
Die Vorbereitung: Welches Saatgut ist das Richtige?
Die Wahl des Saatguts ist entscheidend für den Erfolg deiner Sprossenzucht. Achte unbedingt darauf, dass du Sprossensaatgut kaufst. Dieses ist speziell für den Verzehr als Sprossen gezüchtet und unbehandelt. Konventionelles Saatgut für den Gartenbau kann mit Pestiziden behandelt sein, was du natürlich nicht essen möchtest.
Hier sind einige meiner Lieblingssorten und ihre Geschmacksrichtungen:
* Alfalfa: Mild, nussig, perfekt für Salate und Sandwiches.
* Brokkoli: Leicht scharf, reich an Sulforaphan (einem gesunden Pflanzenstoff).
* Radieschen: Scharf, würzig, ideal für Suppen und Dips.
* Mungbohnen: Knackig, mild, die Basis für viele asiatische Gerichte.
* Linsen: Herzhaft, erdig, gut für Eintöpfe und Salate.
* Kresse: Pfeffrig, würzig, ein toller Hingucker auf jedem Gericht.
Experimentiere einfach, um deine Lieblingssorten zu finden!
Sprossen ziehen im Sprossenglas: Schritt für Schritt
So, jetzt geht’s ans Eingemachte! Ich zeige dir, wie du Sprossen im Sprossenglas ziehst. Es ist wirklich super einfach, versprochen!
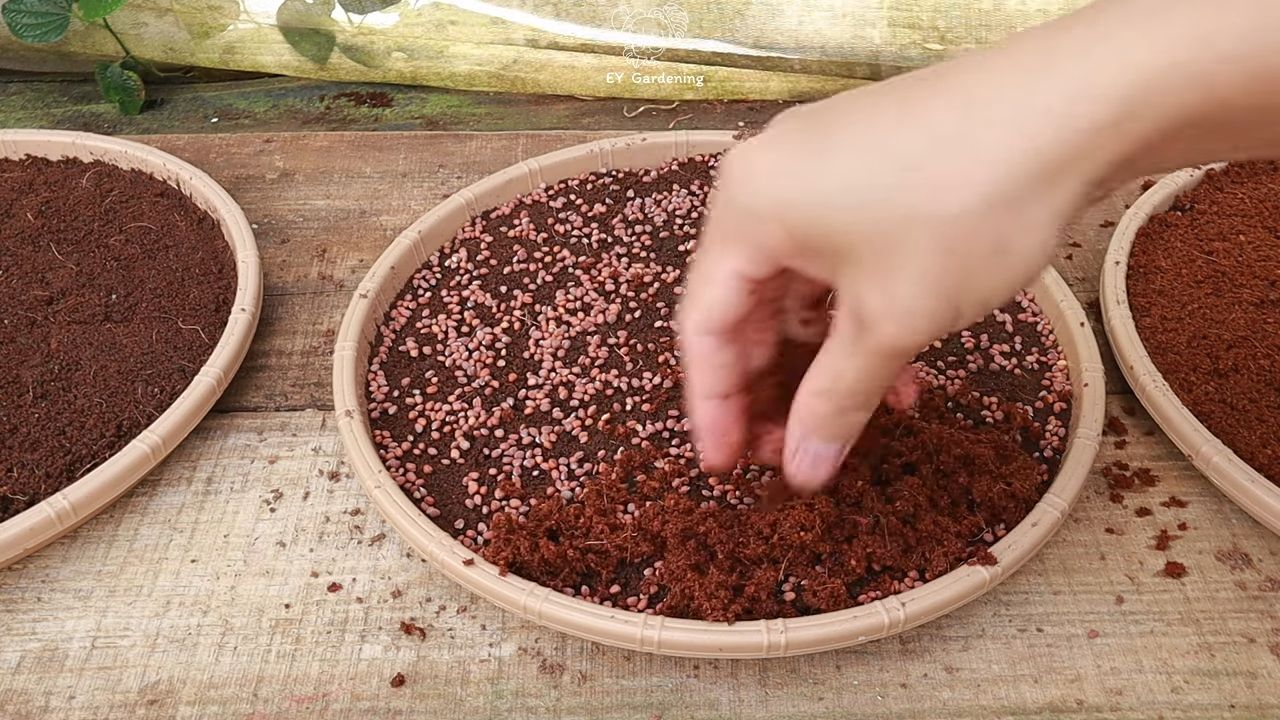
1. Einweichen: Gib einen Esslöffel Sprossensamen in dein Sprossenglas. Fülle das Glas mit reichlich Wasser, sodass die Samen gut bedeckt sind. Lass die Samen je nach Sorte 4-12 Stunden einweichen. Mungbohnen brauchen zum Beispiel länger als Alfalfa. Das Einweichen weckt die Samen auf und startet den Keimprozess.
2. Abgießen und Spülen: Gieße das Einweichwasser ab. Spüle die Samen gründlich mit frischem Wasser durch. Das ist wichtig, um Schimmelbildung zu vermeiden.
3. Dunkel lagern: Stelle das Sprossenglas an einen dunklen Ort. Achte darauf, dass das Glas schräg steht, sodass überschüssiges Wasser ablaufen kann. Ich stelle es meistens in eine Schüssel, falls doch noch etwas Wasser austritt.
4. Spülen, spülen, spülen: Spüle die Sprossen 2-3 Mal täglich mit frischem Wasser. Das ist das A und O für eine erfolgreiche Sprossenzucht. Die Sprossen brauchen Feuchtigkeit, um zu wachsen, aber sie dürfen nicht im Wasser stehen.
5. Licht tanken: Nach 2-3 Tagen, wenn die Sprossen gekeimt sind, kannst du sie an einen hellen Ort stellen, aber ohne direkte Sonneneinstrahlung. Das Licht sorgt dafür, dass die Sprossen grün werden und mehr Vitamine bilden.
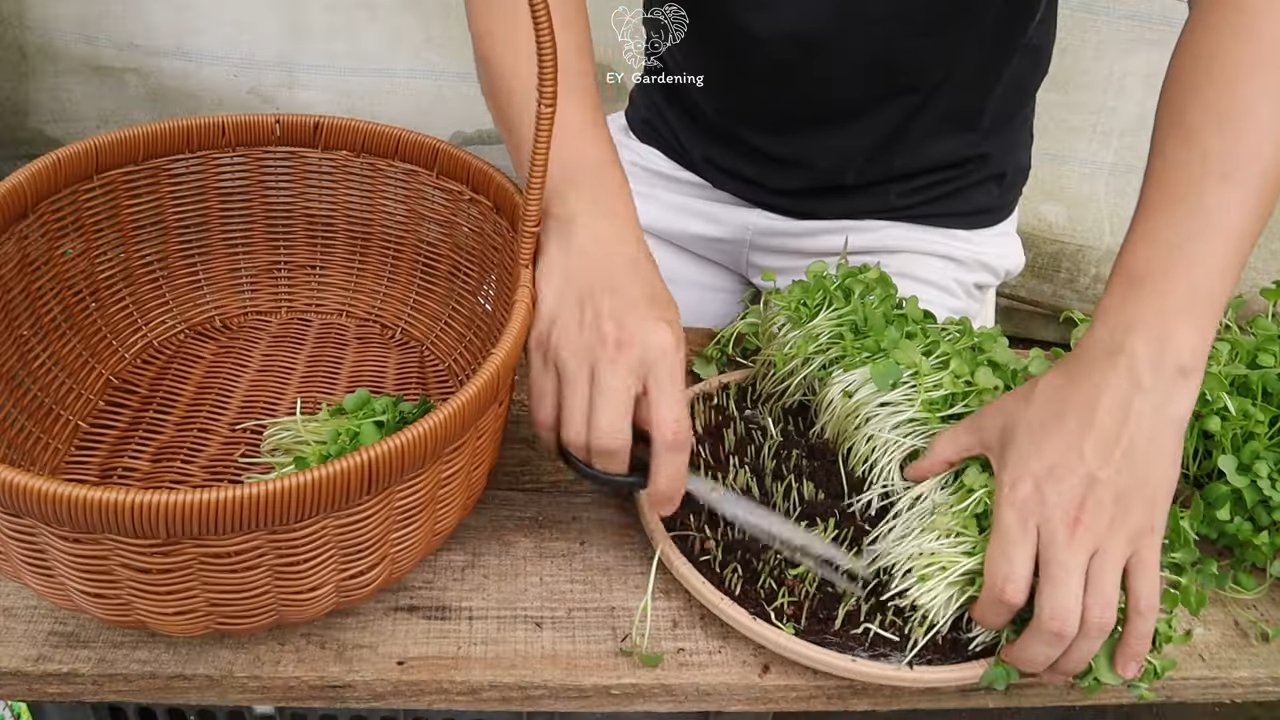
6. Ernten: Nach 5-7 Tagen, je nach Sorte, sind deine Sprossen erntereif. Sie sollten jetzt kleine Blättchen haben und schön grün sein.
7. Genießen: Spüle die Sprossen vor dem Verzehr noch einmal gründlich ab. Du kannst sie pur knabbern, in Salate mischen, auf Sandwiches legen oder als Topping für Suppen verwenden. Deiner Kreativität sind keine Grenzen gesetzt!
Sprossen ziehen im Keimgerät: Eine Alternative
Wenn du größere Mengen Sprossen ziehen möchtest, oder verschiedene Sorten gleichzeitig, ist ein Keimgerät eine tolle Alternative. Es besteht meistens aus mehreren Etagen, sodass du verschiedene Sprossen gleichzeitig ziehen kannst.
1. Vorbereitung: Weiche die Sprossensamen wie oben beschrieben ein.
2. Verteilen: Verteile die eingeweichten Samen gleichmäßig auf den Etagen des Keimgeräts. Achte darauf, dass die Samen nicht zu dicht liegen, damit sie genügend Platz zum Wachsen haben.
3. Spülen: Spüle die Sprossen 2-3 Mal täglich mit frischem Wasser. Bei den meisten Keimgeräten gibt es ein automatisches Bewässerungssystem, das dir diese Arbeit abnimmt.
4. Dunkel lagern: Stelle das Keimgerät an einen dunklen Ort, bis die Sprossen gekeimt sind.
5. Licht tanken: Sobald die Sprossen gekeimt sind, stelle das Keimgerät an einen hellen Ort.
6. Ernten: Ernte die Sprossen, wenn sie erntereif sind.
7. Genießen: Spüle die Sprossen vor dem Verzehr gründlich ab und genieße sie!
Häufige Fehler und wie du sie vermeidest
Auch beim Sprossen ziehen kann mal etwas schiefgehen. Hier sind einige häufige Fehler und wie du sie vermeidest:
* Schimmelbildung: Das ist das häufigste Problem. Schimmel entsteht, wenn die Sprossen zu feucht sind oder nicht ausreichend belüftet werden. Achte darauf, die Sprossen regelmäßig zu spülen und für eine gute Belüftung zu sorgen. Wenn du Schimmel entdeckst, solltest du die betroffenen Sprossen sofort entsorgen.
* Faule Sprossen: Faule Sprossen riechen unangenehm und sind schleimig. Das liegt meistens an einer zu hohen Temperatur oder einer schlechten Wasserqualität. Achte darauf, die Sprossen an einem kühlen Ort zu lagern und frisches Wasser zu verwenden.
* Keine Keimung: Wenn die Samen nicht keimen, kann das an einer schlechten Saatgutqualität liegen oder daran, dass die Samen zu alt sind. Kaufe frisches Sprossensaatgut von einem vertrauenswürdigen Anbieter.
* Zu wenig Licht: Wenn die Sprossen nicht grün werden, bekommen sie zu wenig Licht. Stelle sie an einen helleren Ort, aber ohne direkte Sonneneinstrahlung.
Sprossen lagern: So bleiben sie frisch
Sprossen sind nicht lange haltbar. Am besten verzehrst du sie direkt nach der Ernte. Wenn du sie lagern möchtest, solltest du sie in einem luftdichten Behälter im Kühlschrank aufbewahren. Spüle sie vor der Lagerung noch einmal gründlich ab und lasse sie gut abtropfen. So halten sie sich 2-3 Tage.
Sicherheitshinweise: Was du beachten solltest
Obwohl Sprossen sehr gesund sind, gibt es ein paar Dinge, die du beachten solltest, um sicherzustellen, dass du sie sicher verzehren kannst:
* Kaufe Sprossensaatgut von einem vertrauenswürdigen Anbieter.
* Achte auf Sauberkeit. Wasche deine Hände gründlich, bevor du mit der Sprossenzucht beginnst.
* Spüle die Sprossen regelmäßig.
* Entsorge Sprossen, die schlecht riechen oder schimmelig sind.
*
Conclusion
So, there you have it! Growing sprouts at home is not only incredibly easy and rewarding, but it’s also a fantastic way to boost your nutrient intake and add a vibrant, fresh element to your meals. Forget those expensive, pre-packaged sprouts from the grocery store that might be days old. With just a few simple supplies and a little patience, you can cultivate your own miniature garden right on your kitchen counter.
The benefits extend far beyond just cost savings. You have complete control over the growing process, ensuring that your sprouts are free from harmful chemicals and pesticides. Plus, the sheer variety of sprouts you can grow is astounding! Experiment with alfalfa, broccoli, radish, mung bean, lentil, and even sunflower seeds to discover your personal favorites. Each type offers a unique flavor profile and nutritional punch.
Consider these variations to tailor your sprouting experience:
* Spicy Sprouts: Add a pinch of red pepper flakes to your sprouting jar for a subtle kick.
* Mixed Sprouts: Combine different types of seeds for a diverse and flavorful sprout mix.
* Sprout Salads: Incorporate your freshly grown sprouts into salads, sandwiches, wraps, or even smoothies for an extra boost of vitamins and minerals.
* Sprout Toppings: Use sprouts as a garnish for soups, stir-fries, and other dishes to add a fresh, crunchy texture.
Growing sprouts at home is more than just a DIY project; it’s a commitment to healthier eating and a more sustainable lifestyle. It’s a tangible way to connect with the natural world and appreciate the miracle of life. The process is incredibly satisfying, watching those tiny seeds transform into vibrant, edible greens in just a matter of days.
Don’t be intimidated by the idea of growing your own food. Sprouting is one of the easiest and most accessible ways to get started. It requires minimal space, equipment, and effort. And the rewards are well worth it.
We wholeheartedly encourage you to give this DIY trick a try. You’ll be amazed at how simple and fulfilling it is to grow your own sprouts. Once you experience the freshness and flavor of homegrown sprouts, you’ll never go back to store-bought again.
And most importantly, we want to hear about your experience! Share your sprouting successes (and even your challenges) in the comments below. Let us know what types of sprouts you’ve tried, what recipes you’ve incorporated them into, and any tips or tricks you’ve discovered along the way. Your feedback will not only help other aspiring sprouters but also inspire us to continue exploring the wonderful world of homegrown goodness. So, grab your seeds, your jar, and get sprouting! Happy growing!
Frequently Asked Questions (FAQ)
What types of seeds are best for sprouting?
The best seeds for sprouting are those specifically labeled for sprouting or microgreens. These seeds have been tested for germination rates and are free from harmful pathogens. Common options include alfalfa, broccoli, radish, mung bean, lentil, clover, and sunflower seeds. Avoid using seeds intended for planting in the garden, as they may be treated with chemicals that are not safe for consumption. Always purchase your seeds from a reputable source to ensure quality and safety.
How long does it take for sprouts to grow?
The sprouting time varies depending on the type of seed. Generally, most sprouts are ready to harvest within 3 to 7 days. Alfalfa and clover sprouts typically take 5 to 7 days, while radish and broccoli sprouts may be ready in as little as 3 to 5 days. Mung bean sprouts, often used in Asian cuisine, can be ready in 2 to 3 days. Keep a close eye on your sprouts and harvest them when they have reached your desired length and flavor.
How often should I rinse my sprouts?
Rinsing your sprouts is crucial for preventing mold and bacterial growth. You should rinse them at least twice a day, preferably in the morning and evening. Use cool, clean water and ensure that all the seeds are thoroughly rinsed. After rinsing, drain the sprouts well to prevent them from sitting in excess water. Proper rinsing and drainage are essential for healthy and delicious sprouts.
What if my sprouts start to smell bad?
A foul odor is a sign that your sprouts may be contaminated with bacteria or mold. If you notice a bad smell, it’s best to discard the sprouts immediately. Do not consume them, as they could make you sick. To prevent this from happening, ensure that you are rinsing your sprouts regularly and thoroughly, providing adequate drainage, and using clean equipment. Also, avoid overcrowding the sprouting jar, as this can hinder airflow and promote bacterial growth.
How do I store my sprouts after they are grown?
Once your sprouts are ready to harvest, rinse them thoroughly and drain them well. Then, transfer them to a clean container lined with a paper towel. Store the container in the refrigerator for up to a week. The paper towel will help absorb excess moisture and keep the sprouts fresh. Before using the sprouts, rinse them again to remove any remaining debris.
Can I grow sprouts without a sprouting jar?
Yes, you can grow sprouts without a sprouting jar. Other options include using a sprouting bag, a multi-tiered sprouting tray, or even a simple colander lined with cheesecloth. The key is to provide adequate drainage and airflow to prevent mold growth. Whichever method you choose, make sure to rinse the sprouts regularly and thoroughly.
Are there any health risks associated with eating sprouts?
While sprouts are generally safe to eat, there is a small risk of bacterial contamination, such as Salmonella or E. coli. This is because the warm, moist conditions required for sprouting can also promote bacterial growth. To minimize this risk, purchase your seeds from a reputable source, rinse your sprouts thoroughly and regularly, and store them properly in the refrigerator. Pregnant women, young children, and individuals with weakened immune systems should exercise extra caution and may want to cook their sprouts before consuming them.
My sprouts are not growing, what am I doing wrong?
Several factors can contribute to sprouts not growing. First, ensure that your seeds are viable and specifically intended for sprouting. Old or damaged seeds may not germinate properly. Second, check the temperature of your sprouting environment. Sprouts typically grow best in a warm, but not hot, location (around 70-75°F or 21-24°C). Third, make sure you are rinsing your sprouts regularly and providing adequate drainage. Insufficient moisture or poor drainage can hinder growth. Finally, avoid overcrowding the sprouting jar, as this can restrict airflow and prevent the seeds from germinating.
Can I grow sprouts in direct sunlight?
While sprouts need light to develop their chlorophyll and turn green, direct sunlight can be too intense and can dry them out or even cook them. It’s best to keep your sprouts in a well-lit area, but out of direct sunlight. Indirect sunlight or artificial light is ideal.
What is the nutritional value of sprouts?
Sprouts are packed with nutrients, including vitamins, minerals, enzymes, and antioxidants. They are a good source of vitamin C, vitamin K, folate, and fiber. The sprouting process also increases the bioavailability of certain nutrients, making them easier for your body to absorb. Different types of sprouts offer different nutritional profiles, so experiment with various varieties to get a wide range of health benefits.

Leave a Comment