
Growing Watermelons: Easy Guide – that’s exactly what you need to transform your backyard into a personal watermelon patch! Imagine biting into a juicy, sweet, homegrown watermelon on a hot summer day. Sounds idyllic, right? Well, it’s more achievable than you think! For centuries, watermelons have been a symbol of summer, abundance, and good times, enjoyed in cultures around the globe. From ancient Egypt, where they were buried with pharaohs, to modern-day picnics, watermelons hold a special place in our hearts (and stomachs!).
But let’s be honest, the thought of growing watermelons can seem daunting. They’re big, they need space, and you might think they require a green thumb of mythical proportions. That’s where this easy guide comes in! I’m here to demystify the process and share simple, effective DIY tricks and hacks that will have you harvesting your own delicious watermelons in no time. Whether you’re a seasoned gardener or a complete beginner, this article will equip you with the knowledge and confidence to succeed. Forget store-bought watermelons that lack flavor – let’s get growing and enjoy the unparalleled taste of homegrown goodness!
Growing Watermelons: A Beginner’s Guide to Sweet Success
Hey there, fellow gardening enthusiasts! Ever dreamt of biting into a juicy, homegrown watermelon on a hot summer day? Well, dream no more! Growing watermelons might seem intimidating, but with a little know-how and some patience, you can absolutely cultivate these delicious fruits in your own backyard. I’m going to walk you through everything you need to know, from choosing the right variety to harvesting your prize-winning melon. Let’s get started!
Choosing the Right Watermelon Variety
Before you even think about planting, you need to pick the perfect watermelon variety for your climate and garden size. Here’s a breakdown to help you decide:
* Climate Considerations:
* Short Season Varieties: If you live in a cooler climate with a shorter growing season, opt for varieties like ‘Sugar Baby,’ ‘Bush Sugar Baby,’ or ‘Golden Midget.’ These mature quickly and are more likely to produce fruit before the first frost.
* Long Season Varieties: If you have a long, hot summer, you can experiment with larger varieties like ‘Charleston Gray,’ ‘Crimson Sweet,’ or ‘Jubilee.’
* Space Requirements:
* Vining Varieties: Most watermelon varieties are vining, meaning they spread out quite a bit. ‘Charleston Gray’ and ‘Crimson Sweet’ are examples of these. Make sure you have ample space in your garden for them to roam.
* Bush Varieties: If you’re short on space, consider bush varieties like ‘Bush Sugar Baby’ or ‘Garden Baby.’ These are more compact and suitable for smaller gardens or even containers.
* Seedless vs. Seeded:
* Seedless Watermelons: These are a popular choice, but they require a bit more attention. You’ll need to plant them alongside a seeded variety for pollination.
* Seeded Watermelons: These are generally easier to grow and don’t require a pollinator variety.
Preparing Your Garden Bed
Watermelons are heavy feeders, meaning they need nutrient-rich soil to thrive. Proper soil preparation is crucial for a successful harvest.
* Sunlight: Watermelons need at least 6-8 hours of direct sunlight per day. Choose a location in your garden that gets plenty of sun.
* Soil: Watermelons prefer well-drained, sandy loam soil with a pH between 6.0 and 6.8.
* Soil Testing: It’s always a good idea to test your soil before planting. You can purchase a soil testing kit at your local garden center or send a sample to your county extension office.
* Amending the Soil:
* Compost: Add plenty of compost to your garden bed to improve soil fertility and drainage. I usually add a few inches of compost and work it into the top 6-8 inches of soil.
* Manure: Well-rotted manure is another excellent soil amendment. Be sure to use well-rotted manure to avoid burning your plants.
* Fertilizer: You can also add a balanced fertilizer, such as 10-10-10, to your garden bed. Follow the instructions on the fertilizer package.
Planting Watermelon Seeds or Seedlings
Now comes the fun part – planting! You can either start your watermelon seeds indoors or direct sow them in your garden.
* Starting Seeds Indoors (Optional):
* Timing: Start your seeds indoors about 4-6 weeks before the last expected frost.
* Containers: Use peat pots or biodegradable pots to avoid disturbing the roots when transplanting.
* Soil: Use a seed-starting mix.
* Planting: Plant 2-3 seeds per pot, about 1 inch deep.
* Watering: Keep the soil moist but not soggy.
* Light: Provide plenty of light, either with a grow light or by placing the pots in a sunny window.
* Hardening Off: Before transplanting your seedlings outdoors, you’ll need to harden them off. This means gradually exposing them to outdoor conditions over a period of 7-10 days. Start by placing them in a sheltered location for a few hours each day, gradually increasing the amount of time they spend outdoors.
* Direct Sowing Seeds:
* Timing: Direct sow your seeds after the last expected frost, when the soil temperature is at least 70°F (21°C).
* Planting: Plant seeds 1 inch deep, spacing them 2-3 feet apart in rows that are 6-8 feet apart.
* Watering: Water the seeds thoroughly after planting.
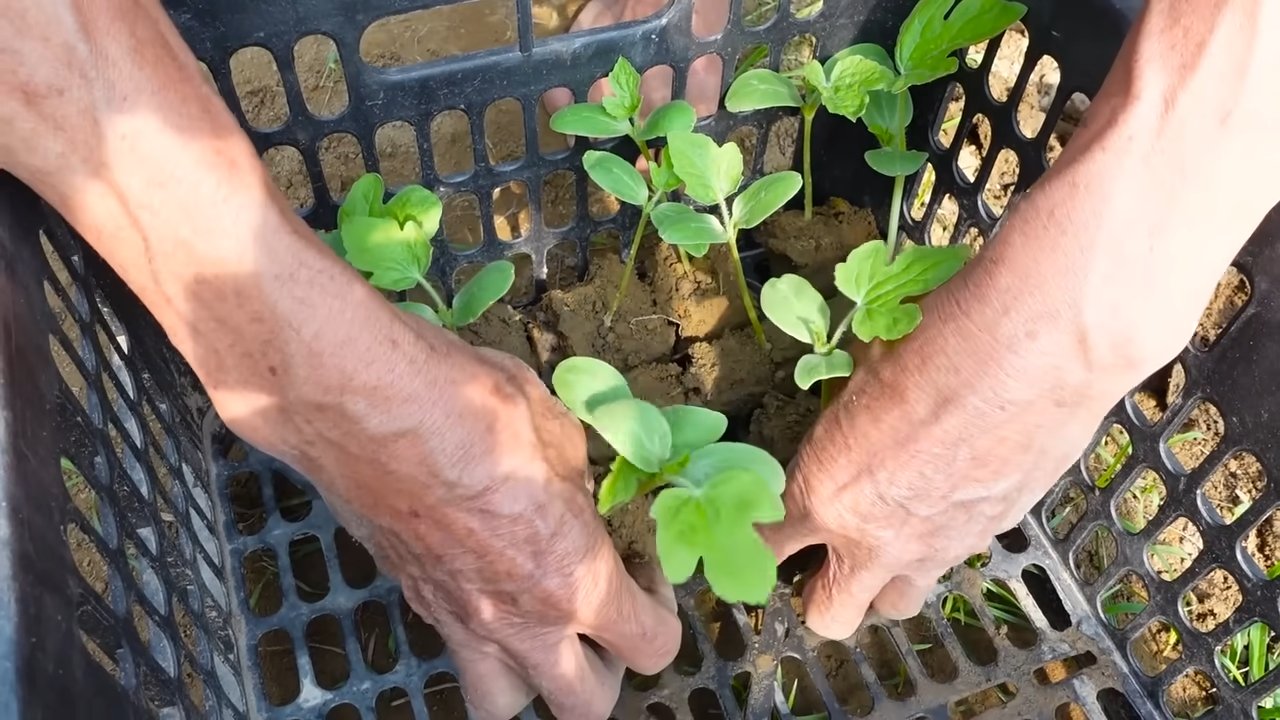
* Transplanting Seedlings:
* Timing: Transplant your seedlings after the last expected frost, when the soil temperature is at least 70°F (21°C).
* Spacing: Space the seedlings 2-3 feet apart in rows that are 6-8 feet apart.
* Planting: Dig a hole slightly larger than the root ball of the seedling. Gently remove the seedling from the pot and place it in the hole. Backfill with soil and water thoroughly.
Caring for Your Watermelon Plants
Once your watermelon plants are in the ground, it’s important to provide them with the care they need to thrive.
* Watering: Watermelons need consistent moisture, especially during fruit development. Water deeply and regularly, aiming for about 1-2 inches of water per week. Avoid overhead watering, as this can lead to fungal diseases. Drip irrigation or soaker hoses are ideal.
* Fertilizing: Fertilize your watermelon plants every 2-3 weeks with a balanced fertilizer. You can also use a fertilizer specifically formulated for melons.
* Weeding: Keep your garden bed free of weeds, as they can compete with your watermelon plants for nutrients and water.
* Mulching: Apply a layer of mulch around your watermelon plants to help retain moisture, suppress weeds, and regulate soil temperature. Straw, wood chips, or black plastic mulch are all good options.
* Pollination: Watermelons require pollination to produce fruit. Bees are the primary pollinators, so avoid using pesticides that could harm them. If you’re not seeing many bees in your garden, you can hand-pollinate your watermelon flowers.
* Hand-Pollination: Identify the male and female flowers. The male flowers have a long, thin stem, while the female flowers have a small, immature watermelon at the base. Use a small paintbrush to transfer pollen from the male flower to the female flower. Do this in the morning, when the flowers are open.
* Vine Training (Optional): If you’re growing vining varieties, you can train the vines to grow in a specific direction. This can help to save space and make it easier to manage your plants.
Protecting Your Watermelons from Pests and Diseases
Watermelons are susceptible to a variety of pests and diseases. Here are some common problems and how to deal with them:
* Pests:
* Aphids: These small, sap-sucking insects can weaken your plants. Spray them with insecticidal soap or neem oil.
* Cucumber Beetles: These beetles can transmit diseases and damage your plants. Use row covers to protect your plants or spray them with an insecticide.
* Squash Bugs: These bugs can suck the sap from your plants and cause them to wilt. Handpick them off your plants or spray them with an insecticide.
* Diseases:
* Powdery Mildew: This fungal disease causes a white, powdery coating on the leaves. Improve air circulation and spray with a fungicide.
* Fusarium Wilt: This fungal disease causes the plants to wilt and die. Plant resistant varieties and practice crop rotation.
* Anthracnose: This fungal disease causes dark, sunken lesions on the leaves and fruit. Spray with a fungicide.
Harvesting Your Watermelons
The moment you’ve been waiting for! Knowing when to harvest your watermelons is key to enjoying their sweet, juicy flavor.
* Days to Maturity: Check the seed packet or plant tag for the days to maturity. This will give you a general idea of when your watermelons will be ready to harvest.
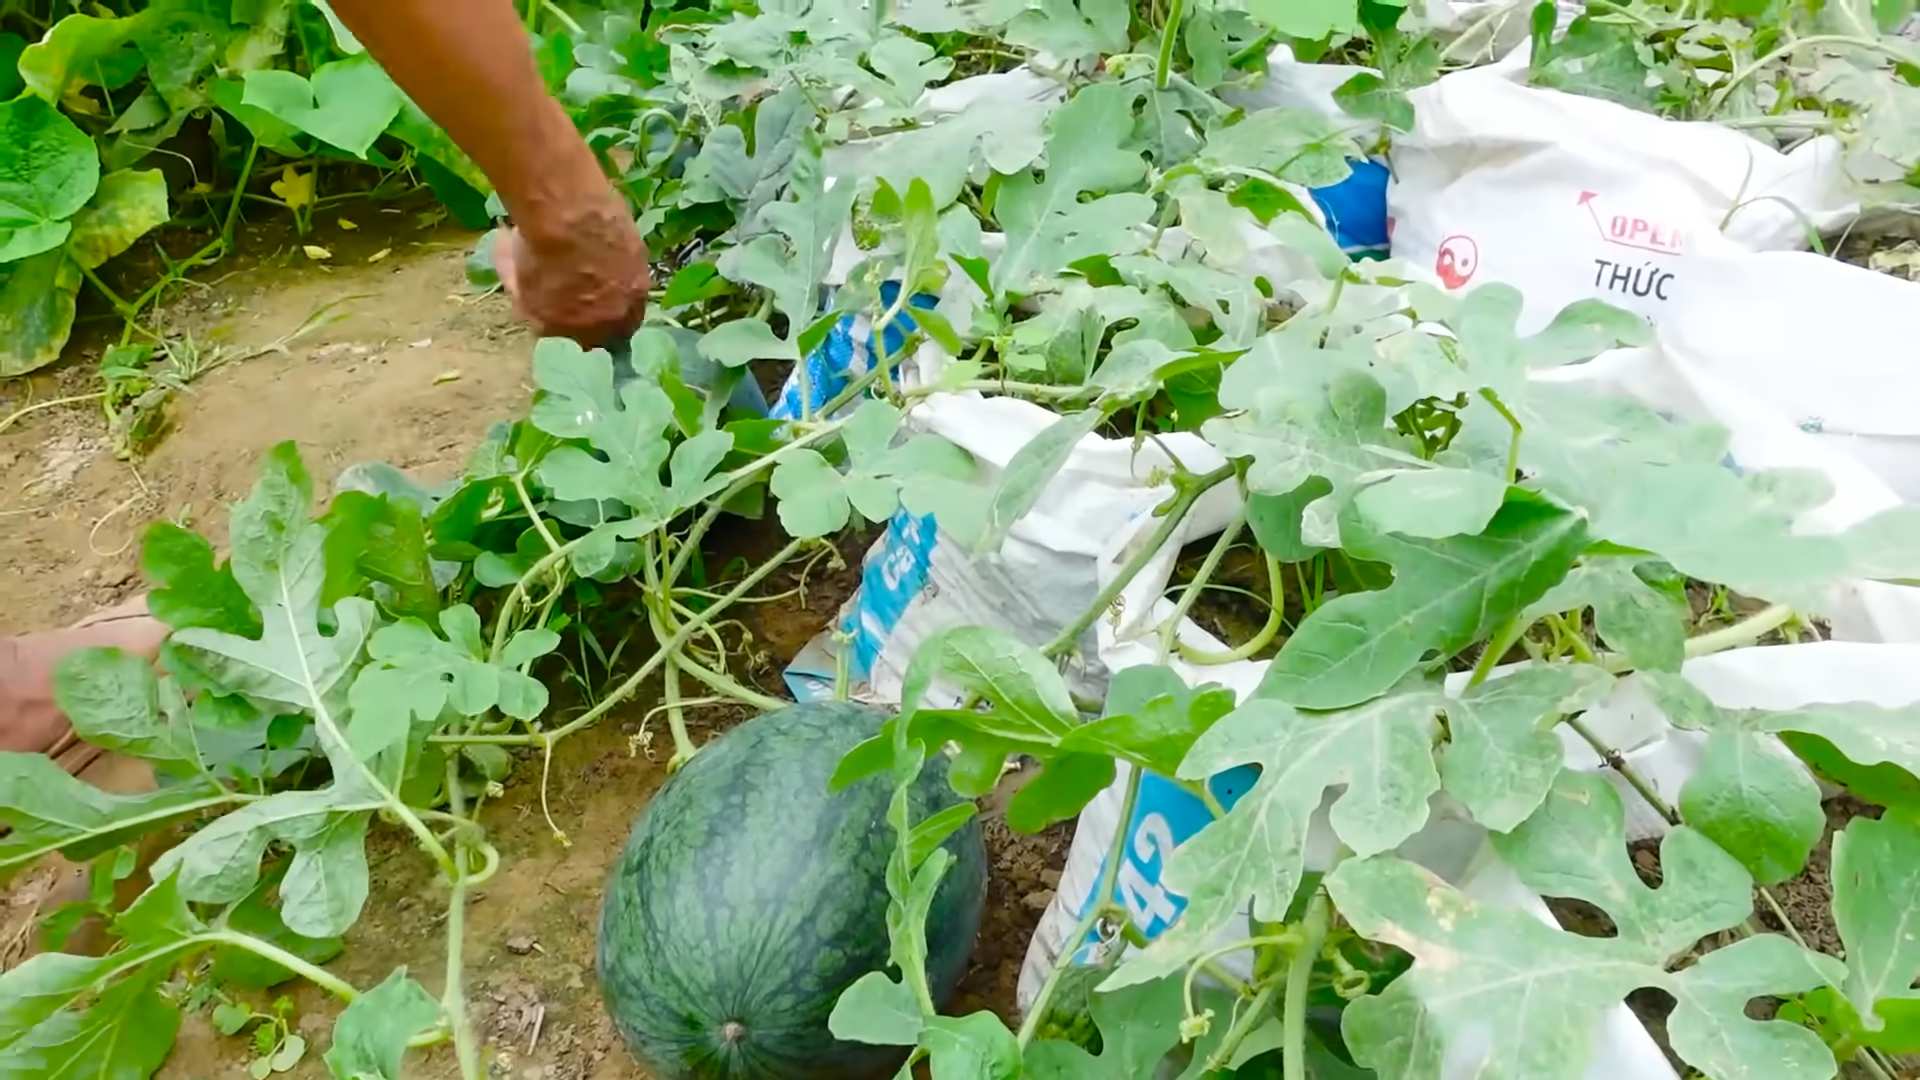
* Visual Cues:
* Tendril: The tendril closest to the watermelon should be brown and dry.
* Ground Spot: The ground spot (the area where the watermelon rests on the ground) should be yellow or cream-colored.
Hey there, fellow gardening enthusiasts! Ever dreamt of biting into a juicy, homegrown watermelon on a hot summer day? Well, dream no more! Growing watermelons might seem intimidating, but with a little know-how and some patience, you can absolutely cultivate these delicious fruits in your own backyard. I’m going to walk you through everything you need to know, from choosing the right variety to harvesting your prize-winning melon. Let’s get started!
Choosing the Right Watermelon Variety
Before you even think about planting, you need to pick the perfect watermelon variety for your climate and garden size. Here’s a breakdown to help you decide:
* Climate Considerations:
* Short Season Varieties: If you live in a cooler climate with a shorter growing season, opt for varieties like ‘Sugar Baby,’ ‘Bush Sugar Baby,’ or ‘Golden Midget.’ These mature quickly and are more likely to produce fruit before the first frost.
* Long Season Varieties: If you have a long, hot summer, you can experiment with larger varieties like ‘Charleston Gray,’ ‘Crimson Sweet,’ or ‘Jubilee.’
* Space Requirements:
* Vining Varieties: Most watermelon varieties are vining, meaning they spread out quite a bit. ‘Charleston Gray’ and ‘Crimson Sweet’ are examples of these. Make sure you have ample space in your garden for them to roam.
* Bush Varieties: If you’re short on space, consider bush varieties like ‘Bush Sugar Baby’ or ‘Garden Baby.’ These are more compact and suitable for smaller gardens or even containers.
* Seedless vs. Seeded:
* Seedless Watermelons: These are a popular choice, but they require a bit more attention. You’ll need to plant them alongside a seeded variety for pollination.
* Seeded Watermelons: These are generally easier to grow and don’t require a pollinator variety.
Preparing Your Garden Bed
Watermelons are heavy feeders, meaning they need nutrient-rich soil to thrive. Proper soil preparation is crucial for a successful harvest.
* Sunlight: Watermelons need at least 6-8 hours of direct sunlight per day. Choose a location in your garden that gets plenty of sun.
* Soil: Watermelons prefer well-drained, sandy loam soil with a pH between 6.0 and 6.8.
* Soil Testing: It’s always a good idea to test your soil before planting. You can purchase a soil testing kit at your local garden center or send a sample to your county extension office.
* Amending the Soil:
* Compost: Add plenty of compost to your garden bed to improve soil fertility and drainage. I usually add a few inches of compost and work it into the top 6-8 inches of soil.
* Manure: Well-rotted manure is another excellent soil amendment. Be sure to use well-rotted manure to avoid burning your plants.
* Fertilizer: You can also add a balanced fertilizer, such as 10-10-10, to your garden bed. Follow the instructions on the fertilizer package.
Planting Watermelon Seeds or Seedlings
Now comes the fun part – planting! You can either start your watermelon seeds indoors or direct sow them in your garden.
* Starting Seeds Indoors (Optional):
* Timing: Start your seeds indoors about 4-6 weeks before the last expected frost.
* Containers: Use peat pots or biodegradable pots to avoid disturbing the roots when transplanting.
* Soil: Use a seed-starting mix.
* Planting: Plant 2-3 seeds per pot, about 1 inch deep.
* Watering: Keep the soil moist but not soggy.
* Light: Provide plenty of light, either with a grow light or by placing the pots in a sunny window.
* Hardening Off: Before transplanting your seedlings outdoors, you’ll need to harden them off. This means gradually exposing them to outdoor conditions over a period of 7-10 days. Start by placing them in a sheltered location for a few hours each day, gradually increasing the amount of time they spend outdoors.
* Direct Sowing Seeds:
* Timing: Direct sow your seeds after the last expected frost, when the soil temperature is at least 70°F (21°C).
* Planting: Plant seeds 1 inch deep, spacing them 2-3 feet apart in rows that are 6-8 feet apart.
* Watering: Water the seeds thoroughly after planting.
* Transplanting Seedlings:
* Timing: Transplant your seedlings after the last expected frost, when the soil temperature is at least 70°F (21°C).
* Spacing: Space the seedlings 2-3 feet apart in rows that are 6-8 feet apart.
* Planting: Dig a hole slightly larger than the root ball of the seedling. Gently remove the seedling from the pot and place it in the hole. Backfill with soil and water thoroughly.
Caring for Your Watermelon Plants
Once your watermelon plants are in the ground, it’s important to provide them with the care they need to thrive.
* Watering: Watermelons need consistent moisture, especially during fruit development. Water deeply and regularly, aiming for about 1-2 inches of water per week. Avoid overhead watering, as this can lead to fungal diseases. Drip irrigation or soaker hoses are ideal.
* Fertilizing: Fertilize your watermelon plants every 2-3 weeks with a balanced fertilizer. You can also use a fertilizer specifically formulated for melons.
* Weeding: Keep your garden bed free of weeds, as they can compete with your watermelon plants for nutrients and water.
* Mulching: Apply a layer of mulch around your watermelon plants to help retain moisture, suppress weeds, and regulate soil temperature. Straw, wood chips, or black plastic mulch are all good options.
* Pollination: Watermelons require pollination to produce fruit. Bees are the primary pollinators, so avoid using pesticides that could harm them. If you’re not seeing many bees in your garden, you can hand-pollinate your watermelon flowers.
* Hand-Pollination: Identify the male and female flowers. The male flowers have a long, thin stem, while the female flowers have a small, immature watermelon at the base. Use a small paintbrush to transfer pollen from the male flower to the female flower. Do this in the morning, when the flowers are open.
* Vine Training (Optional): If you’re growing vining varieties, you can train the vines to grow in a specific direction. This can help to save space and make it easier to manage your plants.
Protecting Your Watermelons from Pests and Diseases
Watermelons are susceptible to a variety of pests and diseases. Here are some common problems and how to deal with them:
* Pests:
* Aphids: These small, sap-sucking insects can weaken your plants. Spray them with insecticidal soap or neem oil.
* Cucumber Beetles: These beetles can transmit diseases and damage your plants. Use row covers to protect your plants or spray them with an insecticide.
* Squash Bugs: These bugs can suck the sap from your plants and cause them to wilt. Handpick them off your plants or spray them with an insecticide.
* Diseases:
* Powdery Mildew: This fungal disease causes a white, powdery coating on the leaves. Improve air circulation and spray with a fungicide.
* Fusarium Wilt: This fungal disease causes the plants to wilt and die. Plant resistant varieties and practice crop rotation.
* Anthracnose: This fungal disease causes dark, sunken lesions on the leaves and fruit. Spray with a fungicide.
Harvesting Your Watermelons
The moment you’ve been waiting for! Knowing when to harvest your watermelons is key to enjoying their sweet, juicy flavor.
* Days to Maturity: Check the seed packet or plant tag for the days to maturity. This will give you a general idea of when your watermelons will be ready to harvest.
* Visual Cues:
* Tendril: The tendril closest to the watermelon should be brown and dry.
* Ground Spot: The ground spot (the area where the watermelon rests on the ground) should be yellow or cream-colored.
* Dullness: The watermelon should have a dull, rather than shiny, appearance.
* Sound Test:
* Thumping: Give the watermelon a
Conclusion
So, there you have it! Growing watermelons doesn’t have to be an intimidating endeavor reserved for seasoned gardeners. With a little planning, preparation, and the right techniques, you can enjoy the sweet, juicy reward of homegrown watermelons right from your own backyard. This easy guide provides a solid foundation for success, empowering you to cultivate these summer favorites with confidence.
Why is this DIY approach a must-try? Because nothing beats the flavor of a watermelon you’ve nurtured from seed to harvest. Store-bought watermelons, while convenient, often lack the intense sweetness and satisfying crunch of a homegrown variety. Plus, you have complete control over the growing process, ensuring your watermelons are free from unwanted chemicals and pesticides. You’re not just growing fruit; you’re cultivating a healthier, more sustainable food source for yourself and your family.
But the benefits extend beyond just taste and health. Gardening, in general, is a fantastic stress reliever. The act of nurturing plants, observing their growth, and connecting with nature can be incredibly therapeutic. Growing watermelons offers a unique opportunity to engage in this rewarding activity while reaping the delicious benefits of your labor.
Don’t be afraid to experiment and personalize your watermelon-growing journey. Consider trying different varieties to discover your favorites. Perhaps you’d like to explore growing miniature watermelons in containers on your patio, or maybe you’re ambitious enough to tackle a giant heirloom variety. The possibilities are endless!
Here are a few suggestions for variations to enhance your watermelon-growing experience:
* Vertical Gardening: If you’re short on space, train your watermelon vines to grow vertically on a trellis or fence. This not only saves space but also improves air circulation and reduces the risk of fungal diseases.
* Companion Planting: Plant beneficial companion plants alongside your watermelons to deter pests and attract pollinators. Marigolds, nasturtiums, and basil are excellent choices.
* Grafting: For increased disease resistance and vigor, consider grafting your watermelon seedlings onto a more robust rootstock. This technique is particularly useful in areas with challenging soil conditions.
* Watermelon infused water: Use your harvest to create refreshing watermelon infused water. Simply cube the watermelon and add it to a pitcher of water with mint and cucumber.
We strongly encourage you to give this DIY watermelon-growing guide a try. It’s a fun, rewarding, and ultimately delicious experience. And most importantly, don’t be discouraged if your first attempt isn’t perfect. Gardening is a learning process, and every season brings new opportunities to improve your skills.
We’re eager to hear about your watermelon-growing adventures! Share your experiences, tips, and photos in the comments below. Let’s create a community of watermelon enthusiasts and learn from each other’s successes and challenges. Happy growing!
Frequently Asked Questions (FAQ)
What is the best time to start growing watermelons?
The ideal time to start growing watermelons depends on your climate. Watermelons are warm-season crops that require a long growing season of at least 70-90 days. In general, you should start seeds indoors about 6-8 weeks before the last expected frost. If you live in a warmer climate with a longer growing season, you can direct sow seeds outdoors once the soil temperature reaches at least 70°F (21°C).
How much space do watermelons need?
Watermelons require a significant amount of space to grow. Vining varieties can spread up to 10-15 feet, so it’s essential to provide ample room for them to sprawl. Space plants at least 3-5 feet apart in rows that are 8-10 feet apart. If you’re growing watermelons in containers, choose a large pot that is at least 24 inches in diameter and depth. Bush or compact varieties are better suited for container gardening.
What kind of soil is best for growing watermelons?
Watermelons thrive in well-drained, sandy loam soil that is rich in organic matter. The soil pH should be between 6.0 and 6.8. Before planting, amend the soil with compost or well-rotted manure to improve its fertility and drainage. Avoid heavy clay soils, as they can become waterlogged and inhibit root growth.
How often should I water my watermelons?
Watermelons need consistent watering, especially during hot, dry weather. Water deeply and regularly, providing about 1-2 inches of water per week. Avoid overhead watering, as it can promote fungal diseases. Use a soaker hose or drip irrigation system to deliver water directly to the roots. Reduce watering as the fruits begin to ripen to prevent them from cracking.
What are some common pests and diseases that affect watermelons?
Watermelons are susceptible to various pests and diseases, including aphids, squash bugs, vine borers, powdery mildew, and fusarium wilt. Regularly inspect your plants for signs of infestation or disease. Use organic pest control methods, such as insecticidal soap or neem oil, to control pests. Choose disease-resistant varieties and practice good sanitation to prevent diseases. Crop rotation can also help reduce the risk of soilborne diseases.
How do I know when my watermelons are ripe?
Determining when a watermelon is ripe can be tricky, but there are several indicators to look for. The tendril closest to the fruit should be brown and dry. The underside of the watermelon, where it rests on the ground (the “ground spot”), should be yellow or cream-colored. When you thump the watermelon, it should sound dull and hollow. A ripe watermelon will also have a slightly sweet aroma.
Can I grow watermelons in containers?
Yes, you can grow watermelons in containers, but it’s essential to choose the right variety and provide adequate care. Select bush or compact varieties that are specifically bred for container gardening. Use a large pot that is at least 24 inches in diameter and depth. Fill the pot with a well-draining potting mix and provide regular watering and fertilization. Place the container in a sunny location that receives at least 6-8 hours of sunlight per day.
How do I fertilize my watermelons?
Watermelons are heavy feeders and require regular fertilization. Apply a balanced fertilizer (e.g., 10-10-10) at planting time and then side-dress with a nitrogen-rich fertilizer when the vines begin to run. Once the fruits start to develop, switch to a fertilizer that is higher in phosphorus and potassium to promote fruit development and sweetness. Follow the instructions on the fertilizer label for application rates.
How can I prevent my watermelons from cracking?
Watermelon cracking can be caused by inconsistent watering, excessive rainfall, or rapid changes in temperature. To prevent cracking, water your watermelons regularly and consistently, especially during hot, dry weather. Avoid overwatering as the fruits begin to ripen. Provide shade during periods of intense heat. Choose varieties that are less prone to cracking.
What are some good companion plants for watermelons?
Companion planting can help improve the health and productivity of your watermelons. Some good companion plants for watermelons include:
* Marigolds: Repel nematodes and other soil pests.
* Nasturtiums: Attract aphids away from watermelons.
* Basil: Repels flies and mosquitoes.
* Oregano: Attracts beneficial insects.
* Radishes: Deter cucumber beetles.
* Beans: Fix nitrogen in the soil.
Leave a Comment