
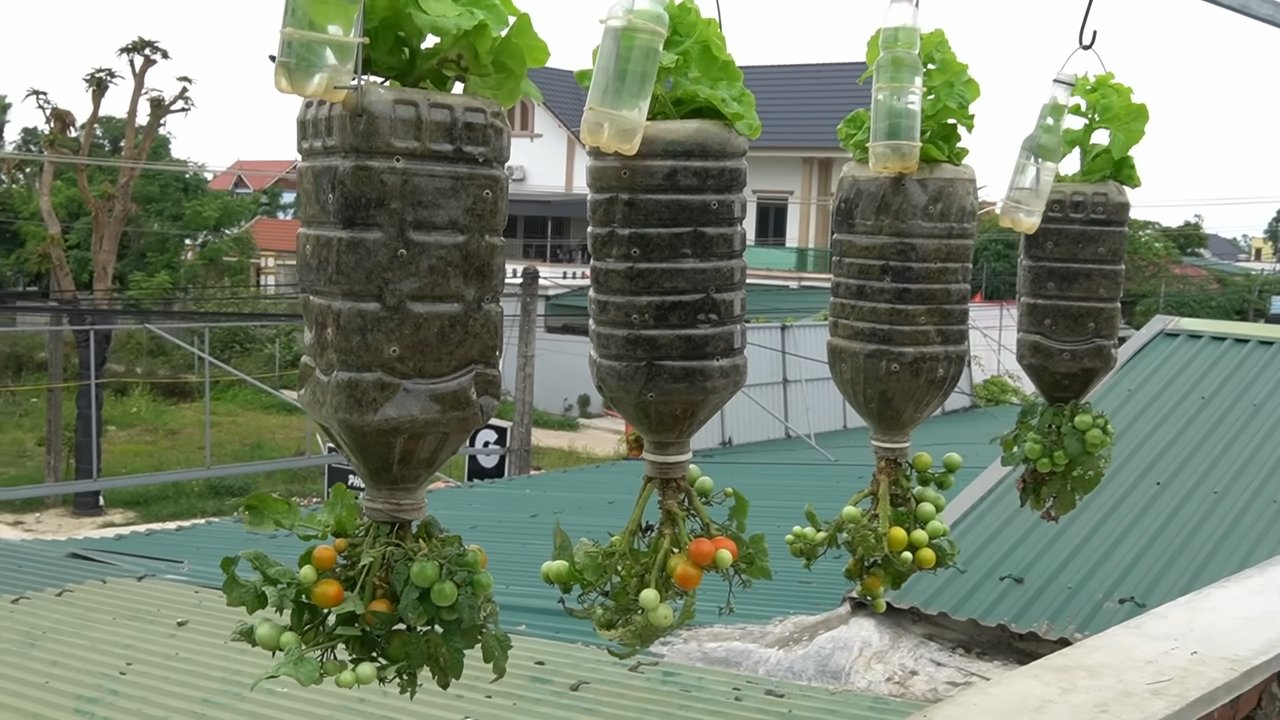
Hanging garden lettuce tomatoes: Imagine stepping onto your balcony or into your backyard and being greeted by a vibrant cascade of fresh, juicy lettuce and plump, sun-ripened tomatoes, all within arm’s reach. Sounds like a dream, right? Well, it doesn’t have to be! For centuries, humans have sought innovative ways to cultivate food, from the legendary Hanging Gardens of Babylon to the modern-day vertical farms. The desire to connect with nature and grow our own food is deeply ingrained in us.
But let’s face it, not everyone has acres of land to dedicate to a traditional garden. That’s where the magic of DIY comes in! This article is your ultimate guide to creating your own thriving hanging garden lettuce tomatoes haven, even if you’re short on space or gardening experience. I’m going to share some simple, yet effective, DIY tricks and hacks that will transform your small space into a productive and beautiful edible landscape.
Why do you need this? Because growing your own food is incredibly rewarding! Not only will you have access to the freshest, most flavorful produce, but you’ll also reduce your carbon footprint, save money, and experience the therapeutic benefits of gardening. Plus, who wouldn’t want to impress their friends and family with their green thumb? So, grab your gardening gloves, and let’s get started on creating your very own hanging garden paradise!
DIY Hängegarten für Salat und Tomaten: So baust du ihn selbst!
Hallo liebe Gartenfreunde! Ich zeige euch heute, wie ihr einen fantastischen Hängegarten für Salat und Tomaten bauen könnt. Das ist nicht nur platzsparend, sondern auch super dekorativ und hält eure Ernte vor Schnecken und anderen Schädlingen geschützt. Lasst uns loslegen!
Was du brauchst:
* Mehrere stabile Pflanzgefäße (Hängekörbe, Eimer oder Töpfe mit Löchern für die Aufhängung)
* Stabile Ketten oder Seile zum Aufhängen
* Bohrmaschine (falls du Löcher für die Aufhängung bohren musst)
* Erde (am besten spezielle Gemüseerde)
* Salat- und Tomatenpflanzen (Setzlinge)
* Dünger (organisch oder mineralisch, je nach Vorliebe)
* Gießkanne oder Gartenschlauch
* Handschuhe
* Optional: Kokosfaser oder Blähton zur Drainage
* Optional: Rankhilfe für die Tomaten (z.B. Bambusstäbe oder Draht)
Die Vorbereitung:
Bevor wir mit dem Bepflanzen beginnen, müssen wir die Pflanzgefäße vorbereiten und die Aufhängung planen.
* Gefäße auswählen: Wähle Pflanzgefäße, die groß genug für Salat und Tomaten sind. Tomaten brauchen mehr Platz als Salat, also plane entsprechend. Hängekörbe sind ideal, aber auch Eimer oder Töpfe mit Löchern für die Aufhängung funktionieren prima.
* Löcher bohren (falls nötig): Wenn deine Gefäße keine Löcher für die Aufhängung haben, bohre vorsichtig Löcher in den oberen Rand. Achte darauf, dass die Löcher stabil genug sind, um das Gewicht der bepflanzten Gefäße zu tragen.
* Drainage vorbereiten: Eine gute Drainage ist wichtig, um Staunässe zu vermeiden. Lege eine Schicht Kokosfaser oder Blähton auf den Boden der Gefäße. Das sorgt dafür, dass überschüssiges Wasser ablaufen kann.
* Aufhängung planen: Überlege dir, wo du deinen Hängegarten aufhängen möchtest. Ein sonniger Platz ist ideal für Salat und Tomaten. Miss die benötigte Länge der Ketten oder Seile ab und befestige sie an den Gefäßen. Achte darauf, dass die Aufhängung stabil ist und das Gewicht der bepflanzten Gefäße tragen kann.
Salat pflanzen: Schritt für Schritt
Salat ist relativ einfach zu pflanzen und wächst schnell. Hier ist, wie ich es mache:
1. Gefäß vorbereiten: Fülle das Pflanzgefäß mit Gemüseerde. Lass oben etwa 2-3 cm Platz.
2. Pflanzlöcher graben: Grabe kleine Löcher in die Erde, die groß genug für die Salatsetzlinge sind. Der Abstand zwischen den Löchern sollte etwa 15-20 cm betragen, damit die Salatpflanzen genug Platz zum Wachsen haben.
3. Salat einsetzen: Nimm die Salatsetzlinge vorsichtig aus ihren Töpfen und setze sie in die Löcher. Achte darauf, dass die Wurzeln gut bedeckt sind.
4. Angießen: Gieße die Salatpflanzen gründlich an. Das hilft ihnen, sich im neuen Zuhause zu etablieren.
5. Düngen: Dünge die Salatpflanzen nach dem Einsetzen mit einem organischen oder mineralischen Dünger. Beachte dabei die Anweisungen auf der Verpackung.
6. Aufhängen: Hänge das bepflanzte Gefäß an den vorbereiteten Platz. Achte darauf, dass es sicher hängt und nicht herunterfallen kann.
Tomaten pflanzen: Schritt für Schritt
Tomaten brauchen etwas mehr Aufmerksamkeit als Salat, aber die Mühe lohnt sich!
1. Gefäß vorbereiten: Fülle das Pflanzgefäß mit Gemüseerde. Tomaten brauchen viel Platz, also verwende am besten ein größeres Gefäß. Lass oben etwa 5 cm Platz.
2. Pflanzloch graben: Grabe ein tiefes Loch in die Erde, das groß genug für den Tomatensetzling ist. Tomaten können tiefer gepflanzt werden als andere Pflanzen, da sie an den Stängeln Wurzeln bilden können.
3. Tomate einsetzen: Nimm den Tomatensetzling vorsichtig aus dem Topf und setze ihn in das Loch. Bedecke den Stängel bis zu den untersten Blättern mit Erde.
4. Angießen: Gieße die Tomatenpflanze gründlich an.
5. Düngen: Dünge die Tomatenpflanze nach dem Einsetzen mit einem speziellen Tomatendünger. Beachte dabei die Anweisungen auf der Verpackung.
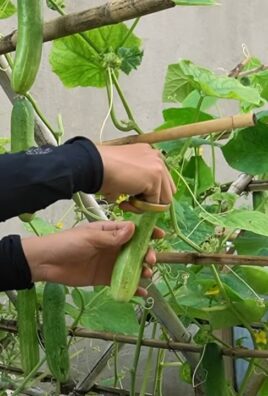
6. Rankhilfe anbringen: Tomaten brauchen eine Rankhilfe, um stabil zu wachsen. Stecke Bambusstäbe oder Draht in die Erde und binde die Tomatenpflanze daran fest.
7. Aufhängen: Hänge das bepflanzte Gefäß an den vorbereiteten Platz. Achte darauf, dass es sicher hängt und nicht herunterfallen kann.
Die Pflege:
Damit dein Hängegarten prächtig gedeiht, ist regelmäßige Pflege wichtig.
* Gießen: Gieße Salat und Tomaten regelmäßig, besonders an heißen Tagen. Achte darauf, dass die Erde immer leicht feucht ist, aber nicht nass. Vermeide Staunässe.
* Düngen: Dünge Salat und Tomaten regelmäßig, um sie mit ausreichend Nährstoffen zu versorgen. Verwende einen organischen oder mineralischen Dünger, je nach Vorliebe.
* Schneiden: Entferne regelmäßig welke Blätter und Seitentriebe von den Tomatenpflanzen. Das fördert das Wachstum und die Fruchtbildung. Beim Salat kannst du die äußeren Blätter ernten, sobald sie groß genug sind.
* Schutz vor Schädlingen: Kontrolliere Salat und Tomaten regelmäßig auf Schädlinge wie Blattläuse oder Schnecken. Bei Bedarf kannst du natürliche Schädlingsbekämpfungsmittel einsetzen. Der Hängegarten an sich hilft schon, viele Schädlinge fernzuhalten.
* Sonneneinstrahlung: Achte darauf, dass Salat und Tomaten ausreichend Sonne bekommen. Ein sonniger Standort ist ideal.
* Drehen: Drehe die Hängegefäße regelmäßig, damit alle Seiten der Pflanzen gleichmäßig Sonne bekommen.
Häufige Probleme und Lösungen:
Auch beim Gärtnern im Hängegarten können Probleme auftreten. Hier sind einige häufige Probleme und wie du sie lösen kannst:
* Gelbe Blätter: Gelbe Blätter können ein Zeichen für Nährstoffmangel sein. Dünge die Pflanzen mit einem geeigneten Dünger.
* Blattläuse: Blattläuse können mit einem Wasserstrahl abgespült oder mit einem natürlichen Schädlingsbekämpfungsmittel bekämpft werden.
* Staunässe: Staunässe kann zu Wurzelfäule führen. Achte auf eine gute Drainage und gieße nicht zu viel.
* Sonnenbrand: Bei zu starker Sonneneinstrahlung können die Blätter verbrennen. Schütze die Pflanzen vor direkter Mittagssonne.
* Schlechte Fruchtbildung bei Tomaten: Schlechte Fruchtbildung kann an fehlender Bestäubung liegen. Schüttele die Tomatenpflanzen leicht, um die Bestäubung zu fördern, oder verwende einen Pinsel, um die Blüten zu bestäuben.
Zusätzliche Tipps:
* Sortenwahl: Wähle Salatsorten und Tomatensorten, die für den Anbau im Topf geeignet sind. Es gibt spezielle Sorten, die kompakter wachsen und weniger Platz benötigen.
* Mischkultur: Pflanze Salat und Tomaten zusammen mit anderen Kräutern oder Gemüse, die sich gegenseitig unterstützen. Basilikum ist zum Beispiel ein guter Begleiter für Tomaten.
* Bewässerungssystem: Wenn du wenig Zeit hast, kannst du ein automatisches Bewässerungssystem installieren. Das spart Zeit und sorgt dafür, dass deine Pflanzen immer ausreichend Wasser bekommen.
* Winterfest machen: Salat ist oft winterhart, aber Tomaten sind frostempfindlich. Wenn du deine Tomaten überwintern möchtest, musst du sie vor dem ersten Frost ins Haus holen.
Fazit:
Ein Hängegarten für Salat und Tomaten ist eine tolle Möglichkeit, auch auf kleinem Raum frisches Gemüse anzubauen. Mit etwas Planung und Pflege kannst du eine reiche Ernte erzielen und deinen Garten oder Balkon verschöner
Conclusion
So, there you have it! Transforming your outdoor space with a DIY hanging garden for lettuce and tomatoes is not just a project; it’s an investment in fresh, flavorful produce and a visually stunning addition to your home. We’ve walked you through the process, highlighting the ease and affordability of creating your own vertical oasis. But why is this a must-try?
Firstly, consider the sheer convenience. Imagine stepping outside your door and harvesting ripe, juicy tomatoes and crisp, vibrant lettuce leaves whenever you need them. No more last-minute trips to the grocery store or settling for less-than-perfect produce. The freshness and flavor are simply unparalleled.
Secondly, think about the space-saving benefits. Whether you have a sprawling backyard or a tiny balcony, a hanging garden allows you to maximize your growing potential without sacrificing precious square footage. It’s the perfect solution for urban gardeners and anyone looking to make the most of their available space.
Thirdly, let’s not forget the aesthetic appeal. A well-designed hanging garden is a beautiful and eye-catching feature that will enhance the look of your outdoor area. The cascading foliage and colorful fruits create a living work of art that will impress your friends and neighbors.
But the possibilities don’t end there! Feel free to experiment with different variations to suit your personal preferences and growing conditions.
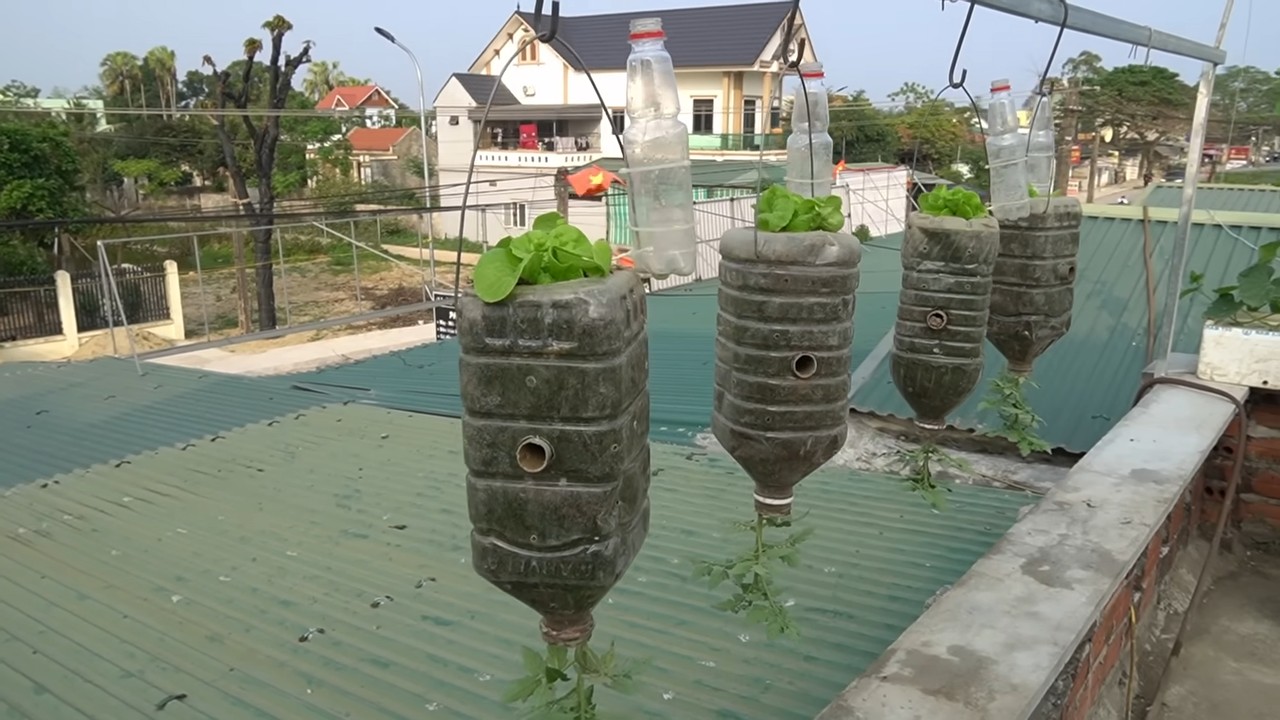
* Consider using different types of containers. From repurposed plastic bottles to woven baskets, the options are endless. Just make sure your chosen containers have adequate drainage.
* Try growing other herbs and vegetables alongside your lettuce and tomatoes. Basil, oregano, and thyme are all excellent companions that will thrive in a hanging garden.
* Experiment with different hanging methods. Macrame hangers, metal chains, and even repurposed rope can all be used to create a unique and stylish display.
* Think about adding some flowers to your hanging garden. Marigolds, petunias, and nasturtiums are all beautiful and edible options that will attract pollinators and add a splash of color.
The key to success with your DIY hanging garden is to provide your plants with the right amount of sunlight, water, and nutrients. Be sure to choose a location that receives at least six hours of direct sunlight per day, and water your plants regularly, especially during hot weather. Fertilize your plants every few weeks with a balanced fertilizer to ensure they have the nutrients they need to thrive.
We are confident that you will love the results of your DIY hanging garden. It’s a rewarding and enjoyable project that will provide you with fresh, delicious produce and a beautiful outdoor space. So, what are you waiting for? Grab your tools, gather your supplies, and get started today!
We can’t wait to see what you create! Share your photos and experiences with us on social media using #DIYHangingGarden. Let’s inspire others to embrace the joys of growing their own food. Remember, creating a thriving hanging garden for lettuce and tomatoes is within everyone’s reach, and the rewards are well worth the effort. Happy gardening!
Frequently Asked Questions (FAQ)
What type of lettuce and tomatoes are best for a hanging garden?
Choosing the right varieties is crucial for success. For lettuce, consider loose-leaf varieties like Black Seeded Simpson, Salad Bowl, or Oakleaf. These are easy to harvest and continue to produce throughout the season. For tomatoes, determinate or bush varieties like Roma, Patio, or Tumbling Tom are ideal. These varieties are more compact and don’t require extensive staking or pruning, making them well-suited for hanging containers. Avoid indeterminate varieties, which can grow very large and become difficult to manage in a hanging garden.
How often should I water my hanging garden?
Watering frequency depends on several factors, including the weather, the type of container you’re using, and the size of your plants. Generally, you’ll need to water your hanging garden more frequently than you would a traditional garden bed. Check the soil moisture daily by sticking your finger about an inch into the soil. If it feels dry, it’s time to water. During hot, dry weather, you may need to water your plants twice a day. Be sure to water thoroughly, until water drains out of the bottom of the container. Avoid overwatering, which can lead to root rot.
What type of soil should I use for my hanging garden?
Use a high-quality potting mix specifically formulated for containers. Avoid using garden soil, which can be too heavy and compact for hanging baskets. A good potting mix will provide adequate drainage and aeration, which are essential for healthy root growth. You can also amend your potting mix with compost or other organic matter to improve its fertility and water-holding capacity.
How much sunlight do my hanging garden plants need?
Lettuce and tomatoes both need at least six hours of direct sunlight per day to thrive. Choose a location for your hanging garden that receives plenty of sunlight throughout the day. If you don’t have a sunny spot, you can supplement with grow lights.
How do I fertilize my hanging garden?
Hanging garden plants need regular fertilization to stay healthy and productive. Use a balanced fertilizer specifically formulated for vegetables. You can use a liquid fertilizer, a slow-release granular fertilizer, or a combination of both. Follow the instructions on the fertilizer package for application rates and frequency. Fertilize your plants every few weeks, or as needed.
How do I prevent pests and diseases in my hanging garden?
Regularly inspect your plants for signs of pests or diseases. Common pests that can affect lettuce and tomatoes include aphids, whiteflies, and tomato hornworms. Common diseases include powdery mildew, blight, and blossom end rot. If you find any pests or diseases, take action immediately. You can use organic pesticides, such as insecticidal soap or neem oil, to control pests. For diseases, you can use fungicides or remove infected leaves. Proper watering, good air circulation, and healthy soil can also help prevent pests and diseases.
How do I harvest lettuce and tomatoes from my hanging garden?
Harvest lettuce leaves as needed, starting with the outer leaves. Cut the leaves off at the base of the plant, leaving the inner leaves to continue growing. For tomatoes, harvest them when they are fully ripe and have reached their mature color. Gently twist the tomato off the vine, being careful not to damage the plant.
Can I grow other plants in my hanging garden with lettuce and tomatoes?
Yes, you can grow other plants in your hanging garden with lettuce and tomatoes. Good companion plants for lettuce include radishes, carrots, and cucumbers. Good companion plants for tomatoes include basil, marigolds, and onions. Avoid planting plants that will compete with your lettuce and tomatoes for sunlight, water, or nutrients.
How do I overwinter my hanging garden?
Depending on your climate, you may be able to overwinter your hanging garden. Lettuce is a cool-season crop that can tolerate light frosts. Tomatoes are more sensitive to cold and will need to be protected from frost. You can bring your hanging garden indoors during the winter, or you can cover it with a frost blanket. If you live in a very cold climate, you may need to start new plants from seed each spring.
What if my tomatoes develop blossom end rot?
Blossom end rot is a common problem in tomatoes, caused by a calcium deficiency. It appears as a dark, leathery spot on the bottom of the tomato. To prevent blossom end rot, make sure your soil is rich in calcium and that you are watering your plants consistently. You can also add calcium to the soil by adding crushed eggshells or bone meal. If your tomatoes develop blossom end rot, remove the affected fruits and adjust your watering and fertilization practices.
Leave a Comment