
Harvesting Potatoes at Home can feel like unearthing buried treasure! Imagine the satisfaction of digging into your own backyard and pulling out plump, earthy potatoes, ready to be transformed into delicious meals. For centuries, growing potatoes has been a staple in cultures worldwide, from the Incas of the Andes who first cultivated them to the Irish who relied on them as a primary food source. It’s a tradition that connects us to the land and provides a tangible reward for our efforts.
But let’s be honest, knowing when and how to harvest those spuds can be a little daunting. That’s where this DIY guide comes in! I’m going to share some simple, effective tricks and hacks that will ensure you get the most bountiful harvest possible. No more guessing games or accidentally damaging your precious potatoes.
Why is this so important? Because knowing the right techniques for harvesting potatoes at home not only maximizes your yield but also ensures the potatoes are stored properly for long-term enjoyment. Think of it: homemade mashed potatoes in the winter, crispy roasted potatoes for Sunday dinner, all thanks to your own green thumb and a little bit of know-how. Let’s get digging!
Harvesting Potatoes Like a Pro: A DIY Guide
Okay, potato lovers! So you’ve nurtured your potato plants, watched them grow, and now it’s time for the most rewarding part: harvesting your homegrown spuds! It’s such a satisfying feeling to dig into the earth and unearth those hidden treasures. I’m going to walk you through everything you need to know to harvest your potatoes successfully, ensuring you get the best yield and quality.
Knowing When to Harvest: The Signs to Look For
First things first, you need to know when your potatoes are ready for harvesting. This isn’t an exact science, but there are some telltale signs to watch out for:
* **The Foliage Dies Back:** This is the biggest indicator. When the leaves of your potato plants start to turn yellow, brown, and wither, it means the plant is redirecting its energy into the tubers underground. This usually happens a few weeks after flowering. Don’t panic when you see this – it’s a good thing!
* **Check the Calendar:** Generally, potatoes are ready to harvest about 80-100 days after planting, depending on the variety. Check the seed packet or your planting records to get a better idea of the timeframe.
* **”New” Potatoes vs. Mature Potatoes:** Do you want small, tender “new” potatoes, or larger, more mature potatoes for storage? If you’re after new potatoes, you can start harvesting a few weeks after flowering, even if the foliage is still green. For mature potatoes, wait until the foliage has completely died back.
* **Do a Test Dig:** The best way to be sure is to dig up a test plant. Gently loosen the soil around the base of the plant and carefully lift it out. If the potatoes are the size you want and the skins are firm enough, you’re good to go!
Tools You’ll Need
Having the right tools makes harvesting potatoes much easier and less likely to damage your precious crop. Here’s what I recommend:
* **Garden Fork:** This is my go-to tool for digging up potatoes. The tines are less likely to slice through the tubers than a shovel.
* **Shovel (Optional):** A shovel can be helpful for loosening the soil around the plants, especially if you have heavy clay soil.
* **Gardening Gloves:** Protect your hands from dirt and potential scratches.
* **Buckets or Baskets:** For collecting your harvested potatoes.
* **Tarp or Old Sheet:** To lay the potatoes on to dry after digging them up.
* **Scissors or Pruning Shears:** To cut away any remaining foliage.
Harvesting Your Potatoes: Step-by-Step
Alright, let’s get down to the nitty-gritty of harvesting! Here’s my step-by-step guide:
1. **Prepare the Area:** Before you start digging, clear the area around your potato plants. Remove any weeds, debris, or rocks that might get in the way. This will make it easier to maneuver your tools and avoid damaging the potatoes.
2. **Cut Back the Foliage:** If there’s still some foliage remaining, cut it back to the ground level using your scissors or pruning shears. This will give you a clearer view of where to dig and prevent the foliage from getting tangled in your tools.
3. **Loosen the Soil:** Using your garden fork or shovel, carefully loosen the soil around the base of the potato plant. Insert the fork or shovel a few inches away from the stem and gently lift upwards. Be careful not to stab the potatoes! Work your way around the plant, loosening the soil in a circle.
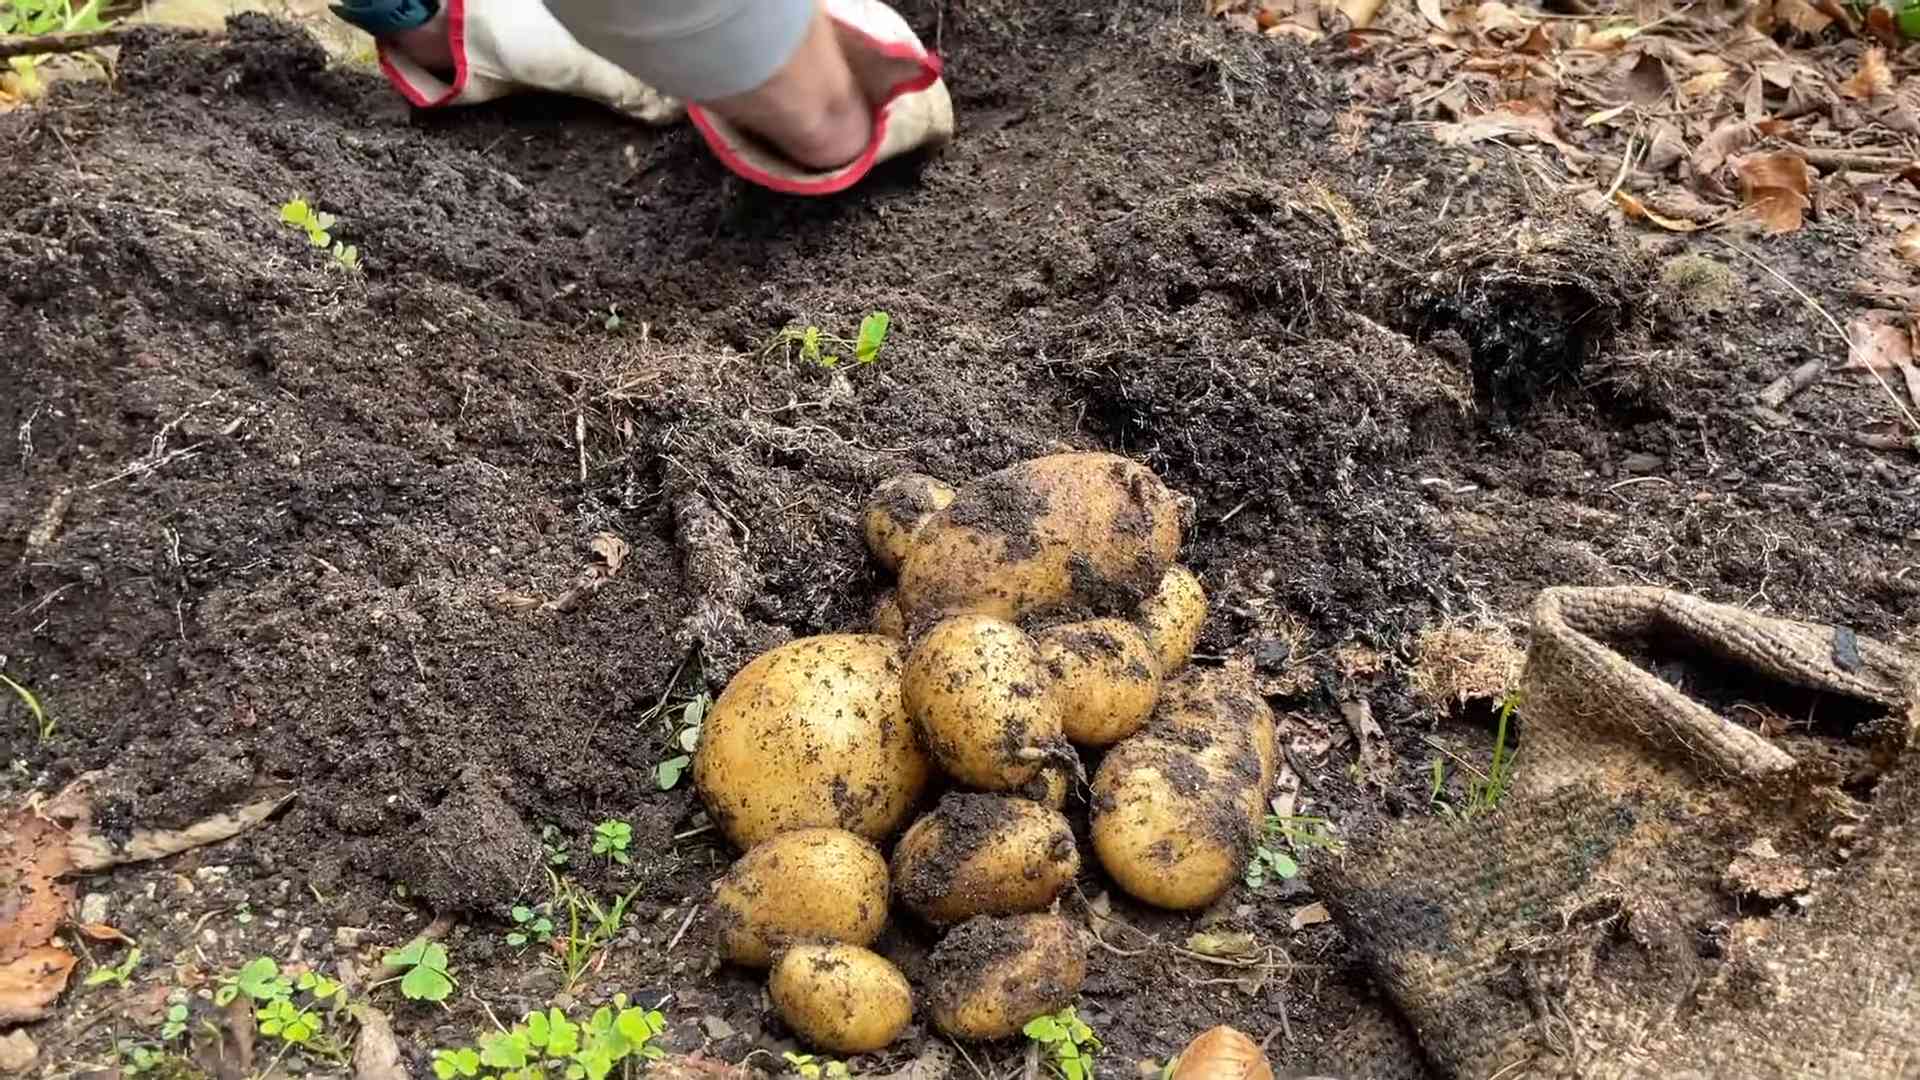
4. **Dig Carefully:** Now comes the fun part! Gently dig into the loosened soil, feeling around for the potatoes. Use your hands to carefully remove the soil around each potato, being mindful not to damage them. Potatoes can grow quite far from the main stem, so be sure to explore the surrounding area thoroughly.
5. **Collect Your Harvest:** As you find potatoes, gently lift them out of the soil and place them in your bucket or basket. Handle them with care to avoid bruising or damaging the skins.
6. **Repeat for Each Plant:** Repeat steps 3-5 for each of your potato plants. Take your time and enjoy the process! It’s like a treasure hunt in your own backyard.
7. **Don’t Forget the Small Ones:** Even the small potatoes are worth harvesting! They’re perfect for roasting or adding to soups and stews.
Curing and Storing Your Potatoes
Once you’ve harvested all your potatoes, it’s important to cure them properly before storing them. Curing helps to toughen the skins and heal any minor cuts or bruises, which will prevent rot and extend their storage life.
1. **Gently Clean the Potatoes:** Brush off any excess dirt from the potatoes, but don’t wash them. Washing can encourage rot.
2. **Lay Them Out to Dry:** Spread the potatoes out in a single layer on a tarp or old sheet in a cool, dry, and well-ventilated place. Avoid direct sunlight, as it can cause the potatoes to turn green.
3. **Cure for 1-2 Weeks:** Let the potatoes cure for 1-2 weeks, or until the skins have hardened and any cuts or bruises have healed.
4. **Store in a Cool, Dark Place:** Once the potatoes are cured, store them in a cool, dark, and well-ventilated place, such as a root cellar or basement. The ideal storage temperature is between 40-50°F (4-10°C).
5. **Use Burlap Sacks or Crates:** Store the potatoes in burlap sacks or crates to allow for good air circulation. Avoid storing them in plastic bags, as this can trap moisture and lead to rot.
6. **Check Regularly:** Check your stored potatoes regularly for any signs of rot or spoilage. Remove any damaged potatoes immediately to prevent the rot from spreading to the others.
Troubleshooting Common Harvesting Issues
Even with the best planning, you might encounter some challenges during your potato harvest. Here are a few common issues and how to address them:
* **Damaged Potatoes:** Despite your best efforts, you might accidentally nick or cut some potatoes during harvesting. Don’t worry, it happens! Use these damaged potatoes first, as they won’t store as well as undamaged ones.
* **Green Potatoes:** Potatoes that are exposed to sunlight can turn green. This is due to the production of solanine, a toxic compound. Green potatoes should not be eaten. Make sure to hill your potatoes properly during the growing season to prevent them from being exposed to sunlight.
* **Pest Damage:** If you find holes or tunnels in your potatoes, it could be a sign of pest damage, such as wireworms or potato beetles. Inspect your plants regularly during the growing season and take appropriate measures to control pests.
* **Rotting Potatoes:** If you find potatoes that are soft, mushy, or have a foul odor, they are likely rotting. Remove them immediately to prevent the rot from spreading to other potatoes. Ensure proper curing and storage conditions to minimize the risk of rot.
Enjoying Your Homegrown Potatoes
Now that you’ve harvested, cured, and stored your potatoes, it’s time to enjoy the fruits (or rather, tubers!) of your labor. Homegrown potatoes taste so much better than store-bought ones, and you’ll be amazed at the difference.
Here are just a few ideas for using your homegrown potatoes:
* **Roasted Potatoes:** Toss them with olive oil, herbs, and spices, and roast them in the oven until golden brown and crispy.
* **Mashed Potatoes:** Boil them until tender, then mash them with butter, milk, and seasonings.
* **Potato Salad:** A classic summer dish made with boiled potatoes, mayonnaise, celery, onion, and other ingredients.
* **Potato Soup:** A hearty and comforting soup made with potatoes, broth, vegetables, and cream.
* **French Fries:** Cut them into strips, fry them until golden brown, and season with salt.
* **Potato Pancakes:** Grate them, mix them with flour, eggs, and seasonings, and fry them until golden brown.
The possibilities are endless! Get creative and experiment with different recipes to find your favorites.
Saving Seed Potatoes for Next Year
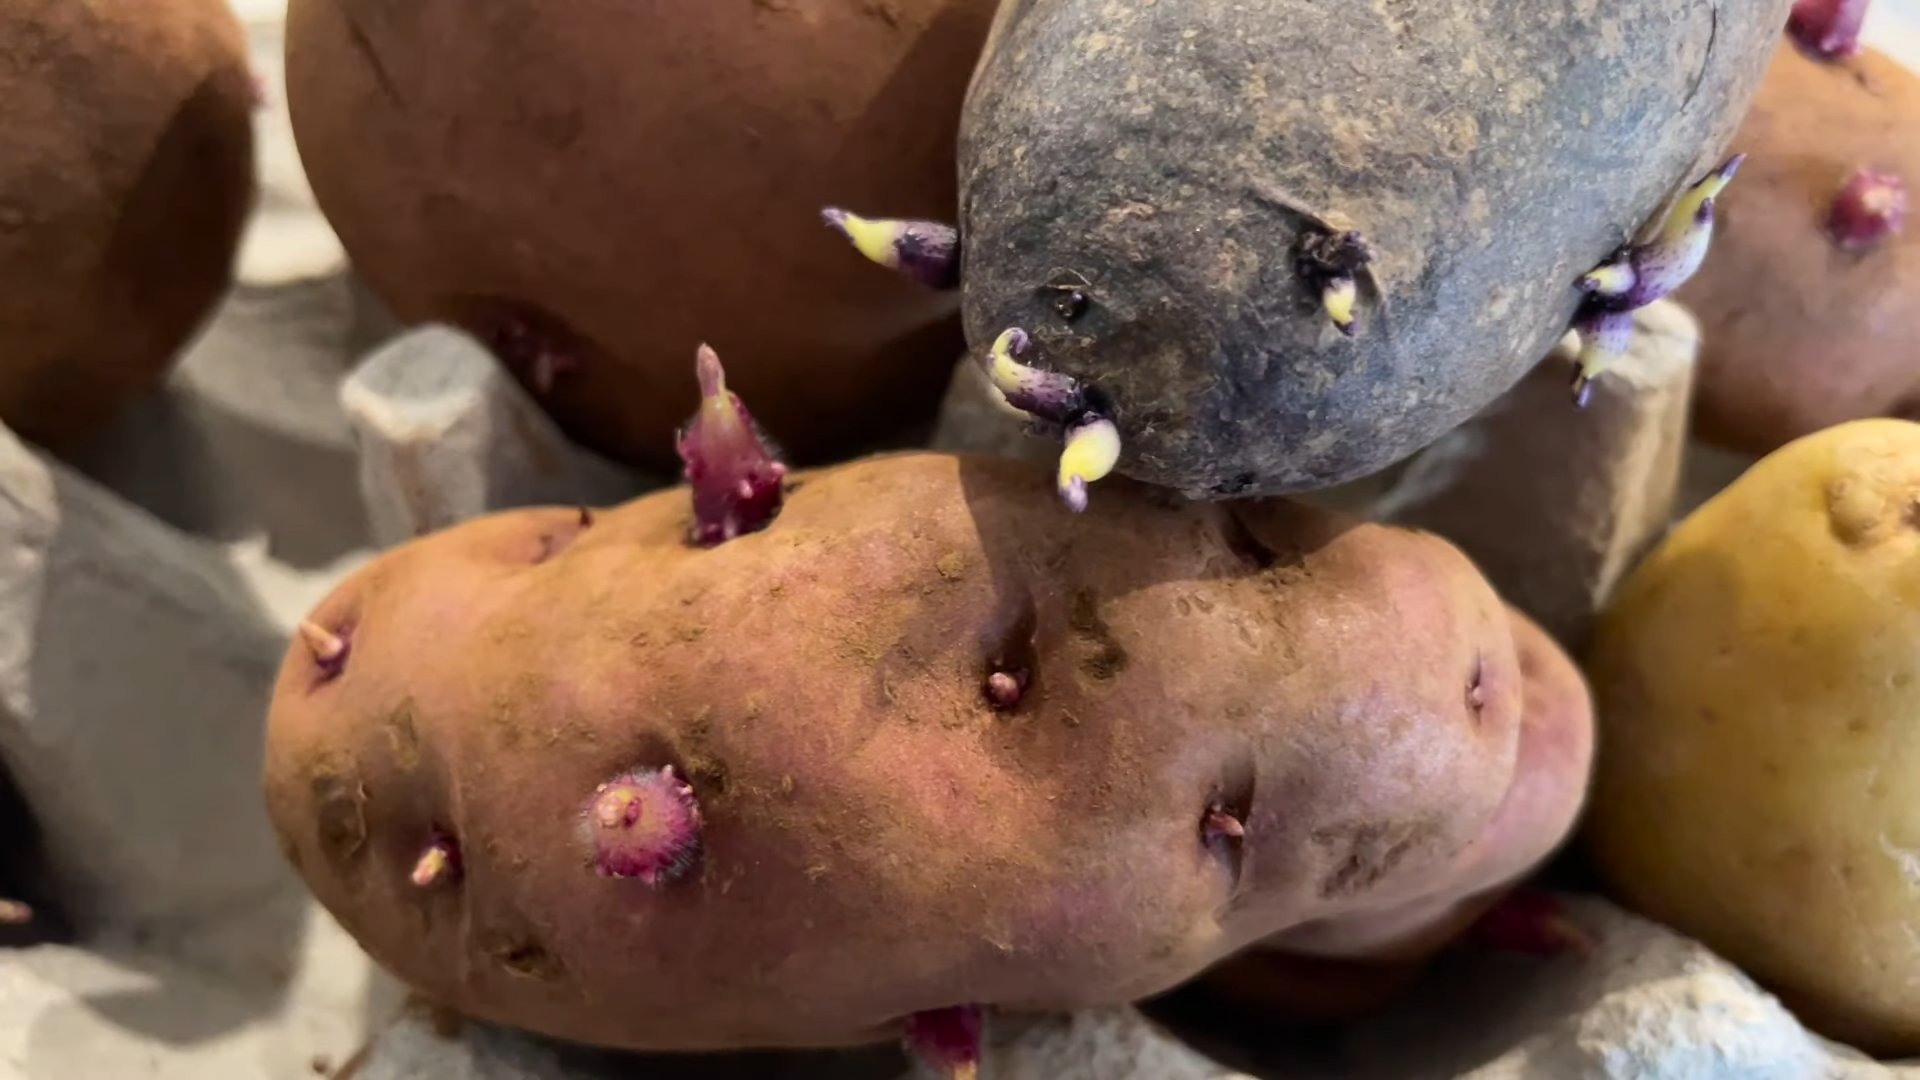
If you want to grow potatoes again next year, you can save some of your harvested potatoes to use as seed potatoes. Choose healthy, disease-free potatoes that are about the size of a chicken egg. Store them in a cool, dark, and dry place until planting time.
A few weeks before planting, you can “chit” the seed potatoes by placing them in a bright, warm location to encourage them to sprout. This will give them a head start when you plant them in the ground.
And there you have it! Everything you need to know to harvest your potatoes like a pro. Happy digging! I hope you have a bountiful harvest and enjoy the delicious taste of your homegrown potatoes.
Conclusion
So, there you have it! Harvesting potatoes at home doesn’t have to be a chore; it can be a rewarding and surprisingly simple process. We’ve walked through the steps, from recognizing the signs of readiness to carefully unearthing your buried treasure. But why is this DIY trick a must-try?
Firstly, the taste. There’s simply no comparison between a freshly harvested potato and one that’s been sitting on a grocery store shelf for weeks. The flavor is earthier, sweeter, and more vibrant. You’ll notice the difference immediately, especially if you’re using them in simple preparations like roasted potatoes or mashed potatoes.
Secondly, control. When you grow and harvest your own potatoes, you have complete control over the process. You know exactly what went into the soil, what (if any) pesticides were used, and how long the potatoes have been stored. This peace of mind is invaluable, especially for those concerned about food quality and sustainability.
Thirdly, the sheer satisfaction. There’s something incredibly gratifying about nurturing a plant from seed (or seed potato) to harvest. Unearthing those first few potatoes feels like discovering buried gold, and the sense of accomplishment is hard to beat.
But the fun doesn’t stop there! Consider these variations to spice up your potato-growing and harvesting experience:
* Succession Planting: Plant potatoes in stages, a few weeks apart, to extend your harvest season. This ensures a continuous supply of fresh potatoes throughout the summer and fall.
* Different Varieties: Experiment with different potato varieties to discover your favorites. From creamy Yukon Golds to starchy Russets to colorful fingerlings, there’s a potato out there for everyone.
* Container Gardening: If you don’t have a garden, you can still grow potatoes in containers. Use large pots or grow bags and follow the same planting and harvesting instructions.
* Companion Planting: Plant potatoes alongside beneficial companion plants like marigolds (to deter pests) or beans (to fix nitrogen in the soil).
Ultimately, learning how to harvest potatoes at home is about connecting with your food, enjoying the process, and reaping the delicious rewards. It’s a skill that will serve you well for years to come, providing you with fresh, flavorful potatoes and a deeper appreciation for the natural world.
We strongly encourage you to give this DIY trick a try. Whether you have a sprawling garden or a small balcony, there’s a way to grow and harvest your own potatoes. And once you’ve experienced the joy of digging up your own homegrown spuds, we’re confident you’ll be hooked.
Don’t forget to share your experience with us! We’d love to hear about your successes, your challenges, and your favorite ways to prepare your freshly harvested potatoes. Post photos and stories on social media using [Your Hashtag Here] and let’s celebrate the joys of homegrown potatoes together! Happy harvesting!
Frequently Asked Questions (FAQs)
Q: When is the best time to harvest my potatoes?
A: The timing depends on the variety of potato and when you planted them. Generally, potatoes are ready for harvest when the foliage starts to yellow and die back. This usually occurs about 2-3 weeks after flowering. For “new potatoes,” which are smaller and have thinner skins, you can start harvesting them earlier, about 2-3 weeks after flowering, even if the foliage is still green. Gently dig around the base of the plant to check the size of the potatoes. If they’re the size you want, you can harvest them. For potatoes intended for storage, wait until the foliage has completely died back before harvesting. This allows the skins to thicken, which helps them store better.
Q: How do I know if my potatoes are ready to be harvested?
A: The most reliable indicator is the condition of the foliage. When the leaves start to yellow, brown, and die back, it’s a sign that the plant is nearing the end of its life cycle and the potatoes are ready to be harvested. You can also gently dig around the base of a plant to check the size and maturity of the potatoes. If the skins are easily rubbed off, they’re likely new potatoes and can be harvested. If the skins are thicker and more firmly attached, they’re more mature and suitable for storage.
Q: What’s the best way to harvest potatoes without damaging them?
A: The key is to be gentle and avoid piercing the potatoes with your tools. Use a garden fork or spade to carefully loosen the soil around the potato plants. Start a foot or so away from the base of the plant and gently lift the soil, being careful not to stab the potatoes. Once the soil is loosened, you can use your hands to gently dig around and lift the potatoes out of the ground. Avoid pulling on the stems, as this can damage the potatoes.
Q: Can I harvest potatoes in the rain?
A: It’s generally best to avoid harvesting potatoes in the rain, as wet potatoes are more susceptible to rot and disease. If you must harvest in the rain, be sure to dry the potatoes thoroughly before storing them. Spread them out in a single layer in a well-ventilated area and allow them to air dry for a few days.
Q: How should I store my harvested potatoes?
A: Proper storage is crucial for preserving the quality and extending the shelf life of your potatoes. Store them in a cool, dark, and well-ventilated place, such as a root cellar or basement. The ideal temperature is between 40-50°F (4-10°C). Avoid storing potatoes in the refrigerator, as this can cause them to convert starch to sugar, resulting in a sweet taste and dark discoloration when cooked. Store potatoes in a breathable container, such as a burlap sack or a cardboard box with holes. Avoid storing them in plastic bags, as this can trap moisture and promote rot. Check your potatoes regularly for signs of spoilage, such as soft spots or sprouts. Remove any damaged potatoes to prevent them from affecting the others.
Q: My potatoes have green spots. Are they safe to eat?
A: Green spots on potatoes indicate the presence of solanine, a toxic alkaloid. Solanine is produced when potatoes are exposed to light. While small amounts of solanine are generally harmless, larger amounts can cause nausea, vomiting, and diarrhea. It’s best to avoid eating potatoes with green spots. You can try cutting away the green parts, but if the greening is extensive, it’s safer to discard the potato. To prevent greening, store potatoes in a dark place.
Q: Can I leave potatoes in the ground over winter?
A: In mild climates, you may be able to leave potatoes in the ground over winter, but it’s generally not recommended, especially in areas with freezing temperatures. The potatoes are susceptible to frost damage, rot, and pests. If you do choose to leave them in the ground, cover them with a thick layer of mulch to protect them from the cold. However, it’s best to harvest them before the first frost and store them properly.
Q: What can I do with small or damaged potatoes?
A: Even small or slightly damaged potatoes can be used in a variety of ways. You can roast them whole, add them to soups or stews, or mash them. If the damage is minor, simply cut away the affected areas before cooking. Don’t throw them away!
Q: Can I grow potatoes from store-bought potatoes?
A: While you can try growing potatoes from store-bought potatoes, it’s not always successful. Store-bought potatoes are often treated with chemicals to prevent sprouting, which can inhibit their ability to grow. Additionally, some store-bought potatoes may be diseased. For best results, use certified seed potatoes, which are specifically grown for planting and are disease-free. However, if you want to experiment, choose organic potatoes that haven’t been treated with sprout inhibitors. Look for potatoes that have “eyes” (small buds) and plant them in the same way you would plant seed potatoes.
Q: What are the best potato varieties to grow at home?
A: The best potato varieties to grow at home depend on your climate, soil type, and personal preferences. Some popular and easy-to-grow varieties include Yukon Gold (creamy and versatile), Russet Burbank (good for baking and frying), Red Pontiac (early-maturing and good for boiling), and fingerling potatoes (unique shape and flavor). Do some research to find varieties that are well-suited to your local conditions.

Leave a Comment