
Higher yield collard greens are within your reach, even if you think you don’t have a green thumb! Have you ever dreamt of a garden overflowing with vibrant, leafy collard greens, enough to share with neighbors and friends? I know I have! For generations, collard greens have been a staple in Southern cuisine, symbolizing prosperity and good fortune. From family gatherings to holiday feasts, these nutrient-packed greens have graced tables and nourished communities. But sometimes, getting a truly bountiful harvest can feel like a challenge.
That’s where these DIY tricks and hacks come in. Let’s face it, store-bought collard greens can be expensive, and they often lack the fresh, vibrant flavor of homegrown produce. Plus, there’s nothing quite like the satisfaction of nurturing a plant from seed to table. This article is packed with simple, effective techniques to help you maximize your collard green production. We’ll explore everything from soil preparation and companion planting to pest control and harvesting tips, all designed to help you achieve a higher yield collard greens harvest. So, grab your gardening gloves, and let’s get started on your journey to a greener, more abundant garden!
How to Grow Collard Greens Like a Pro: My Secrets for a Bumper Crop!
Hey there, fellow gardeners! I’m so excited to share my tried-and-true methods for growing collard greens that are not only delicious but also incredibly abundant. I’ve spent years experimenting, tweaking, and learning from my mistakes (and successes!), and I’m confident that these tips will help you achieve a higher yield of these leafy greens in your own garden. Get ready for collard green overload!
Choosing the Right Variety and Location
Before we even think about planting, let’s talk about variety and location. These two factors are crucial for a successful harvest.
* Variety is the Spice of Life (and Collard Greens!): Not all collard greens are created equal. Some are more heat-tolerant, others are more cold-hardy, and some are simply more productive. My personal favorites are ‘Champion’ (reliable and disease-resistant), ‘Georgia Southern’ (classic flavor and texture), and ‘Vates’ (compact and great for smaller gardens). Do some research and choose a variety that suits your climate and preferences.
* Location, Location, Location: Collard greens thrive in full sun, meaning at least 6 hours of direct sunlight per day. They can tolerate partial shade, but you’ll get the best growth and flavor in a sunny spot. Also, make sure the soil is well-draining. Collards don’t like to sit in soggy soil.
Preparing the Soil: The Foundation for Success
Think of your soil as the foundation of your collard green empire. A strong foundation means a bountiful harvest!
* Soil Testing is Key: Before you do anything, get your soil tested. This will tell you the pH level and nutrient content of your soil. Collard greens prefer a slightly acidic to neutral soil pH (around 6.0 to 7.0). Your local agricultural extension office can provide soil testing services.
* Amend, Amend, Amend!: Based on your soil test results, amend your soil accordingly. If your soil is too acidic, add lime to raise the pH. If it’s too alkaline, add sulfur to lower the pH.
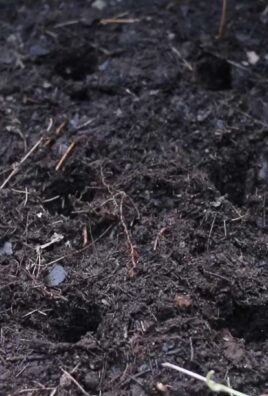
* Organic Matter is Your Best Friend: Incorporate plenty of organic matter into your soil, such as compost, well-rotted manure, or leaf mold. This will improve drainage, aeration, and nutrient retention. I usually add a generous layer of compost (about 2-3 inches) and work it into the top 6-8 inches of soil.
* Fertilizer Boost: Collard greens are heavy feeders, so they need plenty of nutrients. Before planting, I like to add a balanced fertilizer (like 10-10-10) to the soil. Follow the instructions on the fertilizer package for application rates.
Planting Your Collard Greens: From Seed to Seedling
Now for the fun part – planting! You can start collard greens from seed or purchase transplants from a local nursery. I’ve done both, and I find that starting from seed gives me more control over the process.
* Starting Seeds Indoors (Optional): If you want to get a head start on the growing season, you can start your collard green seeds indoors about 4-6 weeks before the last expected frost. Sow the seeds about 1/4 inch deep in seed-starting trays or pots filled with seed-starting mix. Keep the soil moist and warm (around 70-75°F). Once the seedlings have a few true leaves, you can transplant them into larger pots.
* Direct Sowing: If you’re planting directly into the garden, wait until the soil has warmed up to at least 60°F. Sow the seeds about 1/2 inch deep and 1-2 inches apart in rows. Thin the seedlings to about 12-18 inches apart once they have a few true leaves.
* Transplanting Seedlings: If you’re using transplants, dig holes that are slightly larger than the root balls. Gently remove the seedlings from their containers and place them in the holes. Backfill with soil and water thoroughly. Space the transplants about 12-18 inches apart in rows.
* Timing is Everything: For a spring crop, plant collard greens in early spring, about 4-6 weeks before the last expected frost. For a fall crop, plant them in late summer or early fall, about 6-8 weeks before the first expected frost. Collard greens actually taste better after a light frost!
Watering and Feeding: Keeping Your Collards Happy and Healthy
Consistent watering and regular feeding are essential for maximizing your collard green yield.
* Watering Wisely: Collard greens need consistent moisture, especially during hot, dry weather. Water deeply and regularly, aiming for about 1 inch of water per week. Avoid overhead watering, as this can promote fungal diseases. Drip irrigation or soaker hoses are ideal.
* Fertilizing Regularly: After the initial fertilizer application at planting, I like to side-dress my collard greens with a nitrogen-rich fertilizer every 4-6 weeks. This will encourage leafy growth. You can use a commercial fertilizer or an organic option like fish emulsion or compost tea. Follow the instructions on the fertilizer package for application rates.
* Mulching Magic: Apply a layer of mulch around your collard greens to help retain moisture, suppress weeds, and regulate soil temperature. I like to use straw, shredded leaves, or wood chips.
Pest and Disease Control: Protecting Your Precious Greens
Unfortunately, collard greens are susceptible to a few pests and diseases. But don’t worry, with a little vigilance, you can keep them at bay.
* Cabbage Worms: These green caterpillars can quickly decimate your collard greens. Handpicking them off the plants is an effective method, especially for small infestations. You can also use Bacillus thuringiensis (Bt), a natural insecticide that is safe for humans and beneficial insects.
* Aphids: These tiny insects suck the sap from plants, causing them to weaken and become distorted. Spraying the plants with a strong stream of water can dislodge aphids. You can also use insecticidal soap or neem oil.
* Flea Beetles: These small, jumping beetles can create tiny holes in the leaves of your collard greens. Covering the plants with row covers can prevent flea beetles from reaching them. You can also use insecticidal soap or diatomaceous earth.
* Downy Mildew: This fungal disease causes yellow spots on the upper surface of the leaves and a white, downy growth on the underside. To prevent downy mildew, avoid overhead watering and ensure good air circulation. If you see signs of downy mildew, remove the affected leaves and spray the plants with a fungicide.
* Black Rot: This bacterial disease causes yellow, V-shaped lesions on the leaves. To prevent black rot, use disease-resistant varieties and avoid overhead watering. If you see signs of black rot, remove the affected plants and dispose of them properly.
Harvesting Your Bumper Crop: The Fruits (or Greens!) of Your Labor
The moment you’ve been waiting for – harvesting your collard greens!
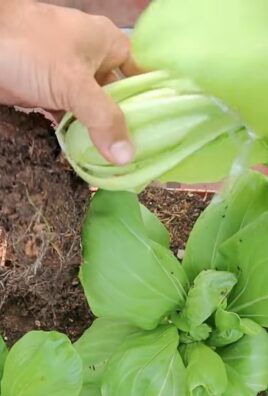
* Timing is Key: You can start harvesting collard greens when the leaves are about 6-8 inches long. The younger leaves are more tender and flavorful.
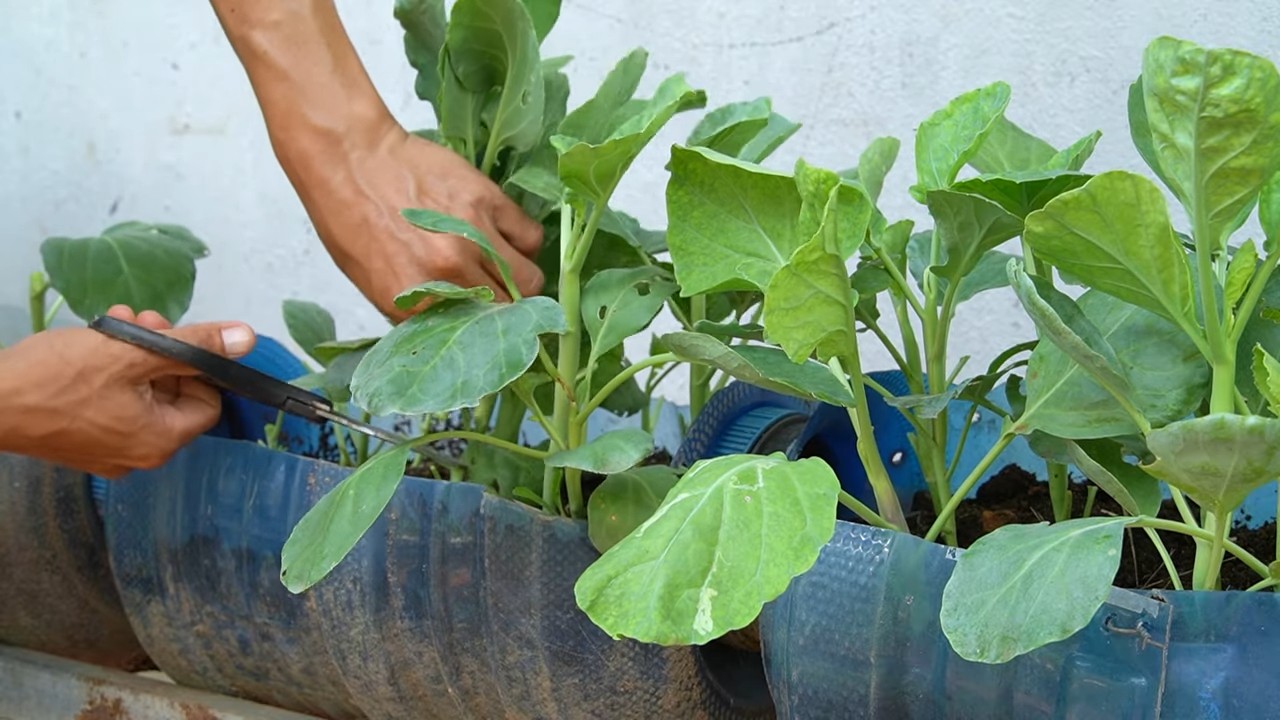
* Harvesting Technique: To harvest, simply cut the outer leaves off the plant, leaving the inner leaves to continue growing. This will allow you to harvest from the same plant for several weeks.
* Succession Planting: To ensure a continuous supply of collard greens, consider succession planting. Plant a new batch of seeds or transplants every 2-3 weeks.
* Post-Harvest Care: After harvesting, wash the collard greens thoroughly and store them in the refrigerator. They will keep for several days.
Extra Tips for a Supercharged Harvest
Here are a few extra tips that I’ve learned over the years that can really boost your collard green yield:
* Companion Planting: Plant collard greens with companion plants like onions, garlic, and rosemary. These plants can help deter pests and improve the flavor of your collard greens.
* Crop Rotation: Avoid planting collard greens in the same spot year after year. Rotate them with other crops to prevent soilborne diseases and nutrient depletion.
* Soil Solarization: If you’ve had problems with soilborne diseases in the past, consider solarizing your soil before planting. This involves covering the soil with clear plastic for several weeks during the hottest part of the summer. The heat from the sun will kill many soilborne pathogens.
* Don’t Forget to Enjoy!: Most importantly, don’t forget to enjoy the process! Gardening is a rewarding hobby, and there’s nothing quite like the taste of homegrown collard greens.
Troubleshooting Common Problems
Even with the best planning, things can sometimes go wrong. Here’s how I tackle some common collard green growing issues:
* Yellowing Leaves: This can be caused by a variety of factors, including nutrient deficiencies, overwatering, or underwatering.

Conclusion
So, there you have it! Unlocking a higher yield of collard greens doesn’t require a green thumb of mythical proportions or a massive investment in specialized equipment. It’s about understanding the plant’s needs and employing simple, effective techniques that anyone can implement. From optimizing your soil composition with the right amendments to mastering the art of strategic pruning and companion planting, these DIY tricks are designed to maximize your harvest and minimize your effort.
Think about it: more delicious, nutritious collard greens from the same amount of space and effort. Imagine the possibilities! You can enjoy them steamed, sautéed, braised, or even blended into smoothies for a nutrient boost. You can share your bounty with friends and neighbors, spreading the joy of homegrown goodness. And you can take pride in knowing that you’ve cultivated a thriving garden using sustainable and cost-effective methods.
But the benefits extend beyond just the immediate harvest. By implementing these techniques, you’re also fostering a healthier garden ecosystem. Improved soil health leads to stronger, more resilient plants that are better able to withstand pests and diseases. Strategic pruning encourages air circulation and sunlight penetration, further reducing the risk of fungal problems. And companion planting creates a diverse and balanced environment that supports beneficial insects and pollinators.
Don’t be afraid to experiment and adapt these techniques to your specific growing conditions. If you live in a particularly hot climate, consider providing some afternoon shade for your collard greens. If your soil is naturally acidic, you may need to add more lime to raise the pH. And if you’re struggling with a particular pest, research companion plants that can help deter them.
Consider these variations to further personalize your collard green growing experience:
* Succession Planting: Plant new collard green seedlings every few weeks to ensure a continuous harvest throughout the growing season.
* Different Varieties: Explore different varieties of collard greens to find the ones that best suit your taste and climate. Some popular options include ‘Georgia Southern’, ‘Champion’, and ‘Vates’.
* Container Gardening: If you don’t have a lot of space, you can still grow collard greens in containers. Just make sure to choose a large container with good drainage and use a high-quality potting mix.
* Overwintering: In milder climates, you can overwinter your collard greens for an even earlier spring harvest. Simply protect them from frost with a layer of mulch or a cold frame.
Ultimately, the key to success is to be observant, patient, and willing to learn. Pay attention to your plants, monitor their growth, and adjust your techniques as needed. And don’t be discouraged if you encounter setbacks along the way. Gardening is a journey, not a destination.
So, what are you waiting for? Grab your gardening gloves, gather your supplies, and get ready to unlock a higher yield of collard greens than you ever thought possible. We’re confident that you’ll be amazed by the results.
We encourage you to try these DIY tricks and share your experience with us! Post photos of your bountiful harvests on social media using #HigherYieldCollards and tag us so we can celebrate your success. Let’s build a community of passionate gardeners who are dedicated to growing the best collard greens possible! We can’t wait to see what you create. Happy gardening!
Frequently Asked Questions (FAQ)
What exactly does “higher yield” mean in this context?
Higher yield refers to obtaining a larger quantity of collard greens from the same amount of planted area or the same number of plants compared to traditional growing methods. This can translate to more harvests, larger leaves, and overall a more productive garden. The DIY tricks outlined aim to optimize various factors that influence collard green growth, leading to this increased output.
How long does it take to see a noticeable difference in yield after implementing these tricks?
The time it takes to see a noticeable difference can vary depending on several factors, including the initial health of your plants, the quality of your soil, and the climate in your region. However, you should generally start to see improvements within a few weeks of implementing these techniques. For example, you might notice new growth emerging more quickly after pruning or that your plants are looking healthier and more vibrant after amending the soil. Keep in mind that consistent application of these techniques over the long term will yield the most significant results.
Are these techniques suitable for all varieties of collard greens?
Yes, these techniques are generally applicable to all varieties of collard greens. However, some varieties may respond more favorably to certain techniques than others. For example, some varieties may be more tolerant of pruning than others. It’s always a good idea to research the specific needs of the variety you’re growing and adjust your techniques accordingly.
What if I don’t have access to all the recommended soil amendments?
Don’t worry if you can’t find all the exact soil amendments listed. The key is to focus on improving the overall health and fertility of your soil. Compost is a great all-purpose amendment that can provide essential nutrients and improve soil structure. You can also use other organic materials like aged manure, leaf mold, or grass clippings. If you’re unsure about the nutrient content of your soil, consider getting a soil test to determine what amendments are needed.
Is companion planting really that effective? What are some good companion plants for collard greens?
Yes, companion planting can be a very effective way to improve the health and yield of your collard greens. Certain plants can help deter pests, attract beneficial insects, or improve soil fertility. Some good companion plants for collard greens include:
* Aromatic herbs: Rosemary, sage, and thyme can help repel cabbage moths and other pests.
* Marigolds: These flowers are known to deter nematodes and other soil pests.
* Garlic and onions: These plants can help repel aphids and other insects.
* Legumes: Beans and peas can fix nitrogen in the soil, which is beneficial for collard greens.
* Dill: Attracts beneficial insects like ladybugs and lacewings, which prey on aphids and other pests.
How often should I prune my collard greens?
The frequency of pruning will depend on the growth rate of your plants and your desired harvest size. As a general rule, you can start pruning when the plants are about 6-8 inches tall. Remove any yellowing or damaged leaves, as well as any leaves that are touching the ground. You can also remove some of the larger, outer leaves to encourage new growth. Prune regularly throughout the growing season to maintain a healthy and productive plant.
Can I use these techniques for other leafy green vegetables?
Absolutely! Many of these techniques, such as soil amendment, strategic pruning, and companion planting, can be applied to other leafy green vegetables like kale, spinach, and mustard greens. The specific needs of each vegetable may vary slightly, so it’s always a good idea to do some research before applying these techniques.
What are the most common mistakes people make when trying to increase their collard green yield?
Some common mistakes include:
* Neglecting soil health: Poor soil is one of the biggest limiting factors for collard green growth.
* Overwatering or underwatering: Collard greens need consistent moisture, but they don’t like to be waterlogged.
* Ignoring pests and diseases: Pests and diseases can quickly decimate a collard green crop.
* Not pruning regularly: Pruning helps to encourage new growth and improve air circulation.
* Not providing enough sunlight: Collard greens need at least 6 hours of sunlight per day.
What if I live in an area with a short growing season? Can I still use these techniques?
Yes, you can still use these techniques even if you live in an area with a short growing season. Start your collard green seedlings indoors a few weeks before the last expected frost. This will give them a head start on the growing season. You can also use row covers or cold frames to protect your plants from frost and extend the growing season. Choose faster-maturing varieties of collard greens to ensure you have enough time to harvest them before the first frost.
How do I know if my collard greens are ready to harvest?
Collard greens are typically ready to harvest when the leaves are about 8-10 inches long. The leaves should be a deep green color and feel firm to the touch. You can harvest individual leaves as needed, starting with the outer leaves. Avoid harvesting more than one-third of the plant at a time, as this can stress the plant and reduce its yield.

Leave a Comment