
Homemade Wheatgrass Juice Recipe: Unlock the vibrant health benefits of this superfood right in your own kitchen! Are you tired of expensive juice bar runs or pre-packaged wheatgrass shots that lack that fresh, earthy punch? I know I was! That’s why I’m so excited to share this simple, cost-effective, and incredibly rewarding DIY guide to making your own wheatgrass juice.
Wheatgrass, with its rich history dating back to ancient Egypt where it was revered for its health-boosting properties, has become a modern-day wellness staple. But let’s be honest, the price tag can be a real deterrent. This is where the magic of DIY comes in. Imagine having a constant supply of fresh, potent wheatgrass juice, knowing exactly what went into it, and saving a ton of money in the process.
This article isn’t just about a recipe; it’s about empowering you to take control of your health and well-being. We’ll walk you through every step, from sprouting your own wheatgrass seeds to juicing them for that concentrated shot of goodness. Whether you’re a seasoned gardener or a complete beginner, I’m confident that you’ll find this homemade wheatgrass juice recipe easy to follow and incredibly satisfying. Get ready to experience the energy boost and health benefits that only freshly made wheatgrass juice can provide!
Making Your Own Vibrant Wheatgrass Juice at Home
Okay, let’s dive into the wonderful world of homemade wheatgrass juice! I know, I know, it sounds intimidating, but trust me, it’s totally doable and way more rewarding (and cheaper!) than buying it pre-made. Plus, you get the freshest, most potent juice possible. I’m going to walk you through everything you need to know, from growing your own wheatgrass to juicing it like a pro.
What You’ll Need: The Essentials
Before we get started, let’s gather our supplies. This is what you’ll need to successfully grow and juice your own wheatgrass:
* Wheatgrass Seeds: Opt for organic, hard red winter wheat seeds. These are readily available online or at your local health food store.
* Growing Trays: You’ll need at least two shallow trays with drainage holes. One tray will hold the soil, and the other will act as a cover during the initial germination phase.
* Potting Soil: Use a good quality organic potting mix. Avoid anything with added fertilizers, as we want pure, unadulterated wheatgrass.
* Spray Bottle: For misting the seeds and seedlings.
* Juicer: A dedicated wheatgrass juicer is ideal. Masticating juicers (also known as slow juicers) work best because they extract the most juice and nutrients. Centrifugal juicers aren’t as effective for wheatgrass. If you don’t have a wheatgrass juicer, I’ll share some alternative methods later.
* Water: Filtered water is always best.
* Sharp Scissors or Knife: For harvesting the wheatgrass.
* Optional: A small fan to improve air circulation and prevent mold.
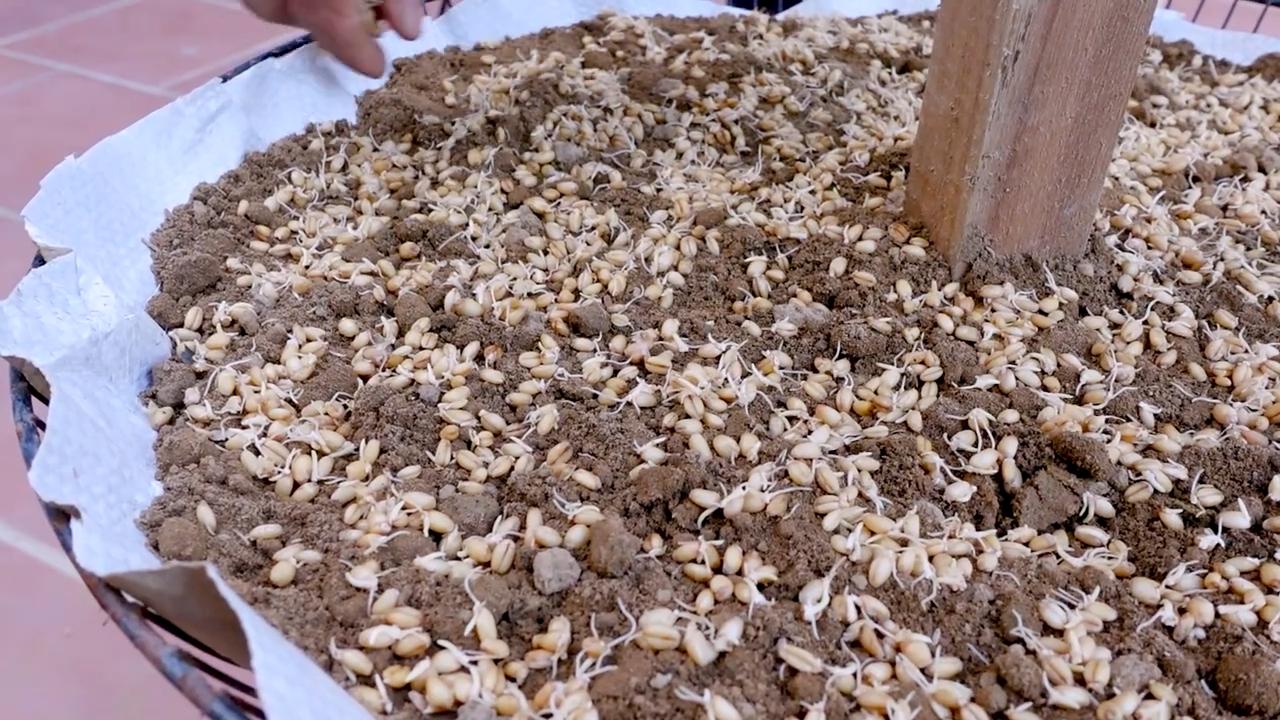
Phase 1: Sprouting Your Wheatgrass Seeds
This is where the magic begins! Getting the sprouting process right is crucial for healthy wheatgrass growth.
1. Soaking the Seeds: Place about 1 cup of wheatgrass seeds in a large bowl. Cover them with plenty of filtered water (about 2-3 times the volume of the seeds). Let them soak for 8-12 hours, or even overnight. This kickstarts the germination process. You’ll notice the seeds swell up as they absorb water.
2. Rinsing and Draining: After soaking, drain the seeds thoroughly using a fine-mesh sieve or colander. Rinse them well with fresh water to remove any debris or residue.
3. Spreading the Seeds: Spread the soaked seeds evenly over the bottom of your growing tray. You want a fairly dense layer, but not so thick that the seeds are piled on top of each other. A single layer is ideal.
4. Covering the Seeds: Place the second tray on top of the seeds, creating a dark, humid environment. This encourages germination. You can also use a damp towel or cloth to cover the seeds if you don’t have a second tray.
5. Misting and Waiting: Mist the seeds thoroughly with your spray bottle. You want them to be moist, but not soaking wet. Place the tray in a cool, dark place (like a cupboard or pantry).
6. Daily Rinsing and Misting: For the next 2-3 days, rinse and drain the seeds twice a day. This prevents mold growth and keeps them hydrated. After rinsing, mist them again and replace the cover.
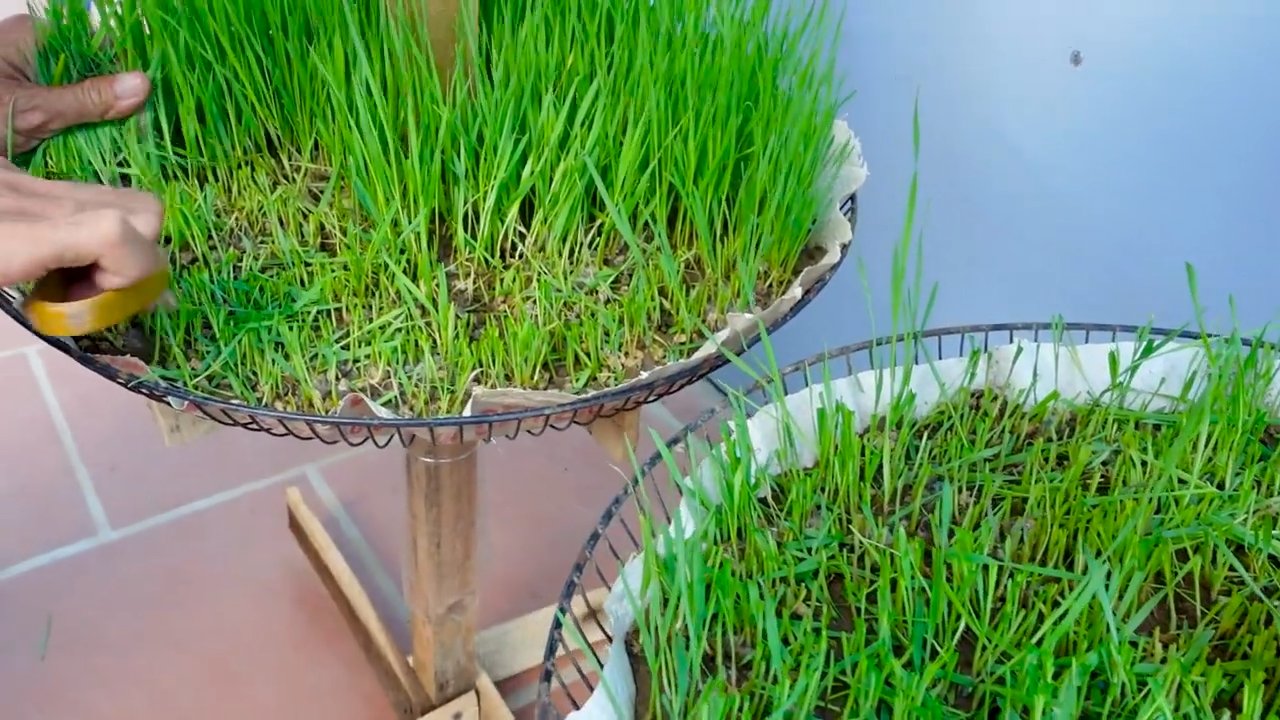
Phase 2: Growing Your Wheatgrass
Once the seeds have sprouted (you’ll see tiny white roots emerging), it’s time to move them into the light and let them grow!
1. Preparing the Soil: Fill your growing tray with about 1-2 inches of organic potting mix. Moisten the soil thoroughly with water. You want it to be damp, but not soggy.
2. Transferring the Sprouts: Gently spread the sprouted seeds evenly over the surface of the soil. Don’t bury them; just let them rest on top.
3. Misting and Covering (Optional): Mist the sprouts lightly with water. You can cover them with the second tray or a damp towel for the first day or two to help them establish themselves. This helps maintain humidity.
4. Moving to the Light: Place the tray in a well-lit area, but avoid direct sunlight, which can scorch the delicate seedlings. A bright windowsill or a spot under a grow light is perfect.
5. Watering Regularly: Water the wheatgrass regularly, keeping the soil consistently moist. You can water from the bottom by placing the tray in a shallow dish of water and allowing the soil to absorb it. Or, you can gently water from the top using a watering can or spray bottle. Avoid overwatering, as this can lead to mold growth.
6. Air Circulation: Good air circulation is essential for preventing mold. If you live in a humid environment, consider using a small fan to gently circulate the air around the wheatgrass.
7. Patience is Key: Your wheatgrass will grow quickly! It typically takes about 7-10 days for it to reach a harvestable height of 4-7 inches.
Phase 3: Harvesting Your Wheatgrass
The moment you’ve been waiting for! Harvesting your wheatgrass at the right time ensures the best flavor and nutrient content.
1. When to Harvest: The best time to harvest wheatgrass is when it’s about 4-7 inches tall and has developed a vibrant green color. You might even see a “split” in the blades, where a second blade starts to emerge. This indicates that the wheatgrass is at its peak nutrient density.
2. Harvesting Technique: Using sharp scissors or a knife, cut the wheatgrass about 1 inch above the soil line. This allows for a second harvest, although the second harvest won’t be as potent as the first.
3. Rinsing the Harvested Wheatgrass: Rinse the harvested wheatgrass thoroughly with cold water to remove any dirt or debris.
4. Storing the Harvested Wheatgrass: You can juice the wheatgrass immediately, or store it in the refrigerator for a few days. To store it, wrap it loosely in a damp paper towel and place it in a plastic bag.
Phase 4: Juicing Your Wheatgrass
Now for the fun part! Let’s turn that beautiful green wheatgrass into a potent shot of goodness.
1. Preparing the Wheatgrass: Cut the harvested wheatgrass into smaller pieces (about 1-2 inches long) to make it easier to feed into the juicer.
2. Juicing with a Wheatgrass Juicer: If you have a dedicated wheatgrass juicer (masticating juicer), simply feed the wheatgrass into the juicer according to the manufacturer’s instructions. The juicer will extract the juice and separate the pulp.
3. Juicing Without a Wheatgrass Juicer (Alternative Methods):
* Blender Method: If you don’t have a wheatgrass juicer, you can use a high-powered blender. Add a small amount of water (about 1/4 cup) to the blender along with the wheatgrass. Blend until it’s a smooth puree. Then, strain the mixture through a cheesecloth or nut milk bag to separate the juice from the pulp. This method is less efficient than using a dedicated juicer, but it works in a pinch.
* Mortar and Pestle Method: For a truly old-school approach, you can use a mortar and pestle to crush the wheatgrass and extract the juice. This is a labor-intensive method, but it can be effective for small batches.
4. Enjoying Your Wheatgrass Juice: Drink your freshly made wheatgrass juice immediately for the best flavor and nutrient content. It’s best consumed on an empty stomach.
Tips and Tricks for Success
* Mold Prevention: Mold is the biggest enemy of wheatgrass. To prevent mold, ensure good air circulation, avoid overwatering, and rinse the seeds and sprouts regularly. If you do see mold, remove the affected area immediately.
* Second Harvest: You can usually get a second harvest from your wheatgrass, but it won’t be as potent as the first. After harvesting, continue to water the wheatgrass and provide it with light.
* Taste Enhancement: Wheatgrass juice has a strong, earthy flavor that some people find unpleasant. You can mix it with other juices, such as apple juice, pineapple juice, or lemon juice, to improve the taste.
* Start Small: Begin with a small amount of wheatgrass juice (about 1-2 ounces) and gradually increase the amount as your body adjusts.
* Experiment: Don’t be afraid to experiment with different growing techniques and juicing methods to find what works best for you.
* Composting: Don’t throw away the pulp! It makes excellent compost for your garden.
Troubleshooting
* Seeds Not Germinating: Make sure your seeds are fresh and viable. Also, ensure that
Conclusion
So, there you have it! Making your own homemade wheatgrass juice isn’t just a trendy health kick; it’s a powerful way to infuse your body with vital nutrients, boost your energy levels, and experience a noticeable improvement in your overall well-being. Forget the expensive juice bar runs and the uncertainty of pre-packaged products. With a little effort and our simple guide, you can unlock the incredible benefits of fresh, potent wheatgrass juice right in your own kitchen.
Why is this DIY trick a must-try? Because it puts you in complete control. You know exactly what’s going into your juice – pure, unadulterated wheatgrass, grown with love and care. You avoid the preservatives, additives, and hidden sugars that often lurk in commercially produced juices. Plus, the taste of freshly squeezed wheatgrass juice is undeniably superior. It’s vibrant, grassy, and bursting with life.
But the benefits extend beyond just taste and purity. Growing your own wheatgrass and juicing it yourself is incredibly cost-effective. Think about it: the price of a single shot of wheatgrass juice at a juice bar can easily cover the cost of a whole tray of wheatgrass seeds. Over time, you’ll save a significant amount of money while enjoying a constant supply of this nutritional powerhouse.
Ready to experiment? Here are a few suggestions and variations to get you started:
* **Flavor Boost:** While some people love the pure, earthy taste of wheatgrass juice, others find it a bit intense. If you’re in the latter camp, try adding a small piece of ginger, a slice of lemon, or a few sprigs of mint to your juicer. These additions can help to balance the flavor and make the juice more palatable.
* **Smoothie Power-Up:** Don’t have time for a dedicated wheatgrass shot? No problem! Add a shot of your freshly squeezed wheatgrass juice to your favorite smoothie recipe. It’s a fantastic way to sneak in extra nutrients without drastically altering the taste.
* **Frozen Cubes:** If you find yourself with an abundance of wheatgrass juice, don’t let it go to waste! Pour the juice into ice cube trays and freeze it. These frozen cubes can be easily added to smoothies, juices, or even used to cool down your water.
* Wheatgrass and Fruit Combinations: Experiment with adding small amounts of fruits like green apple or pineapple to your wheatgrass juice. The sweetness can help to mask the grassy flavor and make it more enjoyable. Remember to start with small amounts and adjust to your taste.
We’re confident that once you experience the difference of homemade wheatgrass juice, you’ll never go back to store-bought alternatives. It’s a simple, affordable, and incredibly rewarding way to nourish your body from the inside out.
So, what are you waiting for? Grab some wheatgrass seeds, follow our easy-to-follow instructions, and start juicing! We can’t wait to hear about your experience. Share your photos, tips, and variations in the comments below. Let’s build a community of wheatgrass enthusiasts and inspire others to embrace the power of homemade goodness!
Frequently Asked Questions (FAQ)
What exactly *is* wheatgrass juice and why is it so good for me?
Wheatgrass juice is the liquid extracted from the freshly sprouted leaves of the common wheat plant (Triticum aestivum). It’s essentially a concentrated dose of vitamins, minerals, antioxidants, and enzymes. Think of it as a superfood shot! It’s particularly rich in chlorophyll, which is believed to have detoxifying and oxygenating properties. People drink wheatgrass juice for a variety of reasons, including boosting energy levels, improving digestion, strengthening the immune system, and promoting overall well-being.
How long does wheatgrass juice last after juicing?
Freshly squeezed wheatgrass juice is best consumed immediately, ideally within 15-20 minutes of juicing. This is because the nutrients and enzymes in the juice begin to degrade quickly once exposed to air and light. If you can’t drink it right away, store it in an airtight container in the refrigerator for up to 24 hours. However, keep in mind that the longer it sits, the more nutrients it will lose. Freezing the juice in ice cube trays is a good option for longer storage.
Can I use a regular blender instead of a juicer?
While you *can* technically use a regular blender, it’s not the ideal method for extracting wheatgrass juice. Blenders tend to chop the wheatgrass rather than extracting the juice, resulting in a less potent and more fibrous mixture. You’ll also need to add water to the blender to help it process the wheatgrass, which dilutes the juice. A masticating juicer (also known as a slow juicer or cold-press juicer) is the best option for extracting the maximum amount of juice and nutrients from wheatgrass. Centrifugal juicers can also be used, but they tend to generate more heat, which can destroy some of the enzymes.
How much wheatgrass juice should I drink per day?
It’s best to start with a small amount, such as 1-2 ounces (30-60 ml) per day, and gradually increase the amount as your body adjusts. Some people can tolerate up to 4 ounces (120 ml) per day, but it’s important to listen to your body and not overdo it. Drinking too much wheatgrass juice can cause nausea, headaches, or other digestive discomfort.
Where can I buy wheatgrass seeds and how do I grow them?
Wheatgrass seeds are readily available online and at most health food stores or garden centers. Look for organic, untreated seeds to ensure the best quality. Growing wheatgrass is relatively easy. You’ll need a tray with drainage holes, some potting soil or a sprouting tray, and a spray bottle. Soak the seeds in water for 8-12 hours, then spread them evenly over the soil or sprouting tray. Mist the seeds with water 2-3 times per day, keeping them moist but not waterlogged. The wheatgrass should be ready to harvest in about 7-10 days, when it’s about 4-6 inches tall.
Is it safe for everyone to drink wheatgrass juice?
While wheatgrass juice is generally safe for most people, there are a few precautions to keep in mind. Pregnant or breastfeeding women should consult with their doctor before drinking wheatgrass juice. People with allergies to wheat or grass should also exercise caution. If you have any underlying health conditions or are taking medications, it’s always a good idea to talk to your doctor before adding wheatgrass juice to your diet.
My wheatgrass juice tastes bitter. Is there anything I can do?
The taste of wheatgrass juice can vary depending on the variety of wheatgrass, the growing conditions, and the juicing method. If your juice tastes too bitter, try adding a small amount of lemon juice, ginger, or a sweet fruit like apple or pineapple to balance the flavor. You can also try growing your wheatgrass in a slightly shadier location, as this can help to reduce the bitterness. Make sure you are cutting the wheatgrass above the root, as the root can add bitterness to the juice.
Can I reuse the soil after harvesting wheatgrass?
It’s generally not recommended to reuse the soil after harvesting wheatgrass. The soil can become depleted of nutrients and may harbor mold or bacteria. It’s best to discard the used soil and start with fresh soil for each batch of wheatgrass. You can compost the used soil if you have a compost pile.
What are the signs of mold on wheatgrass and how can I prevent it?
Mold can sometimes grow on wheatgrass, especially if it’s grown in a humid environment or if the seeds are overcrowded. Signs of mold include white or gray fuzzy patches on the soil or the wheatgrass blades. To prevent mold, make sure to provide good air circulation, avoid overwatering, and don’t overcrowd the seeds. You can also add a small amount of hydrogen peroxide to the water when misting the wheatgrass, as this can help to kill mold spores. If you see mold, discard the affected wheatgrass and soil immediately.


Leave a Comment