
Kailan Growing Tips: Your Guide to a Thriving Home Garden!
Have you ever dreamed of stepping outside your back door and harvesting fresh, vibrant greens for dinner? Imagine the satisfaction of knowing exactly where your food comes from and that it’s packed with nutrients. Well, with these Kailan Growing Tips, that dream can become a reality! This isn’t just about planting seeds; it’s about creating a sustainable and rewarding connection with nature, right in your own backyard.
Kailan, also known as Chinese kale, has been a staple in Asian cuisine for centuries, prized for its robust flavor and impressive nutritional profile. From stir-fries to steamed dishes, this leafy green adds a delicious and healthy touch to countless meals. But you don’t have to rely on grocery stores to enjoy this versatile vegetable. Growing your own kailan is easier than you might think!
In today’s world, where we’re increasingly conscious of food miles and the impact of our choices on the environment, growing your own vegetables is more relevant than ever. Plus, let’s be honest, store-bought produce often lacks the freshness and flavor of homegrown goodies. These Kailan Growing Tips will empower you to cultivate a bountiful harvest, save money, and enjoy the unparalleled taste of freshly picked kailan. So, grab your gardening gloves, and let’s get started on this exciting journey together!
Growing Kailan at Home: A DIY Guide for Delicious Greens
Okay, so you want to grow your own kailan? Awesome! It’s easier than you might think, and nothing beats the taste of fresh, homegrown veggies. I’ve been growing kailan for a few years now, and I’m excited to share my tips and tricks with you. This guide will walk you through everything you need to know, from seed to harvest. Let’s get started!
What You’ll Need
Before we dive into the nitty-gritty, let’s gather our supplies. Here’s a list of everything you’ll need to successfully grow kailan at home:
* Kailan Seeds: Obviously! Choose a variety that suits your taste and climate. I personally love the ‘Green Lance’ variety for its tender leaves.
* Seed Starting Trays or Small Pots: These are essential for starting your seeds indoors.
* Seed Starting Mix: This is a light, well-draining soil mix specifically designed for seedlings.
* Larger Pots or Garden Bed: Once your seedlings are big enough, they’ll need a permanent home.
* Potting Soil or Garden Soil: Choose a high-quality soil that’s rich in nutrients.
* Fertilizer: A balanced fertilizer will help your kailan plants thrive. I recommend a slow-release granular fertilizer or a liquid fertilizer.
* Watering Can or Hose: For keeping your plants hydrated.
* Gardening Gloves: To protect your hands.
* Trowel or Small Shovel: For transplanting seedlings.
* Optional:
* Grow Lights: If you’re starting seeds indoors and don’t have a sunny window.
* Pest Control: Insecticidal soap or neem oil for dealing with pests.
* Mulch: To help retain moisture and suppress weeds.
Starting Your Kailan Seeds
This is where the magic begins! Starting your seeds indoors gives them a head start, especially if you live in a cooler climate.
1. Prepare Your Seed Starting Trays: Fill your seed starting trays or small pots with seed starting mix. Gently pat down the soil to remove any air pockets.
2. Sow the Seeds: Make a small indentation (about ¼ inch deep) in the center of each cell or pot. Place 2-3 kailan seeds in each indentation. This increases your chances of at least one seed germinating.
3. Cover the Seeds: Gently cover the seeds with a thin layer of seed starting mix.
4. Water Thoroughly: Water the soil gently using a watering can or spray bottle. Make sure the soil is moist but not waterlogged.
5. Provide Warmth and Light: Place the seed starting trays in a warm location (around 70-75°F) with plenty of light. A sunny windowsill or grow lights will work well.
6. Keep the Soil Moist: Check the soil moisture daily and water as needed to keep it consistently moist.
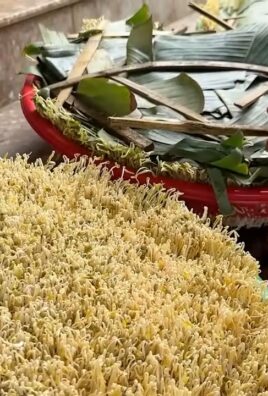
7. Wait for Germination: Kailan seeds typically germinate within 5-10 days.
Transplanting Your Seedlings
Once your seedlings have developed a few sets of true leaves (the leaves that look like miniature kailan leaves), it’s time to transplant them into larger pots or your garden bed.
1. Harden Off Your Seedlings: Before transplanting, you’ll need to “harden off” your seedlings. This means gradually exposing them to outdoor conditions to help them adjust. Start by placing them outside for an hour or two each day, gradually increasing the time over the course of a week.
2. Prepare Your Planting Location: Choose a location that receives at least 6 hours of sunlight per day. If you’re planting in pots, choose pots that are at least 12 inches in diameter. If you’re planting in a garden bed, make sure the soil is well-draining and amended with compost or other organic matter.
3. Dig Holes: Dig holes that are slightly larger than the root balls of your seedlings. Space the holes about 12-18 inches apart.
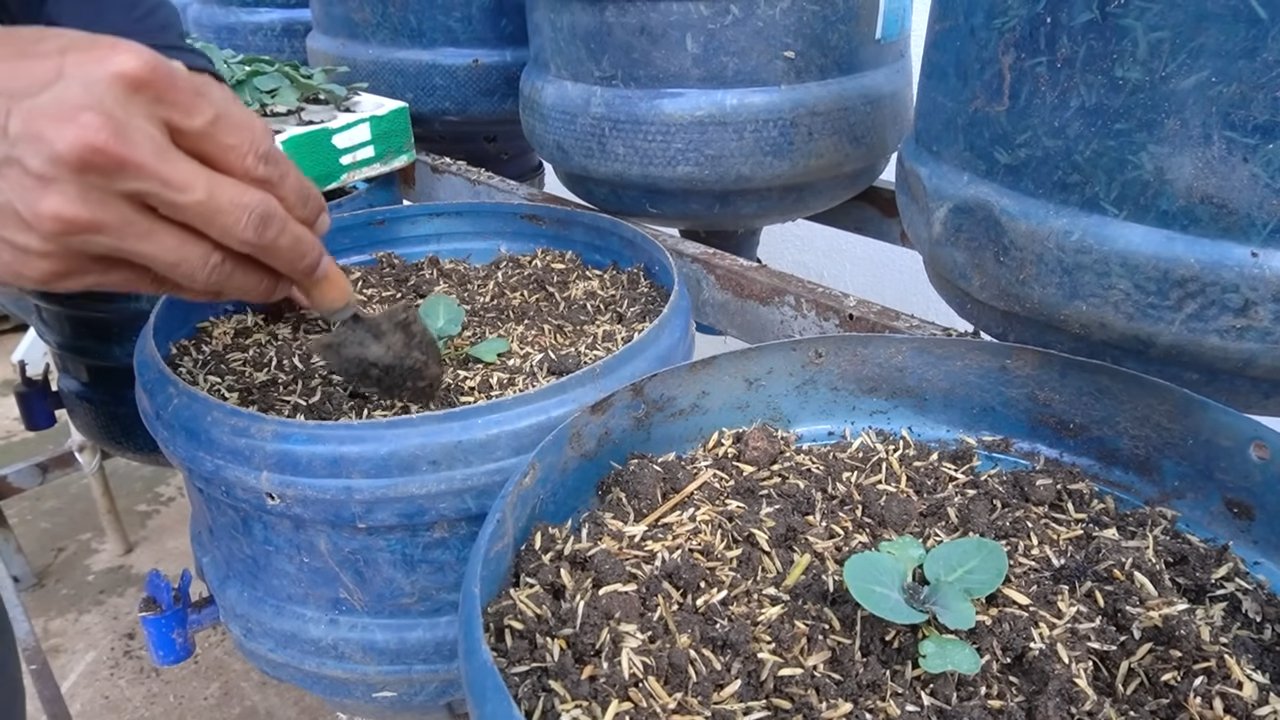
4. Carefully Remove Seedlings: Gently remove the seedlings from their seed starting trays or pots. Be careful not to damage the roots.
5. Plant the Seedlings: Place the seedlings in the holes and gently backfill with soil. Make sure the top of the root ball is level with the surrounding soil.
6. Water Thoroughly: Water the newly transplanted seedlings thoroughly.
7. Mulch (Optional): Apply a layer of mulch around the plants to help retain moisture and suppress weeds.
Caring for Your Kailan Plants
Now that your kailan plants are in their permanent homes, it’s time to provide them with the care they need to thrive.
1. Watering: Kailan plants need consistent moisture, especially during hot weather. Water deeply whenever the top inch of soil feels dry to the touch. Avoid overwatering, as this can lead to root rot.
2. Fertilizing: Fertilize your kailan plants every 2-3 weeks with a balanced fertilizer. Follow the instructions on the fertilizer package.
3. Sunlight: Ensure your kailan plants receive at least 6 hours of sunlight per day.
4. Pest Control: Keep an eye out for pests such as aphids, cabbage worms, and flea beetles. If you notice any pests, treat them with insecticidal soap or neem oil. I’ve found that regular inspection and early intervention are key to preventing major infestations.
5. Weeding: Keep the area around your kailan plants free of weeds. Weeds compete with your plants for nutrients and water.
6. Support (Optional): If your kailan plants get very tall, you may need to provide them with support to prevent them from falling over. You can use stakes or tomato cages for this purpose.
Harvesting Your Kailan
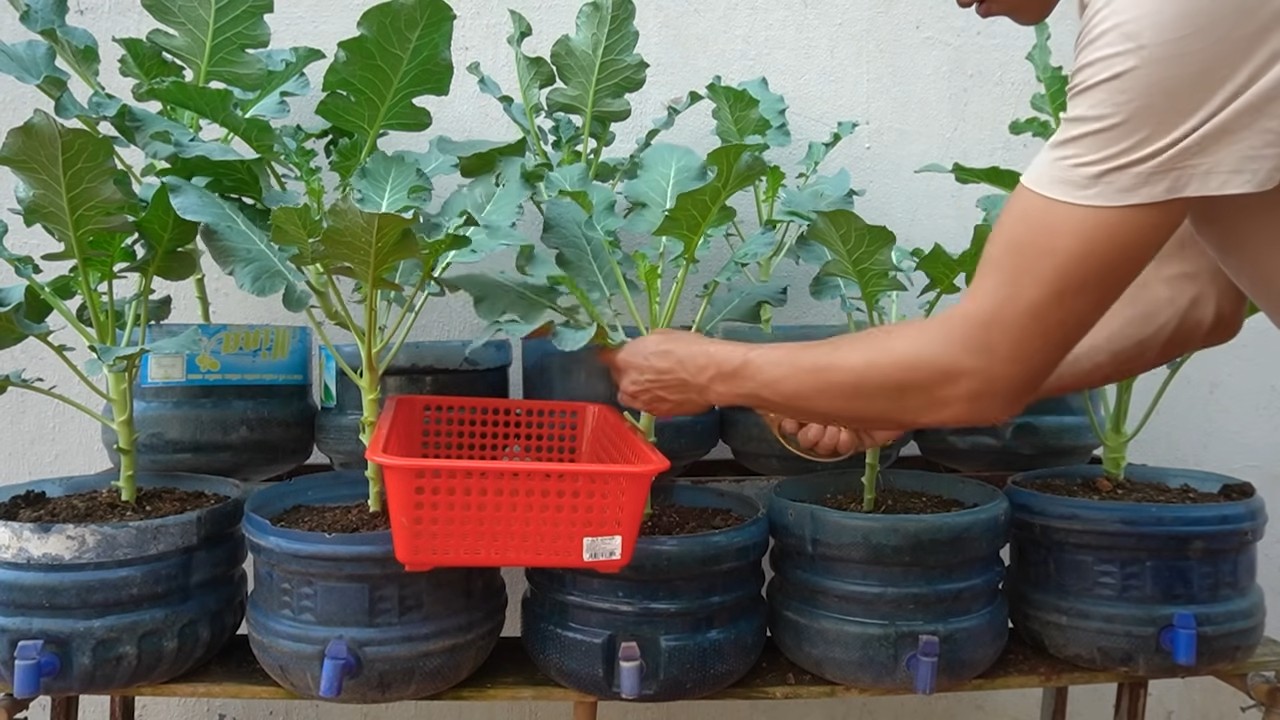
The best part! You can start harvesting kailan leaves about 6-8 weeks after transplanting.
1. Harvesting Leaves: Harvest the outer leaves first, leaving the inner leaves to continue growing. This will allow you to harvest kailan leaves continuously for several weeks.
2. Harvesting Stems: You can also harvest the stems of the kailan plant. The stems are best harvested when they are young and tender.
3. Harvesting Flowers (Optional): If your kailan plant starts to flower, you can harvest the flower buds. The flower buds are also edible and have a slightly sweet flavor.
4. Cut Carefully: Use a sharp knife or scissors to cut the leaves or stems.
5. Wash and Enjoy: Wash the harvested leaves or stems thoroughly before eating. Kailan can be eaten raw in salads, stir-fried, steamed, or added to soups.
Troubleshooting
Even with the best care, you might encounter some problems while growing kailan. Here are a few common issues and how to address them:
* Yellowing Leaves: This could be a sign of overwatering, underwatering, or nutrient deficiency. Check the soil moisture and adjust your watering schedule accordingly. Fertilize your plants with a balanced fertilizer.
* Holes in Leaves: This is usually caused by pests such as cabbage worms or flea beetles. Inspect your plants regularly and treat them with insecticidal soap or neem oil.
* Stunted Growth: This could be caused by poor soil, lack of sunlight, or pests. Amend your soil with compost or other organic matter. Make sure your plants are getting enough sunlight. Check for pests and treat them accordingly.
* Bolting (Premature Flowering): This can happen if the weather gets too hot. Try to provide your plants with some shade during the hottest part of the day.
Tips for Success
Here are a few extra tips to help you grow the best kailan possible:
* Choose the Right Variety: There are many different varieties of kailan available. Choose a variety that is well-suited to your climate and growing conditions.
* Start with Good Soil: Kailan plants need well-draining soil that is rich in nutrients. Amend your soil with compost or other organic matter before planting.
* Water Regularly: Kailan plants need consistent moisture, especially during hot weather. Water deeply whenever the top inch of soil feels dry to the touch.
* Fertilize Regularly: Fertilize your kailan plants every 2-3 weeks with a balanced fertilizer.
* Protect from Pests: Keep an eye out for pests and treat them promptly.
* Harvest Regularly: Harvest the outer leaves regularly to encourage continued growth.
* Succession Planting: Plant new kailan seeds every few weeks to ensure a continuous harvest.
Enjoy Your Homegrown Kailan!
Growing your own kailan is
Conclusion
So, there you have it! Mastering the art of growing kailan at home is not only achievable but also incredibly rewarding. We’ve walked you through the essential steps, from selecting the right seeds to harvesting your bountiful crop. But why should you embark on this kailan-growing adventure?
Firstly, the taste. Freshly harvested kailan from your own garden boasts a flavor profile that far surpasses anything you can find in a supermarket. The subtle sweetness and crisp texture are simply unmatched. Imagine stir-fries bursting with vibrant green goodness, salads that are both nutritious and delicious, and steamed kailan that melts in your mouth. This is the promise of homegrown kailan.
Secondly, control. When you grow your own kailan, you have complete control over the growing process. You can choose organic methods, avoiding harmful pesticides and herbicides. You know exactly what goes into your food, ensuring that you’re feeding yourself and your family the healthiest possible produce. This peace of mind is invaluable.
Thirdly, the satisfaction. There’s an undeniable sense of accomplishment that comes with nurturing a plant from seed to harvest. Watching your kailan seedlings sprout, grow, and flourish is a truly fulfilling experience. It’s a connection to nature that can be incredibly grounding and therapeutic.
But the journey doesn’t end here! Feel free to experiment with different varieties of kailan. Try growing Chinese kailan for its thicker stems and slightly bitter flavor, or explore the more tender and leafy versions. You can also adjust the growing conditions to suit your local climate. If you live in a colder region, consider starting your kailan indoors and transplanting it outdoors when the weather warms up. If you live in a hotter region, provide your kailan with some afternoon shade to prevent it from bolting.
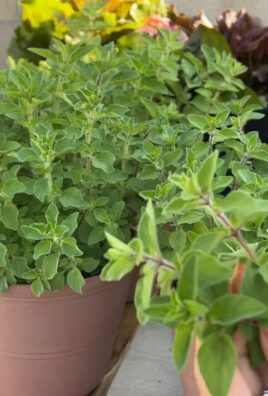
Consider companion planting to further enhance your kailan growing experience. Marigolds can help deter pests, while herbs like basil and rosemary can improve the flavor of your kailan. Experiment with different combinations to find what works best for you.
Don’t be afraid to get creative in the kitchen, too! Kailan is incredibly versatile and can be used in a wide variety of dishes. Try adding it to soups, stews, and even smoothies. You can also juice it for a healthy and refreshing drink. The possibilities are endless!
Growing kailan is a journey of discovery, and we encourage you to embrace it with open arms. So, grab your seeds, prepare your soil, and get ready to experience the joy of homegrown kailan. We’re confident that you’ll be amazed by the results.
And now, we want to hear from you! Share your kailan-growing experiences with us in the comments below. What challenges did you face? What successes did you celebrate? What are your favorite ways to prepare kailan? Your insights will help other aspiring gardeners and inspire us all to grow even more delicious and nutritious food. Let’s build a community of kailan enthusiasts and share our knowledge and passion for this amazing vegetable. Happy gardening!
Frequently Asked Questions (FAQ)
What are the most common problems when growing kailan, and how can I solve them?
The most common problems include pest infestations (aphids, cabbage worms), bolting (premature flowering), and nutrient deficiencies.
* Pest Infestations: Regularly inspect your plants for pests. For aphids, try spraying them with a strong stream of water or using insecticidal soap. For cabbage worms, handpick them off the plants or use Bacillus thuringiensis (Bt), a natural insecticide. Consider using row covers to prevent pests from reaching your plants in the first place.
* Bolting: Bolting is often caused by heat stress. To prevent bolting, provide your kailan with some afternoon shade, especially during hot weather. Water deeply and regularly to keep the soil moist. Choose bolt-resistant varieties if you live in a warm climate.
* Nutrient Deficiencies: Yellowing leaves can indicate a nitrogen deficiency. Amend the soil with compost or use a nitrogen-rich fertilizer. Stunted growth can indicate a phosphorus deficiency. Use a fertilizer that is higher in phosphorus. Always follow the instructions on the fertilizer label.
How often should I water my kailan plants?
Kailan needs consistent moisture to thrive. Water deeply whenever the top inch of soil feels dry to the touch. This usually translates to watering every 2-3 days, but it depends on the weather and soil conditions. During hot, dry weather, you may need to water daily. Use a soaker hose or drip irrigation to water the plants at the base, avoiding wetting the leaves, which can promote fungal diseases.
What kind of soil is best for growing kailan?
Kailan prefers well-drained, fertile soil that is rich in organic matter. The ideal soil pH is between 6.0 and 7.5. Before planting, amend the soil with compost, aged manure, or other organic matter to improve drainage and fertility. If your soil is heavy clay, consider adding sand or perlite to improve drainage. A soil test can help you determine the pH and nutrient levels of your soil.
When is the best time to harvest kailan?
You can start harvesting kailan leaves when they are about 6-8 inches long. Harvest the outer leaves first, leaving the inner leaves to continue growing. This will encourage the plant to produce more leaves. You can harvest kailan continuously for several weeks. If the plant starts to bolt, harvest all the remaining leaves.
Can I grow kailan in containers?
Yes, kailan can be successfully grown in containers. Choose a container that is at least 12 inches deep and wide. Use a high-quality potting mix that is well-draining. Make sure the container has drainage holes. Water regularly and fertilize every 2-3 weeks with a balanced fertilizer. Place the container in a sunny location.
What are some good companion plants for kailan?
Good companion plants for kailan include:
* Marigolds: Deter pests like aphids and nematodes.
* Nasturtiums: Attract aphids away from kailan.
* Rosemary: Deters cabbage moths and other pests.
* Thyme: Repels cabbage white butterflies.
* Garlic: Deters aphids and other pests.
* Onions: Deters aphids and other pests.
* Lettuce: Provides ground cover and helps retain moisture.
How can I prevent kailan from bolting?
Bolting is when the plant prematurely flowers, which can make the leaves bitter. To prevent bolting:
* Choose bolt-resistant varieties: Some varieties are more resistant to bolting than others.
* Provide shade: Protect your kailan from the hot afternoon sun.
* Water regularly: Keep the soil consistently moist.
* Harvest regularly: Harvesting the leaves encourages the plant to continue producing leaves instead of flowering.
* Plant at the right time: Avoid planting kailan during the hottest part of the year.
Is kailan a cut-and-come-again vegetable?
Yes, kailan is a cut-and-come-again vegetable. This means that you can harvest the outer leaves as needed, and the plant will continue to produce new leaves. This makes it a very productive and rewarding vegetable to grow.
How do I store harvested kailan?
To store harvested kailan, wash the leaves and pat them dry. Wrap them in a damp paper towel and store them in a plastic bag in the refrigerator. Kailan can be stored for up to a week in the refrigerator.
Can I freeze kailan?
Yes, you can freeze kailan. To freeze kailan, wash the leaves and blanch them in boiling water for 2-3 minutes. Then, plunge them into ice water to stop the cooking process. Drain the leaves and pat them dry. Place them in a freezer bag and freeze for up to 6 months.

Leave a Comment