
Malabar Spinach Growing Guide: Unlock the secrets to cultivating this vibrant, nutritious leafy green right in your own backyard! Have you ever dreamed of stepping outside and harvesting fresh, delicious spinach that’s bursting with flavor and packed with vitamins? Well, dream no more! This DIY guide is your passport to a thriving Malabar spinach patch, even if you’re a complete beginner.
Malabar spinach, also known as Ceylon spinach or vine spinach, isn’t actually a true spinach, but its succulent leaves offer a similar taste and texture, making it a fantastic alternative, especially in warmer climates where traditional spinach struggles. Its history stretches back centuries, with roots in Asia and Africa, where it’s been a culinary staple and even used in traditional medicine. Imagine growing something with such a rich and fascinating past!
Why do you need this Malabar Spinach Growing Guide? Because store-bought greens simply can’t compare to the satisfaction and freshness of homegrown produce. Plus, Malabar spinach is incredibly versatile in the kitchen – perfect for salads, stir-fries, soups, and more. I’m going to show you simple, step-by-step instructions and clever hacks that will have you harvesting basketfuls of this amazing plant in no time. Say goodbye to bland, wilted spinach and hello to a vibrant, healthy addition to your garden and your plate!
DIY: Growing Your Own Malabar Spinach Oasis
Okay, let’s dive into the wonderful world of growing Malabar spinach! I’ve found it to be such a rewarding plant to cultivate, not only for its delicious, slightly citrusy leaves but also for its beautiful, vining growth habit. This guide will walk you through everything you need to know, from seed to harvest, so you can enjoy fresh, homegrown Malabar spinach all season long.
Understanding Malabar Spinach
Before we get our hands dirty, let’s quickly cover what Malabar spinach actually is. Despite its name, it’s not true spinach. It’s a tropical vine, *Basella alba* or *Basella rubra*, known for its heat tolerance and ability to thrive in warm climates. It’s packed with vitamins and minerals, making it a healthy and delicious addition to your meals. Plus, it’s super easy to grow!
Materials You’ll Need
Here’s a list of everything you’ll need to get started. Don’t worry, most of it is pretty basic gardening stuff:
* Malabar spinach seeds (or cuttings, if you’re propagating that way)
* Seed starting trays or small pots (if starting indoors)
* Potting mix (for starting seeds)
* Garden soil (for planting outdoors)
* Compost or other organic matter (to enrich the soil)
* A trellis, fence, or other support structure (for the vines to climb)
* Watering can or hose
* Gardening gloves (optional, but recommended)
* A sunny spot in your garden
Starting from Seed: A Step-by-Step Guide
Starting Malabar spinach from seed is a great way to get a head start, especially if you live in a cooler climate with a shorter growing season. Here’s how I do it:
1. Soaking the Seeds: Malabar spinach seeds have a tough outer coating, so soaking them beforehand really helps with germination. I usually soak them in warm water for 24-48 hours. You’ll notice they swell up a bit – that’s a good sign!
2. Preparing Your Seed Starting Trays: Fill your seed starting trays or small pots with a good quality potting mix. Make sure the mix is moist but not soggy.
3. Sowing the Seeds: Plant the soaked seeds about ½ inch deep in the potting mix. I usually plant 2-3 seeds per cell or pot, just in case some don’t germinate.
4. Providing Warmth and Moisture: Malabar spinach needs warmth to germinate. I keep my seed starting trays in a warm spot, like on top of the refrigerator or on a heat mat. Keep the soil consistently moist by misting it with water regularly.
5. Waiting for Germination: Be patient! Malabar spinach seeds can take anywhere from 1-3 weeks to germinate, depending on the temperature. Once you see seedlings emerge, move the trays to a sunny location or under grow lights.
6. Thinning the Seedlings: Once the seedlings have a few sets of true leaves, thin them out, leaving only the strongest seedling in each cell or pot.
Transplanting Your Seedlings Outdoors
Once the danger of frost has passed and the soil has warmed up, it’s time to transplant your Malabar spinach seedlings outdoors.
1. Choosing the Right Location: Malabar spinach loves sunshine! Choose a spot in your garden that gets at least 6-8 hours of direct sunlight per day.
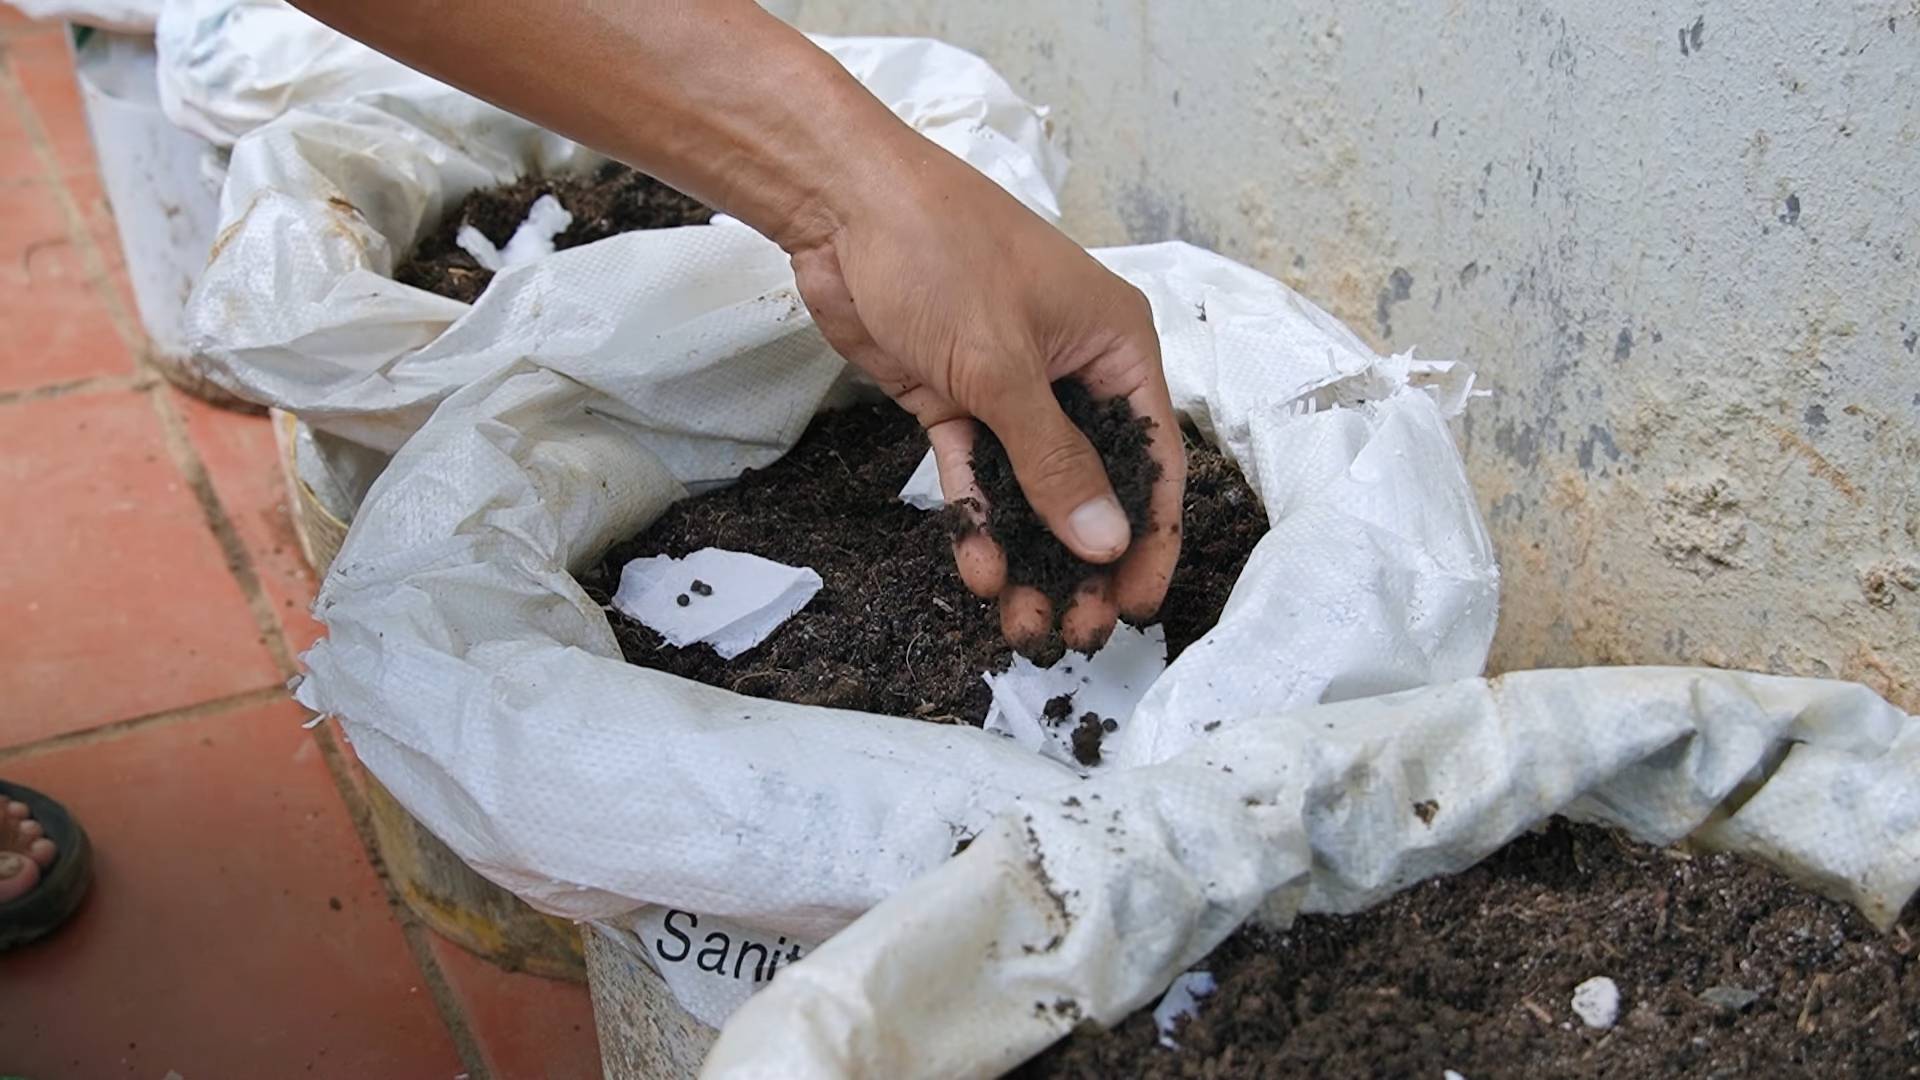
2. Preparing the Soil: Before planting, amend the soil with compost or other organic matter. This will improve drainage and provide the plants with essential nutrients. I like to dig in a generous amount of compost – it really makes a difference!
3. Planting the Seedlings: Gently remove the seedlings from their trays or pots and plant them about 12-18 inches apart. Make sure the top of the root ball is level with the surrounding soil.
4. Providing Support: Malabar spinach is a vine, so it needs something to climb on. Install a trellis, fence, or other support structure near the plants. I’ve used everything from bamboo stakes to old ladders – get creative!
5. Watering and Mulching: Water the newly transplanted seedlings thoroughly. After watering, apply a layer of mulch around the plants to help retain moisture and suppress weeds.
Growing Malabar Spinach from Cuttings
Another way to propagate Malabar spinach is from cuttings. This is a faster method than starting from seed, and it’s a great way to clone your favorite plants.
1. Taking Cuttings: Choose healthy, vigorous stems and cut them into 4-6 inch pieces. Remove the lower leaves, leaving only a few leaves at the top.
2. Rooting the Cuttings: You can root the cuttings in water or directly in soil. For water propagation, place the cuttings in a glass of water, making sure the lower nodes (where the leaves were removed) are submerged. Change the water every few days. For soil propagation, dip the cut ends of the cuttings in rooting hormone (optional) and plant them in a pot filled with moist potting mix.
3. Providing Humidity: Cuttings need high humidity to root successfully. If you’re rooting them in soil, you can cover the pot with a plastic bag or humidity dome to create a humid environment.
4. Waiting for Roots: It usually takes about 2-3 weeks for the cuttings to develop roots. Once you see roots forming, you can transplant them into larger pots or directly into the garden.
Caring for Your Malabar Spinach Plants
Once your Malabar spinach plants are established, they’re relatively low-maintenance. Here are a few tips to keep them happy and healthy:
* Watering: Water regularly, especially during hot, dry weather. Malabar spinach prefers consistently moist soil.
* Fertilizing: Fertilize every few weeks with a balanced fertilizer. You can also side-dress with compost or other organic matter.
* Pruning: Prune the vines regularly to encourage branching and bushier growth. This will also help to keep the plants from getting too leggy.
* Pest and Disease Control: Malabar spinach is generally pest and disease resistant. However, keep an eye out for common garden pests like aphids and spider mites. If you spot any pests, treat them with insecticidal soap or neem oil.
Harvesting Your Malabar Spinach
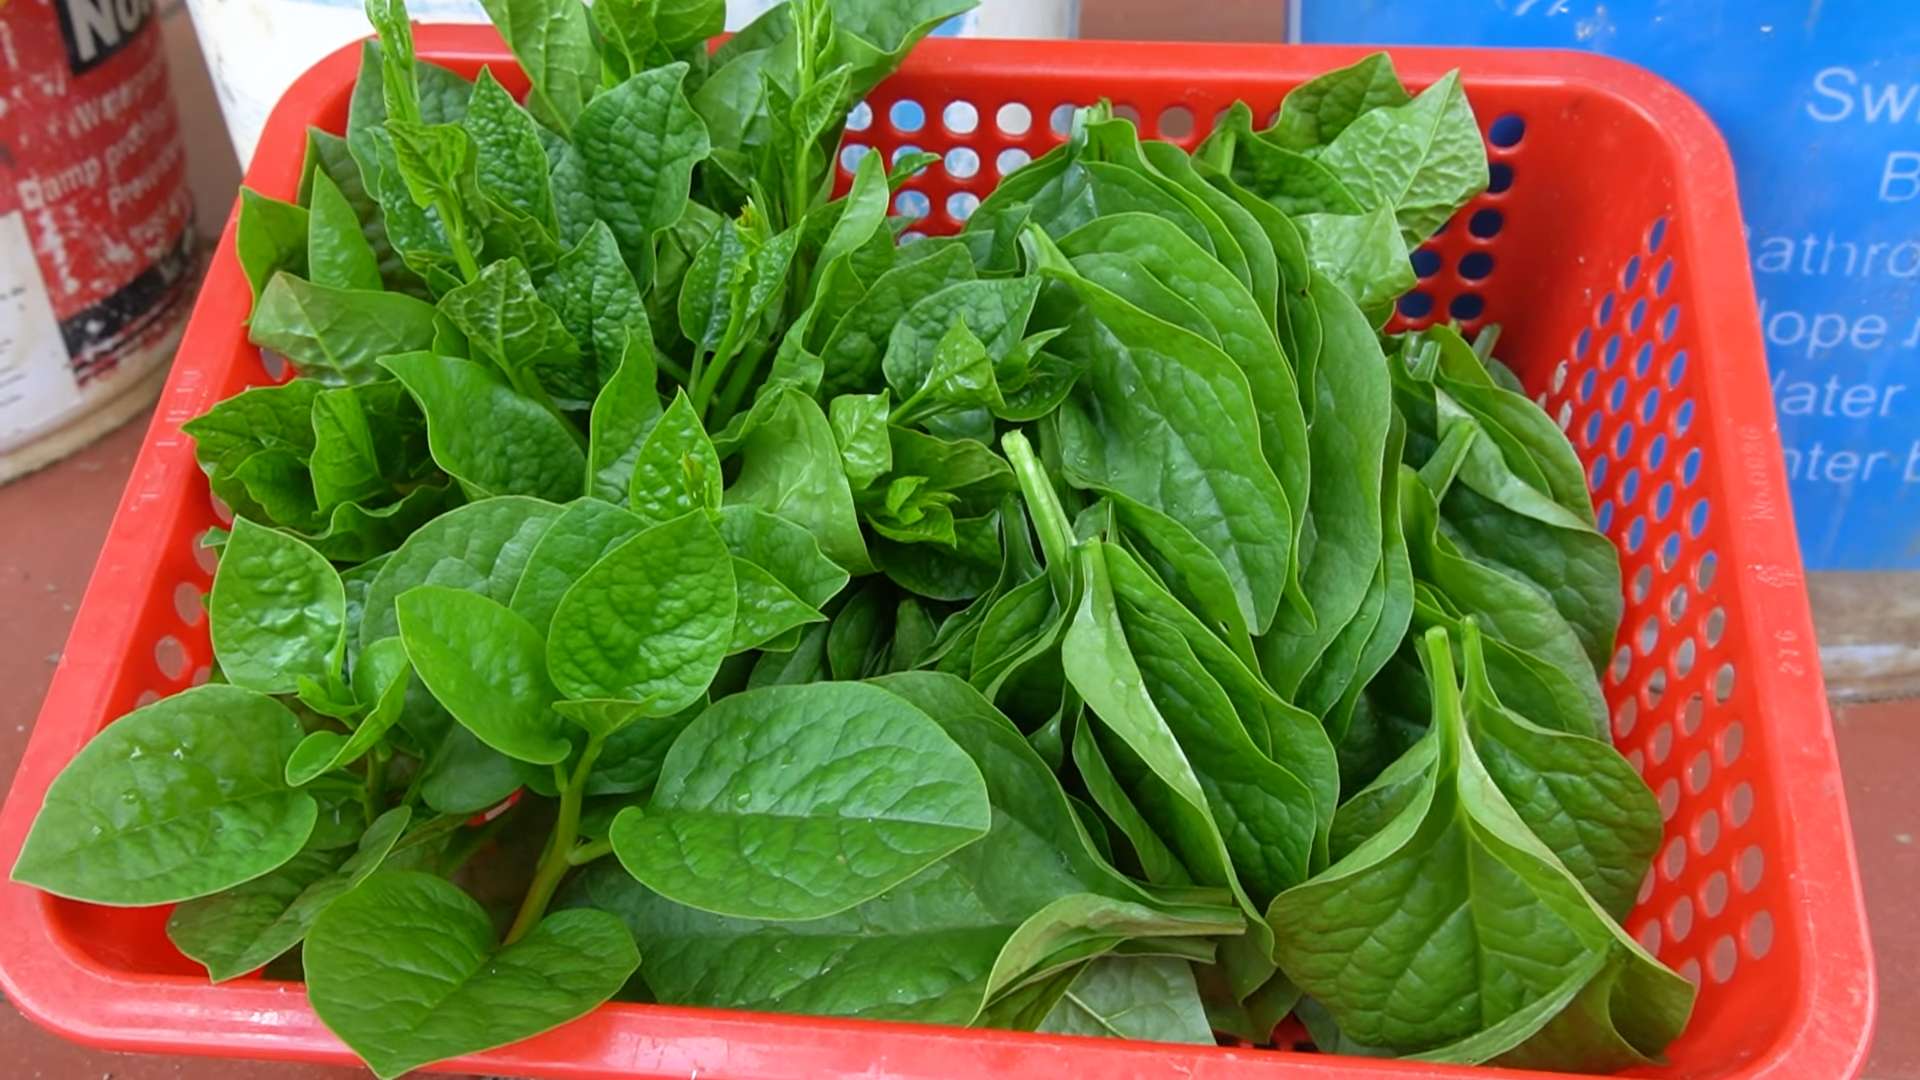
The best part! You can start harvesting Malabar spinach leaves as soon as the plants are large enough.
1. When to Harvest: Harvest the leaves when they are young and tender. Older leaves can be a bit tough and bitter.
2. How to Harvest: Simply pinch off the leaves or cut the stems with scissors. Regular harvesting will encourage the plants to produce more leaves.
3. Storing Your Harvest: Malabar spinach leaves can be stored in the refrigerator for several days. Wrap them in a damp paper towel and place them in a plastic bag.
Using Malabar Spinach in the Kitchen
Malabar spinach is incredibly versatile in the kitchen. You can use it in salads, soups, stir-fries, and more. It has a slightly citrusy flavor that pairs well with a variety of dishes. I love adding it to my smoothies for an extra boost of nutrients!
Here are a few ideas:
* Salads: Add fresh Malabar spinach leaves to your favorite salad for a healthy and flavorful twist.
* Soups: Use Malabar spinach in soups and stews as a substitute for regular spinach.
* Stir-fries: Add Malabar spinach to stir-fries for a quick and easy way to get your greens.
* Smoothies: Blend Malabar spinach into your smoothies for a nutritious and delicious boost.
* Sauteed: Sauté Malabar spinach with garlic and olive oil for a simple and flavorful side dish.
Troubleshooting Common Problems
Even with the best care, you might encounter a few problems while growing Malabar spinach. Here are some common issues and how to address them:
* Slow Germination: If your seeds are taking a long time to germinate, make sure the soil is warm enough and consistently moist. Soaking the seeds beforehand can also help.
* Yellowing Leaves: Yellowing leaves can be a sign of nutrient deficiency. Fertilize the plants with a balanced fertilizer or side-dress with compost.
* Pest Infestations: Keep an eye out for common garden pests like aphids and spider mites. Treat them with insecticidal soap or neem oil.
* Lack of Growth: If your plants aren’t growing well, make sure they’re getting enough sunlight and water. Also, check the soil pH to make sure it’s within the optimal range (6.0-7.0).
Enjoying Your Homegrown Malabar Spinach
Growing your own Malabar spinach is a rewarding experience. Not only will you have a fresh supply of healthy and delicious greens, but you’ll also enjoy the beauty of this v
Conclusion
So, there you have it! A comprehensive guide to unlocking the vibrant, delicious potential of your own homegrown Malabar Spinach. We’ve walked through everything from seed selection and soil preparation to harvesting and enjoying the fruits (or rather, leaves!) of your labor. But why should you bother with this DIY project when you can simply buy spinach at the store? The answer is multifaceted, and ultimately, incredibly rewarding.
Growing your own Malabar Spinach isn’t just about saving a few dollars; it’s about connecting with your food, understanding its journey from seed to table, and experiencing the unparalleled freshness that only homegrown produce can offer. Store-bought spinach, even the organic varieties, often lacks the vibrant flavor and crisp texture of freshly picked Malabar Spinach. Plus, you have complete control over the growing process, ensuring that your spinach is free from harmful pesticides and chemicals.
Beyond the superior taste and health benefits, cultivating Malabar Spinach is a deeply satisfying experience. Watching those tiny seeds sprout and transform into lush, climbing vines is a testament to the power of nature and your own green thumb. It’s a therapeutic activity that can reduce stress, boost your mood, and provide a sense of accomplishment.
But the real magic lies in the versatility of this incredible leafy green. While we’ve focused on the basics, don’t be afraid to experiment! Try different trellising methods to maximize your yield and create a stunning vertical garden. Explore various companion plants to deter pests and enhance growth. And most importantly, get creative in the kitchen!
Consider these variations to elevate your Malabar Spinach experience:
* **Spicy Kick:** Add a pinch of chili flakes to your soil mix to infuse your spinach with a subtle heat.
* **Citrus Burst:** Water your plants with diluted citrus peel tea to boost their vitamin C content and add a zesty flavor.
* **Herbal Infusion:** Plant aromatic herbs like basil or oregano near your Malabar Spinach to naturally repel pests and enhance its flavor profile.
* **Vinegar Boost:** Add a tablespoon of white vinegar to a gallon of water and use it to water your Malabar Spinach every few weeks. This can help to lower the pH of the soil and make it easier for the plants to absorb nutrients.
The possibilities are endless! The key is to embrace the learning process, be patient, and enjoy the journey.
We wholeheartedly encourage you to embark on this exciting adventure of growing your own Malabar Spinach. It’s a simple, sustainable, and incredibly rewarding way to enhance your diet, connect with nature, and discover the joys of gardening.
Once you’ve harvested your first batch of homegrown goodness, we’d love to hear about your experience! Share your tips, tricks, and delicious recipes in the comments below. Let’s create a community of Malabar Spinach enthusiasts and inspire others to embrace the joys of homegrown produce. Don’t forget to share photos of your thriving vines and culinary creations on social media using #HomegrownMalabarSpinach. We can’t wait to see what you create!
Frequently Asked Questions (FAQ)
What are the ideal growing conditions for Malabar Spinach?
Malabar Spinach thrives in warm, humid climates with plenty of sunlight. Aim for at least 6-8 hours of direct sunlight per day. The ideal temperature range is between 70°F and 90°F (21°C and 32°C). The soil should be well-draining and rich in organic matter. Amend your soil with compost or aged manure before planting to provide essential nutrients. Consistent moisture is crucial, so water regularly, especially during dry spells. Mulching around the base of the plants can help retain moisture and suppress weeds.
How often should I water my Malabar Spinach?
Water your Malabar Spinach deeply and regularly, especially during hot and dry weather. The soil should be consistently moist but not waterlogged. Check the soil moisture by sticking your finger about an inch deep. If the soil feels dry, it’s time to water. In general, you may need to water daily or every other day during the peak growing season. Reduce watering frequency during cooler periods. Consider using a soaker hose or drip irrigation system to deliver water directly to the roots and minimize water loss through evaporation.
What are some common pests and diseases that affect Malabar Spinach, and how can I prevent them?
While Malabar Spinach is relatively pest-resistant, it can occasionally be affected by aphids, spider mites, and snails. To prevent pest infestations, inspect your plants regularly and remove any pests you find by hand. You can also use insecticidal soap or neem oil to control infestations. Ensure good air circulation around your plants to prevent fungal diseases. Avoid overhead watering, as this can create a humid environment that promotes fungal growth. If you notice any signs of disease, such as yellowing leaves or powdery mildew, remove the affected leaves immediately and treat the plant with a fungicide if necessary. Companion planting with herbs like basil and marigolds can also help deter pests.
When and how should I harvest my Malabar Spinach?
You can start harvesting Malabar Spinach leaves about 6-8 weeks after planting, once the vines are established and have produced a good amount of foliage. Harvest the leaves regularly by snipping them off with scissors or pruning shears. Focus on harvesting the younger, more tender leaves, as these have the best flavor and texture. Regular harvesting encourages the plant to produce more leaves, so don’t be afraid to harvest frequently. You can also harvest the tender stems and shoots, which can be cooked similarly to the leaves. Avoid harvesting more than one-third of the plant at a time to ensure it continues to grow and produce.
Can I grow Malabar Spinach in containers?
Yes, Malabar Spinach can be successfully grown in containers, making it a great option for gardeners with limited space. Choose a large container that is at least 12 inches in diameter and depth to accommodate the plant’s root system. Use a well-draining potting mix that is rich in organic matter. Provide a trellis or other support structure for the vines to climb on. Place the container in a sunny location that receives at least 6-8 hours of direct sunlight per day. Water regularly and fertilize every few weeks with a balanced liquid fertilizer.
Is Malabar Spinach a perennial or an annual?
Malabar Spinach is a tender perennial in tropical and subtropical climates, meaning it can live for more than two years if protected from frost. However, in colder climates, it is typically grown as an annual, as it cannot tolerate freezing temperatures. If you live in a colder climate, you can try growing Malabar Spinach in containers and bringing them indoors during the winter months. Alternatively, you can collect seeds from your plants at the end of the growing season and sow them again the following spring.
How do I save seeds from my Malabar Spinach plants?
Saving seeds from Malabar Spinach is relatively easy. Allow some of the flowers to mature and develop into small, dark berries. Once the berries are fully ripe and have turned a deep purple or black color, harvest them and gently squeeze out the seeds. Rinse the seeds with water and spread them out on a paper towel to dry completely. Once the seeds are dry, store them in an airtight container in a cool, dark, and dry place. The seeds should remain viable for several years if stored properly.
What are some delicious ways to use Malabar Spinach in cooking?
Malabar Spinach is a versatile leafy green that can be used in a variety of dishes. It can be eaten raw in salads, added to soups and stews, stir-fried, or steamed. Its slightly mucilaginous texture makes it a great thickening agent for soups and sauces. It pairs well with a variety of flavors, including garlic, ginger, chili, and soy sauce. Try adding it to your favorite spinach recipes for a unique twist. You can also use it to make smoothies, omelets, or even pesto. The possibilities are endless!
Leave a Comment