
Peroxide cleaning solutions are a game-changer in the world of home gardening, and I’m so excited to share some incredible DIY tricks with you! Forget those expensive, chemical-laden products – we’re going back to basics with a simple, safe, and surprisingly effective solution that’s probably already sitting in your medicine cabinet.
For generations, gardeners have sought natural ways to nurture their plants and combat common problems. While the exact origins of using hydrogen peroxide in the garden are a bit hazy, its powerful oxidizing properties have long been recognized for their disinfecting and sanitizing abilities. Think of it as a secret weapon passed down through generations, now ready for you to wield!
Why do you need these peroxide cleaning solutions hacks? Well, imagine your precious seedlings suddenly wilting, or your vibrant tomato plants succumbing to fungal diseases. It’s heartbreaking, right? But with a few simple peroxide-based solutions, you can tackle these issues head-on, promoting healthy growth, preventing diseases, and even boosting seed germination. Plus, you’ll be saving money and reducing your environmental impact – it’s a win-win!
Ready to unlock the power of peroxide and transform your garden? Let’s dive in!
DIY Peroxide Cleaning Power: Unleash the Bubbles!
Hey there, fellow DIY enthusiasts! I’m so excited to share one of my favorite cleaning hacks with you – harnessing the incredible power of hydrogen peroxide! It’s cheap, readily available, and surprisingly effective for tackling a wide range of cleaning challenges around the house. Forget those harsh chemicals; let’s dive into the bubbly world of peroxide cleaning!
Understanding Hydrogen Peroxide: Your New Best Friend
Before we get started, let’s quickly understand what we’re working with. Hydrogen peroxide (H2O2) is a mild antiseptic that breaks down into water and oxygen. That’s right, it’s eco-friendly! The bubbling action you see when it comes into contact with organic matter is the oxygen being released, which helps to lift dirt and grime.
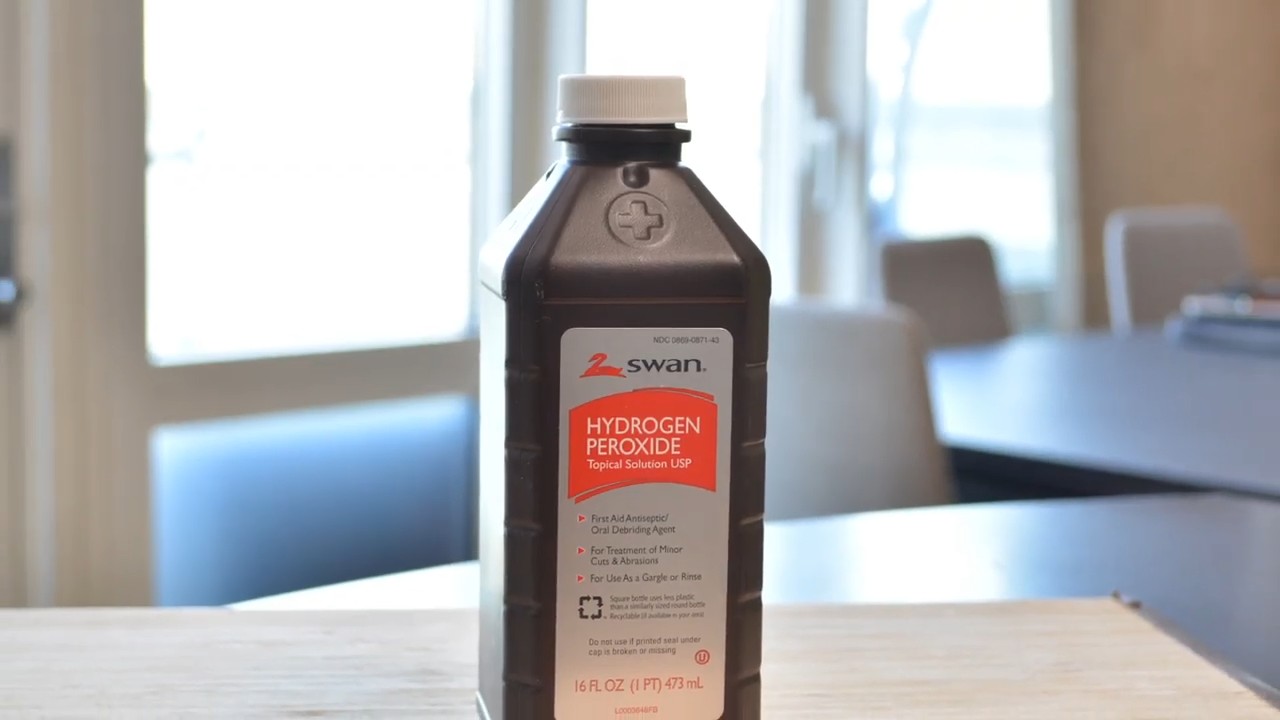
Important Safety Note: Always use 3% hydrogen peroxide (the kind you find at the drugstore) for cleaning. Higher concentrations can be dangerous. Wear gloves when handling peroxide, especially if you have sensitive skin. Avoid contact with eyes and never mix peroxide with vinegar or bleach, as this can create harmful fumes.
Cleaning Solutions Guide: Peroxide Power Unleashed
Here’s a breakdown of how to use hydrogen peroxide for various cleaning tasks:
* Disinfecting Surfaces: Perfect for countertops, cutting boards, sinks, and bathroom fixtures.
* Whitening Laundry: A gentle alternative to bleach for brightening whites.
* Removing Stains: Effective on blood, grass, wine, and other common stains.
* Cleaning Grout: Banishes mold and mildew from grout lines.
* Freshening Sponges and Dishcloths: Kills bacteria and eliminates odors.
* Cleaning Mirrors and Windows: Leaves a streak-free shine.
* Sanitizing Toothbrushes: Keeps your oral hygiene tools clean.
* Cleaning Toilets: Disinfects and removes stains.
* Removing Mildew from Showers: A natural way to combat bathroom mildew.
* Cleaning Fruits and Vegetables: Removes pesticides and bacteria.
DIY Projects: Step-by-Step Instructions
Now, let’s get our hands dirty (or rather, clean them!). I’ll walk you through some of my favorite peroxide cleaning projects.
Project 1: Disinfecting Kitchen Surfaces
This is a daily must-do in my kitchen!
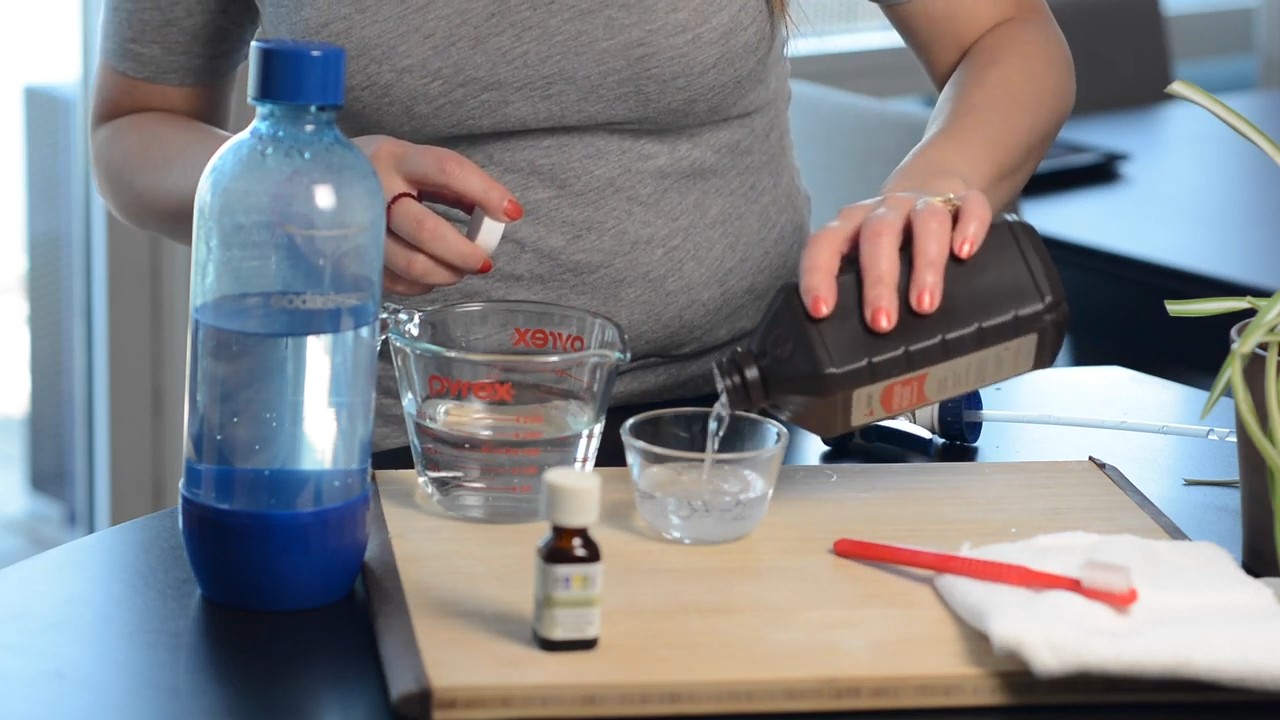
1. Gather Your Supplies: You’ll need a spray bottle, 3% hydrogen peroxide, and a clean cloth.
2. Prepare the Spray Bottle: Pour the hydrogen peroxide directly into the spray bottle. No need to dilute it for disinfecting.
3. Spray the Surface: Liberally spray the countertops, cutting boards (especially after cutting meat), and sink.
4. Let it Sit: Allow the peroxide to sit on the surface for at least 5-10 minutes to effectively kill bacteria. This is crucial!
5. Wipe Clean: Wipe the surface with a clean, damp cloth.
6. Air Dry: Allow the surface to air dry. This helps ensure complete disinfection.
Project 2: Whitening Laundry
Say goodbye to dingy whites!
1. Sort Your Laundry: Separate your white clothes from colored items.
2. Add Peroxide to the Washing Machine: Pour 1 cup of 3% hydrogen peroxide into the washing machine along with your regular laundry detergent. Add it to the bleach dispenser if your machine has one, or directly into the drum.
3. Wash as Usual: Wash your clothes as you normally would, using the appropriate water temperature and cycle.
4. Check for Stains: Before drying, check your clothes for any remaining stains. If you see any, you can try pre-treating them with a peroxide paste (see stain removal section below) and re-washing.
5. Dry as Usual: Dry your clothes in the dryer or hang them to dry.
Project 3: Removing Stains from Fabric
Peroxide is a stain-fighting superhero!
1. Test in an Inconspicuous Area: Before applying peroxide to the stain, test it on a hidden area of the fabric (like an inside seam) to make sure it doesn’t cause discoloration.
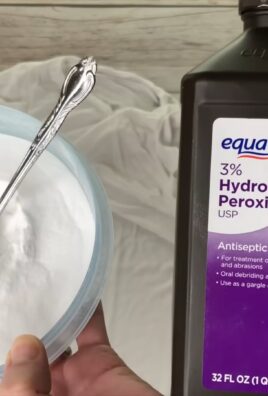
2. Prepare a Peroxide Paste (for stubborn stains): For tougher stains like blood or grass, mix hydrogen peroxide with baking soda to create a paste. The baking soda adds a gentle abrasive action.
3. Apply Peroxide to the Stain: For lighter stains, you can apply hydrogen peroxide directly to the stain. For the paste, spread it generously over the stain.
4. Let it Sit: Allow the peroxide (or paste) to sit on the stain for 10-30 minutes, depending on the severity of the stain. Keep an eye on it to make sure it’s not damaging the fabric.
5. Blot or Scrub Gently: Gently blot the stain with a clean cloth, working from the outside in. If you’re using the paste, you can gently scrub the area with a soft brush.
6. Rinse Thoroughly: Rinse the treated area with cold water to remove any remaining peroxide or paste.
7. Launder as Usual: Wash the item as you normally would.
8. Check Before Drying: As with whitening laundry, check the item for any remaining stain before drying. If the stain is still visible, repeat the process.
Project 4: Cleaning Grout
Get rid of that unsightly grout grime!
1. Gather Your Supplies: You’ll need a spray bottle, 3% hydrogen peroxide, a grout brush (or an old toothbrush), and a clean cloth.
2. Spray the Grout: Spray the grout lines liberally with hydrogen peroxide.
3. Let it Sit: Allow the peroxide to sit on the grout for at least 10-15 minutes. This gives it time to penetrate and break down the mold and mildew.
4. Scrub the Grout: Use the grout brush to scrub the grout lines. You’ll see the grime start to lift away.
5. Rinse with Water: Rinse the grout with clean water to remove any remaining peroxide and grime.
6. Dry the Grout: Wipe the grout with a clean cloth to dry it.
Project 5: Freshening Sponges and Dishcloths
Keep your cleaning tools clean!
1. Prepare a Peroxide Soak: Fill a bowl or sink with cold water and add 1/2 cup of 3% hydrogen peroxide.
2. Soak the Sponges and Dishcloths: Submerge the sponges and dishcloths in the peroxide solution.
3. Let it Soak: Allow them to soak for at least 15-20 minutes.
4. Rinse Thoroughly: Rinse the sponges and dishcloths thoroughly with clean water.
5. Wring Out Excess Water: Wring out as much water as possible.
6. Air Dry: Allow the sponges and dishcloths to air dry completely.
Project 6: Cleaning Mirrors and Windows
Achieve a streak-free shine!
1. Gather Your Supplies: You’ll need a spray bottle, 3% hydrogen peroxide, and two clean microfiber cloths.
2. Prepare the Spray Bottle: Pour the hydrogen peroxide directly into the spray bottle.
3. Spray the Surface: Lightly spray the mirror or window with hydrogen peroxide.
4. Wipe with a Clean Cloth: Use one microfiber cloth to wipe the surface clean.
5. Buff with a Dry Cloth: Use the second, dry microfiber cloth to buff the surface to a streak-free shine.
Project 7: Sanitizing Toothbrushes
A quick and easy way to keep your toothbrush clean.
1. Rinse Toothbrush: Rinse your toothbrush thoroughly with water after each use.
2. Soak in Peroxide: Pour a small amount of 3% hydrogen peroxide into a cup. Dip the head of your toothbrush into the peroxide, ensuring the bristles are submerged.
3. Soak Time: Let the toothbrush soak for about 5-10 minutes.
4. Rinse Again: Rinse the toothbrush thoroughly with water before using it.
5. Frequency: Repeat this process a few times a week to keep your toothbrush sanitized.
Project 8: Cleaning Toilets
Disinfect and remove stains in one go!
1. Pour in Peroxide: Pour about 1/2 cup of 3% hydrogen peroxide into the toilet bowl.
2. Let it Sit: Allow the peroxide to sit for at least 30 minutes, or even overnight for tougher stains.
3. Scrub: Use a toilet brush to scrub the bowl, paying attention to any stains or buildup.
4. Flush: Flush the toilet to
Conclusion
So, there you have it! Mastering the art of creating your own peroxide cleaning solutions is not just about saving money; it’s about taking control of the cleanliness and safety of your home. It’s about knowing exactly what ingredients are going into the solutions you use around your family and pets. It’s about reducing your reliance on harsh chemicals and embracing a more eco-friendly approach to cleaning.
We’ve walked you through the simple steps, highlighting the versatility and effectiveness of hydrogen peroxide as a cleaning agent. From tackling stubborn stains to disinfecting surfaces, the possibilities are truly endless. And remember, the key to success lies in understanding the proper dilutions and safety precautions. Always test your solution in an inconspicuous area first, and never mix peroxide with vinegar or bleach.
But the real magic happens when you start experimenting and tailoring your peroxide cleaning solutions to your specific needs. Feeling adventurous? Try adding a few drops of your favorite essential oil, like lemon or tea tree, for an extra boost of fragrance and antibacterial power. For tougher grime, consider increasing the concentration of peroxide slightly, but always err on the side of caution. You could also infuse your cleaning solution with citrus peels for a natural, refreshing scent and added cleaning power. Let your creativity guide you!
This isn’t just a recipe; it’s a gateway to a cleaner, healthier, and more sustainable lifestyle. It’s an opportunity to ditch those expensive, chemical-laden cleaners and embrace a simple, effective, and affordable alternative.
We truly believe that once you experience the power of homemade peroxide cleaning solutions, you’ll never go back to store-bought cleaners again. The satisfaction of knowing you’re using a safe, effective, and environmentally friendly product is simply unmatched.
So, what are you waiting for? Gather your ingredients, follow our instructions, and prepare to be amazed by the cleaning power of hydrogen peroxide. Don’t be afraid to experiment, adapt, and personalize your solutions to suit your unique needs.
And most importantly, we want to hear about your experiences! Share your tips, tricks, and success stories in the comments below. Let us know how you’re using your homemade peroxide cleaning solutions to keep your home sparkling clean. Your insights could inspire others to make the switch and embrace a more sustainable cleaning routine. Together, we can create a community of eco-conscious cleaners who are passionate about protecting our planet and our families.
Give it a try, and let us know what you think! We’re confident that you’ll be thrilled with the results. Happy cleaning!
Frequently Asked Questions (FAQ)
What exactly is hydrogen peroxide, and is it safe to use for cleaning?
Hydrogen peroxide (H2O2) is a mild antiseptic with oxidizing properties. It’s essentially water with an extra oxygen molecule. The common household concentration is 3%, which is generally safe for cleaning when used properly. However, it’s crucial to avoid ingesting it and to prevent contact with your eyes. Always wear gloves when handling peroxide for extended periods, and ensure proper ventilation in the area you’re cleaning. Never mix it with other cleaning agents, especially bleach or vinegar, as this can create dangerous fumes.
Can I use peroxide cleaning solutions on all surfaces?
While hydrogen peroxide is generally safe for many surfaces, it’s always best to test it in an inconspicuous area first. Avoid using it on delicate fabrics, polished wood, or surfaces that are prone to discoloration. It’s generally safe for use on most countertops (except marble, which can be etched), sinks, toilets, showers, and floors (again, test first!). Be cautious when using it on colored fabrics, as it can have a bleaching effect.
How long do peroxide cleaning solutions last?
Hydrogen peroxide is relatively stable, but it can degrade over time, especially when exposed to light and air. Store your homemade peroxide cleaning solutions in a dark, airtight container to prolong their shelf life. Ideally, use them within 1-3 months for optimal effectiveness. You’ll know the solution is losing its potency if it stops bubbling when applied to a stain or surface.
What are some specific cleaning tasks where peroxide cleaning solutions excel?
Hydrogen peroxide is fantastic for a variety of cleaning tasks. It’s excellent for disinfecting surfaces like countertops, cutting boards, and bathroom fixtures. It’s also effective at removing stains from clothing, carpets, and upholstery (always test first!). You can use it to clean and brighten grout, remove mildew from showers, and even sanitize your toothbrush. It’s also a great alternative to bleach for whitening laundry.
Can I add essential oils to my peroxide cleaning solutions?
Yes, absolutely! Adding essential oils can enhance the cleaning power and fragrance of your peroxide cleaning solutions. Tea tree oil, lemon oil, eucalyptus oil, and lavender oil are all excellent choices due to their antibacterial and antifungal properties. Just add a few drops to your solution and shake well before using. Be mindful of the essential oils you choose if you have pets, as some can be toxic to them.
What safety precautions should I take when using peroxide cleaning solutions?
Always wear gloves to protect your skin, especially if you’re using a higher concentration of peroxide. Avoid getting the solution in your eyes; if contact occurs, rinse immediately with plenty of water. Ensure proper ventilation in the area you’re cleaning. Never mix peroxide with other cleaning agents, especially bleach or vinegar. Store your peroxide cleaning solutions out of reach of children and pets.
What concentration of hydrogen peroxide should I use for cleaning?
The standard 3% hydrogen peroxide solution found in most drugstores is sufficient for most cleaning tasks. For tougher stains or disinfecting heavily soiled areas, you can use a slightly higher concentration, but always dilute it with water. Never use concentrations higher than 10% without proper safety precautions and knowledge of handling strong chemicals.
How can I make a simple all-purpose peroxide cleaning solution?
A simple all-purpose peroxide cleaning solution can be made by mixing equal parts of 3% hydrogen peroxide and water in a spray bottle. You can add a few drops of your favorite essential oil for added fragrance and cleaning power. Shake well before each use and spray onto surfaces, allowing it to sit for a few minutes before wiping clean.
Is peroxide cleaning solution safe for septic systems?
Yes, hydrogen peroxide is generally considered safe for septic systems. It breaks down into water and oxygen, which are harmless to the bacteria in your septic tank. However, it’s always a good idea to use it in moderation and avoid pouring large quantities down the drain at once.
What if I accidentally mix peroxide with vinegar or bleach?
Mixing peroxide with vinegar creates peracetic acid, which can be irritating to the eyes, skin, and respiratory system. Mixing peroxide with bleach creates chlorine gas, which is highly toxic and can be fatal. If you accidentally mix these substances, immediately evacuate the area and ventilate it thoroughly. Seek medical attention if you experience any symptoms such as coughing, shortness of breath, or eye irritation.

Leave a Comment