
Rooftop Kale Growing Routine: Unlock the secrets to a thriving edible garden just steps from your door! Imagine stepping onto your rooftop and harvesting fresh, vibrant kale for your dinner – a truly rewarding experience. For centuries, urban dwellers have sought ways to connect with nature and cultivate their own food, from ancient rooftop gardens in Babylon to the modern-day urban farming movement. This DIY guide isn’t just about growing kale; it’s about reclaiming a piece of nature in your urban landscape and enjoying the unparalleled taste of homegrown goodness.
Why should you embrace a rooftop kale growing routine? Because store-bought kale simply can’t compare! Not only will you save money, but you’ll also know exactly where your food comes from and what’s in it. Plus, gardening is a fantastic stress reliever and a great way to get some fresh air and sunshine. This article will provide you with simple, effective DIY tricks and hacks to maximize your kale yield, even in limited rooftop space. I’m excited to share my tried-and-true methods for creating a flourishing rooftop kale garden that will be the envy of your neighbors. Let’s get growing!
Dein eigener Dachgarten: Kale-Anbau leicht gemacht!
Hallo liebe Gartenfreunde! Habt ihr auch genug von teurem Supermarkt-Grünkohl? Dann lasst uns gemeinsam einen kleinen Dachgarten anlegen und uns selbst mit diesem gesunden Superfood versorgen! Ich zeige euch, wie ihr ganz einfach Grünkohl auf eurem Dach anbauen könnt – auch wenn ihr keinen grünen Daumen habt!
Was du für deinen Dachgarten brauchst:
* Grünkohlsamen oder Jungpflanzen: Am besten verschiedene Sorten ausprobieren!
* Pflanzgefäße: Große Töpfe, Pflanzkästen oder sogar alte Badewannen – eurer Kreativität sind keine Grenzen gesetzt! Achtet nur darauf, dass sie Abzugslöcher haben.
* Hochwertige Pflanzerde: Grünkohl ist ein Starkzehrer, also braucht er nährstoffreiche Erde.
* Kompost oder organischer Dünger: Für einen zusätzlichen Nährstoffkick.
* Gießkanne oder Gartenschlauch: Grünkohl mag es feucht, aber nicht nass.
* Schaufel oder Pflanzkelle: Zum Umtopfen und Einpflanzen.
* Handschuhe: Zum Schutz eurer Hände.
* Schneckenkorn (optional): Wenn ihr in einer schneckenreichen Gegend wohnt.
* Rankhilfe (optional): Für hochwachsende Grünkohlsorten.
* Sonnenschutz (optional): Bei sehr intensiver Sonneneinstrahlung.
Die Vorbereitung: Der Grundstein für deinen Grünkohl-Erfolg
Bevor wir loslegen, ist eine gute Vorbereitung das A und O. Denn nur mit den richtigen Voraussetzungen kann dein Grünkohl prächtig gedeihen.
1. Wähle den richtigen Standort: Grünkohl liebt die Sonne! Sucht euch einen Platz auf eurem Dach aus, der mindestens sechs Stunden Sonne am Tag bekommt. Achtet aber darauf, dass es im Hochsommer nicht zu heiß wird. Ein bisschen Schatten am Nachmittag kann Wunder wirken.
2. Reinige deine Pflanzgefäße: Egal ob neue oder gebrauchte Töpfe, sie sollten sauber sein. Reinigt sie gründlich mit Wasser und Seife, um Krankheiten und Schädlinge vorzubeugen.
3. Bereite die Erde vor: Füllt eure Pflanzgefäße mit hochwertiger Pflanzerde. Mischt am besten noch etwas Kompost oder organischen Dünger unter, um den Grünkohl mit ausreichend Nährstoffen zu versorgen. Die Erde sollte locker und gut durchlässig sein.
4. Überprüfe die Drainage: Achtet darauf, dass eure Pflanzgefäße ausreichend Abzugslöcher haben, damit überschüssiges Wasser ablaufen kann. Staunässe mag Grünkohl gar nicht! Legt eventuell eine Schicht Kies oder Tonscherben auf den Boden der Töpfe, um die Drainage zu verbessern.
5. Plane deine Anordnung: Überlegt euch, wie ihr eure Pflanzgefäße auf dem Dach anordnen wollt. Achtet darauf, dass die Pflanzen genügend Platz haben, um sich auszubreiten. Berücksichtigt auch die Höhe der Pflanzen, damit sie sich nicht gegenseitig beschatten.
Die Aussaat oder das Einpflanzen: Der Startschuss für deinen Grünkohl
Jetzt geht es ans Eingemachte! Entweder ihr zieht eure Grünkohlpflanzen selbst aus Samen vor oder ihr kauft Jungpflanzen im Gartencenter. Ich persönlich finde beides toll!
Aussaat (wenn du es selbst versuchen möchtest):
1. Wähle den richtigen Zeitpunkt: Grünkohl kann ab April im Haus vorgezogen werden. Die Direktsaat ins Freie ist ab Mai möglich.
2. Bereite die Anzuchttöpfe vor: Füllt kleine Anzuchttöpfe mit Anzuchterde.
3. Säe die Samen aus: Lege ein bis zwei Samen pro Topf in die Erde und bedecke sie leicht mit Erde.
4. Gieße die Erde an: Befeuchte die Erde vorsichtig mit einer Sprühflasche.
5. Stelle die Töpfe an einen hellen Ort: Die Anzuchttöpfe sollten an einem hellen und warmen Ort stehen, z.B. auf einer Fensterbank.
6. Halte die Erde feucht: Die Erde sollte immer leicht feucht sein, aber nicht nass.
7. Pikiere die Jungpflanzen: Sobald die Jungpflanzen einige Blätter haben, können sie in größere Töpfe pikiert werden.
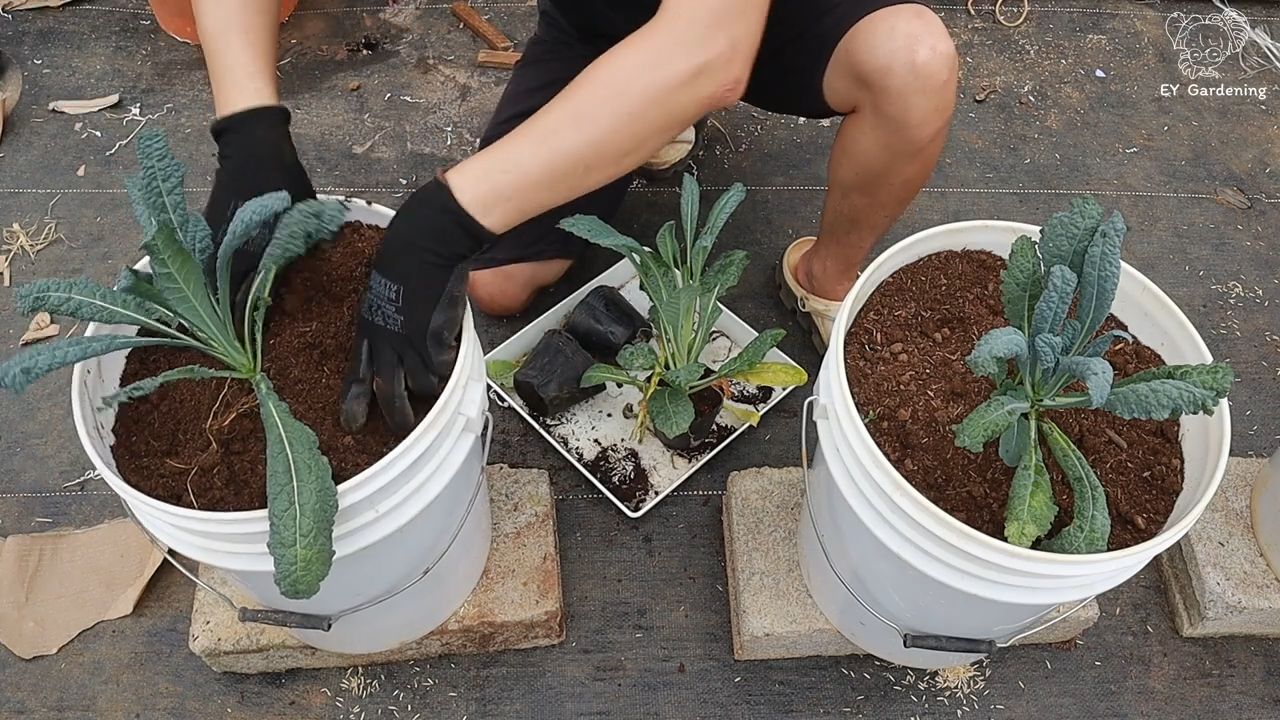
Einpflanzen von Jungpflanzen (die einfache Variante):
1. Wähle den richtigen Zeitpunkt: Jungpflanzen können ab Mitte Mai ins Freie gepflanzt werden, wenn keine Frostgefahr mehr besteht.
2. Lockere die Wurzeln: Nehmt die Jungpflanzen vorsichtig aus ihren Töpfen und lockert die Wurzeln etwas auf.
3. Pflanze die Jungpflanzen ein: Grabt ein Loch in die Erde, das groß genug ist, um die Wurzeln der Jungpflanzen aufzunehmen. Setzt die Jungpflanzen in die Löcher und füllt sie mit Erde auf.
4. Gieße die Pflanzen an: Gießt die Pflanzen gründlich an.
5. Achte auf den Abstand: Pflanzt die Grünkohlpflanzen mit ausreichend Abstand zueinander, damit sie genügend Platz zum Wachsen haben. Ein Abstand von 40-50 cm ist ideal.
Die Pflege: Damit dein Grünkohl sich wohlfühlt
Grünkohl ist zwar relativ pflegeleicht, aber ein bisschen Aufmerksamkeit braucht er trotzdem.
1. Gießen: Gießt euren Grünkohl regelmäßig, besonders an heißen Tagen. Die Erde sollte immer leicht feucht sein, aber nicht nass. Vermeidet Staunässe!
2. Düngen: Grünkohl ist ein Starkzehrer und braucht regelmäßig Dünger. Düngt ihn alle zwei bis drei Wochen mit organischem Dünger oder Kompost.
3. Schnecken bekämpfen: Schnecken lieben Grünkohl! Schützt eure Pflanzen mit Schneckenkorn oder anderen natürlichen Methoden.
4. Unkraut jäten: Haltet eure Pflanzgefäße unkrautfrei, damit der Grünkohl nicht von Unkraut überwuchert wird.
5. Kontrollieren: Kontrolliert eure Pflanzen regelmäßig auf Schädlinge und Krankheiten. Bei Bedarf könnt ihr natürliche Schädlingsbekämpfungsmittel einsetzen.
6. Rankhilfe (optional): Wenn ihr hochwachsende Grünkohlsorten angebaut habt, solltet ihr ihnen eine Rankhilfe geben, damit sie nicht umknicken.
7. Sonnenschutz (optional): Bei sehr intensiver Sonneneinstrahlung kann es sinnvoll sein, den Grünkohl mit einem Sonnenschutznetz zu beschatten.
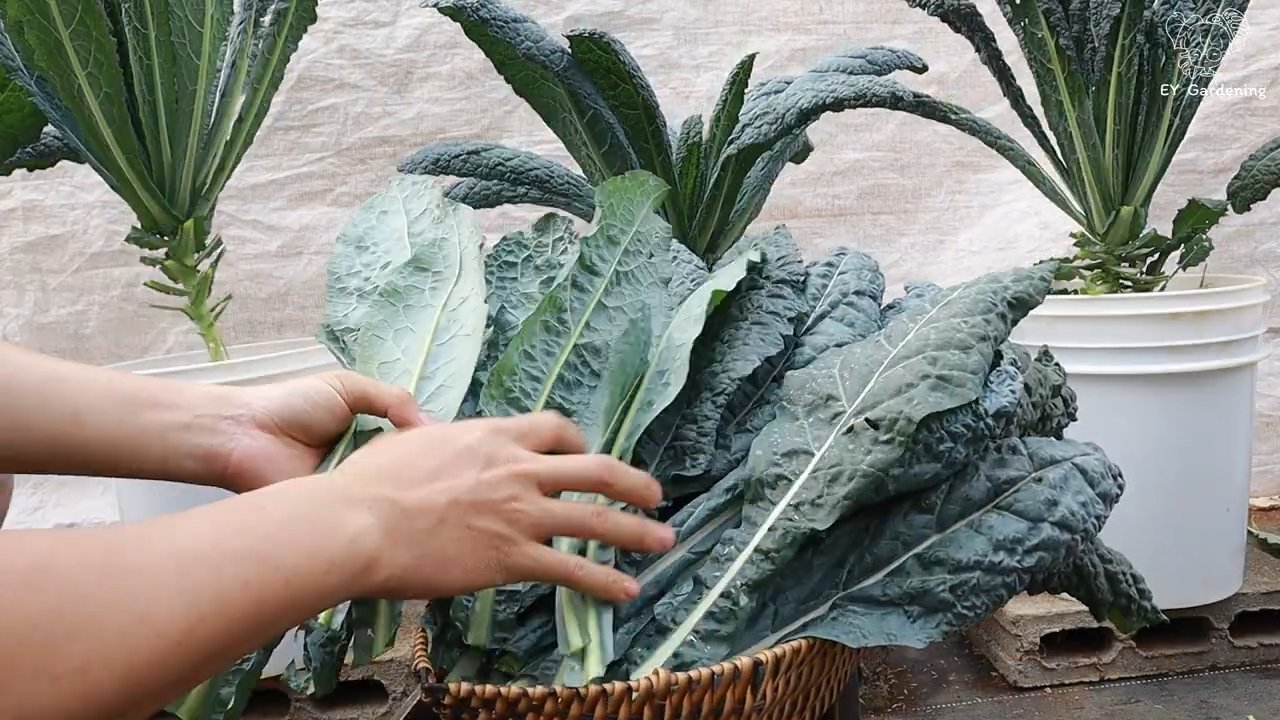
Die Ernte: Der Lohn deiner Mühe
Endlich ist es soweit! Ihr könnt euren selbst angebauten Grünkohl ernten!
1. Wähle den richtigen Zeitpunkt: Grünkohl kann geerntet werden, sobald die Blätter groß genug sind. Die Erntezeit beginnt meist im Herbst und dauert bis in den Winter hinein.
2. Ernte die Blätter: Erntet die äußeren Blätter des Grünkohls, indem ihr sie vorsichtig abbrecht oder abschneidet. Lasst die inneren Blätter stehen, damit die Pflanze weiterwachsen kann.
3. Regelmäßige Ernte: Je öfter ihr erntet, desto mehr neue Blätter wachsen nach.
4. Nach der Ernte: Nach der Ernte könnt ihr den Grünkohl direkt verarbeiten oder ihn im Kühlschrank aufbewahren.
Grünkohl-Sorten für den Dachgarten:
Es gibt viele verschiedene Grünkohlsorten, die sich für den Anbau auf dem Dach eignen. Hier sind einige meiner Favoriten:
* ‘Nero di Toscana’ (Palmkohl): Ein italienischer Klassiker mit langen, schmalen Blättern.
* ‘Red Russian’: Eine dekorative Sorte mit rot geäderten Blättern.
* ‘Halbhoher Grüner Krauser’: Eine robuste und ertragreiche Sorte mit krausen Blättern.
* ‘Lerchenzungen’: Eine alte Sorte mit zarten, milden Blättern.
Häufige Probleme und Lösungen:
Auch beim Grünkohlanbau kann es zu Problemen kommen. Hier sind einige der häufigsten Probleme und wie ihr sie lösen könnt:
*
Conclusion
So, there you have it – a comprehensive guide to establishing and maintaining a thriving rooftop kale garden. This isn’t just about growing vegetables; it’s about transforming unused space into a vibrant, edible landscape. It’s about connecting with your food source, reducing your carbon footprint, and enjoying the unparalleled taste of freshly harvested, organic kale.
Why is this DIY rooftop kale growing routine a must-try? Because it empowers you to take control of your food supply, even in the most urban environments. It’s a sustainable solution that promotes healthy eating habits and reduces reliance on store-bought produce, which can often be laden with pesticides and transported long distances. Beyond the practical benefits, there’s a profound sense of satisfaction that comes from nurturing a plant from seed to harvest, witnessing the miracle of nature unfold right on your doorstep.
But the beauty of this system lies in its adaptability. Feel free to experiment with different kale varieties. Curly kale, Lacinato kale (also known as dinosaur kale), and Red Russian kale all offer unique flavors and textures. Consider companion planting to maximize space and deter pests. Marigolds, for example, are excellent at repelling nematodes, while basil can help ward off aphids.
Don’t be afraid to get creative with your container choices. While we’ve recommended specific sizes and materials, you can repurpose old buckets, troughs, or even wooden crates, as long as they provide adequate drainage. Vertical gardening systems can also be incorporated to maximize space and add visual interest to your rooftop oasis.
And remember, success in rooftop gardening is a journey, not a destination. There will be challenges along the way – unexpected weather patterns, pest infestations, or nutrient deficiencies. But with a little patience, observation, and willingness to learn, you can overcome these obstacles and reap the rewards of a bountiful harvest.
We strongly encourage you to embark on this rooftop kale growing adventure. It’s an investment in your health, your well-being, and the environment. And once you’ve tasted the difference between store-bought kale and the kale you’ve grown yourself, you’ll never look back.
So, grab your seeds, gather your supplies, and get ready to transform your rooftop into a kale-filled paradise. We’re confident that you’ll be amazed by what you can achieve.
We’d love to hear about your experiences! Share your photos, tips, and challenges in the comments below. Let’s build a community of rooftop kale growers and inspire others to embrace sustainable urban gardening. What kind of fertilizer did you use? Did you have any pest problems? What was your biggest success? Your insights can help others learn and grow. Let’s cultivate a greener, healthier future, one rooftop kale garden at a time.
Frequently Asked Questions (FAQ)
What if I don’t have a rooftop? Can I still use this method?
While this article focuses on rooftop gardening, the principles can be adapted to other spaces. Balconies, patios, and even sunny windowsills can be suitable for growing kale in containers. Just be sure to adjust the container size and watering schedule to match the available sunlight and space. If you’re growing indoors, you may need to supplement with grow lights to ensure adequate light exposure.
How much sunlight does kale need?
Kale thrives in full sun, which means at least 6 hours of direct sunlight per day. However, it can tolerate partial shade, especially in hotter climates. If your rooftop receives less than 6 hours of sunlight, try to position your containers in the sunniest spot possible. You may also consider using grow lights to supplement the natural sunlight.
What kind of soil should I use for growing kale?
Kale prefers well-draining, fertile soil with a slightly acidic to neutral pH (6.0-7.0). A good potting mix specifically formulated for vegetables is ideal. You can also amend your soil with compost or other organic matter to improve drainage and fertility. Avoid using garden soil, as it can be too heavy and may contain pests or diseases.
How often should I water my kale plants?
Water your kale plants regularly, especially during hot, dry weather. The soil should be consistently moist but not waterlogged. Check the soil moisture by sticking your finger about an inch into the soil. If it feels dry, it’s time to water. Avoid overhead watering, as this can promote fungal diseases. Instead, water at the base of the plant.
What are some common pests and diseases that affect kale?
Common pests that affect kale include aphids, cabbage worms, flea beetles, and slugs. Diseases include powdery mildew, downy mildew, and black rot. To prevent pest and disease problems, practice good sanitation, such as removing dead leaves and weeds. You can also use organic pest control methods, such as insecticidal soap or neem oil. For diseases, ensure good air circulation and avoid overhead watering.
How do I harvest kale?
You can start harvesting kale leaves when they are about 4-6 inches long. Harvest the outer leaves first, leaving the inner leaves to continue growing. Avoid harvesting more than one-third of the plant at a time. Kale leaves are best harvested in the morning, when they are crisp and hydrated.
Can I grow kale in the winter?
Kale is a cold-hardy vegetable that can tolerate frost and even snow. In mild climates, you can grow kale throughout the winter. In colder climates, you may need to protect your plants with row covers or a cold frame.
What are some good companion plants for kale?
Good companion plants for kale include marigolds, basil, rosemary, thyme, and garlic. These plants can help deter pests and attract beneficial insects. Avoid planting kale near other members of the brassica family, such as broccoli, cabbage, and cauliflower, as they can attract the same pests and diseases.
How do I fertilize my kale plants?
Fertilize your kale plants every 2-3 weeks with a balanced organic fertilizer. You can also use compost tea or fish emulsion. Avoid over-fertilizing, as this can lead to excessive leaf growth and reduced flavor.
Is rooftop kale growing safe?
Generally, yes, but consider the weight of the soil and plants, especially when saturated with water. Consult a structural engineer if you have any concerns about the load-bearing capacity of your roof. Also, ensure your rooftop is accessible and safe to navigate while carrying tools and supplies. Consider using raised beds or containers to minimize the weight on the roof surface.
Leave a Comment