
Salt and Detergent Cleaning Solution: Sounds like a science experiment, right? Well, in a way, it is! But instead of bubbling beakers and lab coats, we’re talking sparkling clean patios, rejuvenated garden furniture, and thriving plants. For generations, resourceful gardeners have whispered about the magic of combining simple household ingredients to tackle common outdoor woes. Think of it as a time-honored tradition, passed down from green-thumbed grandparents who knew a thing or two about stretching a dollar and keeping their gardens pristine.
Let’s be honest, maintaining a beautiful outdoor space can feel like a constant battle against grime, mildew, and pesky weeds. Store-bought cleaners can be expensive and often packed with harsh chemicals that aren’t exactly friendly to our precious plants or the environment. That’s where this DIY salt and detergent cleaning solution comes to the rescue! It’s a cost-effective, surprisingly powerful, and relatively eco-conscious way to tackle a multitude of outdoor cleaning tasks. I’m excited to share this simple yet effective trick that will help you keep your garden looking its best without breaking the bank or harming the planet. Get ready to unlock the secrets to a cleaner, happier garden with just two common ingredients!
DIY Power Cleaner: Salt and Detergent Solution for Sparkling Cleanliness
Hey there, fellow DIY enthusiasts! I’m excited to share one of my go-to cleaning hacks: a super effective and budget-friendly cleaning solution made with just salt and detergent. Seriously, you won’t believe how well this stuff works on everything from stubborn grease to grimy bathroom surfaces. Let’s dive in!
What You’ll Need
Before we get started, let’s gather our supplies. This is a pretty simple recipe, so you probably already have most of these items on hand.
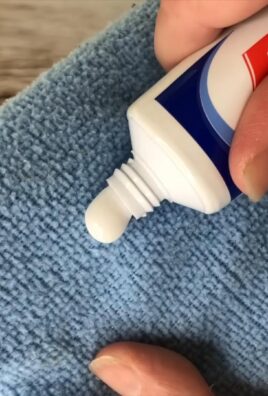
* **Detergent:** I usually use a liquid dish soap like Dawn or Palmolive. It cuts through grease like a champ. You can also use laundry detergent, especially for cleaning floors or outdoor surfaces. Just make sure it doesn’t contain bleach if you’re planning to use it on colored surfaces.
* **Salt:** Plain old table salt works perfectly fine. The salt acts as a mild abrasive, helping to scrub away dirt and grime without scratching.
* **Warm Water:** Warm water helps the salt dissolve and activates the cleaning power of the detergent.
* **Spray Bottle:** A clean spray bottle is essential for applying the solution.
* **Mixing Bowl:** A bowl for mixing the ingredients.
* **Spoon or Whisk:** For stirring everything together.
* **Gloves (Optional):** If you have sensitive skin, wearing gloves is always a good idea.
* **Cleaning Cloths or Sponges:** For wiping down surfaces.
* **Scrub Brush (Optional):** For tackling tougher stains or grime.
Mixing the Magic Potion: Step-by-Step Instructions
Okay, now for the fun part – creating our powerful cleaning solution! Follow these steps carefully for the best results.
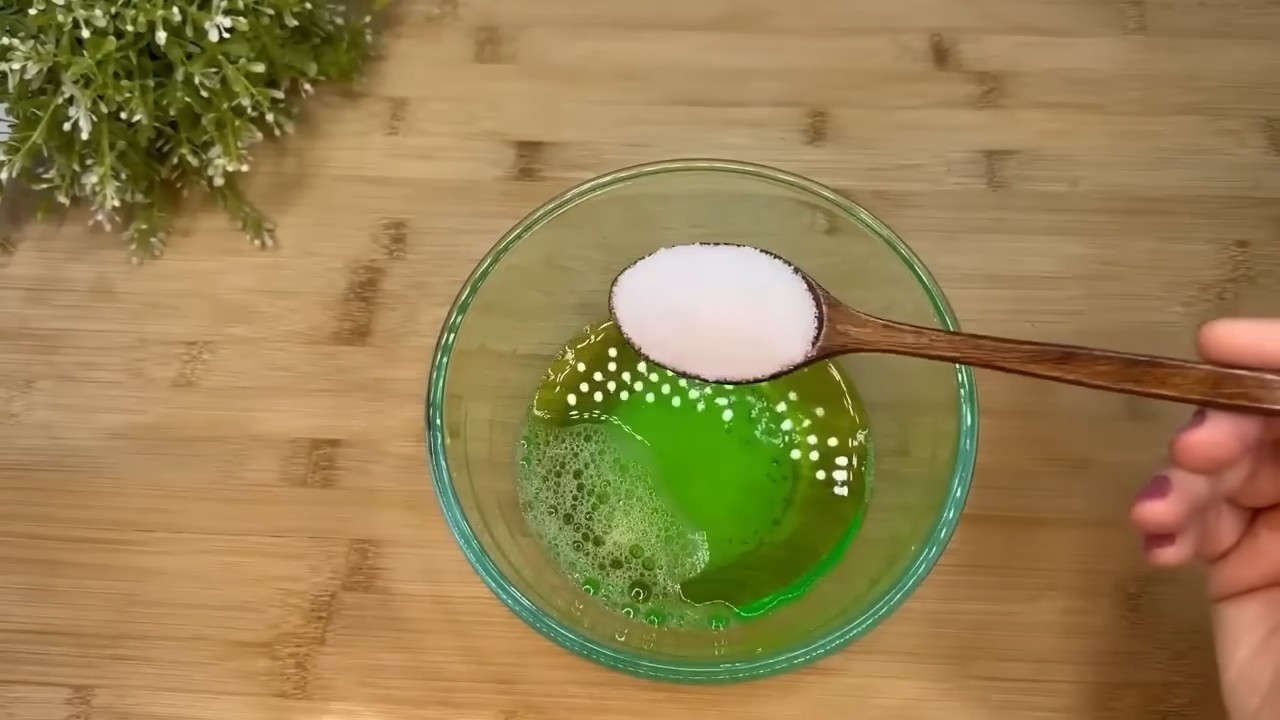
1. **Measure Your Ingredients:** In your mixing bowl, add 1/4 cup of detergent. I usually eyeball it, but for consistent results, measuring is best. Next, add 1/4 cup of salt. Again, table salt is your friend here.
2. **Add Warm Water:** Pour in 2 cups of warm water. Make sure the water isn’t too hot, as it could damage some surfaces or cause the detergent to foam excessively.
3. **Stir, Stir, Stir!:** Now, grab your spoon or whisk and start stirring. Keep stirring until the salt is completely dissolved. This might take a minute or two, so be patient. You don’t want any gritty salt residue left in your solution.
4. **Transfer to Spray Bottle:** Once the salt is dissolved, carefully pour the mixture into your clean spray bottle. A funnel can be helpful here to avoid spills.
5. **Label Your Bottle:** This is important! Label your spray bottle clearly as “Salt and Detergent Cleaning Solution.” This will prevent any accidental misuse.
Putting Your Power Cleaner to the Test: Cleaning Applications
Now that you have your cleaning solution ready, let’s put it to work! Here are some of my favorite ways to use this DIY cleaner:
Kitchen Cleaning
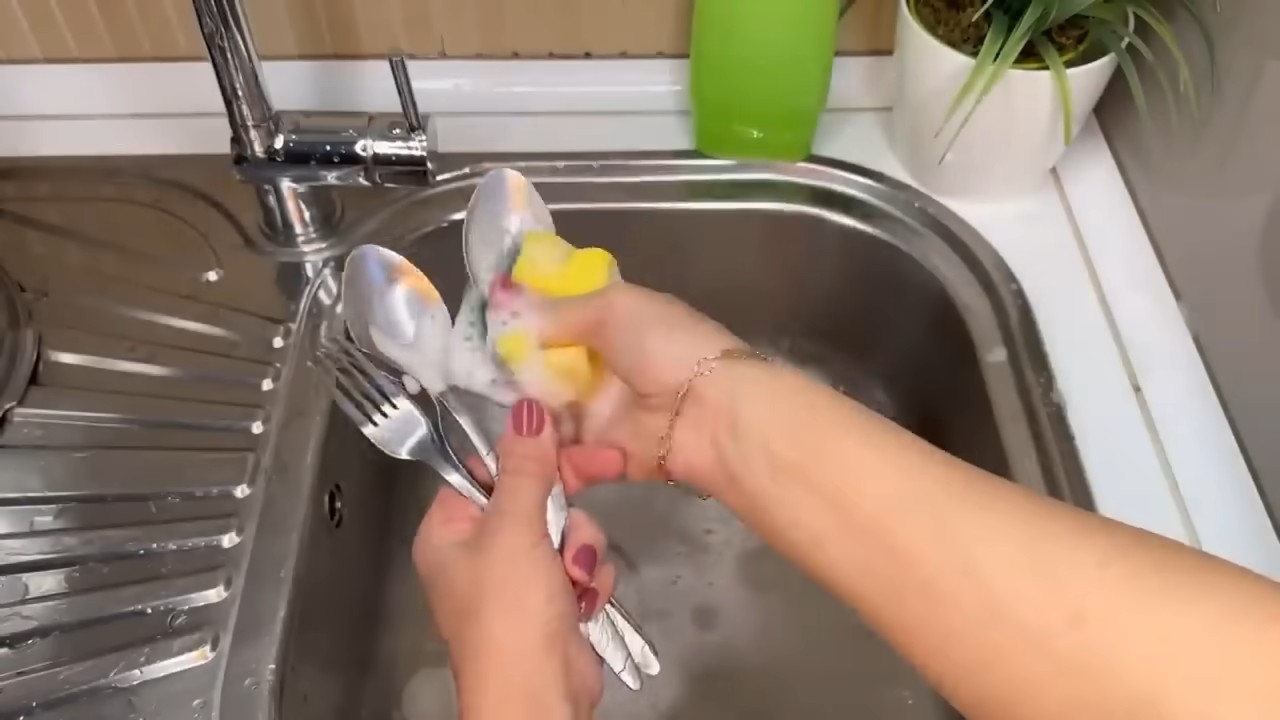
* **Greasy Stovetop:** Spray the solution directly onto the greasy stovetop and let it sit for a few minutes. Then, scrub with a sponge or scrub brush and wipe clean. The salt helps to loosen the grease, while the detergent cuts through it.
* **Dirty Oven Door:** This solution works wonders on oven doors! Spray it on, let it sit for a bit, and then scrub with a non-abrasive pad. Be careful not to scratch the glass.
* **Grimy Countertops:** Spray the solution on your countertops and wipe clean with a damp cloth. It’s great for removing food stains and spills.
* **Sink Cleaning:** Sprinkle some extra salt directly into your sink, then spray with the solution. Scrub with a sponge to remove grime and water spots. Rinse thoroughly.
* **Microwave Cleaning:** Spray the inside of your microwave with the solution and let it sit for a few minutes. Then, wipe clean with a damp cloth. The steam from the solution will help to loosen any stuck-on food.
Bathroom Cleaning
* **Shower and Tub:** Spray the solution on your shower and tub walls and let it sit for a few minutes. Then, scrub with a sponge or brush and rinse thoroughly. It’s effective against soap scum and mildew.
* **Toilet Cleaning:** Spray the solution inside the toilet bowl and let it sit for a few minutes. Then, scrub with a toilet brush and flush.
* **Sink and Faucet:** Spray the solution on your sink and faucet and wipe clean with a damp cloth. It’s great for removing water spots and toothpaste splatters.
* **Grout Cleaning:** For stubborn grout stains, spray the solution directly onto the grout and let it sit for a few minutes. Then, scrub with a grout brush and rinse thoroughly.
Floor Cleaning
* **Tile Floors:** Add 1/2 cup of the solution to a bucket of warm water. Mop your tile floors as usual. This solution is great for removing dirt and grime without leaving a residue.
* **Linoleum Floors:** Similar to tile floors, add 1/2 cup of the solution to a bucket of warm water and mop your linoleum floors.
* Important Note: Always test the solution in an inconspicuous area first to make sure it doesn’t damage the flooring. Avoid using this solution on hardwood floors, as it can damage the finish.
Outdoor Cleaning
* **Patio Furniture:** Spray the solution on your patio furniture and wipe clean with a damp cloth. It’s great for removing dirt, grime, and bird droppings.
* **Grill Cleaning:** Spray the solution on your grill grates and let it sit for a few minutes. Then, scrub with a grill brush to remove grease and food residue. Rinse thoroughly.
* **Car Washing:** Add 1/4 cup of the solution to a bucket of warm water. Wash your car as usual with a sponge or wash mitt. Rinse thoroughly.
Important Note: Be sure to test a small, hidden area of your car’s paint first to ensure the solution doesn’t damage the finish.
Important Considerations and Safety Tips
While this cleaning solution is generally safe and effective, there are a few things to keep in mind:
* **Test First:** Always test the solution in an inconspicuous area before applying it to a large surface. This will help you ensure that it doesn’t damage or discolor the material.
* **Avoid Sensitive Surfaces:** Avoid using this solution on delicate surfaces like marble, granite, or wood, as it can scratch or damage them.
* **Rinse Thoroughly:** Always rinse surfaces thoroughly after cleaning with this solution to remove any residue.
* **Ventilation:** When cleaning in enclosed spaces, make sure to have adequate ventilation.
* **Storage:** Store the solution in a cool, dry place away from children and pets.
* **Don’t Mix with Bleach:** Never mix this solution with bleach, as it can create harmful fumes.
* **Skin Sensitivity:** If you have sensitive skin, wear gloves when using this solution.
* Not a Disinfectant: This solution is a great cleaner, but it’s not a disinfectant. If you need to disinfect a surface, use a separate disinfectant product.
Troubleshooting
* **Salt Not Dissolving:** If the salt isn’t dissolving completely, try using warmer water or stirring for a longer period of time.
* **Solution Leaving a Residue:** If the solution is leaving a residue, try using less detergent or rinsing the surface more thoroughly.
* **Solution Not Working:** If the solution isn’t working as well as you’d like, try adding a bit more salt or detergent. You can also try letting the solution sit on the surface for a longer period of time before scrubbing.
Why This Works: The Science Behind the Sparkle
You might be wondering why such a simple solution is so effective. Here’s a quick breakdown:
* **Detergent:** Detergents are surfactants, which means they reduce the surface tension of water, allowing it to penetrate dirt and grease more easily. They also have emulsifying properties, which means they can suspend oil and grease in water, allowing them to be washed away.
* **Salt:** Salt acts as a mild abrasive, helping to scrub away dirt and grime without scratching. It also helps to absorb grease and oil.
* **Warm Water:** Warm water helps to dissolve the salt and activate the cleaning power of the detergent.
So there you have it! A simple, effective, and budget-friendly cleaning solution that you can make at home with just salt and detergent. Give it a try and let me know what you think! Happy cleaning!
Conclusion
So, there you have it! This simple yet surprisingly effective salt and detergent cleaning solution is a game-changer for anyone looking to tackle stubborn stains and grime without resorting to harsh chemicals or expensive commercial cleaners. We’ve walked you through the easy steps, highlighting the science behind why this combination works so well, and hopefully, you’re already itching to give it a try.
But why is this DIY trick a must-try? It boils down to several key factors. First, it’s incredibly cost-effective. You likely already have both salt and detergent in your home, meaning you can whip up a batch of this powerful cleaner without spending a dime. Second, it’s environmentally friendly. By using readily available ingredients and avoiding harsh chemicals, you’re reducing your impact on the planet. Third, it’s versatile. From scrubbing greasy stovetops to brightening dingy grout, this solution can handle a wide range of cleaning tasks around your home. And finally, it’s surprisingly effective. The abrasive action of the salt combined with the degreasing power of the detergent creates a synergistic effect that can lift even the most stubborn stains.
Looking for variations? Absolutely! For extra cleaning power on tough stains, consider adding a tablespoon of white vinegar to the mixture. The acidity of the vinegar will help to break down grease and grime even further. For a pleasant scent, add a few drops of your favorite essential oil, such as lemon, lavender, or tea tree oil. Just be sure to test the solution on an inconspicuous area first to ensure it doesn’t damage the surface. You can also adjust the ratio of salt to detergent depending on the specific cleaning task. For delicate surfaces, use less salt and more detergent. For tougher stains, use more salt and less detergent.
The key is to experiment and find what works best for you and your home.
We’re confident that once you try this salt and detergent cleaning solution, you’ll be amazed by the results. It’s a simple, affordable, and effective way to keep your home sparkling clean without exposing yourself or your family to harmful chemicals. So, ditch the expensive commercial cleaners and give this DIY trick a try.
We encourage you to share your experiences with us! Let us know in the comments below how this solution worked for you, what surfaces you used it on, and any variations you tried. We’re always eager to hear from our readers and learn from your experiences. Your feedback will not only help us improve this recipe but also inspire others to try this amazing cleaning solution.
Don’t forget to take before-and-after photos and share them on social media using #SaltAndDetergentClean. Let’s spread the word about this amazing DIY cleaning trick and help everyone achieve a cleaner, healthier home! We believe that this simple solution can make a big difference in your cleaning routine.
Frequently Asked Questions (FAQ)
What kind of salt should I use for this cleaning solution?
The best type of salt to use is regular table salt. It’s readily available, inexpensive, and has a fine texture that makes it effective for scrubbing without being too abrasive. You can also use sea salt or kosher salt, but make sure to grind them into a finer consistency before using them. Avoid using rock salt, as it’s too coarse and could scratch delicate surfaces. The goal is to have a slightly abrasive texture that helps to lift dirt and grime without causing damage.
What kind of detergent should I use?
You can use any type of liquid dish soap or laundry detergent for this cleaning solution. However, it’s best to use a detergent that is free of harsh chemicals and fragrances, especially if you have sensitive skin or allergies. Look for detergents that are labeled as “natural” or “eco-friendly.” Avoid using detergents that contain bleach, as bleach can react with other cleaning agents and create harmful fumes. A mild, all-purpose detergent will work perfectly fine for most cleaning tasks.
Can I use this solution on all surfaces?
While this salt and detergent cleaning solution is generally safe for most surfaces, it’s always a good idea to test it on an inconspicuous area first, especially on delicate surfaces like wood, painted walls, or natural stone. Avoid using it on surfaces that are easily scratched, such as polished metal or glass. The abrasive nature of the salt can damage these surfaces. If you’re unsure, err on the side of caution and use a gentler cleaning solution.
How do I store the leftover cleaning solution?
You can store the leftover cleaning solution in a sealed container, such as a spray bottle or a jar, for up to a week. However, it’s best to use it as soon as possible, as the salt may settle to the bottom over time. Before using the stored solution, give it a good shake to redistribute the salt. Avoid storing the solution in direct sunlight or in a hot environment, as this can cause the detergent to break down and lose its effectiveness.
Is this cleaning solution safe for pets and children?
While this cleaning solution is made with relatively safe ingredients, it’s still important to keep it out of reach of pets and children. The detergent can be irritating if ingested, and the salt can cause dehydration. If your pet or child accidentally ingests the solution, contact a veterinarian or poison control center immediately. When using the solution, make sure to ventilate the area well and avoid spraying it directly into the eyes or mouth.
How often can I use this cleaning solution?
You can use this cleaning solution as often as needed, but it’s best to avoid overusing it, especially on delicate surfaces. Over time, the abrasive nature of the salt can cause damage. For regular cleaning, you may want to use a gentler cleaning solution and reserve this salt and detergent solution for tackling tough stains and grime. Pay attention to the surface you’re cleaning and adjust the frequency of use accordingly.
Can I use this solution to clean my oven?
Yes, this salt and detergent cleaning solution can be used to clean your oven, but it’s important to take some precautions. First, make sure the oven is completely cool before applying the solution. Second, remove any loose debris or food particles. Third, apply the solution to the oven walls and floor, avoiding the heating elements. Let it sit for a few minutes to loosen the grime, then scrub with a sponge or brush. Finally, rinse thoroughly with clean water. For stubborn stains, you may need to repeat the process.
Can I use this solution to clean my bathroom?
Absolutely! This salt and detergent cleaning solution is excellent for cleaning bathrooms. It can be used to scrub tile grout, clean shower doors, and remove soap scum from sinks and tubs. The abrasive nature of the salt helps to lift dirt and grime, while the detergent cuts through grease and soap residue. Just be sure to test the solution on an inconspicuous area first, especially on delicate surfaces like marble or granite.
What if the salt scratches the surface I’m cleaning?
If you’re concerned about the salt scratching the surface you’re cleaning, you can try using a finer grain of salt or reducing the amount of salt in the solution. You can also try using a softer scrubbing tool, such as a microfiber cloth or a sponge. If you notice any scratches, stop using the solution immediately and switch to a gentler cleaning method. Prevention is key, so always test the solution on an inconspicuous area first.
Can I add other ingredients to this cleaning solution?
Yes, you can add other ingredients to this cleaning solution to customize it to your specific needs. For example, you can add a tablespoon of baking soda to boost its cleaning power, or a few drops of essential oil for a pleasant scent. You can also add a splash of vinegar to help break down grease and grime. Just be sure to research any potential interactions between the ingredients before adding them to the solution. And always test the solution on an inconspicuous area first to ensure it doesn’t damage the surface.
Leave a Comment