
Styrofoam Box Bok Choy: Who knew growing your own delicious, crisp bok choy could be so easy and eco-friendly? I’m excited to share a simple, yet incredibly effective DIY trick that will transform your discarded styrofoam boxes into thriving mini-gardens!
For centuries, cultivating bok choy has been a staple in Asian cuisine, prized for its nutritional value and versatility. From stir-fries to soups, this leafy green adds a delightful crunch and subtle flavor to countless dishes. But what if I told you that you don’t need a sprawling garden to enjoy freshly harvested bok choy?
In today’s world, where sustainability is more important than ever, repurposing materials is a fantastic way to reduce waste and connect with nature. This styrofoam box bok choy project is not only a fun and rewarding activity, but it also addresses a common problem: what to do with all those styrofoam boxes that end up in landfills. Plus, growing your own food ensures you know exactly what you’re eating – no harmful pesticides or hidden additives! I’ll guide you through each step, making it easy to enjoy fresh, homegrown bok choy, even if you have limited space or gardening experience. Let’s get started and turn those styrofoam boxes into a bok choy bonanza!
Grow Your Own Bok Choy in a Styrofoam Box: A Beginner’s Guide
Hey there, fellow gardening enthusiasts! Ever thought about turning that old styrofoam box into a mini vegetable garden? Well, I’m here to tell you it’s totally doable, and growing bok choy in one is surprisingly easy and rewarding. This guide will walk you through every step, from prepping the box to harvesting your delicious, homegrown bok choy. Let’s get our hands dirty!
What You’ll Need
Before we dive in, let’s gather our supplies. Here’s a list of everything you’ll need to transform that styrofoam box into a bok choy haven:
* A Styrofoam Box: The bigger, the better, but any size will work. Just make sure it’s clean and sturdy.
* Potting Soil: Choose a good quality potting mix that drains well.
* Bok Choy Seeds: You can find these at most garden centers or online.
* Drill or Screwdriver: For creating drainage holes.
* Landscape Fabric (Optional): This helps prevent soil from washing out of the drainage holes.
* Watering Can or Hose: For watering your bok choy.
* Fertilizer (Optional): A balanced, water-soluble fertilizer can boost growth.
* Gloves: To keep your hands clean.
* Measuring Tape or Ruler: To space your seeds properly.
Preparing the Styrofoam Box
Okay, first things first, we need to get our styrofoam box ready for its new life as a bok choy planter.
1. Clean the Box: Give the styrofoam box a good scrub with soap and water to remove any dirt or residue. Rinse it thoroughly and let it dry completely. This is super important to prevent any unwanted contaminants from affecting your bok choy.
2. Drill Drainage Holes: This is crucial! Bok choy needs well-draining soil to thrive. Use a drill or screwdriver to create drainage holes in the bottom of the box. I usually aim for about 6-8 holes, evenly spaced. Make sure they’re not too big, or the soil will just wash out.
3. Line with Landscape Fabric (Optional): This step is optional, but I highly recommend it. Cut a piece of landscape fabric slightly larger than the inside of the box. Place it inside, pressing it against the bottom and sides. This will help prevent soil from escaping through the drainage holes and keep your box cleaner.
Planting the Bok Choy Seeds
Now for the fun part – planting the seeds!
1. Fill the Box with Potting Soil: Fill the styrofoam box with potting soil, leaving about an inch or two of space at the top. Gently pat down the soil to create a level surface.
2. Sow the Seeds: Bok choy seeds are tiny, so be careful not to plant them too deep. I usually sprinkle the seeds evenly across the surface of the soil. You can also create shallow furrows (about ¼ inch deep) and sow the seeds in rows.
3. Cover the Seeds: Lightly cover the seeds with a thin layer of potting soil.
4. Water Gently: Use a watering can or hose with a gentle spray nozzle to water the soil thoroughly. Be careful not to wash away the seeds. The soil should be moist but not soggy.
Caring for Your Bok Choy
Alright, the seeds are planted! Now, let’s talk about how to keep your bok choy happy and healthy.
1. Sunlight: Bok choy needs at least 4-6 hours of sunlight per day. Place your styrofoam box in a sunny location, such as a patio, balcony, or garden. If you don’t have a sunny spot, you can use a grow light.
2. Watering: Water your bok choy regularly, especially during hot, dry weather. The soil should be consistently moist but not waterlogged. Check the soil moisture by sticking your finger into the soil. If the top inch feels dry, it’s time to water.
3. Fertilizing (Optional): If you want to give your bok choy a boost, you can fertilize it every 2-3 weeks with a balanced, water-soluble fertilizer. Follow the instructions on the fertilizer package.
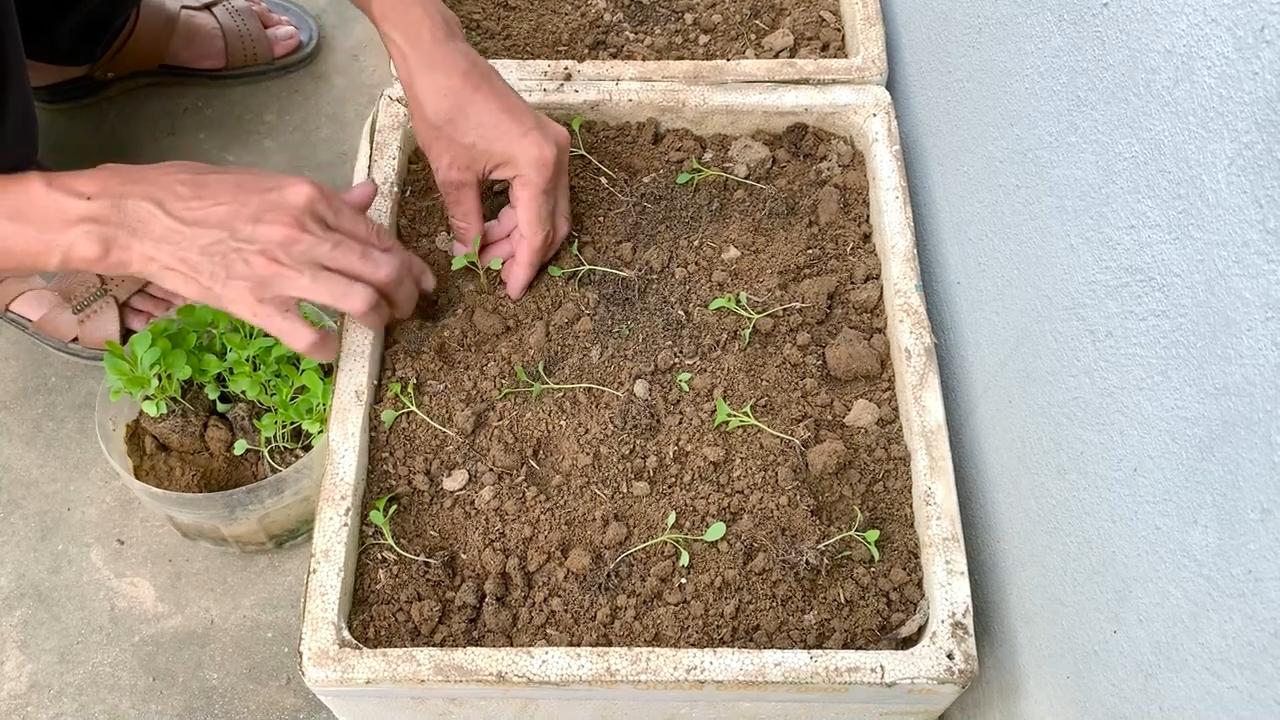
4. Thinning: Once the seedlings emerge and have a few true leaves (the leaves that look like miniature bok choy), you’ll need to thin them out. This means removing some of the seedlings to give the remaining ones enough space to grow. Aim for a spacing of about 6-8 inches between plants. Don’t just pull them out! Gently snip them at the base with scissors to avoid disturbing the roots of the remaining plants.
5. Weed Control: Keep an eye out for weeds and remove them promptly. Weeds can compete with your bok choy for nutrients and water.
6. Pest Control: Bok choy can be susceptible to pests such as aphids and cabbage worms. Inspect your plants regularly for signs of infestation. If you find pests, you can try spraying them with insecticidal soap or neem oil. You can also handpick the pests off the plants.
Harvesting Your Bok Choy
The moment we’ve been waiting for! Harvesting your homegrown bok choy.
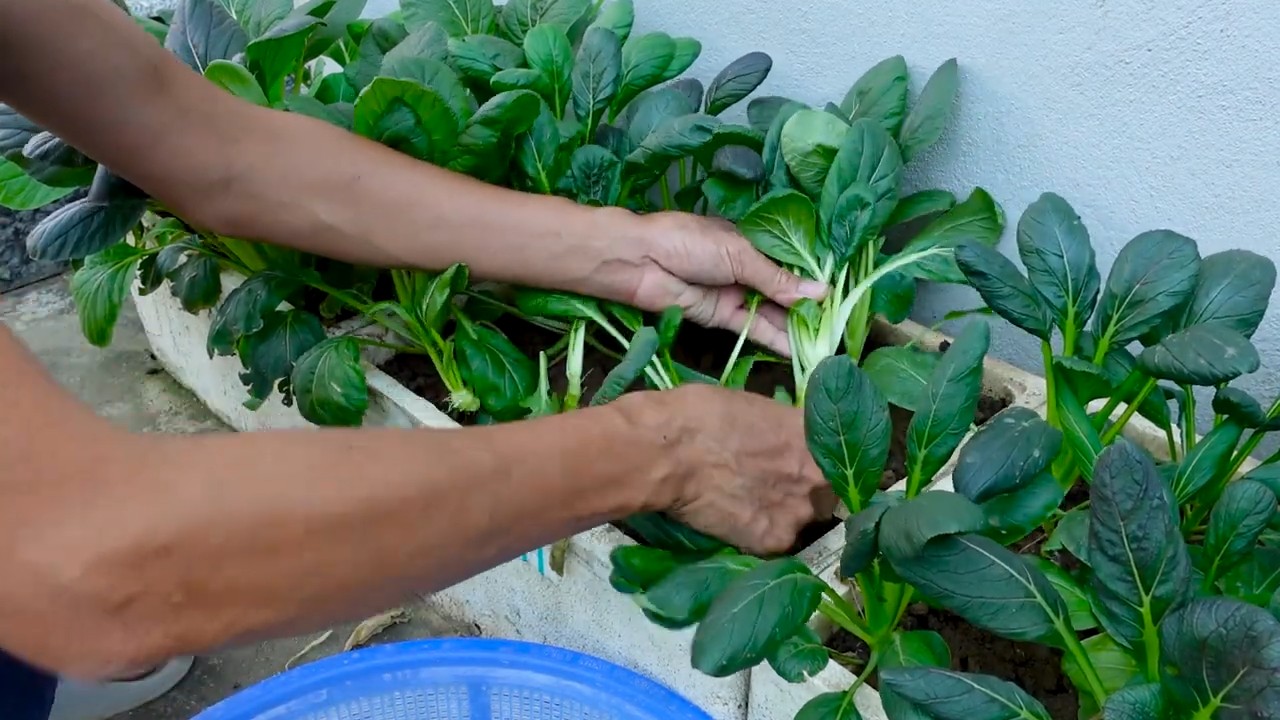
1. When to Harvest: Bok choy is typically ready to harvest in about 45-60 days after planting. You can harvest the entire plant at once, or you can harvest individual leaves as needed. I prefer to harvest individual leaves, as this allows the plant to continue producing.
2. How to Harvest: To harvest the entire plant, use a sharp knife to cut the bok choy at the base. To harvest individual leaves, simply snap them off near the base of the plant.
3. Enjoy Your Harvest: Wash your harvested bok choy thoroughly and enjoy it in salads, stir-fries, soups, or any other dish you like. Freshly harvested bok choy tastes amazing!
Troubleshooting
Even with the best care, you might encounter a few challenges along the way. Here are some common problems and how to fix them:
* Yellowing Leaves: This could be a sign of overwatering, underwatering, or nutrient deficiency. Check the soil moisture and adjust your watering accordingly. If the soil is consistently moist, you may be overwatering. If the soil is dry, you may be underwatering. You can also try fertilizing your bok choy with a balanced fertilizer.
* Stunted Growth: This could be due to lack of sunlight, poor soil, or pests. Make sure your bok choy is getting enough sunlight. If the soil is poor, you can amend it with compost or other organic matter. Check for pests and treat them accordingly.
* Bolting (Flowering): Bok choy can bolt (go to seed) in hot weather. If your bok choy starts to bolt, the leaves will become bitter. To prevent bolting, try to plant your bok choy in the spring or fall, when the weather is cooler. You can also provide shade for your plants during the hottest part of the day.
Tips for Success
Here are a few extra tips to help you grow the best bok choy possible:
* Choose the Right Variety: There are many different varieties of bok choy available. Some varieties are more heat-tolerant than others. Choose a variety that is well-suited to your climate.
* Start Seeds Indoors: If you live in a cold climate, you can start your bok choy seeds indoors 4-6 weeks before the last frost. This will give you a head start on the growing season.
* Succession Planting: To enjoy a continuous harvest of bok choy, plant new seeds every 2-3 weeks.
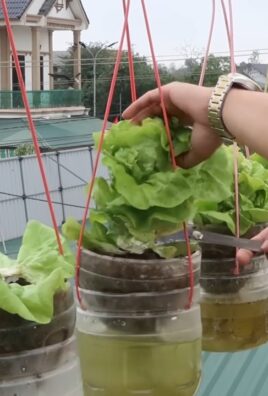
* Companion Planting: Bok choy grows well with other vegetables such as lettuce, spinach, and radishes.
Why I Love This DIY Project
Honestly, I love this DIY project because it’s so simple and rewarding. It’s a great way to recycle styrofoam boxes and grow your own fresh, healthy food. Plus, it’s a fun activity for the whole family! There’s something incredibly satisfying about watching those tiny seeds sprout and grow into beautiful, leafy bok choy. And the taste of homegrown bok choy? Unbeatable!
So, what are you waiting for? Grab that styrofoam box and get planting! You’ll be enjoying your own homegrown bok choy in no time. Happy gardening!
Conclusion
So, there you have it! Transforming a simple styrofoam box into a thriving mini-garden for your Bok Choy is not just a fun project; it’s a sustainable and incredibly rewarding way to enjoy fresh, homegrown vegetables right at your fingertips. We’ve walked you through the process, highlighting the ease and affordability of this DIY trick. But why is this a must-try?
Firstly, it’s about control. You dictate the growing environment, minimizing exposure to harmful pesticides and ensuring your Bok Choy receives the optimal conditions for growth. This translates to healthier, tastier vegetables that you can feel good about serving to your family. Secondly, it’s about accessibility. Whether you live in an apartment with a small balcony or a house with a sprawling garden, this method allows you to cultivate your own produce regardless of space constraints. The styrofoam box acts as a self-contained ecosystem, making it perfect for urban gardeners or anyone looking to maximize their yield in a limited area.
Thirdly, it’s about sustainability. Repurposing styrofoam boxes, which often end up in landfills, gives them a new lease on life and reduces waste. You’re not only growing your own food but also contributing to a more environmentally conscious lifestyle. It’s a win-win situation!
But the beauty of this DIY project lies in its adaptability. Feel free to experiment with different soil mixtures to find what works best for your local climate. Consider adding companion plants like marigolds to deter pests naturally. You can even paint the styrofoam box to add a touch of personality to your mini-garden. The possibilities are endless!
Don’t be afraid to get creative and personalize your Bok Choy growing experience.
We encourage you to embrace this simple yet effective DIY trick and witness the joy of nurturing your own Bok Choy from seed to harvest. Imagine the satisfaction of adding freshly picked, vibrant green leaves to your stir-fries, soups, or salads, knowing that you grew them yourself.
So, grab a styrofoam box, some soil, and Bok Choy seeds, and embark on this exciting gardening adventure. We’re confident that you’ll be amazed by the results. And most importantly, we want to hear about your experience! Share your photos, tips, and challenges in the comments below. Let’s build a community of DIY gardeners and inspire others to grow their own food. Let us know if you have any questions about growing Bok Choy in a styrofoam box. Happy gardening!
Frequently Asked Questions (FAQ)
What type of styrofoam box is best for growing Bok Choy?
Ideally, you want a styrofoam box that’s at least 6-8 inches deep to provide ample space for the Bok Choy roots to grow. The size of the box will depend on how many Bok Choy plants you want to grow. A standard-sized box (approximately 12×18 inches) can comfortably accommodate 3-4 plants. Make sure the box is clean and free of any harmful chemicals or residues. Food-grade styrofoam boxes are generally the safest option. If you’re unsure, line the box with a plastic sheet before adding soil.
What kind of soil should I use for growing Bok Choy in a styrofoam box?
A well-draining potting mix is crucial for growing healthy Bok Choy. Avoid using garden soil, as it tends to compact and doesn’t provide adequate drainage. A mix of potting soil, compost, and perlite or vermiculite is ideal. The compost provides essential nutrients, while the perlite or vermiculite improves drainage and aeration. You can also add some slow-release fertilizer to the soil mix to provide a steady supply of nutrients throughout the growing season.
How often should I water my Bok Choy plants in a styrofoam box?
Watering frequency depends on several factors, including the weather, the type of soil, and the size of the plants. Generally, you should water your Bok Choy plants when the top inch of soil feels dry to the touch. Avoid overwatering, as this can lead to root rot. Ensure the styrofoam box has drainage holes to allow excess water to escape. During hot weather, you may need to water more frequently, possibly even daily. Check the soil moisture regularly and adjust your watering schedule accordingly.
How much sunlight does Bok Choy need when grown in a styrofoam box?
Bok Choy thrives in partial to full sunlight. Aim for at least 4-6 hours of direct sunlight per day. If you’re growing your Bok Choy indoors or in a shaded area, you may need to supplement with artificial grow lights. Rotate the styrofoam box regularly to ensure all sides of the plants receive adequate sunlight. Insufficient sunlight can result in leggy growth and reduced yields.
How do I protect my Bok Choy from pests and diseases when growing in a styrofoam box?
Regularly inspect your Bok Choy plants for signs of pests or diseases. Common pests that affect Bok Choy include aphids, cabbage worms, and slugs. You can control aphids with a strong spray of water or by introducing beneficial insects like ladybugs. Cabbage worms can be handpicked or controlled with Bacillus thuringiensis (Bt), a natural insecticide. Slugs can be deterred with copper tape or by placing beer traps around the styrofoam box. To prevent diseases, ensure good air circulation and avoid overwatering. If you notice any signs of disease, remove the affected leaves immediately.
Can I grow other vegetables in a styrofoam box besides Bok Choy?
Absolutely! Styrofoam boxes are versatile containers that can be used to grow a variety of vegetables, herbs, and flowers. Some other vegetables that thrive in styrofoam boxes include lettuce, spinach, kale, radishes, and carrots. Herbs like basil, parsley, and cilantro also do well in styrofoam boxes. When choosing what to grow, consider the size of the box and the space requirements of the plants.
How do I harvest Bok Choy grown in a styrofoam box?
You can harvest Bok Choy when the leaves are about 6-8 inches long. You can either harvest the entire plant at once or harvest individual leaves as needed. To harvest the entire plant, simply cut it off at the base with a sharp knife. To harvest individual leaves, start with the outer leaves and work your way inwards. This allows the inner leaves to continue growing. Regular harvesting encourages continued production.
How long does it take for Bok Choy to grow in a styrofoam box?
Bok Choy is a relatively fast-growing vegetable. From seed to harvest, it typically takes about 45-60 days. However, the exact time will depend on the variety of Bok Choy, the growing conditions, and the weather. You can start harvesting baby Bok Choy leaves as early as 30 days after planting.
What are some variations I can try when growing Bok Choy in a styrofoam box?
There are many variations you can try to customize your Bok Choy growing experience. You can experiment with different varieties of Bok Choy, such as Shanghai Bok Choy or Baby Bok Choy. You can also try growing Bok Choy in different soil mixtures or adding different types of fertilizers. Another variation is to use different types of styrofoam boxes, such as those with built-in drainage systems or those that are insulated to protect the plants from extreme temperatures. You can also try companion planting, which involves growing other plants alongside your Bok Choy to deter pests or improve growth.
How do I dispose of the styrofoam box after I’m done growing Bok Choy?
If the styrofoam box is still in good condition, you can reuse it for another growing season. If the box is damaged or no longer needed, check with your local recycling center to see if they accept styrofoam for recycling. Some communities have styrofoam recycling programs, while others do not. If recycling is not an option, you can dispose of the styrofoam box in the trash. However, consider the environmental impact of disposing of styrofoam and explore alternative options whenever possible.

Leave a Comment