
Swiss chard kitchen garden: Ever dreamt of stepping outside your back door and snipping fresh, vibrant greens for your dinner? I know I have! There’s something incredibly satisfying about growing your own food, and Swiss chard is the perfect place to start. It’s not only beautiful with its rainbow of stems, but it’s also incredibly easy to grow, even if you’re a complete beginner like I once was.
For centuries, leafy greens like Swiss chard have been a staple in diets around the world, providing essential vitamins and minerals. From ancient Mediterranean gardens to modern-day kitchen plots, the practice of cultivating our own food connects us to a rich history of self-sufficiency and healthy living. But let’s be honest, sometimes gardening feels overwhelming, right? That’s where these DIY tricks and hacks come in!
Life gets busy, and not everyone has the time (or the green thumb!) to dedicate hours to tending a garden. That’s why I’ve compiled these simple, effective, and time-saving tips to help you create a thriving Swiss chard kitchen garden, even if you’re short on space or experience. Imagine enjoying delicious, homegrown Swiss chard in your salads, soups, and stir-fries – all thanks to a few clever DIY solutions. Get ready to unlock the secrets to a bountiful harvest with minimal effort!
Growing Swiss Chard: A Beginner’s Guide to a Colorful and Productive Kitchen Garden
Hey there, fellow gardening enthusiasts! I’m so excited to share my experience with growing Swiss chard. It’s one of my absolute favorite vegetables to have in the garden. Not only is it incredibly nutritious, but it’s also beautiful, adding a splash of color to any space. Plus, it’s surprisingly easy to grow, even if you’re a complete beginner. So, let’s dive in and get our hands dirty!
Choosing Your Swiss Chard Variety
Before we get started, let’s talk about the different types of Swiss chard. You’ll find a rainbow of options, each with its own unique charm.
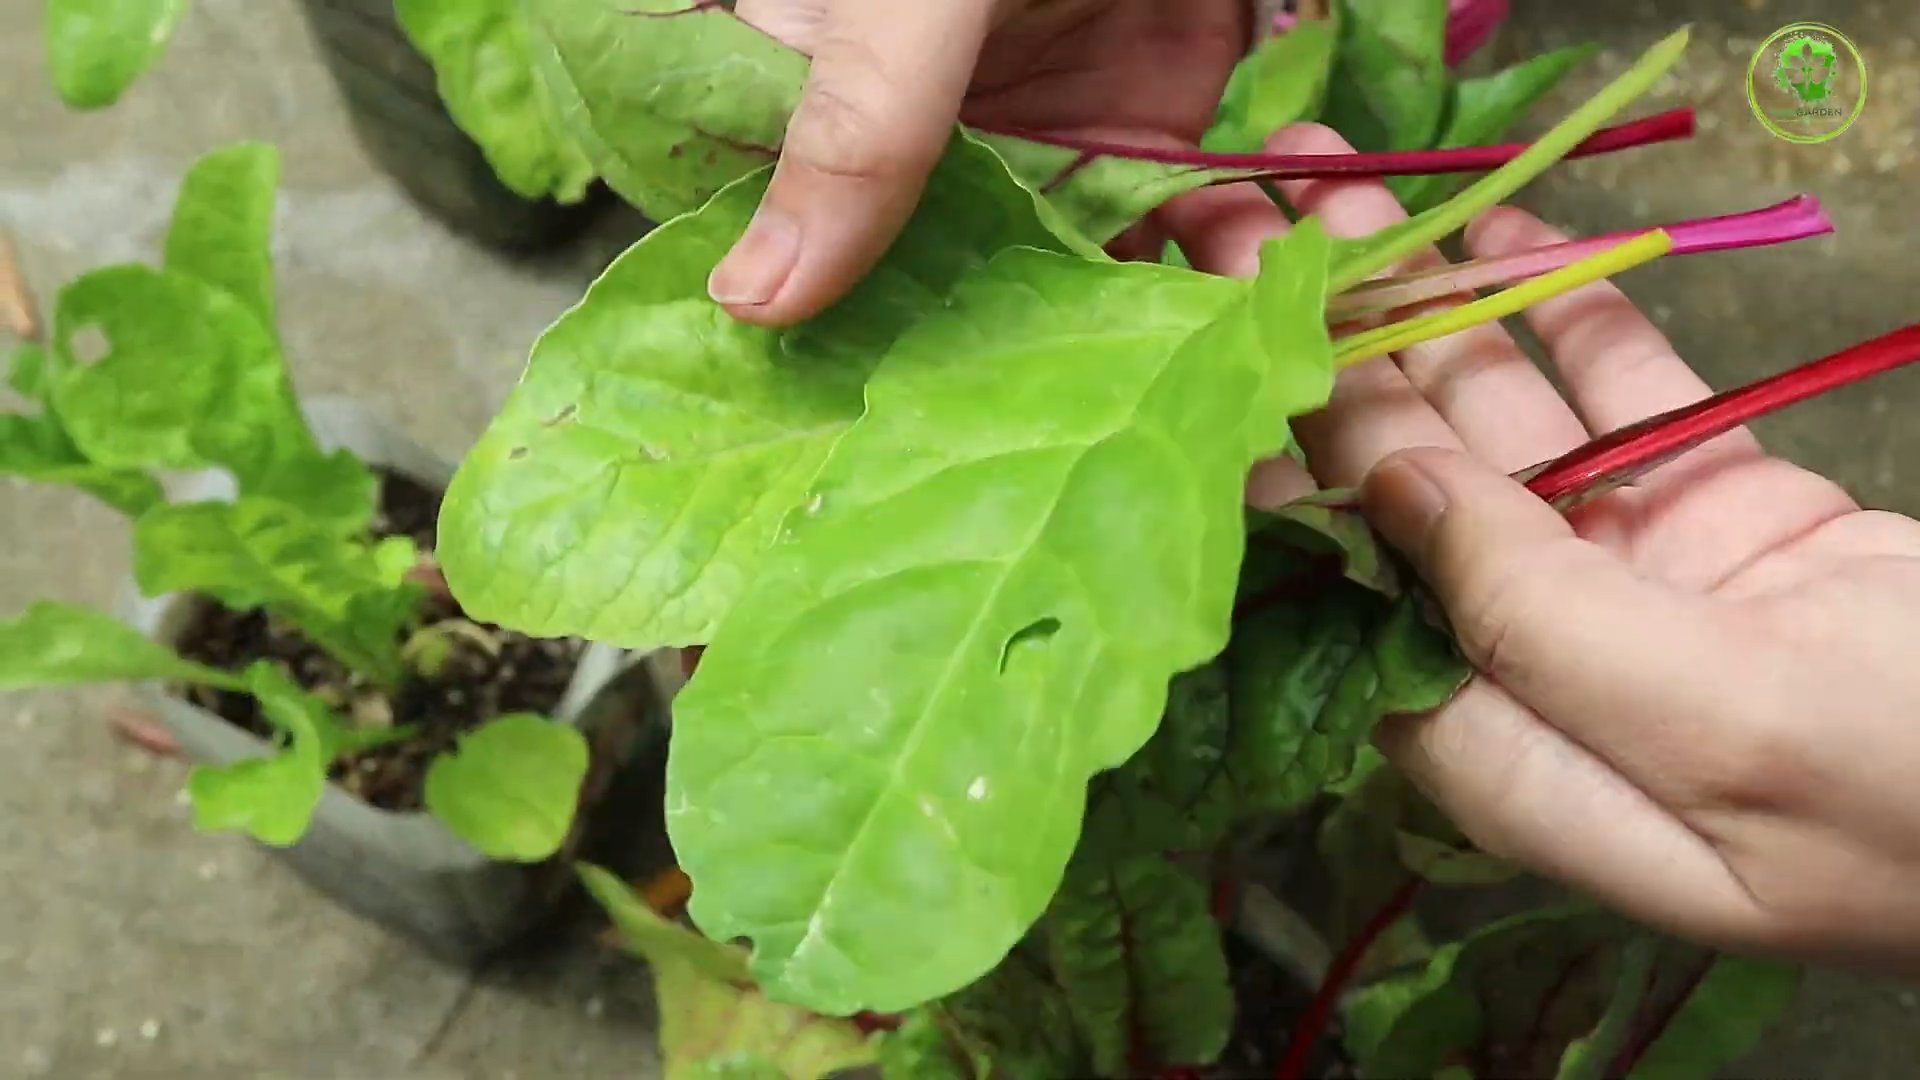
* ‘Bright Lights’: This is probably the most popular variety, and for good reason! It boasts a mix of vibrant stem colors, including red, yellow, orange, pink, and white. It’s a real showstopper in the garden.
* ‘Fordhook Giant’: If you’re looking for a more traditional variety, ‘Fordhook Giant’ is a great choice. It has dark green, heavily crumpled leaves and thick, white stems. It’s known for its excellent flavor and productivity.
* ‘Ruby Red’: As the name suggests, this variety features stunning deep red stems and dark green leaves. It’s not only beautiful but also has a slightly sweeter flavor than some other varieties.
* ‘Lucullus’: This is an heirloom variety with light green, crinkled leaves and thick, white stems. It’s known for its mild flavor and tender texture.
I personally love growing ‘Bright Lights’ for its visual appeal, but any of these varieties will thrive in your garden with the right care.
Preparing Your Garden Bed
Swiss chard needs a sunny spot and well-drained soil to flourish. Here’s how I prepare my garden bed:
* Sunlight: Choose a location that receives at least 6 hours of sunlight per day. Swiss chard can tolerate some shade, especially in hotter climates, but it will produce the best yields in full sun.
* Soil: Swiss chard prefers fertile, well-drained soil with a pH between 6.0 and 7.0. If your soil is heavy clay or sandy, amend it with compost or other organic matter to improve drainage and fertility.
* Testing: I highly recommend testing your soil before planting. You can purchase a soil testing kit at your local garden center or send a sample to your local agricultural extension office. This will help you determine if your soil is lacking any essential nutrients.
* Amending: Based on your soil test results, amend your soil with the appropriate nutrients. Swiss chard benefits from a balanced fertilizer or compost. I like to add a generous amount of compost to my garden bed before planting.
* Tilling: Till the soil to a depth of 12 inches to loosen it up and incorporate the amendments. This will make it easier for the Swiss chard roots to grow.
* Leveling: Rake the soil to create a smooth, even surface. This will make it easier to plant the seeds or seedlings.
Planting Your Swiss Chard
You can start Swiss chard from seed or purchase seedlings from a garden center. I’ve done both, and both methods work well.
Starting from Seed
* Timing: You can sow Swiss chard seeds directly in the garden 2-4 weeks before the last expected frost. You can also start seeds indoors 4-6 weeks before the last frost.
* Sowing: Sow seeds ½ inch deep and 1 inch apart in rows 18-24 inches apart.
* Watering: Keep the soil consistently moist until the seeds germinate. Germination typically takes 5-10 days.
* Thinning: Once the seedlings have emerged, thin them to 6-12 inches apart. You can transplant the thinned seedlings to another location in your garden or give them away to friends.
Planting Seedlings
* Hardening Off: If you purchased seedlings from a garden center, it’s important to harden them off before planting them in the garden. This means gradually exposing them to outdoor conditions over a period of 7-10 days. Start by placing them in a sheltered location for a few hours each day, gradually increasing the amount of time they spend outdoors.
* Planting: Dig a hole that is slightly larger than the root ball of the seedling. Gently remove the seedling from its container and place it in the hole. Backfill the hole with soil and gently firm the soil around the base of the plant.
* Spacing: Space seedlings 6-12 inches apart in rows 18-24 inches apart.
* Watering: Water the seedlings thoroughly after planting.
Caring for Your Swiss Chard
Swiss chard is relatively low-maintenance, but there are a few things you can do to help it thrive.
* Watering: Water regularly, especially during dry periods. Swiss chard needs about 1 inch of water per week.
* Fertilizing: Fertilize every 4-6 weeks with a balanced fertilizer or compost tea.
* Weeding: Keep the garden bed free of weeds. Weeds compete with Swiss chard for nutrients and water.
* Mulching: Apply a layer of mulch around the plants to help retain moisture, suppress weeds, and regulate soil temperature. I like to use straw or shredded leaves as mulch.
* Pest Control: Swiss chard is generally pest-resistant, but it can be susceptible to aphids, flea beetles, and leaf miners. Inspect your plants regularly for signs of pests and take action if necessary. I prefer to use organic pest control methods, such as insecticidal soap or neem oil.
* Bolting: Swiss chard can bolt (go to seed) in hot weather. To prevent bolting, provide shade during the hottest part of the day and water regularly. If your Swiss chard does bolt, you can still harvest the leaves, but they may be slightly bitter.
Harvesting Your Swiss Chard
You can start harvesting Swiss chard leaves as soon as they are large enough to eat, typically when they are about 6 inches long.
* Method: Harvest the outer leaves first, leaving the inner leaves to continue growing. You can harvest individual leaves or cut the entire plant at the base.
* Timing: Harvest in the morning, when the leaves are crisp and fresh.
* Storage: Swiss chard can be stored in the refrigerator for up to a week. Wrap the leaves in a damp paper towel and store them in a plastic bag.
Using Your Swiss Chard
Swiss chard is incredibly versatile in the kitchen. You can use it in salads, soups, stews, stir-fries, and more. The leaves can be eaten raw or cooked, and the stems can be cooked like asparagus.
Here are a few of my favorite ways to use Swiss chard:
* Sautéed Swiss Chard: Sauté Swiss chard with garlic, olive oil, and a pinch of red pepper flakes for a simple and delicious side dish.
* Swiss Chard and Ricotta Pie: Use Swiss chard in a savory pie with ricotta cheese, eggs, and Parmesan cheese.
* Swiss Chard Smoothie: Add Swiss chard to your favorite smoothie for a boost of nutrients.
* Swiss Chard Chips: Bake Swiss chard leaves with olive oil and salt for a healthy and delicious snack.
Troubleshooting
Even with the best care, you might encounter some problems while growing Swiss chard. Here are a few common issues and how to address them:
* Yellowing Leaves: This can be caused by a nutrient deficiency, overwatering, or underwatering. Check your soil pH and nutrient levels, and adjust your watering schedule accordingly.
* Holes in Leaves: This is often caused by pests, such as flea beetles or leaf miners. Inspect your plants regularly for signs of pests and take action if necessary.
* Bolting: As mentioned earlier, bolting can be caused by hot weather. Provide shade during the hottest part of the day and water regularly.
Enjoying Your Harvest
Growing Swiss chard is a rewarding experience. Not only will you have a beautiful and productive garden, but you’ll also have a delicious and nutritious vegetable to enjoy. So, get out there and start planting! I promise you won’t regret it. Happy gardening!

Conclusion
So, there you have it! Transforming your kitchen scraps into a thriving Swiss chard kitchen garden is not only incredibly rewarding but also surprisingly simple. We’ve walked you through the process, from selecting the right chard stalks to nurturing their growth, and hopefully, you’re now feeling confident and excited to embark on this green adventure.
But why is this DIY trick a must-try? Beyond the obvious benefits of fresh, organic produce at your fingertips, growing your own Swiss chard offers a unique connection to your food. You’ll witness the miracle of regeneration firsthand, turning what would have been waste into a vibrant source of nutrients. It’s a sustainable practice that reduces your carbon footprint, minimizes food waste, and saves you money on grocery bills. Plus, there’s an undeniable satisfaction in harvesting your own homegrown vegetables.
This isn’t just about growing Swiss chard; it’s about embracing a more mindful and sustainable lifestyle.
Looking for variations? Absolutely! Once you’ve mastered the basics, feel free to experiment. Try different varieties of Swiss chard, such as Ruby Red, Bright Lights, or Fordhook Giant, each offering unique colors and flavors. You can also explore different growing mediums, from traditional potting soil to hydroponic systems. Consider companion planting to enhance growth and deter pests. Marigolds, for example, are known to repel nematodes and attract beneficial insects. Basil is another great companion, improving the flavor of your chard and deterring pests.
Don’t be afraid to get creative with your containers, too. While standard pots work perfectly well, you can repurpose old buckets, tubs, or even tires to create a unique and eco-friendly garden. Just ensure that your chosen container has adequate drainage.
And remember, growing Swiss chard from scraps is a fantastic way to introduce children to the wonders of gardening. It’s a hands-on learning experience that teaches them about plant life cycles, sustainability, and the importance of healthy eating.
We wholeheartedly encourage you to give this DIY trick a try. It’s a simple, affordable, and incredibly rewarding way to grow your own fresh produce. Once you’ve harvested your first batch of homegrown Swiss chard, we’d love to hear about your experience! Share your photos, tips, and challenges in the comments below. Let’s create a community of urban gardeners, sharing our knowledge and inspiring others to embrace sustainable living.
Ready to transform your kitchen scraps into a bountiful harvest? Start your Swiss chard kitchen garden today!
Frequently Asked Questions (FAQ)
What kind of Swiss chard stalks are best for regrowing?
The best stalks for regrowing are those that are firm, healthy, and have a good amount of the base intact. Look for stalks that are at least 2-3 inches long and have a clean cut at the bottom. Avoid stalks that are wilted, discolored, or have any signs of rot. The fresher the stalk, the better the chances of successful regrowth. Ideally, use stalks from organic Swiss chard to avoid any potential pesticide residue.
How long does it take for Swiss chard to regrow from scraps?
The time it takes for Swiss chard to regrow from scraps can vary depending on several factors, including the variety of chard, the growing conditions (temperature, light, humidity), and the overall health of the stalk. Generally, you can expect to see new growth within 1-2 weeks. It may take several weeks to a couple of months to get a substantial harvest. Be patient and consistent with watering and care, and you’ll be rewarded with fresh, homegrown Swiss chard.
What kind of soil is best for growing Swiss chard?
Swiss chard thrives in well-draining, fertile soil that is rich in organic matter. A good quality potting mix is ideal for container gardening. You can also amend your existing soil with compost, aged manure, or other organic materials to improve its fertility and drainage. The ideal pH level for Swiss chard is between 6.0 and 7.5. If your soil is too acidic, you can add lime to raise the pH.
How often should I water my regrowing Swiss chard?
Water your regrowing Swiss chard regularly, keeping the soil consistently moist but not waterlogged. The frequency of watering will depend on the weather conditions and the type of soil you’re using. In hot, dry weather, you may need to water daily. In cooler, wetter weather, you may only need to water every few days. A good rule of thumb is to check the soil moisture level before watering. If the top inch of soil feels dry, it’s time to water. Avoid overwatering, as this can lead to root rot.
How much sunlight does Swiss chard need?
Swiss chard needs at least 6 hours of sunlight per day to thrive. However, it can tolerate partial shade, especially in hot climates. If you’re growing your Swiss chard indoors, place it near a sunny window or use grow lights to provide adequate light. Insufficient sunlight can result in leggy growth and reduced yields.
Can I grow Swiss chard indoors year-round?
Yes, you can grow Swiss chard indoors year-round, provided you provide adequate light, water, and nutrients. Use grow lights to supplement natural sunlight, especially during the winter months. Maintain a consistent temperature and humidity level. Fertilize regularly with a balanced liquid fertilizer. With proper care, you can enjoy fresh, homegrown Swiss chard even in the dead of winter.
What are some common pests and diseases that affect Swiss chard?
Some common pests that affect Swiss chard include aphids, flea beet
So, there you have it! Transforming your kitchen scraps into a thriving Swiss chard kitchen garden is not only incredibly rewarding but also surprisingly simple. We’ve walked you through the process, from selecting the right chard stalks to nurturing their growth, and hopefully, you’re now feeling confident and excited to embark on this green adventure.
But why is this DIY trick a must-try? Beyond the obvious benefits of fresh, organic produce at your fingertips, growing your own Swiss chard offers a unique connection to your food. You’ll witness the miracle of regeneration firsthand, turning what would have been waste into a vibrant source of nutrients. It’s a sustainable practice that reduces your carbon footprint, minimizes food waste, and saves you money on grocery bills. Plus, there’s an undeniable satisfaction in harvesting your own homegrown vegetables.
This isn’t just about growing Swiss chard; it’s about embracing a more mindful and sustainable lifestyle.
Looking for variations? Absolutely! Once you’ve mastered the basics, feel free to experiment. Try different varieties of Swiss chard, such as Ruby Red, Bright Lights, or Fordhook Giant, each offering unique colors and flavors. You can also explore different growing mediums, from traditional potting soil to hydroponic systems. Consider companion planting to enhance growth and deter pests. Marigolds, for example, are known to repel nematodes and attract beneficial insects. Basil is another great companion, improving the flavor of your chard and deterring pests.
Don’t be afraid to get creative with your containers, too. While standard pots work perfectly well, you can repurpose old buckets, tubs, or even tires to create a unique and eco-friendly garden. Just ensure that your chosen container has adequate drainage.
And remember, growing Swiss chard from scraps is a fantastic way to introduce children to the wonders of gardening. It’s a hands-on learning experience that teaches them about plant life cycles, sustainability, and the importance of healthy eating.
We wholeheartedly encourage you to give this DIY trick a try. It’s a simple, affordable, and incredibly rewarding way to grow your own fresh produce. Once you’ve harvested your first batch of homegrown Swiss chard, we’d love to hear about your experience! Share your photos, tips, and challenges in the comments below. Let’s create a community of urban gardeners, sharing our knowledge and inspiring others to embrace sustainable living.
Ready to transform your kitchen scraps into a bountiful harvest? Start your Swiss chard kitchen garden today!
Frequently Asked Questions (FAQ)
What kind of Swiss chard stalks are best for regrowing?
The best stalks for regrowing are those that are firm, healthy, and have a good amount of the base intact. Look for stalks that are at least 2-3 inches long and have a clean cut at the bottom. Avoid stalks that are wilted, discolored, or have any signs of rot. The fresher the stalk, the better the chances of successful regrowth. Ideally, use stalks from organic Swiss chard to avoid any potential pesticide residue.
How long does it take for Swiss chard to regrow from scraps?
The time it takes for Swiss chard to regrow from scraps can vary depending on several factors, including the variety of chard, the growing conditions (temperature, light, humidity), and the overall health of the stalk. Generally, you can expect to see new growth within 1-2 weeks. It may take several weeks to a couple of months to get a substantial harvest. Be patient and consistent with watering and care, and you’ll be rewarded with fresh, homegrown Swiss chard.
What kind of soil is best for growing Swiss chard?
Swiss chard thrives in well-draining, fertile soil that is rich in organic matter. A good quality potting mix is ideal for container gardening. You can also amend your existing soil with compost, aged manure, or other organic materials to improve its fertility and drainage. The ideal pH level for Swiss chard is between 6.0 and 7.5. If your soil is too acidic, you can add lime to raise the pH.
How often should I water my regrowing Swiss chard?
Water your regrowing Swiss chard regularly, keeping the soil consistently moist but not waterlogged. The frequency of watering will depend on the weather conditions and the type of soil you’re using. In hot, dry weather, you may need to water daily. In cooler, wetter weather, you may only need to water every few days. A good rule of thumb is to check the soil moisture level before watering. If the top inch of soil feels dry, it’s time to water. Avoid overwatering, as this can lead to root rot.
How much sunlight does Swiss chard need?
Swiss chard needs at least 6 hours of sunlight per day to thrive. However, it can tolerate partial shade, especially in hot climates. If you’re growing your Swiss chard indoors, place it near a sunny window or use grow lights to provide adequate light. Insufficient sunlight can result in leggy growth and reduced yields.
Can I grow Swiss chard indoors year-round?
Yes, you can grow Swiss chard indoors year-round, provided you provide adequate light, water, and nutrients. Use grow lights to supplement natural sunlight, especially during the winter months. Maintain a consistent temperature and humidity level. Fertilize regularly with a balanced liquid fertilizer. With proper care, you can enjoy fresh, homegrown Swiss chard even in the dead of winter.
What are some common pests and diseases that affect Swiss chard?
Some common pests that affect Swiss chard include aphids, flea beetles, leaf miners, and slugs. Diseases that can affect Swiss chard include downy mildew, leaf spot, and root rot. To prevent pests and diseases, practice good garden hygiene, such as removing weeds and debris, and providing adequate air circulation. Inspect your plants regularly for signs of pests or diseases and take action promptly. Organic pest control methods, such as insecticidal soap or neem oil, can be effective in controlling many common pests.
How do I harvest Swiss chard?
You can harvest Swiss chard leaves as needed, starting with the outer leaves. Simply cut the leaves off at the base of the plant, leaving the inner leaves to continue growing. Avoid harvesting more than one-third of the plant at a time, as this can stress the plant and reduce its yield. Regular harvesting encourages new growth and extends the harvest season.
Can I eat the stems of Swiss chard?
Yes, the stems of Swiss chard are edible and delicious! They have a slightly different texture and flavor than the leaves, but they are equally nutritious. You can cook the stems in the same way you would cook other vegetables, such as celery or asparagus. Try sautéing them, steaming them, or adding them to soups and stews.
How do I store harvested Swiss chard?
To store harvested Swiss chard, wash the leaves thoroughly and pat them dry. Wrap them in a damp paper towel and store them in a plastic bag in the refrigerator. Swiss chard can be stored in the refrigerator for up to a week. For longer storage, you can blanch the leaves and freeze them.
Leave a Comment