
Tomato growing routine can seem daunting, especially if you’re new to home gardening. But trust me, with a few clever tricks and DIY hacks, you can transform your backyard (or even your balcony!) into a thriving tomato paradise. Imagine biting into a juicy, sun-ripened tomato that you nurtured from a tiny seed – the taste is simply unmatched!
For centuries, tomatoes have held a special place in cultures around the world. Originating in South America, they were initially met with suspicion in Europe, but eventually, their vibrant color and delicious flavor won everyone over. Now, they’re a staple in countless cuisines, from Italian pasta sauces to refreshing summer salads.
But why bother with a tomato growing routine when you can just buy them at the store? Well, for starters, homegrown tomatoes taste infinitely better. Plus, you have complete control over what goes into them – no harmful pesticides or artificial fertilizers. More importantly, gardening is incredibly therapeutic! It’s a chance to connect with nature, de-stress, and enjoy the satisfaction of creating something beautiful and delicious. In this article, I’m going to share some of my favorite DIY tricks and hacks to make your tomato growing journey easier, more productive, and a whole lot more fun. Get ready to roll up your sleeves and get your hands dirty!
DIY Tomato Growing Routine: From Seed to Sauce!
Hey there, fellow gardening enthusiasts! I’m so excited to share my tried-and-true tomato growing routine with you. I’ve spent years tweaking and perfecting this process, and I’m confident that it will help you yield a bumper crop of juicy, flavorful tomatoes, no matter your experience level. Get ready to roll up your sleeves and get your hands dirty!
Choosing the Right Tomato Variety
Before we even think about planting, let’s talk about variety. This is crucial! Different tomato varieties thrive in different climates and have varying needs.
* Consider your climate: Are you in a hot, humid area or a cooler, drier one? Some varieties are more heat-tolerant, while others prefer cooler temperatures.
* Think about your space: Do you have a large garden or just a small patio? Determinate varieties are bushier and more compact, making them ideal for containers. Indeterminate varieties are vining and require staking or caging, but they produce fruit throughout the season.
* Decide on your desired use: Are you planning to make sauces, salads, or sandwiches? Different varieties have different flavors and textures. Roma tomatoes are great for sauces, while beefsteak tomatoes are perfect for slicing. Cherry tomatoes are fantastic for snacking.
* Do your research: Read reviews and talk to local gardeners to find out which varieties perform well in your area.
Some of my personal favorites include:
* ‘Early Girl’: A reliable early-season producer that’s great for cooler climates.
* ‘Roma’: Perfect for making sauces and pastes.
* ‘Beefsteak’: Large, juicy, and flavorful, ideal for sandwiches.
* ‘Sungold’: A super-sweet cherry tomato that’s irresistible.
Starting Seeds Indoors (Optional, but Recommended)
Starting your tomato seeds indoors gives you a head start on the growing season, especially if you live in a colder climate. I highly recommend it!
* When to start: About 6-8 weeks before the last expected frost in your area.
* What you’ll need:
* Seed starting trays or small pots
* Seed starting mix (not regular potting soil!)
* Tomato seeds
* A spray bottle
* A heat mat (optional, but helpful)
* A grow light (essential for strong seedlings)
Step-by-Step Instructions:
1. Prepare your seed starting trays: Fill each cell or pot with seed starting mix, leaving about half an inch of space at the top. Gently tap the trays to settle the mix.
2. Sow the seeds: Place 2-3 tomato seeds in the center of each cell or pot. Cover the seeds with a thin layer of seed starting mix (about 1/4 inch).
3. Water gently: Use a spray bottle to mist the soil until it’s evenly moist but not soggy.
4. Provide warmth: Place the trays on a heat mat, if using. This will help the seeds germinate faster.
5. Cover with a humidity dome: This will help retain moisture and create a humid environment for germination. If you don’t have a humidity dome, you can cover the trays with plastic wrap.
6. Place under grow lights: Position the grow lights a few inches above the trays. Keep the lights on for 14-16 hours per day.
7. Monitor moisture levels: Check the soil daily and mist with water as needed to keep it moist.
8. Remove the humidity dome: Once the seeds have germinated (usually within 5-10 days), remove the humidity dome.
9. Thin the seedlings: Once the seedlings have their first true leaves (the second set of leaves), thin them to one seedling per cell or pot. Choose the strongest seedling and snip off the others at the soil line. Don’t pull them out, as this can disturb the roots of the remaining seedling.
10. Fertilize: Once the seedlings have their second set of true leaves, start fertilizing them with a diluted liquid fertilizer specifically formulated for seedlings. Follow the instructions on the fertilizer label.
11. Harden off the seedlings: About a week before you plan to transplant the seedlings outdoors, start hardening them off. This means gradually exposing them to outdoor conditions to help them acclimate. Start by placing them outdoors in a sheltered location for an hour or two each day, gradually increasing the amount of time they spend outdoors. Protect them from direct sunlight and strong winds.
Preparing the Garden Bed
Whether you’re starting with seedlings or direct sowing, preparing your garden bed is essential for healthy tomato plants.
* Choose a sunny location: Tomatoes need at least 6-8 hours of direct sunlight per day.
* Test your soil: A soil test will tell you the pH level and nutrient content of your soil. Tomatoes prefer a slightly acidic soil pH of 6.0-6.8.
* Amend the soil: Amend the soil with compost or other organic matter to improve drainage and fertility. I like to add a generous amount of well-rotted manure.
* Remove weeds: Remove any weeds from the garden bed. Weeds compete with tomato plants for nutrients and water.
* Consider raised beds: Raised beds offer excellent drainage and are easier to manage.
Transplanting Seedlings or Direct Sowing
Now for the exciting part – getting those tomatoes in the ground!
* When to transplant: After the last expected frost and when the soil has warmed up to at least 60°F (15°C).
* When to direct sow: After the last expected frost and when the soil has warmed up to at least 70°F (21°C).
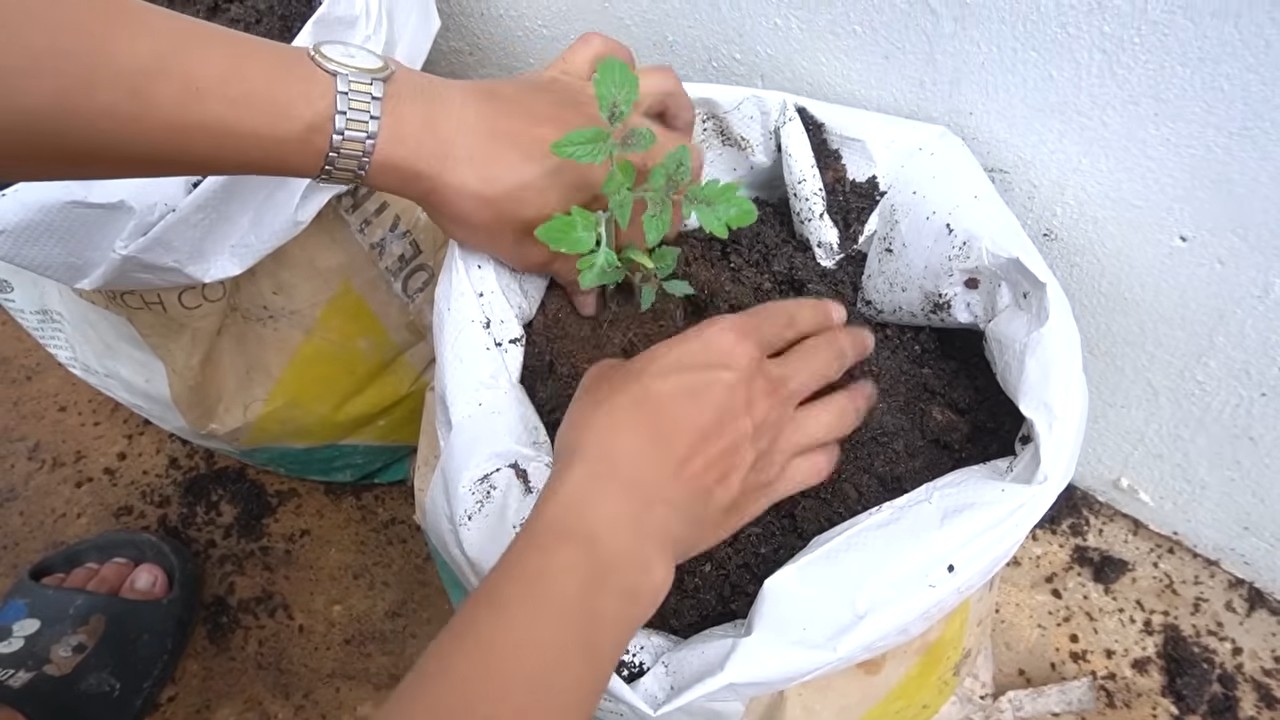
Step-by-Step Instructions for Transplanting Seedlings:
1. Dig a hole: Dig a hole that’s slightly larger than the root ball of the seedling.
2. Add fertilizer: Add a small amount of slow-release fertilizer to the bottom of the hole. This will provide the seedling with a boost of nutrients.
3. Remove the seedling from the pot: Gently squeeze the sides of the pot to loosen the root ball. Carefully remove the seedling from the pot.
4. Loosen the roots: Gently loosen the roots of the seedling. This will encourage them to grow outwards into the surrounding soil.
5. Plant the seedling: Place the seedling in the hole and backfill with soil. Plant the seedling deep, burying the stem up to the first set of leaves. This will encourage the plant to develop more roots along the buried stem.
6. Water thoroughly: Water the seedling thoroughly after planting.
7. Mulch: Apply a layer of mulch around the base of the plant to help retain moisture and suppress weeds. I like to use straw or shredded leaves.
8. Stake or cage: If you’re growing indeterminate varieties, stake or cage the plants to provide support.
Step-by-Step Instructions for Direct Sowing:
1. Prepare the soil: Make sure the soil is loose and well-drained.
2. Sow the seeds: Sow the seeds about 1/4 inch deep and 1-2 inches apart.
3. Water gently: Water the seeds gently to avoid washing them away.
4. Keep the soil moist: Keep the soil moist until the seeds germinate.
5. Thin the seedlings: Once the seedlings have their first true leaves, thin them to the desired spacing.
Caring for Your Tomato Plants
Consistent care is key to a successful tomato harvest.
* Watering: Water deeply and regularly, especially during hot, dry weather. Aim for about 1-2 inches of water per week. Water at the base of the plant to avoid wetting the foliage, which can lead to disease.
* Fertilizing: Fertilize every 2-3 weeks with a balanced fertilizer or a fertilizer specifically formulated for tomatoes.
* Pruning: Prune indeterminate varieties to remove suckers (the shoots that grow between the main stem and the branches). This will help improve air circulation and encourage the plant to focus its energy on producing fruit.
* Pest and disease control: Monitor your plants regularly for pests and diseases. Common tomato pests include aphids, tomato hornworms, and whiteflies. Common tomato diseases include early blight, late blight, and blossom end rot. Use organic pest control methods whenever possible.
* Support: Make sure your plants have adequate support, especially as the fruit starts to develop.
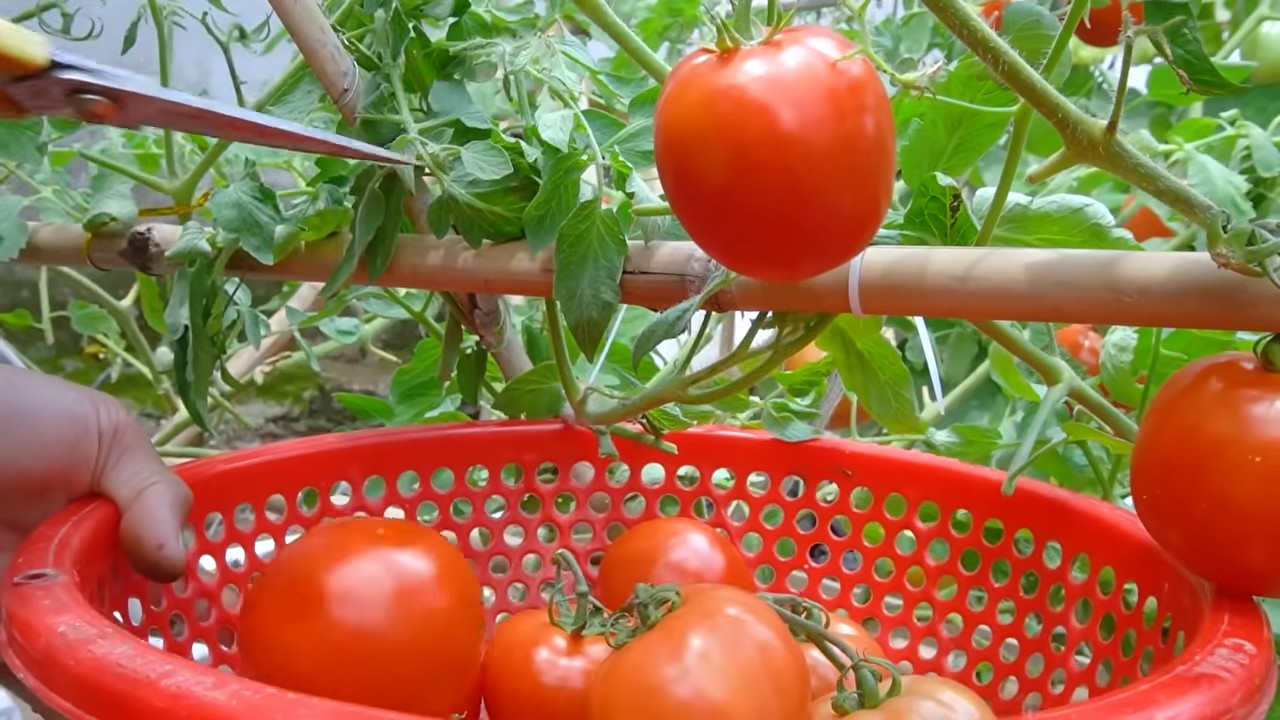
Harvesting Your Tomatoes
The moment you’ve been waiting for!
* When to harvest: When the tomatoes are fully colored and slightly soft to the touch.
* How to harvest: Gently twist the tomato off the vine.
* Store properly: Store tomatoes at room temperature, away from direct sunlight.
Conclusion
So, there you have it! Transforming your tomato growing routine with this simple yet incredibly effective DIY trick is more than just a gardening hack; it’s an investment in healthier, more abundant, and ultimately, more delicious tomatoes. We’ve walked you through the process, highlighting the benefits at every step, from improved soil aeration and drainage to enhanced nutrient absorption and a significant reduction in common tomato plant diseases.
But why is this DIY trick a must-try? Simply put, it empowers you to take control of your tomato plants’ environment, creating optimal conditions for them to thrive. Store-bought solutions can be expensive and often contain ingredients you might not want near your food. This method is cost-effective, environmentally friendly, and allows you to tailor the process to your specific needs and resources. Imagine biting into a juicy, sun-ripened tomato, knowing you played a direct role in its exceptional flavor and quality. That’s the reward waiting for you.
Beyond the basic method we’ve outlined, there’s plenty of room for experimentation and personalization. Consider these variations to further enhance your tomato growing routine:
* Compost Tea Boost: Incorporate compost tea into your watering schedule. This liquid fertilizer is packed with beneficial microbes and nutrients that will further invigorate your tomato plants. Simply brew a batch of compost tea and use it to water your plants every two weeks.
* Companion Planting Power: Strategically plant companion plants around your tomatoes. Basil, marigolds, and garlic are excellent choices, as they deter pests and attract beneficial insects. This natural pest control method reduces the need for chemical interventions.
* Vertical Support Systems: Explore different vertical support systems, such as tomato cages, stakes, or trellises. These structures provide support for your growing plants, preventing them from sprawling on the ground and reducing the risk of fruit rot.
* Mulch Magic: Experiment with different types of mulch, such as straw, wood chips, or shredded leaves. Mulch helps retain moisture in the soil, suppress weeds, and regulate soil temperature.
We are confident that this DIY trick will revolutionize your tomato growing experience. But don’t just take our word for it – try it out for yourself! We encourage you to embrace this simple yet powerful technique and witness the remarkable difference it makes in the health and productivity of your tomato plants.
Once you’ve given it a try, we’d love to hear about your experience. Share your results, tips, and variations in the comments section below. Let’s build a community of tomato-growing enthusiasts who are passionate about cultivating the best possible tomatoes using sustainable and effective methods. Your insights could inspire others to embark on their own tomato-growing journey and discover the joys of harvesting homegrown goodness. Happy gardening!
Frequently Asked Questions (FAQ)
What type of soil is best for tomatoes when using this DIY trick?
Tomatoes thrive in well-draining soil that is rich in organic matter. A slightly acidic soil pH, ideally between 6.0 and 6.8, is also preferred. Before planting, amend your soil with compost, aged manure, or other organic materials to improve its fertility and drainage. The DIY trick we’ve outlined will further enhance the soil structure and aeration, creating an even more favorable environment for your tomato plants. Consider performing a soil test to determine the pH and nutrient levels of your soil and adjust accordingly.
How often should I water my tomato plants after implementing this DIY method?
Watering frequency depends on several factors, including the weather, soil type, and the size of your plants. Generally, tomato plants need about 1-2 inches of water per week. After implementing the DIY trick, monitor the moisture level of the soil regularly. Water deeply when the top inch of soil feels dry to the touch. Avoid overwatering, as this can lead to root rot and other problems. Using mulch around your plants can help retain moisture and reduce the need for frequent watering.
Can I use this DIY trick for other plants besides tomatoes?
Yes, absolutely! While we’ve focused on tomatoes in this article, this DIY trick can be beneficial for a wide range of plants that prefer well-draining soil and good aeration. Vegetables like peppers, cucumbers, and zucchini can also benefit from this method. Additionally, many flowering plants and herbs will thrive in the improved soil conditions created by this technique. Just be sure to adjust the watering and fertilization schedule to suit the specific needs of each plant.
What if I don’t have access to all the materials mentioned in the DIY trick?
Don’t worry! The beauty of this DIY method is its adaptability. If you don’t have access to specific materials, you can substitute them with readily available alternatives. For example, if you don’t have perlite, you can use coarse sand or vermiculite to improve drainage. If you don’t have compost, you can use aged manure or other organic matter to enrich the soil. The key is to focus on improving the soil structure, aeration, and nutrient content.
How long does it take to see results after implementing this DIY trick?
The time it takes to see results can vary depending on the initial condition of your soil and the overall health of your plants. However, you should start to notice improvements within a few weeks of implementing the DIY trick. You may see increased growth, healthier foliage, and a greater abundance of flowers and fruits. Be patient and consistent with your care, and you’ll be rewarded with a bountiful harvest.
Is this DIY trick suitable for container gardening?
Yes, this DIY trick is perfectly suitable for container gardening. In fact, it can be particularly beneficial for container-grown tomatoes, as it helps to improve drainage and prevent the soil from becoming compacted. When using this method in containers, be sure to choose a pot that is large enough to accommodate the mature size of your tomato plant. Also, remember to water your container plants more frequently than those grown in the ground, as they tend to dry out more quickly.
What are some common mistakes to avoid when growing tomatoes?
Some common mistakes to avoid when growing tomatoes include overwatering, underwatering, planting too early in the season, not providing adequate support, and failing to protect your plants from pests and diseases. By implementing this DIY trick and following proper care practices, you can significantly reduce the risk of these problems and ensure a successful tomato-growing season.
How do I deal with pests and diseases on my tomato plants?
Regularly inspect your tomato plants for signs of pests and diseases. Common pests include aphids, whiteflies, and tomato hornworms. Diseases like early blight, late blight, and blossom end rot can also affect tomato plants. Use organic pest control methods, such as insecticidal soap or neem oil, to control pests. Ensure good air circulation around your plants to prevent fungal diseases. Remove any infected leaves or fruits promptly to prevent the spread of disease.
What is the best time of day to water my tomato plants?
The best time of day to water your tomato plants is in the morning. This allows the foliage to dry out during the day, reducing the risk of fungal diseases. Avoid watering in the evening, as this can create a moist environment that is conducive to disease development. When watering, focus on watering the soil around the base of the plant, rather than wetting the foliage.
How do I know when my tomatoes are ripe and ready to harvest?
Tomatoes are typically ready to harvest when they have reached their mature size and color. The color will depend on the variety of tomato you are growing. The fruit should also feel slightly soft to the touch. Gently twist the tomato from the vine. If it comes off easily, it is ripe. If it requires a lot of force, it is not quite ready.

Leave a Comment