
Vinegar and Salt Cleaning: Unlock the power of your pantry! Are you tired of harsh chemicals and expensive cleaning products cluttering your cabinets? I know I was! For generations, resourceful homemakers have turned to simple, natural ingredients to keep their homes sparkling. Think back to your grandmother’s cleaning rituals – chances are, vinegar and salt played a starring role. This isn’t just some new-age trend; it’s a time-tested method rooted in practicality and effectiveness.
But why should you embrace vinegar and salt cleaning today? Well, beyond the cost savings and eco-friendly appeal, these humble ingredients pack a serious punch against grime, mildew, and even stubborn stains. In this article, I’m going to share some amazing DIY cleaning tricks using vinegar and salt that will transform your cleaning routine. From tackling tough bathroom buildup to restoring shine to your kitchen surfaces, you’ll be amazed at what these two simple ingredients can achieve. Get ready to ditch the chemicals and discover the magic of natural cleaning!
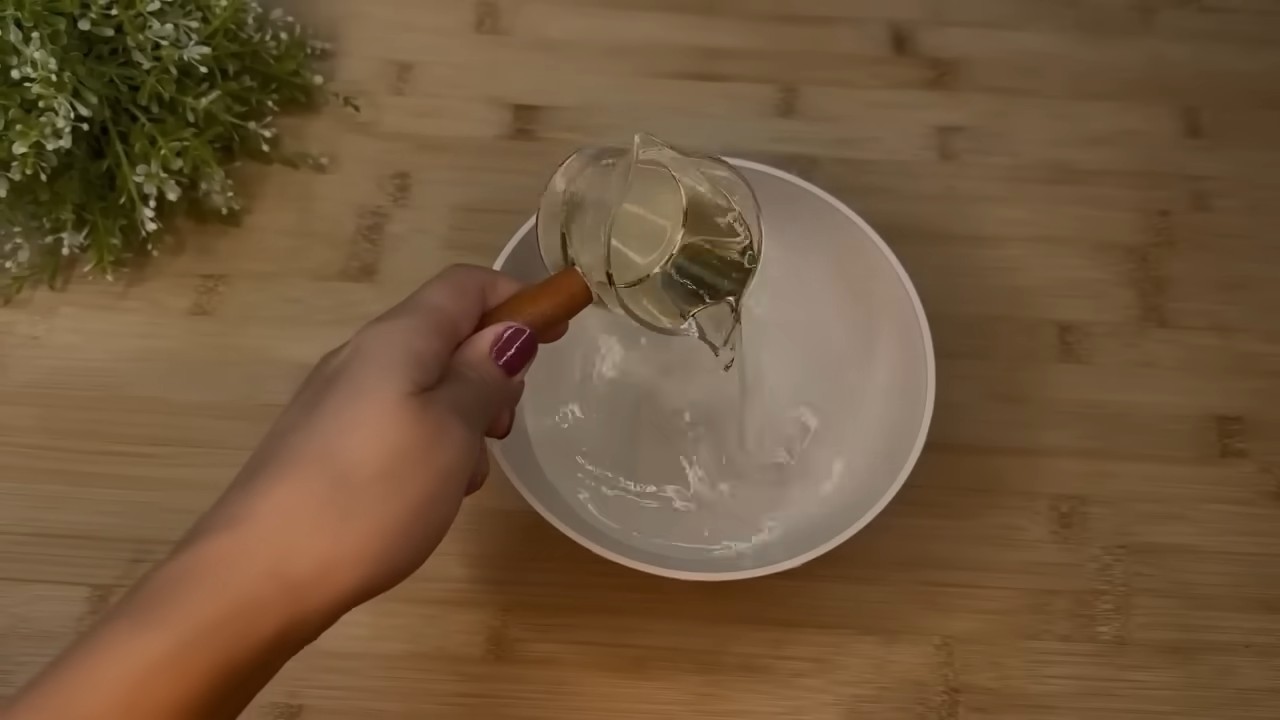
DIY Power Cleaner: Vinegar and Salt for a Sparkling Home
Hey everyone! I’m so excited to share one of my favorite DIY cleaning hacks with you: using vinegar and salt! It’s amazing how these two simple ingredients, probably already in your pantry, can tackle so many cleaning challenges around the house. Forget those harsh chemicals – let’s get cleaning the natural way!
Why Vinegar and Salt?
Before we dive in, let’s talk about why this combo is so effective. Vinegar, thanks to its acetic acid, is a fantastic disinfectant and degreaser. It cuts through grime, dissolves mineral deposits, and even helps eliminate odors. Salt, on the other hand, acts as a gentle abrasive, helping to scrub away stubborn stains and buildup without scratching most surfaces. Together, they’re a dynamic cleaning duo!
General Safety Tips
Before we get started, a few quick safety reminders:
* Always test in an inconspicuous area first. This is especially important on delicate surfaces like natural stone or certain fabrics.
* Wear gloves. While vinegar and salt are natural, prolonged exposure can irritate your skin.
* Ventilate the area. Vinegar has a strong smell, so open a window or turn on a fan.
* Never mix vinegar with bleach. This creates toxic fumes.
Cleaning Applications: Where to Use Vinegar and Salt
This mixture is surprisingly versatile! Here are some of my favorite ways to use it:
* Cleaning Grout: Say goodbye to dingy grout lines!
* Removing Hard Water Stains: Faucets, showerheads, and shower doors will sparkle.
* Polishing Copper and Brass: Bring back the shine to your metal items.
* Cleaning Cutting Boards: A natural way to disinfect and deodorize.
* Unclogging Drains: A gentle alternative to harsh drain cleaners.
* Cleaning Irons: Remove mineral buildup and scorch marks.
* Removing Rust: A surprisingly effective rust remover.
Cleaning Grout with Vinegar and Salt
Grout can be a real pain to clean, but this method works wonders!
Materials You’ll Need:
* White vinegar
* Salt (table salt or kosher salt works fine)
* Spray bottle
* Old toothbrush or grout brush
* Clean cloth or sponge
* Water
Step-by-Step Instructions:
1. Prepare the Grout: Lightly dampen the grout lines with water. This helps the vinegar and salt penetrate better.
2. Mix the Cleaning Solution: In a spray bottle, combine equal parts white vinegar and water. Add a generous amount of salt to the mixture. I usually start with about 1/4 cup of salt per cup of vinegar and water mixture, and adjust as needed until the salt is mostly dissolved.
3. Apply the Solution: Spray the vinegar and salt mixture directly onto the grout lines. Make sure to saturate the grout.
4. Let it Sit: Allow the solution to sit on the grout for at least 15-20 minutes. For heavily soiled grout, you can let it sit for up to an hour.
5. Scrub the Grout: Using an old toothbrush or grout brush, scrub the grout lines vigorously. You should see the dirt and grime start to lift.
6. Rinse Thoroughly: Rinse the grout lines with clean water to remove the vinegar and salt residue.
7. Dry and Admire: Wipe the area dry with a clean cloth or sponge. Step back and admire your sparkling clean grout! You might need to repeat the process for particularly stubborn stains.
Removing Hard Water Stains with Vinegar and Salt
Hard water stains are unsightly and can be tough to remove. Here’s how to tackle them with vinegar and salt:
Materials You’ll Need:
* White vinegar
* Salt
* Spray bottle or bowl
* Clean cloth or sponge
* Old toothbrush (for tight spots)
* Water
Step-by-Step Instructions:
1. Prepare the Solution: For light hard water stains, mix equal parts white vinegar and water in a spray bottle. For heavier stains, use undiluted white vinegar. Add a tablespoon or two of salt to the mixture.
2. Apply the Solution: Spray the solution directly onto the hard water stains. For faucets and showerheads, you can soak a cloth in the solution and wrap it around the fixture. For shower doors, spray the entire surface.
3. Let it Soak: Allow the solution to soak for at least 30 minutes. For stubborn stains, you can let it soak for several hours or even overnight.
4. Scrub (if needed): If the stains are still present after soaking, gently scrub them with a clean cloth, sponge, or old toothbrush. The salt will act as a mild abrasive to help lift the stains.
5. Rinse Thoroughly: Rinse the area thoroughly with clean water to remove the vinegar and salt residue.
6. Dry and Polish: Dry the area with a clean cloth. For extra shine, you can polish the surface with a dry microfiber cloth.
Polishing Copper and Brass with Vinegar and Salt
Bring back the luster to your copper and brass items with this simple polishing method:
Materials You’ll Need:
* White vinegar
* Salt
* Soft cloth
* Bowl
Step-by-Step Instructions:
1. Make a Paste: In a bowl, mix equal parts white vinegar and salt to form a paste. The consistency should be thick enough to stick to the metal surface.
2. Apply the Paste: Apply the paste to the copper or brass item, covering the entire surface.
3. Let it Sit: Allow the paste to sit for 15-30 minutes. For heavily tarnished items, you can let it sit for up to an hour.
4. Rub and Polish: Using a soft cloth, rub the paste into the metal surface in a circular motion. You should see the tarnish start to lift.
5. Rinse Thoroughly: Rinse the item thoroughly with clean water to remove the paste.
6. Dry and Buff: Dry the item with a clean cloth. For extra shine, buff the surface with a dry microfiber cloth.
Cleaning Cutting Boards with Vinegar and Salt
Keep your cutting boards clean and sanitary with this natural cleaning method:
Materials You’ll Need:
* White vinegar
* Salt
* Clean cloth or sponge
Step-by-Step Instructions:
1. Sprinkle with Salt: Sprinkle a generous amount of salt over the entire surface of the cutting board.
2. Spray with Vinegar: Spray the cutting board with white vinegar, saturating the salt.
3. Scrub: Using a clean cloth or sponge, scrub the cutting board vigorously. The salt will act as a mild abrasive to help remove food particles and stains.
4. Rinse Thoroughly: Rinse the cutting board thoroughly with clean water.
5. Dry: Allow the cutting board to air dry completely.
Unclogging Drains with Vinegar and Salt
A gentle and natural way to clear minor drain clogs:
Materials You’ll Need:
* 1/2 cup salt
* 1/2 cup white vinegar
* Boiling water
Step-by-Step Instructions:
1. Pour in Salt: Pour the salt down the drain.
2. Add Vinegar: Follow with the white vinegar.
3. Let it Fizz: Let the mixture fizz and sit for about 30 minutes. This will help break down the clog.
4. Flush with Boiling Water: Carefully pour a pot of boiling water down the drain.
5. Repeat if Necessary: If the drain is still clogged, repeat the process.
Cleaning Irons with Vinegar and Salt
Remove mineral buildup and scorch marks from your iron:
Materials You’ll Need:
* White vinegar
* Salt
* Old towel
* Ironing board
Step-by-Step Instructions:
1. Prepare the Iron: Make sure your iron is cool and unplugged.
2. Make a Paste: Mix equal parts white vinegar and salt to form a paste.
3. Apply the Paste: Apply the paste to the soleplate of the iron, focusing on areas with mineral buildup or scorch marks.
4. Rub Gently: Using an old towel, gently rub the paste into the soleplate.
5. Wipe Clean: Wipe the soleplate clean with a damp cloth.
6. Steam Clean: Fill the iron with water and set it to the steam setting. Iron over an old towel to flush out any remaining residue.
Removing Rust with Vinegar and Salt
A surprisingly effective rust remover for smaller items:
Materials You’ll Need

Conclusion
So, there you have it! This simple yet incredibly effective vinegar and salt cleaning solution is a game-changer for anyone looking to ditch harsh chemicals and embrace a more natural and budget-friendly approach to household cleaning. We’ve explored how the acidic power of vinegar, combined with the abrasive action of salt, creates a dynamic duo capable of tackling a wide range of cleaning challenges, from stubborn grime in your bathroom to baked-on messes in your kitchen.
But why is this DIY trick a must-try? Beyond its simplicity and cost-effectiveness, it’s about taking control of what you bring into your home. You know exactly what’s in this cleaning solution – no hidden ingredients, no harsh fumes, just the pure cleaning power of vinegar and salt. This makes it a fantastic option for those with sensitivities to commercial cleaners, families with young children, and pet owners concerned about their furry friends’ well-being.
Furthermore, the versatility of this solution is truly remarkable. While we’ve highlighted some key applications, don’t be afraid to experiment! You can adjust the ratio of vinegar to salt depending on the severity of the cleaning task. For tougher stains, create a paste with more salt and let it sit for a longer period before scrubbing. For lighter cleaning, a more diluted solution will suffice.
Consider these variations to personalize your vinegar and salt cleaning experience:
* **Infused Vinegar:** Add citrus peels (lemon, orange, grapefruit) to your vinegar for a few weeks before using it in your cleaning solution. This will impart a pleasant scent and boost the cleaning power with the natural oils from the peels.
* **Essential Oils:** A few drops of your favorite essential oil, such as lavender, tea tree, or eucalyptus, can add a refreshing aroma and provide additional antibacterial benefits. Be sure to use essential oils that are safe for your intended surface.
* **Baking Soda Boost:** For particularly stubborn stains, add a small amount of baking soda to the vinegar and salt mixture. The fizzing action will help to lift the grime.
Ultimately, the best way to discover the full potential of this vinegar and salt cleaning method is to try it yourself! We encourage you to experiment with different ratios and variations to find what works best for your specific needs and cleaning challenges.
Don’t just take our word for it – give it a go! We’re confident that you’ll be amazed by the results. And most importantly, we want to hear about your experience. Share your tips, tricks, and before-and-after photos in the comments below. Let’s build a community of DIY cleaning enthusiasts and discover even more ways to harness the power of vinegar and salt! Let us know what surfaces you found it worked best on, any unique challenges you overcame, and any variations you tried. Your feedback will help others discover the magic of this simple yet effective cleaning solution. Embrace the power of vinegar and salt cleaning and transform your home into a sparkling sanctuary, naturally!
Frequently Asked Questions (FAQ)
Is vinegar and salt cleaning safe for all surfaces?
That’s a great question! While vinegar and salt are generally safe and effective cleaners, it’s crucial to exercise caution on certain surfaces. Avoid using this solution on natural stone surfaces like marble, granite, and limestone, as the acidity of the vinegar can etch and damage them. Similarly, it’s best to steer clear of using it on waxed or unfinished wood, as it can strip the finish and potentially warp the wood. Always test the solution in an inconspicuous area first to ensure it doesn’t cause any discoloration or damage. For delicate surfaces, consider diluting the vinegar solution even further. When in doubt, consult the manufacturer’s recommendations for cleaning specific surfaces.
What is the best ratio of vinegar to salt for cleaning?
The ideal ratio of vinegar to salt depends on the cleaning task at hand. For general cleaning purposes, a 1:1 ratio of vinegar to salt is a good starting point. For example, you can mix 1 cup of vinegar with 1 cup of salt. For tougher stains or grime, you can increase the amount of salt to create a more abrasive paste. Conversely, for lighter cleaning or more delicate surfaces, you can dilute the vinegar solution with water. Experiment with different ratios to find what works best for your specific needs. Remember to always test the solution in an inconspicuous area first to ensure it doesn’t cause any damage.
Can I use any type of vinegar for cleaning?
White distilled vinegar is generally the best choice for cleaning due to its high acidity and lack of color, which minimizes the risk of staining. Apple cider vinegar can also be used, but it may leave a slight residue or odor. Avoid using balsamic vinegar or other colored vinegars, as they can stain surfaces. Ensure the vinegar you use is food-grade and safe for household use.
How long should I let the vinegar and salt solution sit on a surface before scrubbing?
The amount of time you let the vinegar and salt solution sit on a surface depends on the severity of the stain or grime. For light cleaning, a few minutes may be sufficient. For tougher stains, you can let the solution sit for up to 30 minutes or even longer. This allows the vinegar to penetrate and loosen the grime, making it easier to scrub away. Keep an eye on the surface and ensure the solution doesn’t dry out completely. If it does, you can reapply the solution or lightly dampen the area with water.
What type of salt is best for cleaning?
Common table salt is perfectly fine for most cleaning tasks. However, for more abrasive cleaning, you can use coarser salts like sea salt or kosher salt. The larger crystals will provide more scrubbing power. Just be mindful of the surface you’re cleaning and avoid using overly abrasive salts on delicate materials.
Does the vinegar and salt solution have a strong odor?
Yes, vinegar has a distinct odor that some people find unpleasant. However, the odor typically dissipates quickly after cleaning. To minimize the odor, you can open windows and ventilate the area while cleaning. You can also add a few drops of essential oils to the solution to mask the vinegar smell. Citrus oils like lemon or orange are particularly effective at neutralizing the vinegar odor.
How should I store the vinegar and salt cleaning solution?
Store the vinegar and salt cleaning solution in a clean, airtight container. A spray bottle is a convenient option for easy application. Label the container clearly to avoid confusion. Keep the solution out of reach of children and pets. The solution can be stored at room temperature for several months.
Can I use this solution to clean my oven?
Yes, vinegar and salt can be used to clean your oven, but it may require some extra effort. First, remove any loose debris from the oven. Then, create a paste of vinegar and salt and apply it to the interior surfaces of the oven, avoiding the heating elements. Let the paste sit for several hours or overnight. Finally, scrub the oven with a sponge or brush and wipe away the residue with a damp cloth. For stubborn baked-on messes, you may need to repeat the process or use a more abrasive scrubbing tool.
Is vinegar and salt cleaning environmentally friendly?
Yes, vinegar and salt cleaning is a much more environmentally friendly option compared to using harsh chemical cleaners. Vinegar and salt are natural, biodegradable substances that don’t release harmful chemicals into the environment. By using this DIY cleaning solution, you can reduce your reliance on synthetic chemicals and contribute to a healthier planet.
What safety precautions should I take when using vinegar and salt for cleaning?
While vinegar and salt are generally safe, it’s always a good idea to take some basic safety precautions. Avoid getting the solution in your eyes, as it can cause irritation. If contact occurs, rinse thoroughly with water. Wear gloves to protect your hands, especially if you have sensitive skin. Never mix vinegar with bleach, as this can create toxic fumes. Always test the solution in an inconspicuous area first to ensure it doesn’t damage the surface. Keep the solution out of reach of children and pets.


Leave a Comment