
Water potato styrofoam growing – sounds a bit wacky, right? But trust me, this simple DIY trick can revolutionize your home garden and bring you a bountiful harvest of delicious potatoes! For centuries, potatoes have been a staple food in cultures around the globe, from the Andes Mountains where they originated to the bustling kitchens of modern homes. They’re versatile, nutritious, and oh-so-satisfying.
But let’s face it, traditional potato growing can be a bit of a hassle. Digging, hilling, dealing with pests… it can feel like a lot of work! That’s where this ingenious water potato styrofoam growing method comes in. Imagine growing potatoes without all the back-breaking labor, using readily available materials, and even saving space in your garden.
This DIY project is perfect for anyone who wants to enjoy fresh, homegrown potatoes, whether you have a sprawling backyard or just a small balcony. I’m going to show you how to create a simple, effective, and surprisingly fun potato-growing system using just water and styrofoam. Get ready to ditch the dirt and embrace a new way to grow your own spuds!

DIY: Kartoffeln in Styroporbehältern anbauen – Eine einfache Anleitung für reiche Ernte
Hallo Gartenfreunde! Habt ihr schon mal darüber nachgedacht, Kartoffeln in Styroporbehältern anzubauen? Es klingt vielleicht erstmal komisch, aber es ist eine super einfache und effektive Methode, um eine reiche Ernte zu erzielen, auch wenn ihr wenig Platz habt. Ich habe es selbst ausprobiert und war begeistert! In diesem Artikel zeige ich euch Schritt für Schritt, wie ihr das auch hinbekommt. Los geht’s!
Was ihr für den Kartoffelanbau in Styroporbehältern benötigt:
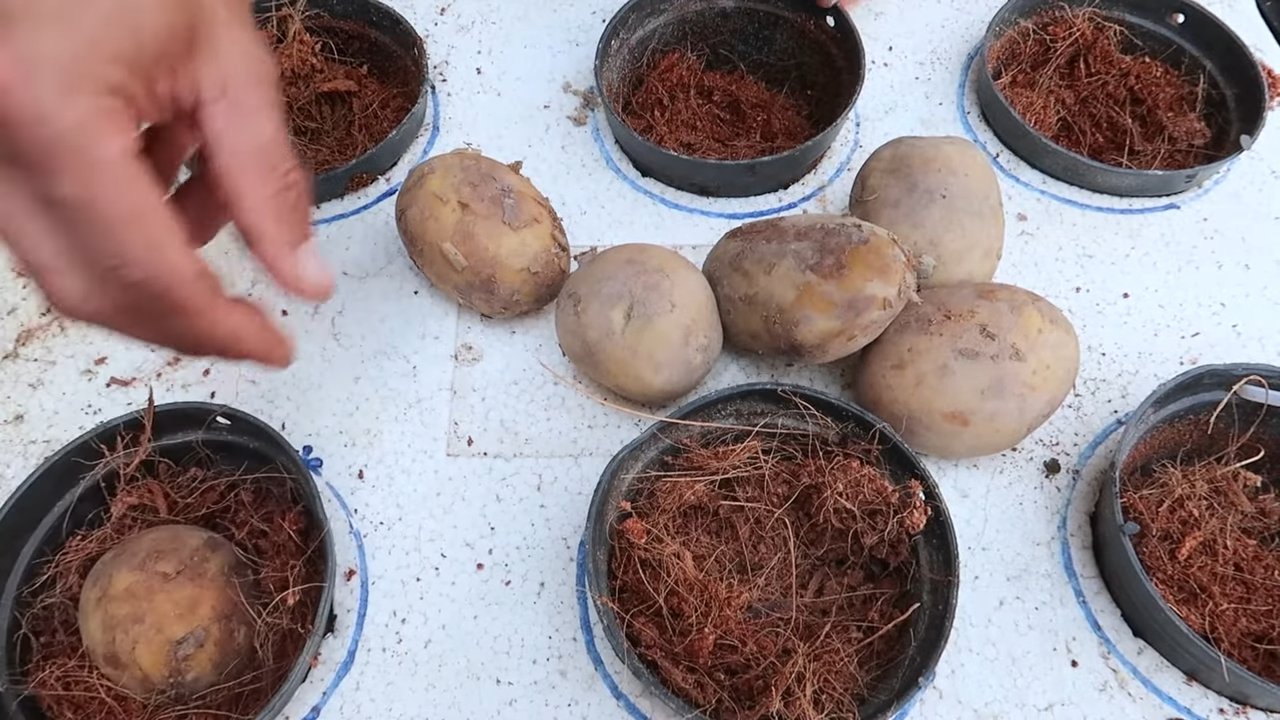
* Styroporbehälter: Am besten eignen sich große, stabile Behälter. Ihr könnt sie oft kostenlos in Supermärkten oder bei Elektronikhändlern bekommen. Achtet darauf, dass sie sauber und unbeschädigt sind.
* Saatkartoffeln: Wählt eine Sorte, die euch schmeckt und für eure Region geeignet ist. Saatkartoffeln bekommt ihr im Gartenfachhandel oder online.
* Gute Erde: Eine Mischung aus Gartenerde, Kompost und etwas Sand ist ideal. Sie sollte locker und gut durchlässig sein.
* Messer oder Bohrer: Zum Anbringen von Drainagelöchern.
* Gießkanne oder Schlauch: Zum Bewässern.
* Mulchmaterial (optional): Stroh, Heu oder Grasschnitt helfen, die Feuchtigkeit im Boden zu halten und Unkraut zu unterdrücken.
* Dünger (optional): Ein organischer Dünger kann das Wachstum der Kartoffeln fördern.
Schritt-für-Schritt-Anleitung:
1. Vorbereitung der Styroporbehälter
1. Reinigung: Zuerst solltet ihr die Styroporbehälter gründlich reinigen. Entfernt alle Etiketten und Rückstände. Ein feuchtes Tuch reicht meistens aus.
2. Drainagelöcher: Das ist super wichtig! Kartoffeln mögen keine Staunässe. Bohrt oder schneidet mehrere Drainagelöcher in den Boden der Behälter. Ich empfehle mindestens 5-6 Löcher pro Behälter, je nach Größe. Die Löcher sollten etwa 1 cm Durchmesser haben.
3. Standortwahl: Sucht euch einen sonnigen Standort für eure Kartoffeln. Sie brauchen mindestens 6 Stunden Sonne pro Tag, um gut zu wachsen. Ein windgeschützter Platz ist auch von Vorteil.
2. Vorbereitung der Saatkartoffeln
1. Vorkeimen (optional, aber empfehlenswert): Das Vorkeimen der Saatkartoffeln beschleunigt das Wachstum. Legt die Kartoffeln etwa 4-6 Wochen vor dem Pflanzen an einen hellen, kühlen Ort (ca. 10-15°C). So bilden sie kleine, grüne Triebe.
2. Schneiden (optional): Große Saatkartoffeln könnt ihr in Stücke schneiden. Achtet darauf, dass jedes Stück mindestens ein “Auge” (Triebansatz) hat. Lasst die Schnittflächen vor dem Pflanzen ein paar Tage antrocknen, um Fäulnis zu vermeiden.
3. Pflanzen der Kartoffeln
1. Erste Erdschicht: Füllt die Styroporbehälter mit einer etwa 15-20 cm hohen Schicht Erde.
2. Kartoffeln legen: Legt die Saatkartoffeln (oder die Stücke) mit den Trieben nach oben auf die Erde. Achtet darauf, dass zwischen den Kartoffeln genügend Platz ist (ca. 20-30 cm).
3. Zweite Erdschicht: Bedeckt die Kartoffeln mit einer weiteren Schicht Erde, etwa 10 cm hoch.
4. Angießen: Gießt die Erde vorsichtig an, sodass sie gut durchfeuchtet ist.
4. Pflege während des Wachstums
1. Angießen: Haltet die Erde feucht, aber nicht nass. Gießt regelmäßig, besonders an heißen Tagen. Vermeidet Staunässe.
2. Anhäufeln: Das ist der Clou beim Kartoffelanbau in Behältern! Wenn die Kartoffelpflanzen etwa 20 cm hoch sind, füllt ihr die Behälter mit weiterer Erde auf, sodass nur noch die obersten Blätter herausschauen. Diesen Vorgang wiederholt ihr mehrmals, bis die Behälter fast voll sind. Das Anhäufeln fördert die Bildung von neuen Kartoffeln an den Stängeln.
3. Düngen (optional): Wenn ihr möchtet, könnt ihr die Kartoffeln während des Wachstums mit einem organischen Dünger düngen. Befolgt dabei die Anweisungen auf der Packung.
4. Unkraut entfernen: Entfernt regelmäßig Unkraut, das in den Behältern wächst.
5. Schutz vor Schädlingen: Achtet auf Schädlinge wie Kartoffelkäfer oder Blattläuse. Bei Bedarf könnt ihr biologische Schädlingsbekämpfungsmittel einsetzen.
5. Ernte
1. Erntezeitpunkt: Die Kartoffeln sind erntereif, wenn die Blätter der Pflanzen gelb werden und absterben. Das ist meistens im Spätsommer oder Herbst der Fall.
2. Ernten: Das Ernten ist super einfach! Kippt die Styroporbehälter einfach um und sammelt die Kartoffeln auf. Ihr werdet staunen, wie viele Kartoffeln sich in den Behältern gebildet haben!
3. Lagerung: Lagert die Kartoffeln an einem kühlen, dunklen und trockenen Ort. So halten sie sich mehrere Monate.
Zusätzliche Tipps und Tricks:
* Sortenwahl: Informiert euch, welche Kartoffelsorten für den Anbau in Behältern geeignet sind. Frühkartoffeln sind oft eine gute Wahl.
* Styropor isoliert: Styropor isoliert gut, was besonders in kälteren Regionen von Vorteil ist. Es schützt die Wurzeln vor extremen Temperaturen.
* Recycling: Styroporbehälter sind eine tolle Möglichkeit, um Styropor zu recyceln und wiederzuverwenden.
* Experimentieren: Probiert verschiedene Sorten und Anbaumethoden aus, um herauszufinden, was für euch am besten funktioniert.
* Mulchen: Eine Mulchschicht hilft, die Feuchtigkeit im Boden zu halten und Unkraut zu unterdrücken. Stroh, Heu oder Grasschnitt eignen sich gut als Mulchmaterial.
* Bewässerung: Achtet darauf, die Kartoffeln regelmäßig zu gießen, besonders während trockener Perioden. Vermeidet aber Staunässe, da dies zu Fäulnis führen kann.
* Düngen: Eine regelmäßige Düngung mit einem organischen Dünger kann das Wachstum der Kartoffeln fördern.
* Schädlinge: Achtet auf Schädlinge wie Kartoffelkäfer oder Drahtwürmer. Bei Bedarf könnt ihr biologische Schädlingsbekämpfungsmittel einsetzen.
* Sonnenbrand: In sehr heißen Regionen kann es vorkommen, dass die Kartoffeln Sonnenbrand bekommen. Dies äußert sich durch grüne Stellen auf der Schale. Diese Stellen sind giftig und sollten vor dem Verzehr entfernt werden.
* Nach dem Anbau: Nach der Ernte könnt ihr die Erde aus den Styroporbehältern kompostieren oder für andere Pflanzen verwenden. Die Behälter könnt ihr reinigen und für den nächsten Anbau aufbewahren.
Warum Kartoffeln in Styroporbehältern anbauen?
* Platzsparend: Ideal für Balkone, Terrassen oder kleine Gärten.
* Einfach: Auch für Anfänger geeignet.
* Hohe Erträge: Durch das Anhäufeln könnt ihr eine reiche Ernte erzielen.
* Flexibel: Die Behälter können leicht umgestellt werden, um den optimalen Standort zu finden.
* Recycling: Eine tolle Möglichkeit, Styropor wiederzuverwenden.
Ich hoffe, diese Anleitung hilft euch dabei, eure eigenen Kartoffeln in Styroporbehältern anzubauen. Es ist wirklich ein tolles Gefühl, seine eigenen Kartoffeln zu ernten und zu genießen! Viel Spaß beim Gärtnern!
Conclusion
So, there you have it! Transforming humble kitchen scraps and discarded styrofoam into a thriving potato patch using this simple water potato growing method is not just a fun experiment; it’s a sustainable and surprisingly rewarding way to cultivate your own food. We’ve shown you how to bypass the traditional soil-based approach, offering a clean, space-saving, and visually engaging alternative.
Why is this DIY trick a must-try? Because it empowers you to take control of your food source, even if you lack a sprawling garden. It’s an educational experience, perfect for families and anyone curious about the magic of plant propagation. Plus, it’s a fantastic way to reduce waste by repurposing styrofoam and giving new life to those potatoes that have started to sprout in your pantry. Imagine the satisfaction of harvesting your own homegrown potatoes, knowing you nurtured them from a simple spud in a jar of water!
But the beauty of this method lies in its adaptability. Feel free to experiment with different potato varieties. Russets, Yukon Golds, red potatoes – each will offer a unique flavor and texture to your homegrown harvest. You can also explore different containers. While glass jars offer a clear view of the root development, opaque containers can also work, potentially reducing algae growth. Consider adding a diluted liquid fertilizer to the water every few weeks to provide extra nutrients and boost growth. Just remember to monitor the water level and change it regularly to prevent stagnation.
Beyond the basic method, consider these variations:
* Vertical Potato Garden: Stack multiple containers vertically, creating a visually stunning and space-efficient potato tower.
* Hydroponic System Integration: If you’re feeling ambitious, integrate this method into a larger hydroponic system for even greater control over nutrient delivery and environmental conditions.
* Companion Planting: Once you transplant your potato plants to soil, consider companion planting with herbs like basil or marigolds to deter pests and enhance growth.
We wholeheartedly encourage you to give this water potato growing technique a try. It’s a simple, cost-effective, and incredibly satisfying way to connect with nature and enjoy the fruits (or rather, tubers) of your labor. Don’t be afraid to experiment, adapt, and personalize the method to suit your own needs and preferences.
Most importantly, we want to hear about your experiences! Share your photos, tips, and challenges in the comments below. Let’s create a community of water potato growers, sharing our knowledge and inspiring others to embrace this innovative and sustainable approach to gardening. What potato varieties did you try? What challenges did you face, and how did you overcome them? Your insights could be invaluable to other aspiring water potato enthusiasts. So, grab a sprouting potato, a styrofoam cup, and a jar of water, and embark on this exciting gardening adventure today! Let’s grow together!
Frequently Asked Questions (FAQ)
What kind of potatoes work best for water propagation?
Any potato variety that has developed “eyes” or sprouts will work for water propagation. However, some varieties tend to sprout more readily than others. Russet potatoes, Yukon Gold potatoes, and red potatoes are all good options. Experiment with different varieties to see which ones thrive best in your environment. Smaller potatoes or potato pieces with multiple eyes are often ideal for starting. Avoid using potatoes that are rotten or have signs of disease.
How long does it take for roots to develop?
Root development can vary depending on factors such as temperature, humidity, and potato variety. Generally, you should start to see roots emerging from the eyes within 1-2 weeks. Keep the potato in a well-lit area (but not direct sunlight) and change the water regularly to encourage healthy root growth. Be patient, as some potatoes may take longer to sprout than others.
What type of water should I use?
Tap water is generally fine to use, but it’s best to let it sit out for 24 hours to allow chlorine to dissipate. Alternatively, you can use filtered water or rainwater. Avoid using distilled water, as it lacks the minerals that plants need for healthy growth. Changing the water every few days is crucial to prevent algae growth and maintain a fresh environment for the developing roots.
How much light do the potatoes need?
Potatoes need indirect sunlight to thrive. Avoid placing them in direct sunlight, as this can scorch the sprouts and overheat the water. A bright windowsill or a spot near a grow light is ideal. If you notice the sprouts becoming leggy or pale, it may indicate that they are not receiving enough light.
When should I transplant the potato to soil?
Once the roots are well-developed (at least a few inches long) and the sprouts have grown into small plants with several leaves, it’s time to transplant the potato to soil. Choose a large pot or a sunny spot in your garden with well-draining soil. Gently remove the potato from the water, being careful not to damage the roots. Plant the potato deep enough so that the roots are covered and the base of the plant is just above the soil surface.
Can I use this method to grow potatoes indoors permanently?
While you can technically grow potatoes indoors using hydroponic methods, it’s generally more challenging than growing them in soil. Potatoes require a lot of space and nutrients to produce a substantial harvest. If you want to grow potatoes indoors permanently, you’ll need to invest in a more sophisticated hydroponic system with proper lighting, nutrient solutions, and environmental controls. This water potato growing method is best used as a starting point for transplanting to soil.
What kind of styrofoam is best to use?
Any type of styrofoam can be used, but make sure it is clean and free of any harmful chemicals or coatings. Recycled styrofoam is a great option, as it helps reduce waste. Cut the styrofoam into a size that fits snugly into the mouth of the jar or container, with a hole large enough to hold the potato securely.
Can I eat the potatoes grown using this method?
Yes, you can eat the potatoes grown using this method, provided that you use clean water and avoid using any harmful chemicals. However, keep in mind that potatoes grown in water may not be as large or as flavorful as those grown in soil. The taste and texture can also vary depending on the potato variety and growing conditions.
What if my potato starts to rot in the water?
If you notice your potato starting to rot, it’s important to remove it from the water immediately to prevent the rot from spreading. Discard the potato and start with a fresh one. To prevent rot, make sure to use clean water, change it regularly, and avoid overcrowding the container. Also, ensure that the potato is not submerged completely in water, as this can promote rot.
How do I prevent algae growth in the water?
Algae growth is a common problem when growing plants in water. To prevent algae growth, change the water regularly (every few days), use an opaque container to block out light, and avoid placing the container in direct sunlight. You can also add a small amount of hydrogen peroxide to the water to kill algae.
Can I use fertilizer in the water?
Yes, you can add a diluted liquid fertilizer to the water to provide extra nutrients and boost growth. Use a balanced fertilizer specifically formulated for vegetables, and dilute it to half strength. Add the fertilizer to the water every few weeks, and monitor the plants for any signs of nutrient deficiencies or toxicities.
What are some common problems I might encounter?
Some common problems you might encounter include:
* Rotting potatoes: Prevent this by using clean water, changing it regularly, and avoiding overcrowding.
* Algae growth: Prevent this by using an opaque container, changing the water regularly, and avoiding direct sunlight.
* Leggy sprouts: This indicates that the plants are not receiving enough light. Move them to a brighter location.
* Nutrient deficiencies: This can manifest as yellowing leaves or stunted growth. Add a diluted liquid fertilizer to the water.
* Pests: Monitor the plants for pests such as aphids or spider mites, and treat them accordingly.
How do I know when the potatoes are ready to harvest after transplanting to soil?
The time it takes for potatoes to mature after transplanting to soil depends on the variety and growing conditions. Generally, you can harvest potatoes when the plants start to flower or when the foliage begins to die back. To check if the potatoes are ready, gently dig around the base of the plant and feel for the tubers. If they are large enough and the skins are firm, they are ready to harvest.


Leave a Comment