
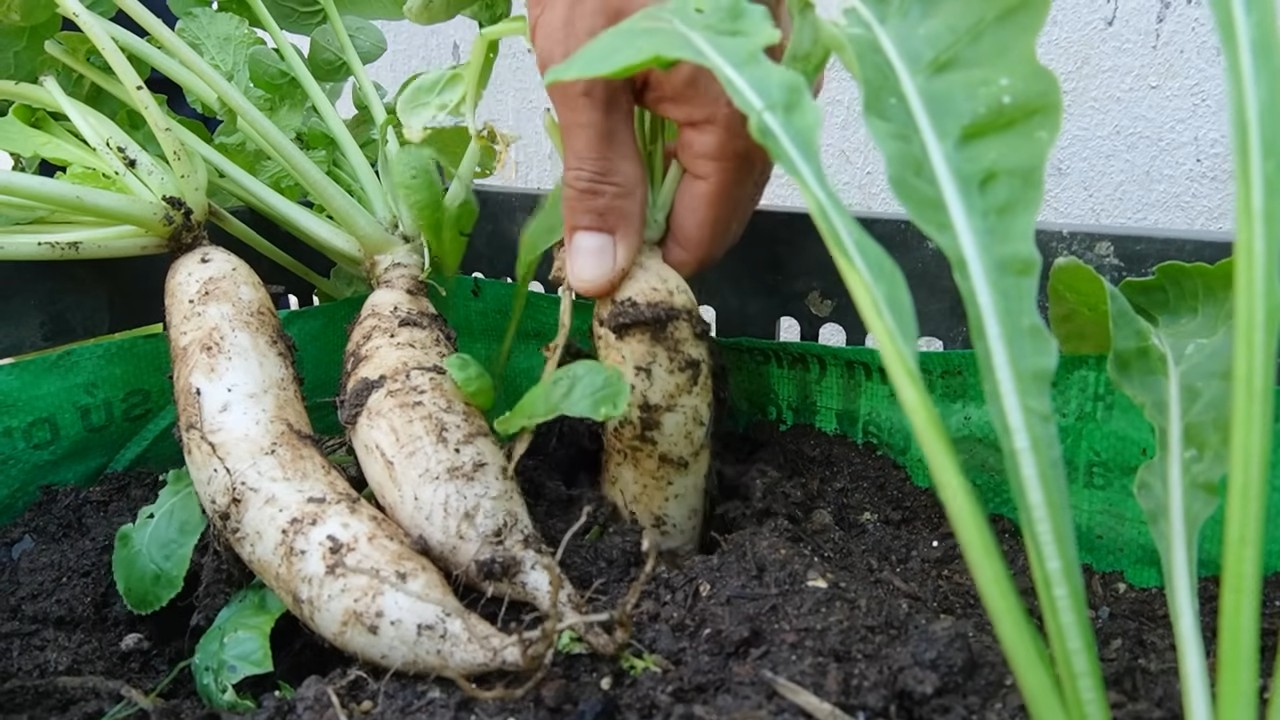
Weekly Fresh Radish Harvest: Imagine stepping into your backyard and plucking crisp, peppery radishes, bursting with flavor, ready to add a zing to your salad or a crunchy bite to your tacos. Sounds idyllic, right? Well, it doesn’t have to be a dream! I’m here to share some simple, effective DIY tricks to ensure you enjoy a bountiful weekly fresh radish harvest, even if you’re a complete beginner.
Radishes have a surprisingly rich history, dating back to ancient Egypt, where they were a staple food. They were even used as currency to pay laborers building the pyramids! Today, they’re enjoyed worldwide, but often overlooked in the home garden. That’s a shame, because they’re incredibly easy to grow and offer a quick reward for your efforts.
Let’s face it, we all crave fresh, healthy produce, but not everyone has the time or space for a sprawling vegetable garden. That’s where these DIY hacks come in. I’ll show you how to maximize your radish yield, prevent common problems like bolting (going to seed too quickly), and ensure a continuous supply of these delightful root vegetables. Get ready to transform your garden into a radish-producing powerhouse!
DIY: Extending the Life of Your Freshly Harvested Radishes
Okay, radish lovers, let’s talk about keeping those peppery little gems fresh and crunchy for as long as possible after you’ve pulled them from the garden! I know, I know, sometimes they seem to wilt faster than you can say “crudités.” But fear not! I’ve got a few tried-and-true methods that will significantly extend their lifespan, keeping them crisp and delicious for weeks, not just days.
Understanding the Enemy: Why Radishes Wilt
Before we dive into the preservation techniques, let’s quickly understand why radishes go limp in the first place. The main culprit is moisture loss. Radishes are mostly water, and once they’re harvested, they start to dehydrate. The leaves also contribute to this process, drawing moisture away from the radish itself. So, our goal is to minimize moisture loss and keep those radishes hydrated.
Method 1: The Classic Water Bath (Short-Term Storage)
This is my go-to method for radishes I plan to use within a week or so. It’s super simple and effective.
Materials You’ll Need:
* Freshly harvested radishes
* A large bowl or container
* Cold water
* Paper towels or a clean kitchen towel
* A resealable plastic bag or airtight container
Step-by-Step Instructions:
1. Prepare the Radishes: Gently wash the radishes under cool running water to remove any dirt or debris. Don’t scrub too hard, as you don’t want to damage the delicate skin.
2. Trim the Greens (Optional): This is where personal preference comes in. You can either trim the greens completely off, leaving about half an inch of stem, or leave them on. If you leave them on, be aware that they will draw moisture from the radish, so you’ll need to change the water more frequently. I usually trim them, but sometimes I leave a little bit on if I plan to use the greens in a salad.
3. Soak in Cold Water: Fill your bowl or container with cold water. Submerge the radishes completely.
4. Store in the Refrigerator: Place the bowl or container in the refrigerator.
5. Change the Water Regularly: This is crucial! Change the water every day or two to keep it fresh and prevent the radishes from getting slimy.
6. Enjoy! When you’re ready to use the radishes, simply remove them from the water, pat them dry, and enjoy!
Method 2: The Crisper Drawer Champion (Medium-Term Storage)
This method is perfect for extending the life of your radishes for a couple of weeks. It involves creating a humid environment in your refrigerator’s crisper drawer.
Materials You’ll Need:
* Freshly harvested radishes
* A resealable plastic bag or airtight container
* Paper towels
* Water
Step-by-Step Instructions:
1. Prepare the Radishes: Wash the radishes thoroughly under cool running water.
2. Trim the Greens: This time, definitely trim the greens completely off, leaving about half an inch of stem. The greens will definitely cause problems with this method if you leave them on.
3. Dry the Radishes: Gently pat the radishes dry with paper towels. You don’t want them soaking wet, just damp.
4. Line the Bag/Container: Line your resealable plastic bag or airtight container with a couple of layers of paper towels.
5. Moisten the Paper Towels: Lightly dampen the paper towels with water. They should be moist, but not dripping wet.
6. Add the Radishes: Place the radishes in the bag or container in a single layer.
7. Cover with More Paper Towels: Cover the radishes with another layer of lightly dampened paper towels.
8. Seal and Store: Seal the bag or container tightly and store it in the crisper drawer of your refrigerator.
9. Check and Re-Moisten: Check the paper towels every few days. If they start to dry out, lightly re-moisten them with water.
10. Enjoy! Your radishes should stay crisp and fresh for up to two weeks using this method.
Method 3: The Sand Storage Secret (Long-Term Storage)
This is an old-fashioned method that can keep your radishes fresh for a month or even longer! It mimics the conditions of storing root vegetables in the ground.
Materials You’ll Need:
* Freshly harvested radishes
* A bucket or container with drainage holes
* Clean, damp sand (play sand works well)
* Water
Step-by-Step Instructions:
1. Prepare the Radishes: Gently brush off any excess dirt from the radishes, but don’t wash them. You want to keep the natural protective layer intact.
2. Trim the Greens: Trim the greens completely off, leaving about half an inch of stem.
3. Layer Sand and Radishes: Place a layer of damp sand in the bottom of your bucket or container. Then, arrange the radishes on top of the sand, making sure they don’t touch each other. Cover the radishes with another layer of sand. Continue layering sand and radishes until the container is full.
4. Keep the Sand Damp: Make sure the sand stays consistently damp, but not soaking wet. You can lightly water it every few days.
5. Store in a Cool, Dark Place: Store the bucket or container in a cool, dark place, such as a root cellar, basement, or garage. The ideal temperature is between 32°F and 40°F (0°C and 4°C).
6. Check Periodically: Check the radishes periodically for any signs of spoilage. Remove any that are starting to rot to prevent them from affecting the others.
7. Enjoy! When you’re ready to use the radishes, simply dig them out of the sand, wash them, and enjoy!
Bonus Tip: Reviving Limp Radishes
Even with the best storage methods, sometimes radishes can start to lose their crispness. But don’t despair! You can often revive them with a simple ice water bath.
Instructions:
1. Prepare an Ice Water Bath: Fill a bowl with ice water.
2. Soak the Radishes: Submerge the limp radishes in the ice water for about 30 minutes.
3. Pat Dry and Enjoy: Remove the radishes from the ice water, pat them dry, and they should be noticeably crisper.
Troubleshooting: Common Radish Storage Problems
* Radishes are slimy: This is usually caused by too much moisture or infrequent water changes. Make sure to change the water regularly in the water bath method and avoid over-wetting the paper towels in the crisper drawer method.
* Radishes are moldy: This can happen if the radishes are damaged or if the storage environment is too humid. Discard any moldy radishes and make sure to provide adequate ventilation.
* Radishes are bitter: Bitterness can be caused by several factors, including hot weather, lack of water, or over-maturity. Unfortunately, there’s not much you can do to fix bitter radishes after they’ve been harvested. Choose younger radishes for a milder flavor.
Radish Greens: Don’t Throw Them Away!
Speaking of radishes, don’t toss those greens! They’re perfectly edible and packed with nutrients. You can use them in salads, soups, stir-fries, or even make radish green pesto! Just make sure to wash them thoroughly before using.
Final Thoughts
So there you have it! Three different methods for extending the life of your freshly harvested radishes. Experiment with each one to see which works best for you and your storage conditions. With a little bit of effort, you can enjoy crisp, peppery radishes for weeks to come! Happy harvesting!
Conclusion
So, there you have it! Transforming your weekly fresh radish harvest from a fleeting pleasure into a long-lasting pantry staple is not only achievable but surprisingly simple. This DIY pickling method unlocks a whole new dimension of flavor and extends the life of your radishes far beyond their typical shelf life. No more sad, wilted radishes languishing in the crisper drawer!
This isn’t just about preservation; it’s about elevating the humble radish. The pickling process mellows out the sharp bite, replacing it with a tangy, slightly sweet, and utterly addictive flavor profile. Imagine adding these pickled radishes to salads for a vibrant crunch, using them as a zesty topping for tacos, or even incorporating them into charcuterie boards for a sophisticated twist. The possibilities are truly endless.
Why is this DIY trick a must-try? Because it’s economical, reduces food waste, and empowers you to create a delicious and versatile ingredient right in your own kitchen. You’re not just preserving radishes; you’re preserving the freshness and vibrancy of your garden (or your local farmer’s market) for weeks to come. Plus, you have complete control over the ingredients, ensuring a healthy and preservative-free final product.
Variations to Explore
Don’t be afraid to experiment! This recipe is a fantastic base for your own culinary creativity. Here are a few suggestions to get you started:
* Spice it up: Add a pinch of red pepper flakes, a sliced jalapeño, or a few whole peppercorns to the brine for a spicy kick.
* Herbal infusion: Include fresh herbs like dill, thyme, or rosemary in the jar for an aromatic twist.
* Sweeten the deal: A touch of honey or maple syrup can add a subtle sweetness to balance the tanginess.
* Garlic galore: Add a few cloves of garlic to the jar for a pungent and savory flavor.
* Different vinegars: Experiment with different types of vinegar, such as apple cider vinegar or rice vinegar, to alter the flavor profile.
We wholeheartedly encourage you to try this DIY pickling method with your next weekly fresh radish harvest. It’s a rewarding experience that will transform the way you think about radishes. And most importantly, we want to hear about your experience! Share your photos, variations, and tips in the comments below. Let’s build a community of radish-loving picklers! Your insights could inspire others to embrace this simple yet transformative technique. Happy pickling!
Frequently Asked Questions (FAQ)
Q: How long will these pickled radishes last?
A: Properly sealed and refrigerated, these pickled radishes can last for several weeks, even up to a couple of months. The acidity of the brine acts as a natural preservative, inhibiting the growth of spoilage-causing microorganisms. However, it’s always best to use your senses – if the radishes develop an off odor or appearance, discard them. For optimal quality and flavor, we recommend consuming them within the first month.
Q: Can I use different types of radishes for pickling?
A: Absolutely! While this recipe is designed for common red radishes, you can certainly experiment with other varieties. Daikon radishes, French breakfast radishes, and even watermelon radishes can be pickled using this method. Keep in mind that different varieties may have slightly different textures and flavors, so adjust the pickling time accordingly. For example, daikon radishes, being denser, might benefit from a slightly longer pickling period.
Q: Do I need to sterilize the jars before pickling?
A: While not strictly necessary for refrigerator pickles (which are not shelf-stable), sterilizing the jars is always a good practice to minimize the risk of spoilage. To sterilize your jars, wash them thoroughly with hot, soapy water, then place them in a large pot of boiling water for 10 minutes. Remove them carefully with tongs and allow them to air dry completely before filling them with the pickled radishes.
Q: The brine seems too strong/weak. Can I adjust it?
A: Yes, you can absolutely adjust the brine to suit your taste preferences. The ratio of vinegar to water is a matter of personal preference. If you find the brine too tart, add a little more water or a touch of sweetener. If you prefer a stronger vinegar flavor, reduce the amount of water. Remember to taste the brine before adding the radishes and adjust accordingly.
Q: My pickled radishes are soft. What did I do wrong?
A: Soft pickled radishes can be caused by a few factors. Overcooking the radishes before pickling can lead to a mushy texture. Avoid boiling the radishes for too long; a quick blanch is all that’s needed. Another potential cause is using a brine that is too weak. Ensure that the vinegar-to-water ratio is sufficient to properly preserve the radishes. Fin
So, there you have it! Transforming your weekly fresh radish harvest from a fleeting pleasure into a long-lasting pantry staple is not only achievable but surprisingly simple. This DIY pickling method unlocks a whole new dimension of flavor and extends the life of your radishes far beyond their typical shelf life. No more sad, wilted radishes languishing in the crisper drawer!
This isn’t just about preservation; it’s about elevating the humble radish. The pickling process mellows out the sharp bite, replacing it with a tangy, slightly sweet, and utterly addictive flavor profile. Imagine adding these pickled radishes to salads for a vibrant crunch, using them as a zesty topping for tacos, or even incorporating them into charcuterie boards for a sophisticated twist. The possibilities are truly endless.
Why is this DIY trick a must-try? Because it’s economical, reduces food waste, and empowers you to create a delicious and versatile ingredient right in your own kitchen. You’re not just preserving radishes; you’re preserving the freshness and vibrancy of your garden (or your local farmer’s market) for weeks to come. Plus, you have complete control over the ingredients, ensuring a healthy and preservative-free final product.
Variations to Explore
Don’t be afraid to experiment! This recipe is a fantastic base for your own culinary creativity. Here are a few suggestions to get you started:
* Spice it up: Add a pinch of red pepper flakes, a sliced jalapeño, or a few whole peppercorns to the brine for a spicy kick.
* Herbal infusion: Include fresh herbs like dill, thyme, or rosemary in the jar for an aromatic twist.
* Sweeten the deal: A touch of honey or maple syrup can add a subtle sweetness to balance the tanginess.
* Garlic galore: Add a few cloves of garlic to the jar for a pungent and savory flavor.
* Different vinegars: Experiment with different types of vinegar, such as apple cider vinegar or rice vinegar, to alter the flavor profile.
We wholeheartedly encourage you to try this DIY pickling method with your next weekly fresh radish harvest. It’s a rewarding experience that will transform the way you think about radishes. And most importantly, we want to hear about your experience! Share your photos, variations, and tips in the comments below. Let’s build a community of radish-loving picklers! Your insights could inspire others to embrace this simple yet transformative technique. Happy pickling!
Frequently Asked Questions (FAQ)
Q: How long will these pickled radishes last?
A: Properly sealed and refrigerated, these pickled radishes can last for several weeks, even up to a couple of months. The acidity of the brine acts as a natural preservative, inhibiting the growth of spoilage-causing microorganisms. However, it’s always best to use your senses – if the radishes develop an off odor or appearance, discard them. For optimal quality and flavor, we recommend consuming them within the first month.
Q: Can I use different types of radishes for pickling?
A: Absolutely! While this recipe is designed for common red radishes, you can certainly experiment with other varieties. Daikon radishes, French breakfast radishes, and even watermelon radishes can be pickled using this method. Keep in mind that different varieties may have slightly different textures and flavors, so adjust the pickling time accordingly. For example, daikon radishes, being denser, might benefit from a slightly longer pickling period.
Q: Do I need to sterilize the jars before pickling?
A: While not strictly necessary for refrigerator pickles (which are not shelf-stable), sterilizing the jars is always a good practice to minimize the risk of spoilage. To sterilize your jars, wash them thoroughly with hot, soapy water, then place them in a large pot of boiling water for 10 minutes. Remove them carefully with tongs and allow them to air dry completely before filling them with the pickled radishes.
Q: The brine seems too strong/weak. Can I adjust it?
A: Yes, you can absolutely adjust the brine to suit your taste preferences. The ratio of vinegar to water is a matter of personal preference. If you find the brine too tart, add a little more water or a touch of sweetener. If you prefer a stronger vinegar flavor, reduce the amount of water. Remember to taste the brine before adding the radishes and adjust accordingly.
Q: My pickled radishes are soft. What did I do wrong?
A: Soft pickled radishes can be caused by a few factors. Overcooking the radishes before pickling can lead to a mushy texture. Avoid boiling the radishes for too long; a quick blanch is all that’s needed. Another potential cause is using a brine that is too weak. Ensure that the vinegar-to-water ratio is sufficient to properly preserve the radishes. Finally, using iodized salt can sometimes contribute to softening; opt for pickling salt or kosher salt instead.
Q: Can I reuse the pickling brine?
A: It’s generally not recommended to reuse pickling brine. The brine has already been exposed to the radishes and may contain bacteria or other microorganisms that could compromise the quality and safety of subsequent batches. It’s best to discard the brine after the radishes have been consumed.
Q: What are some creative ways to use pickled radishes?
A: The possibilities are endless! Here are a few ideas to get you started:
* Add them to salads for a tangy crunch.
* Use them as a topping for tacos, nachos, or burgers.
* Incorporate them into charcuterie boards or cheese plates.
* Serve them as a side dish with grilled meats or fish.
* Chop them up and add them to dips or spreads.
* Use them as a garnish for soups or stews.
* Add them to sandwiches or wraps for a zesty kick.
Q: Can I can these pickled radishes for long-term storage?
A: While this recipe is designed for refrigerator pickles, you can adapt it for canning using proper canning techniques. However, it’s crucial to follow a tested and approved canning recipe to ensure the safety of the final product. Improperly canned foods can pose a serious health risk. Consult a reliable source, such as the National Center for Home Food Preservation, for detailed instructions on canning pickled radishes safely.
Q: What is the best way to store my weekly fresh radish harvest before pickling?
A: To keep your radishes fresh before pickling, trim the greens (leaving about an inch) and store them in a plastic bag in the refrigerator. You can also wrap them in a damp paper towel before placing them in the bag. This will help to keep them hydrated and prevent them from wilting. Use them as soon as possible for the best flavor and texture.


Leave a Comment